
By Jess Wilk
Have you ever wondered how websites can offer their content in multiple languages, perfectly tailored to different cultures and regions?
Well, that magic is called localization, and it's a game-changer for web development – especially when using Django, a super versatile Python framework.
It's not just about translating text – it's also about tuning your app to fit into different cultures, with their unique customs and preferences.
So, today I'm going to guide you through localizing a Django app. Let's dive in!
Prerequisites
First of all, make sure you’ve got Python installed on your machine. For this tutorial, I assume you already possess basic Django knowledge – we will move through some parts quickly.
If you’re not yet familiar with the basics of Django, you might want to brush up on that first. Don’t worry, Hyperskill, where I work as an expert, has got your back with some awesome learning tracks.
Here's what we'll cover:
- How to Install Django
- How to Create a New Django Project and App
- How to Create a Locale Switcher
- How to Localize Your App
- How to Mark Strings in Templates Using
{% trans %} - Pluralization
- Conclusion
How to Install Django
Step 1: Create a virtual environment
Usually, we create a virtual environment for Django projects. This helps isolate the project from other Python projects on your machine and keep project dependencies unique. Run the python -m venv myenv command to create a virtual environment.
Step 2: Activate the virtual environment
Run source myenv/bin/activate on Unix/macOS or myenv\\Scripts\\activate on Windows to activate the virtual environment.
Step 3: Install Django
With your virtual environment active, install Django using the Python package manager pip by executing pip install django command.
Step 4: Test the Django installation
After installation, verify that Django is installed correctly by running django-admin --version. It should output the version number without any errors.

django-admin is the command-line script that comes with Django. It performs administrative tasks like starting a new project and handling database migrations.
How to Create a New Django Project and App
Step 1: Create a Django project
Let’s create a new project named localization_project using the django-admin startproject localization_project command.
This command will create a new directory called localization_project, containing all the necessary files for our Django project, as shown below.
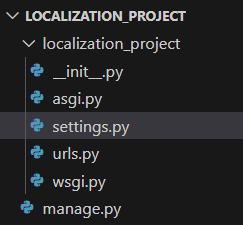
localization_project_
To start working on this new project, go to the newly created folder by executing the command cd localization_project.
Step 2: Create a Django app
You need an app with some content to show how to translate content. I will use the python manage.py startapp homepage command to create a simple app.
Again, manage.py is another command-line utility that acts as a thin wrapper around django-admin, letting you interact with your Django project in various ways.
Once you run that, you should get another folder called the homepage with many Python files.
Step 3: Define the view for your app
Open the views.py file in the homepage app directory and define a view for the homepage. For the sale of simplicity, our homepage will display a greeting, a number in the thousands, and the current date.
from django.shortcuts import render
from django.utils import timezone


def home_view(request):
    context = {
        'greeting': "Welcome to our Localization Project!",
        'large_number': 12345.67,
        'current_date': timezone.now()
    }
    return render(request, 'home.html', context)
Step 4: Configure URLs
First, in the localization_project directory, edit the urls.py to include the homepage app's URLs.
from django.contrib import admin
from django.urls import path, include


urlpatterns = [
    path('admin/', admin.site.urls),
    path('', include('homepage.urls')),
]
Then, create a urls.py file in the homepage app directory and set the URL for your view.
from django.urls import path
from .views import home_view


urlpatterns = [
    path('', home_view, name='home'),
]
Step 5: Create the homepage template
In the homepage app directory, create a folder named templates. Inside it, create a file named home.html. This is where you'll design your homepage. Add the following HTML code:
<!DOCTYPE html>
<html>
<head>
    <title>Localization Project</title>
</head>
<body>
    <h1>{{ greeting }}</h1>
    <p>Number: {{ large_number }}</p>
    <p>Date: {{ current_date }}</p>
</body>
</html>
Add the homepage to the INSTALLED_APPS list in your settings.py file in the localization_project directory.
INSTALLED_APPS = [
    # 'other apps',
    'homepage',
]
It should be your final localization_project directory:
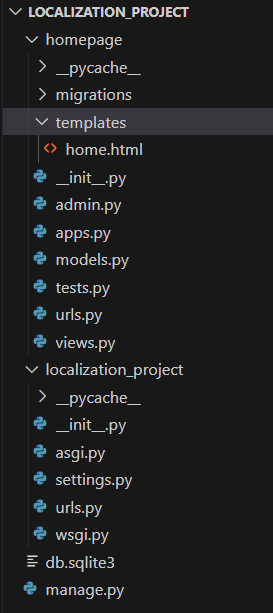
localization_project directory_
Step 6 - Run the development server
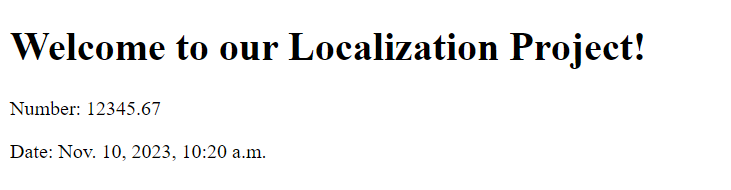
Finally, you can run your development server to see the homepage using the python manage.py runserver command.
Now, when you visit http://127.0.0.1:8000/ in your web browser, you should see your simple homepage displaying a welcome message, a number in thousands, and the current date.
How to Create a Locale Switcher
Typically, most websites display content in English when you visit them for the first time.
If you have visited a website that supports localization, you might have noticed a dropdown menu allowing users to select from the languages the website supports. Once the user selects their preferred language, the website automatically sets this as the default language and updates the content accordingly.
This dropdown is called a locale switcher, which you will create next. With it, you will have an option to allow users to change the language and see the localization functionality in action, which you will do after that.
Step 1: Add language selection form
First, modify your home.html template to include a form for language selection. This form will contain a drop-down menu with English, Spanish, and French options. The form will be submitted to Django's built-in set_language view, which will handle the language change.
<!DOCTYPE html>
<html>
<head>
    <title>Localization Project</title>
</head>
<body>
    <h1>{{ greeting }}</h1>
    <p>Number: {{ large_number }}</p>
    <p>Date: {{ current_date }}</p>


    <form action="{% url 'set_language' %}" method="post">
        {% csrf_token %}
        <input name="next" type="hidden" value="{{ redirect_to }}" />
        <select name="language">
            <option value="en">English</option>
            <option value="es">Español</option>
            <option value="fr">Français</option>
        </select>
        <input type="submit" value="Change Language">
    </form>
</body>
</html>
Step 2: Update your view
In your home_view function in views.py, include the current path in the context so that the form knows where to redirect after changing the language.
from django.utils.translation import gettext as _


def home_view(request):
    context = {
        'greeting': _("Welcome to our Localization Project!"),
        'large_number': 12345.67,
        'current_date': timezone.now(),
        'redirect_to': request.path
    }
    return render(request, 'home.html', context)
Step 3: Configure URL for language changing
Ensure that your urls.py in the localization_project directory is set up to handle the language change. Django provides a view for this, but you must hook it up in your URL configuration.
from django.contrib import admin
from django.urls import path, include
from django.conf.urls.i18n import i18n_patterns


urlpatterns = [
    path('admin/', admin.site.urls),
    path('', include('homepage.urls')),
    path('i18n/', include('django.conf.urls.i18n')),
]
The i18n URL pattern includes the set_language redirect view.
Step 4: Enable middleware for locale
Make sure that LocaleMiddleware is enabled in your settings.py. This middleware allows Django to detect the user’s language preference from the request automatically.
MIDDLEWARE = [
    # 'other middleware',
    'django.middleware.locale.LocaleMiddleware',
]
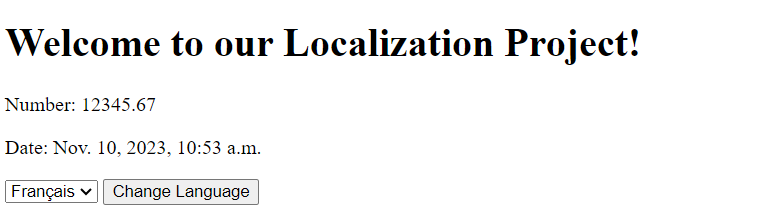
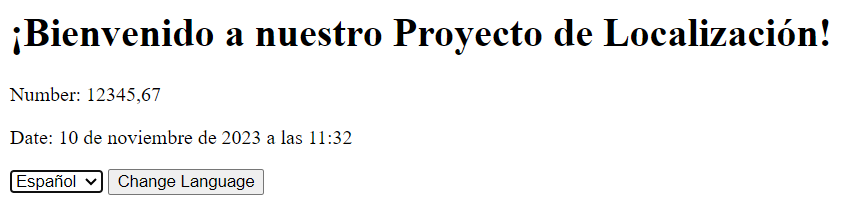
Step 5: Run the development server and test the language switcher
Run your development server and visit your homepage. You should now see something similar to the image below, featuring the language selection dropdown with the three languages we have chosen.
How to Localize Your App
This section will show you how to translate the text on our homepage according to the local user's selections.
Step 1: Enable internationalization in Django settings
Before starting, ensure your Django project is set up for internationalization. In your settings.py file, you'll need to check and update the following settings.
The first four settings in the following code probably come by default. So, you need to specify the languages you want to support in your application – in this case, English, Spanish, and French.
Next, define the path to your locale directory. This is where Django will store and look for translation files. You need to create this directory manually in your project (in the same directory as the manage.py file). Also, remember to import the OS module at the top of the file.
LANGUAGE_CODE = 'en-us'
TIME_ZONE = 'UTC'
USE_I18N = True
USE_TZ = True
LANGUAGES = [
    ('en', 'English'),
    ('es', 'Spanish'),
    ('fr', 'French'),
]
LOCALE_PATHS = [os.path.join(BASE_DIR, 'locale')]
Step 2: Mark text for translation
When developing a web application using Django, it's essential to remember that text, numbers, and dates are localized differently depending on the language and culture. This is because their content and context can vary greatly.
For example, text strings need to be more inherently aware of their meaning and context when used in an application. So to make your application accessible to users from different cultures, you need to mark each string that needs to be translated explicitly.
On the other hand, numbers and dates are data types that Django can automatically format according to the locale. You don't have to mark them.
If you check our application, you'll notice that we passed three values from our views.py file to the HTML template: a string, a number, and a date. While there is no need to mark the number and date for localization, you must mark the string to enable its localization. For this purpose, Django provides the gettext function.
When localizing your app, mark any string you pass from the view to the HTML template you want to localize. In our case, we will mark the greeting text with _().
from django.utils.translation import gettext as _
from django.shortcuts import render
from django.utils import timezone


def home_view(request):
    context = {
        'greeting': _("Welcome to our Localization Project!"),
         #other data
    }
    return render(request, 'home.html', context)
Step 3: Create message files
Use the makemessages command to create language files for each language. It scans your Django project files for translation strings marked for localization and generates _._po files, which store the translations. Run these commands in your command line tool or terminal tool.
- For Spanish:
django-admin makemessages -l es - For French:
django-admin makemessages -l fr
This will create .po files in the locale/es/LC_MESSAGES and locale/fr/LC_MESSAGES directories.
Step 4: Translate message files
Open each .po file and add the translation for each string under its corresponding msgstr. For example, in locale/es/LC_MESSAGES/django.po, you would add the following:
msgid "Welcome to our Localization Project!"
msgstr "¡Bienvenido a nuestro Proyecto de Localización!"
And you would add the following text in locale/fr/LC_MESSAGES/django.po:
msgid "Welcome to our Localization Project!"
msgstr "Bienvenue dans notre Projet de Localisation!"
Step 5: Compile message files
After translating, compile these files into .mo files, machine-readable files that Django can use. Run the django-admin compilemessages command to process all your _._po files within the project and generate corresponding .mo files.
Step 6: Run the server and test the translations
Now, test your translations using the language switcher on your website. Refresh your homepage, and you should see the greeting message in the selected language:
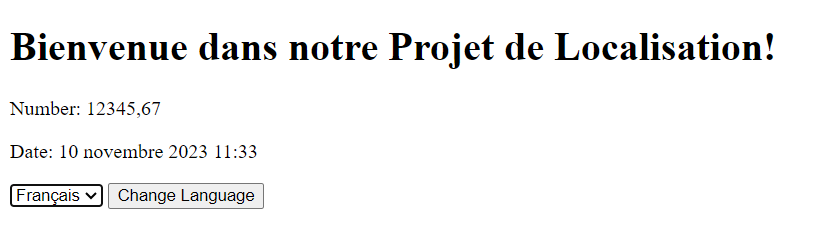
As you can see, the project's heading, Welcome to our Localization Project, is translated according to the language we select. You will also notice that the number and date are automatically translated into the switched language.
But you can see that the words Number and Date are not translated. We didn’t mark them for translation in the previous steps.
Every time you update your web application with additional content and need to localize this new content, simply follow the steps mentioned above.
First, mark the strings that require localization. Then, run the makemessages command to update your .po files with these new strings. Next, provide the relevant translated texts in the .po files for these new strings. Finally, generate the .mo files using the compilemessages command.
How to Mark Strings in Templates Using {% trans %}
As you know, the words Numbers and Date were not localized in our previous steps. Interestingly, you can’t mark them using the gettext method as they are not passed from the views.py file. These are static words in the HTML template.
To localize text in Django templates, you use the {% trans %} template tag provided by Django. This tag instructs Django to translate the specified text into the appropriate language based on the current user's language preference.
Let’s localize the Number and Date text using the {% trans %} template tag.
Step 1: Update your template with {% trans %} tags
Open your home.html template and modify it to include {% trans %} tags around the text you want to translate. Here's an example – remember to add {% load i18n %} at the top of the HTML file:
{% load i18n %}


<!DOCTYPE html>
<html>
<head>
    <title>{% trans "Localization Project" %}</title>
</head>
<body>
    <h1>{{ greeting }}</h1>
    <p>{% trans "Number" %}: {{ large_number }}</p>
    <p>{% trans "Date" %}: {{ current_date }}</p>


    <!-- Language Switcher Form -->
    <!-- ... -->
</body>
</html>
In this example, the words Localization Project, Number, and Date in the template are marked for translation.
Step 2: Create/update the language message files
Run the makemessages command to update the .po files for each language.
- For Spanish:
django-admin makemessages -l es - For French:
django-admin makemessages -l fr
Step 3: Translate the new strings in the .po files
In each .po file, you will find the newly added strings. Add their translations under msgstr for each language. For example, here is the related content for the Spanish .po file:
#: .\homepage\templates\home.html:10
msgid "Number"
msgstr "Número"

#: .\homepage\templates\home.html:11
msgid "Date"
msgstr "Fecha"
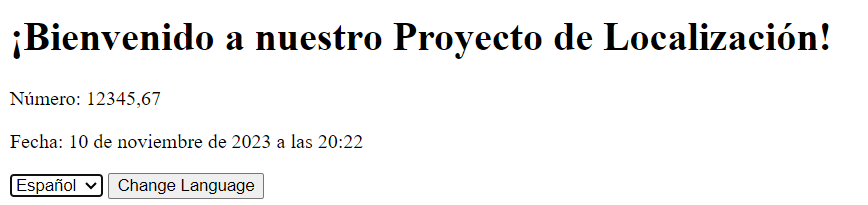
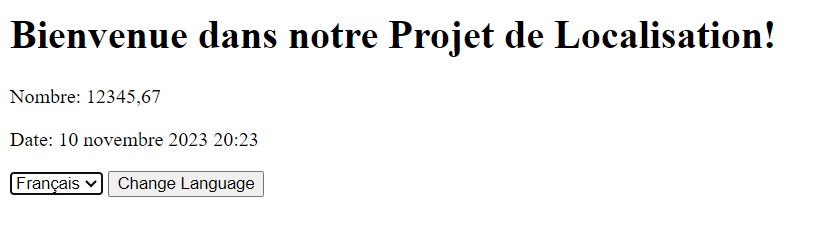
Next, run the django-admin compilemessages command to compile the messages files and run the development server to test the updated web application. Now, you can see the following output:
Pluralization
Pluralization in Django's framework is a way to handle different translations based on a numeric value. It is essential because, in many languages, the form of a word changes depending on the number describing it.
Django provides a way to handle this using the {% blocktrans %} template tag with a plural form.
Let's demonstrate this using our Django app. Suppose you want to display a message about the number of visitors on your site, which changes dynamically.
Step 1: Update your view to pass number of visitors
First, modify your home_view in views.py to include a variable representing the number of visitors. For demonstration purposes, this can be a static number.
from django.shortcuts import render
from django.utils import timezone
from django.utils.translation import gettext as _


def home_view(request):
    num_visitors = 5
    context = {
        'greeting': _("Welcome to our Localization Project!"),
        'num_visitors': num_visitors,
    }
    return render(request, 'home.html', context)
Step 2: Update the template with pluralization
In your home.html, use the {% blocktrans %} tag with a plural form to handle the pluralization, like this:
<!-- Other template content -->

    <h1>{{ greeting }}</h1>
    <p>
    {% blocktrans count counter=num_visitors %}
        There is {{ counter }} visitor.
    {% plural %}
        There are {{ counter }} visitors.
    {% endblocktrans %}
    </p>


    <!-- Remaining template content -->
Here, {% blocktrans count counter=num_visitors %} is used to handle the singular case, and the {% plural %} section is for the plural case.
Step 3: Update the message files
Run the makemessages command to update your _._po files for each language: django-admin makemessages -l es for Spanish, and django-admin makemessages -l fr for French.
Step 4: Translate and handle plural forms in .po files
In each .po file, you will find entries for the singular and plural forms.
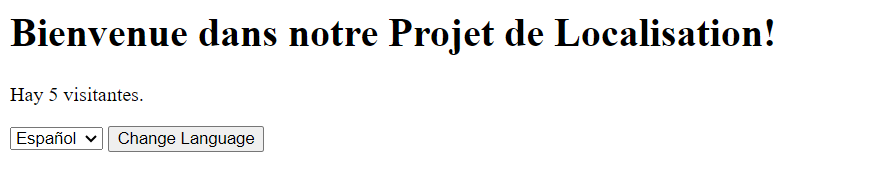
For example, the Spanish .po file should have the following content:
msgid "There is %(counter)s visitor."
msgid_plural "There are %(counter)s visitors."
msgstr[0] "Hay %(counter)s visitante."
msgstr[1] "Hay %(counter)s visitantes."
Next, run the django-admin compilemessages command to compile the messages files. Run your server, and you should see the message in singular or plural form depending on the number of visitors. Change the number in num_visitors in your view and observe how the message changes.
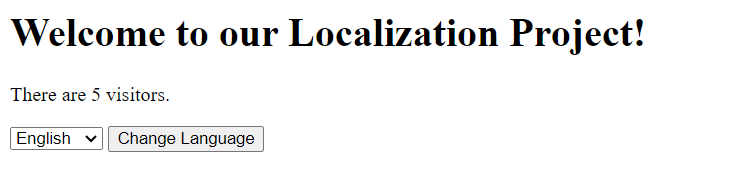
Conclusion
And there you have it – a comprehensive guide to localizing a Django app. With Django's approachable design, you've got all the necessary tools to translate numbers and DateTime values at your fingertips. Plus, we've seen how the Django-admin command line can make managing translation files a breeze.
But it's key to remember that localizing a website goes beyond just translating words. To fully harness the power of Django's localization capabilities, immerse yourself in its documentation, deepen your understanding, and keep on practicing.
Thank you for reading! I'm Jess, and I'm an expert at Hyperskill. You can check out a Django track on the platform.