By Saamer Mansoor
In this tutorial for beginners, you will learn the basics of using SwiftUI to make API calls using the popular Internet Chuck Norris DataBase (ICNDB) as an example. It will display a joke quickly and easily using Swift and SwiftUI.
You'll see how the cross-platform framework SwiftUI lets us use the exact same code across iOS, iPadOS, macOS, watchOS, App Clips and tvOS, which otherwise would have been impossible.
Along with that, you will use async-await that was introduced in Swift 5.5, which works for newer operating systems including iPhones running iOS > v15.0. This really simplifies our work of making data network calls asynchronously on click of a button without freezing the UI thread.
I will share the code changes you'll need to make first. Then in the following section, I will share a brief analysis of the code so beginners can understand what's going on as well.
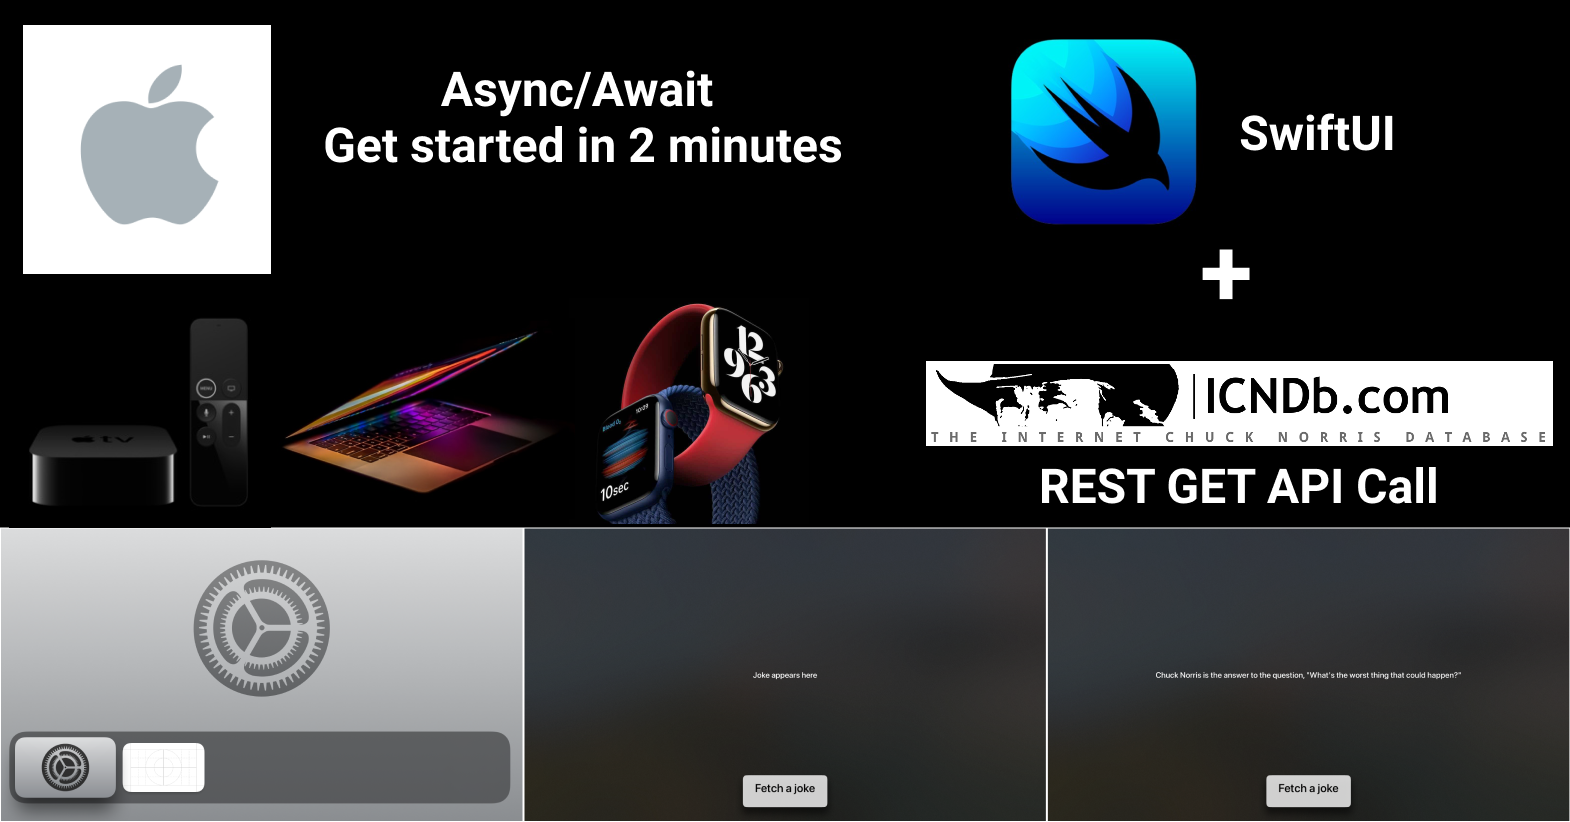
 tvOS app running the code displays a button that retrieves the joke on click
How to Make API Calls in Swift and SwiftUI
First, you'll need a Mac to install Xcode. Once it's installed, open Xcode and create a new project. Then select "App" for iOS, macOS, tvOS, or watchOS.
ContentView
Just update your existing ContentView SwiftUI file to add a Button and use the State variable to refresh the text displayed as the joke returns from ICNDB API:
import Foundation
import SwiftUI
struct ContentView: View {
    @State private var joke: String = ""
    var body: some View {
        Text(joke)
        Button {
            Task {
                let (data, _) = try await URLSession.shared.data(from: URL(string:"https://api.chucknorris.io/jokes/random")!)
                let decodedResponse = try? JSONDecoder().decode(Joke.self, from: data)
                joke = decodedResponse?.value ?? ""
            }
        } label: {
            Text("Fetch Joke")
        }
    }
}
struct ContentView_Previews: PreviewProvider {
    static var previews: some View {
        ContentView()
    }
}
struct Joke: Codable {
    let value: String
}
Fetch a joke!
If you press build/play, the app will build in whatever platform you selected above:
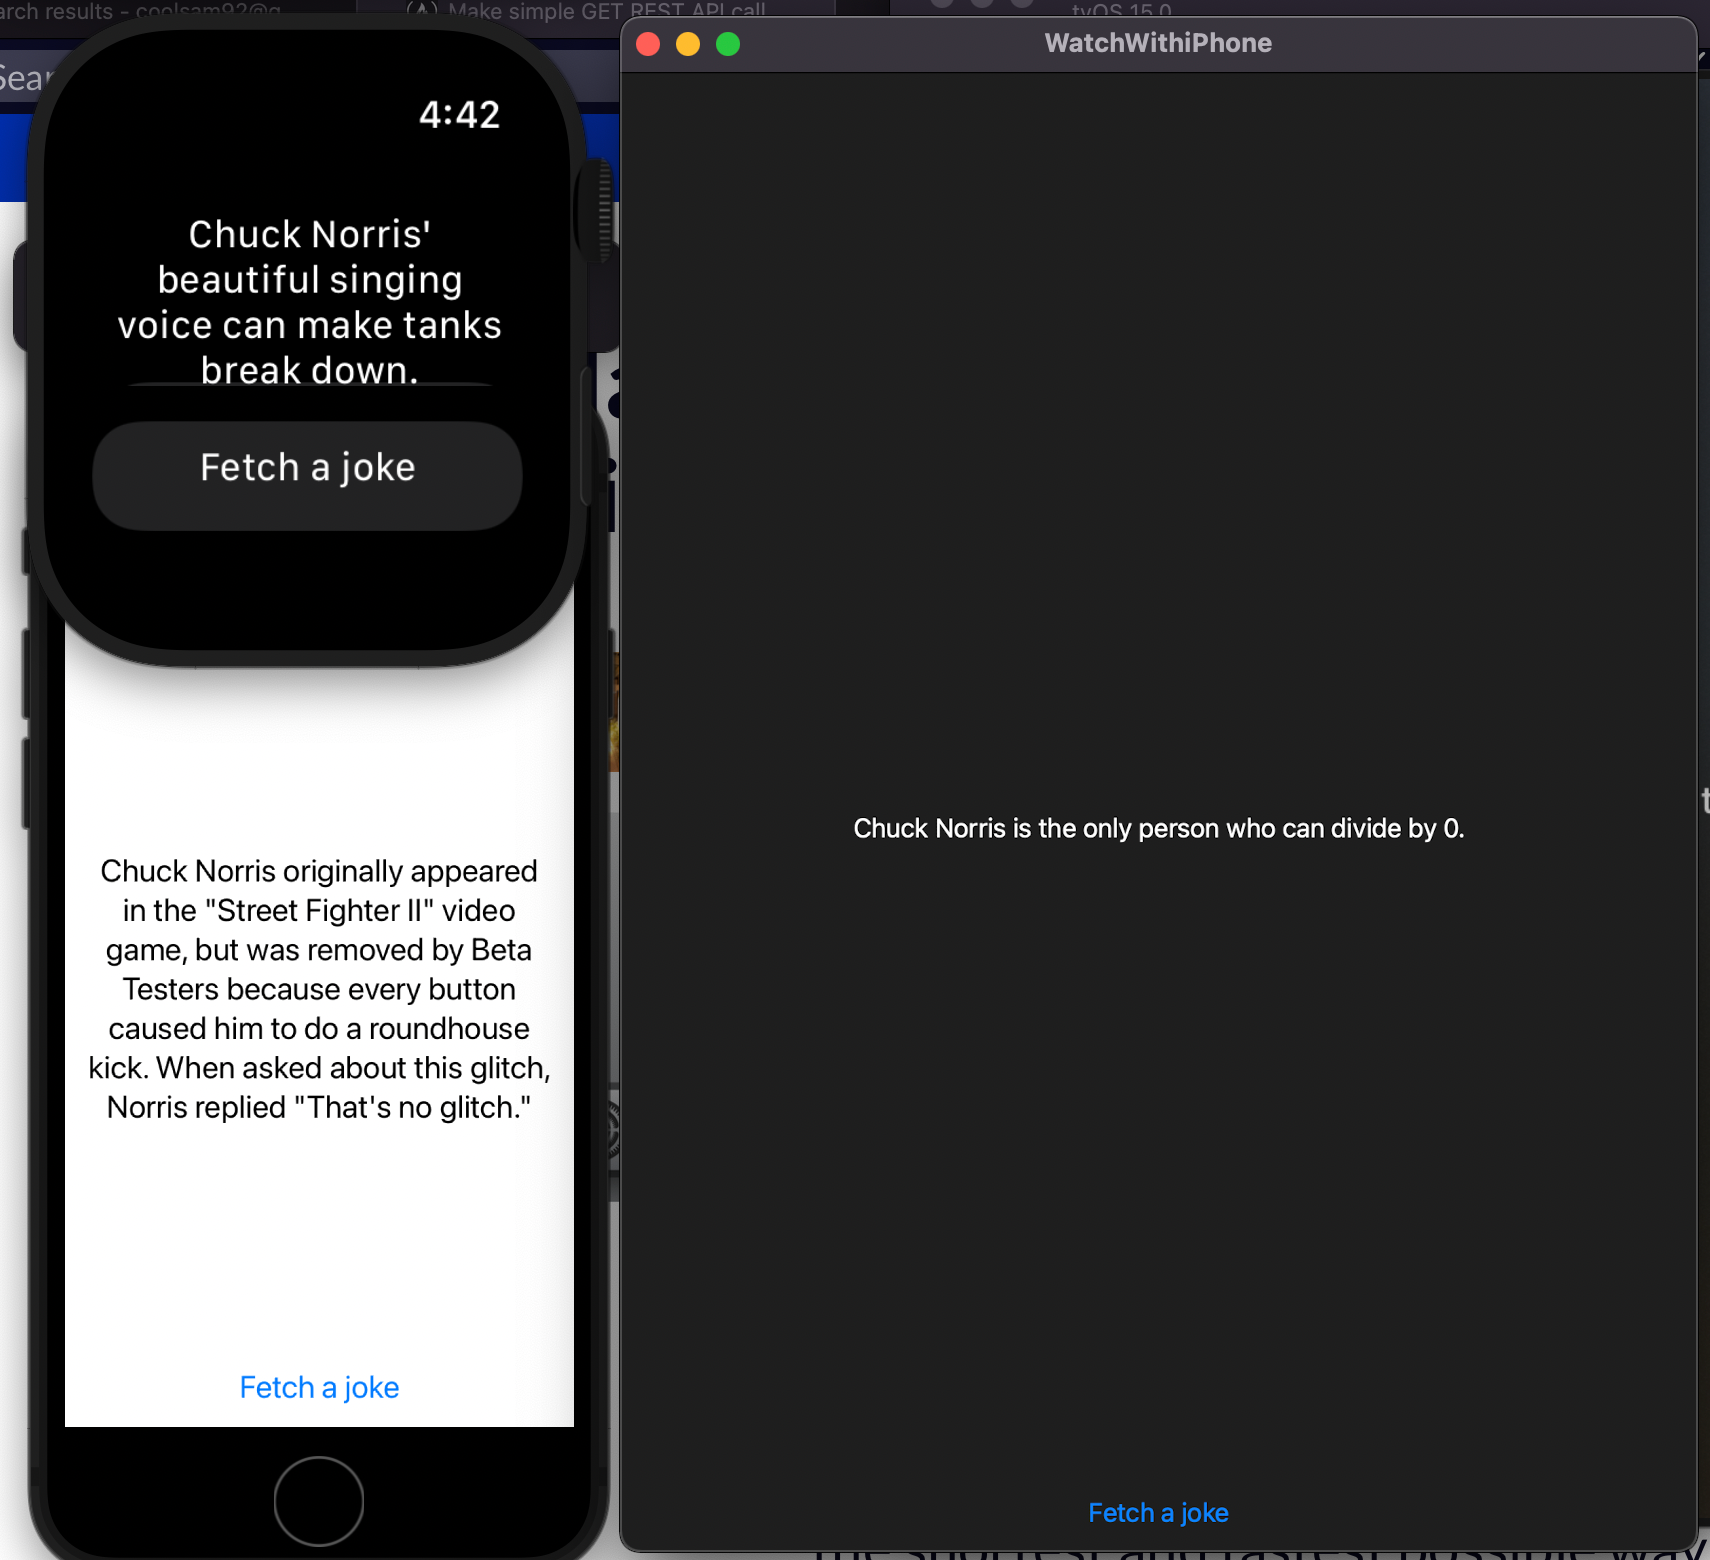 Screenshots of watchOS, macOS, and iOS apps running the same exact code
Code Analysis
If you go to the random joke URL, you'll notice that the data is in JSON format. You can copy that and use a JSON Linter to view its structure to figure out what property of the Joke object is needed.
Based on that, you determine the code above. You use the Codable protocol (aka interfaces) to go from a JSON data object to an actual Swift class or struct, and you create properties for the data you want to store (value in our case).
JSONDecoder helps us parse the JSON string using the Codable object. This works regardless of platform because the page that loads on launching the app has the same name ContentView regardless of platform.
App Clips
App Clips are Apple's latest way of using native app functionality using an "App Clip Code" without having to download the whole application from the App Store.
App Clips work similar to an iOS app – the only difference is that you don't create a new App Clip project. You just need to add the App Clip as a target to an existing iOS app by going to File->New->Target->iOS->App Clip when an existing iOS app is open in Xcode.
If you you wondering about iPhone/iPad Widgets, well they don't animate. So button clicks will just open the corresponding app and can't update text through an external API independently.
Conclusion
In this article, you learned how to make RESTful GET API calls from SwiftUI in the simplest possible way!
Feel free to reach out to me if you have any questions. I figured this out using another article and I thought of simplifying it further. So for more details and ways to make this code more complex, check out that article: