By Sigurður Skúli
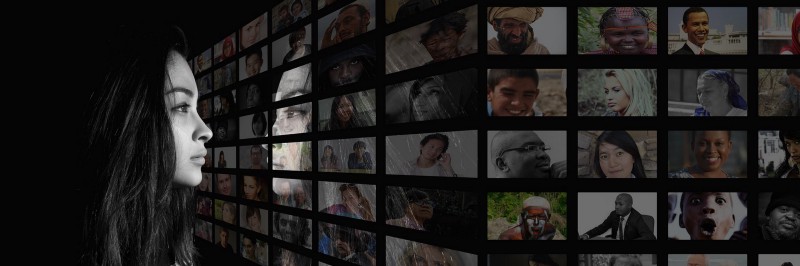
Face recognition is the latest trend when it comes to user authentication. Apple recently launched their new iPhone X which uses Face ID to authenticate users. OnePlus 5 is getting the Face Unlock feature from theOnePlus 5T soon. And Baidu is using face recognition instead of ID cards to allow their employees to enter their offices. These applications may seem like magic to a lot of people. But in this article we aim to demystify the subject by teaching you how to make your own simplified version of a face recognition system in Python.
Github link for those who do not like reading and only want the code
Background
Before we get into the details of the implementation I want to discuss the details of FaceNet. Which is the network we will be using in our system.
FaceNet
FaceNet is a neural network that learns a mapping from face images to a compact Euclidean space where distances correspond to a measure of face similarity. That is to say, the more similar two face images are the lesser the distance between them.
Triplet Loss
FaceNet uses a distinct loss method called Triplet Loss to calculate loss. Triplet Loss minimises the distance between an anchor and a positive, images that contain same identity, and maximises the distance between the anchor and a negative, images that contain different identities.

- f(a) refers to the output encoding of the anchor
- f(p) refers to the output encoding of the positive
- f(n) refers to the output encoding of the negative
- alpha is a constant used to make sure that the network does not try to optimise towards f(a) - f(p) = f(a) - f(n) = 0.
- […]+ is equal to max(0, sum)
Siamese Networks
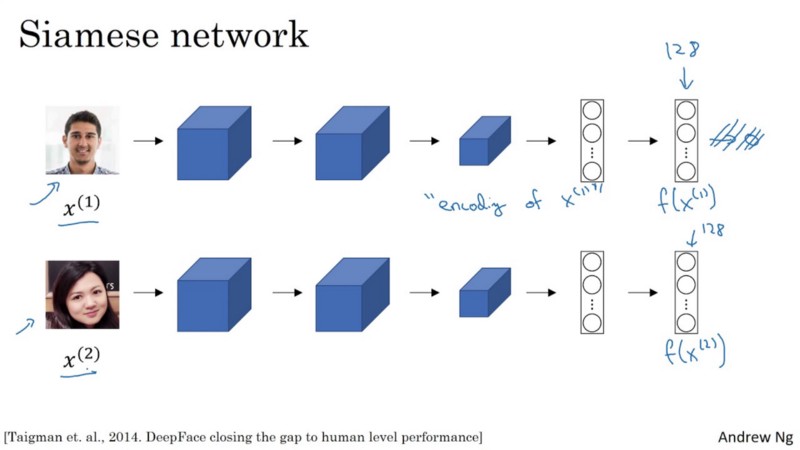
FaceNet is a Siamese Network. A Siamese Network is a type of neural network architecture that learns how to differentiate between two inputs. This allows them to learn which images are similar and which are not. These images could be contain faces.
Siamese networks consist of two identical neural networks, each with the same exact weights. First, each network take one of the two input images as input. Then, the outputs of the last layers of each network are sent to a function that determines whether the images contain the same identity.
In FaceNet, this is done by calculating the distance between the two outputs.
Implementation
Now that we have clarified the theory, we can jump straight into the implementation.
In our implementation we’re going to be using Keras and Tensorflow. Additionally, we’re using two utility files that we got from deeplearning.ai’s repo to abstract all interactions with the FaceNet network.:
- fr_utils.py contains functions to feed images to the network and getting the encoding of images
- inception_blocks_v2.py contains functions to prepare and compile the FaceNet network
Compiling the FaceNet network
The first thing we have to do is compile the FaceNet network so that we can use it for our face recognition system.
import osimport globimport numpy as npimport cv2import tensorflow as tffrom fr_utils import *from inception_blocks_v2 import *from keras import backend as K
K.set_image_data_format('channels_first')
FRmodel = faceRecoModel(input_shape=(3, 96, 96))
def triplet_loss(y_true, y_pred, alpha = 0.3): anchor, positive, negative = y_pred[0], y_pred[1], y_pred[2] pos_dist = tf.reduce_sum(tf.square(tf.subtract(anchor, positive)), axis=-1) neg_dist = tf.reduce_sum(tf.square(tf.subtract(anchor, negative)), axis=-1) basic_loss = tf.add(tf.subtract(pos_dist, neg_dist), alpha) loss = tf.reduce_sum(tf.maximum(basic_loss, 0.0)) return loss
FRmodel.compile(optimizer = 'adam', loss = triplet_loss, metrics = ['accuracy'])load_weights_from_FaceNet(FRmodel)
We’ll start by initialising our network with an input shape of (3, 96, 96). That means that the Red-Green-Blue (RGB) channels are the first dimension of the image volume fed to the network. And that all images that are fed to the network must be 96x96 pixel images.
Next we’ll define the Triplet Loss function. The function in the code snippet above follows the definition of the Triplet Loss equation that we defined in the previous section.
If you are unfamiliar with any of the Tensorflow functions used to perform the calculation, I’d recommend reading the documentation (for which I have added links to for each function) as it will improve your understanding of the code. But comparing the function to the equation in Figure 1 should be enough.
Once we have our loss function, we can compile our face recognition model using Keras. And we’ll use the Adam optimizer to minimise the loss calculated by the Triplet Loss function.
Preparing a Database
Now that we have compiled FaceNet, we are going to prepare a database of individuals we want our system to recognise. We are going to use all the images contained in our images directory for our database of individuals.
NOTE: We are only going to use one image of each individual in our implementation. The reason is that the FaceNet network is powerful enough to only need one image of an individual to recognise them!
def prepare_database(): database = {}
for file in glob.glob("images/*"): identity = os.path.splitext(os.path.basename(file))[0] database[identity] = img_path_to_encoding(file, FRmodel)
return database
For each image, we will convert the image data to an encoding of 128 float numbers. We do this by calling the function img_path_to_encoding. The function takes in a path to an image and feeds the image to our face recognition network. Then, it returns the output from the network, which happens to be the encoding of the image.
Once we have added the encoding for each image to our database, our system can finally start recognising individuals!
Recognising a Face
As discussed in the Background section, FaceNet is trained to minimise the distance between images of the same individual and maximise the distance between images of different individuals. Our implementation uses this information to determine which individual the new image fed to our system is most likely to be.
def who_is_it(image, database, model): encoding = img_to_encoding(image, model) min_dist = 100 identity = None # Loop over the database dictionary's names and encodings. for (name, db_enc) in database.items(): dist = np.linalg.norm(db_enc - encoding)
print('distance for %s is %s' %(name, dist))
if dist < min_dist: min_dist = dist identity = name if min_dist > 0.52: return None else: return identity
The function above feeds the new image into a utility function called img_to_encoding. The function processes an image using FaceNet and returns the encoding of the image. Now that we have the encoding we can find the individual that the image most likely belongs to.
To find the individual, we go through our database and calculate the distance between our new image and each individual in the database. The individual with the lowest distance to the new image is then chosen as the most likely candidate.
Finally, we must determine whether the candidate image and the new image contain the same person or not. Since by the end of our loop we have only determined the most likely individual. This is where the following code snippet comes into play.
if min_dist > 0.52: return Noneelse: return identity
- If the distance is above 0.52, then we determine that the individual in the new image does not exist in our database.
- But, if the distance is equal to or below 0.52, then we determine they are the same individual!
Now the tricky part here is that the value 0.52 was achieved through trial-and-error on my behalf for my specific dataset. The best value might be much lower or slightly higher and it will depend on your implementation and data. I recommend trying out different values and see what fits your system best!
Building a System using Face Recognition
Now that we know the details on how we recognise a person using a face recognition algorithm, we can start having some fun with it.
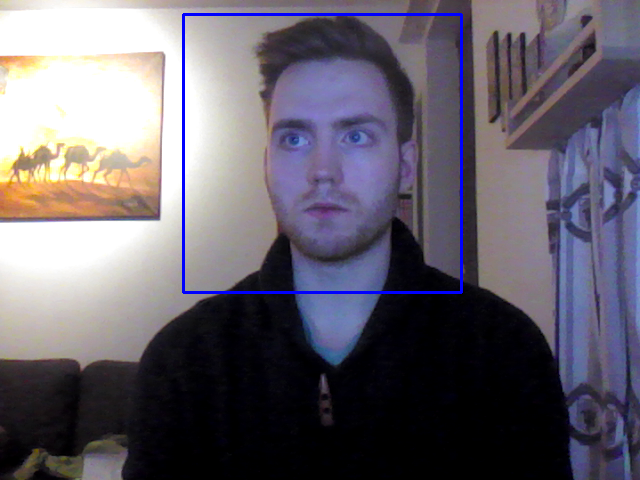
In the Github repository I linked to at the beginning of this article is a demo that uses a laptop’s webcam to feed video frames to our face recognition algorithm. Once the algorithm recognises an individual in the frame, the demo plays an audio message that welcomes the user using the name of their image in the database. Figure 3 shows an example of the demo in action.
Conclusion
By now you should be familiar with how face recognition systems work and how to make your own simplified face recognition system using a pre-trained version of the FaceNet network in python!
If you want to play around with the demonstration in the Github repository and add images of people you know then go ahead and fork the repository.
Have some fun with the demonstration and impress all your friends with your awesome knowledge of face recognition!