
By Andrea Bizzotto
In this tutorial, I will show how to manage navigation and application state by building a simple app with React Navigation and Redux.
Prerequisite: you should already be familiar with React Native, React Navigation, and Redux. If you’re just getting started with React Native, I highly recommend this course:
Application Overview
We’re going to build an app made of two pages:
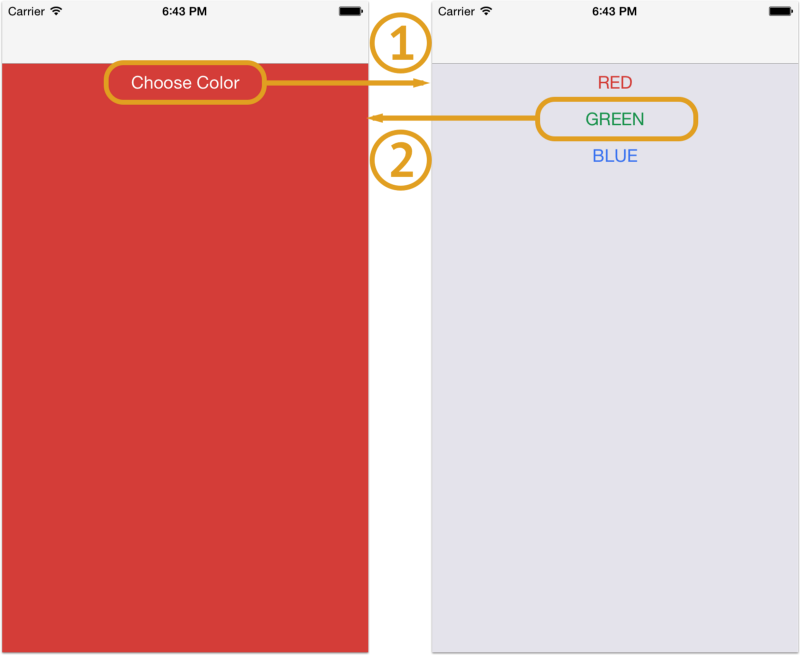
- Main Page: This shows a container view with a specific background color, and a button. When the button is pressed, the second page is presented.
- Choose Color Page: This shows RED, GREEN and BLUE buttons. When a color is selected, the app returns to the main page and shows the updated background color.
By building this app, you will learn:
- How to navigate between different screens with React Navigation
- How to use reducers and actions to update application state, so that actions on one screen drive UI changes on another
With this knowledge, you’ll be able to build more complex apps.
Note: For the remainder of this tutorial, I will use the terms “page” and “screen” to mean the same thing.
Project Setup (Expo)
We’re going to build this app with the Expo XDE.
You can download Expo for your OS from the Expo XDE GitHub page.
Then head over to the installation instructions on the Expo Docs. These will show you how to install the XDE on your desktop, and run apps within Expo on simulator/device.
As we’ll be running the app on the simulator, you’ll also need to download Xcode or Android Studio.
Upon launching Expo, this page is presented:
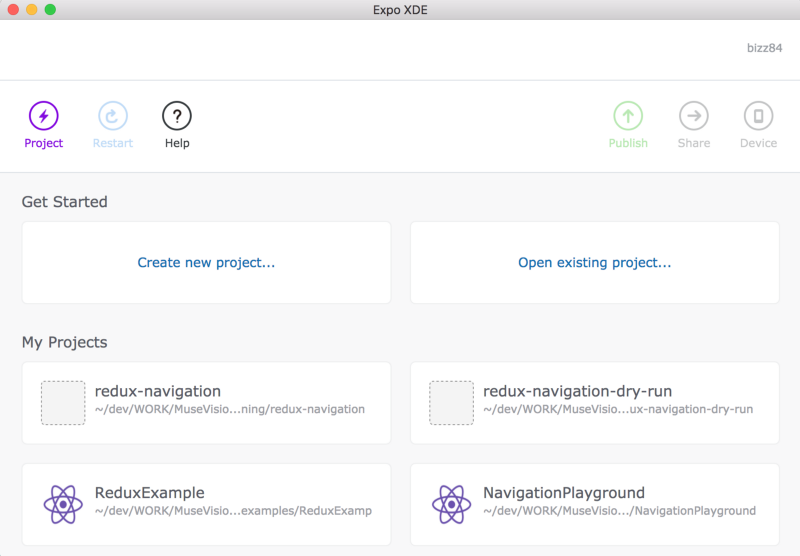
- Select “Create new project…”
- Choose the blank template, and name the project
**redux-navigation**
The project will be created, then the React Native packager will start.
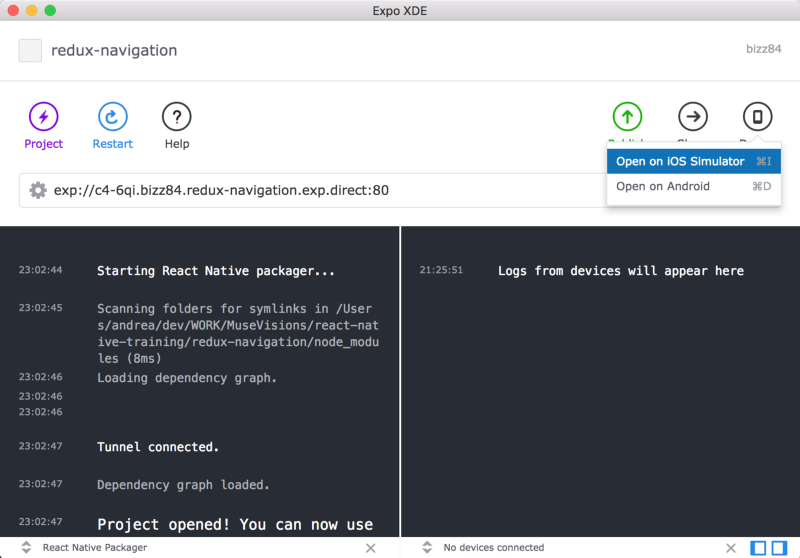
To run the app in the simulator, select Device -> Open in iOS Simulator.
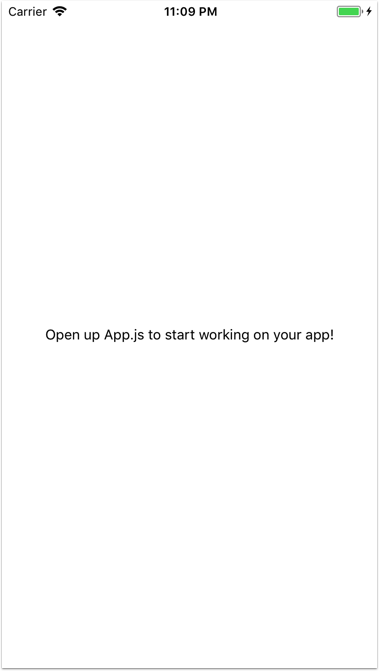
Once the simulator is booted up, the following screen appears:
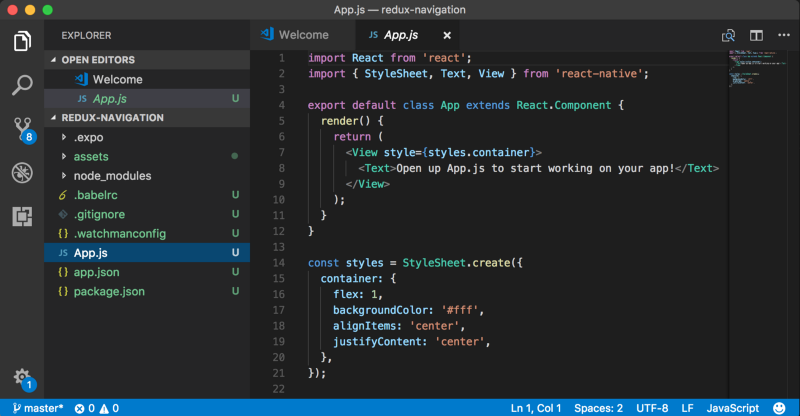
As the project is now created, it can be opened with your editor of choice. I use Visual Studio Code with the React Native Tools extension.
Building the app
Before we can code our app, we need to install all the dependencies it needs.
Open a terminal, move to the project folder you created in Expo, and type:
npm install --save react-navigation redux react-reduxnpm install
Then, make sure to hit the Restart button in Expo. If you don’t do this, the new dependencies won’t be recognized and the simulator will throw a red error screen if you try to use them.
Time to build our app. I organized my project folders like this:
/src /actions ColorChangedAction.js /components AppNavigator.js ChooseColorPage.js MainPage.js /reducers AppReducer.js ColorReducer.js NavReducer.js /state Colors.js
You can replicate this same structure from your terminal:
cd redux-navigationmkdir src && cd srcmkdir actions && cd actions && touch ColorChangedAction.js && cd ..mkdir components && cd components && touch AppNavigator.js ChooseColorPage.js MainPage.js && cd ..mkdir reducers && cd reducers && touch AppReducer.js ColorReducer.js NavReducer.js && cd ..mkdir state && cd state && touch Colors.js && cd ..
Copy-paste the following code into the **Colors.js** file:
Next, create the **MainPage** with a default background color and a button:
A few notes:
**MainPage**is a React component rather than a stateless functional component, because it will need to access application state- I use
flex: 1, alignSelf: 'stretch'to make the container view extend to the whole screen - The color of the container view is defined in the
selectedColor()method, which samples**RED**from our**COLORS**table, and returns the corresponding hex code - I have added an empty
onChooseColor()handler for the button press event. We will add the body of this method later.
Time to hook up our **MainPage** into our root **App.js** file. Replace the old contents with this:
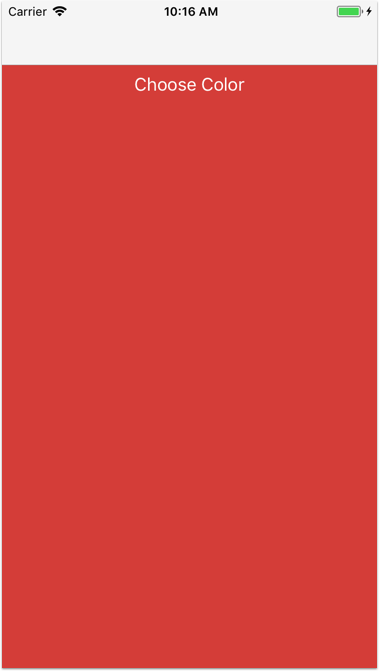
Refreshing the simulator yields this:

Not pretty, but it shows the background color and our button as intended.
Here is a snapshot of what we’ve built so far: GitHub Code Snapshot 1.
Adding Navigation
We are now ready to add some navigation to our app.
To do this, open the **AppNavigator.js** file and add these contents:
This code is borrowed from the Redux Example in the react-navigation project.
It defines a StackNavigator, using our **MainPage** as its main screen.
It also sets up AppWithNavigationState, a top-level container holding the navigation state. If this seems unclear, don’t worry. This is standard boilerplate code in React Navigation and we’ll just use it for now to get things going.
Time to write the navigation reducer, which will hold the navigation state inside the Redux store. Open the **NavReducer.js** file and add the following:
This reducer defines the initial navigation state of our app. Again, boilerplate code.
Now, let’s open the **AppReducer.js** file and add this:
As our application grows, we may need other reducers alongside our NavReducer. So we can combine them all together inside AppReducer.
Finally, we’re able to update our **App.js** to use all these new goodies:
The render method returns a provider with the created redux store, and holds our top-level component. Again, this is just boilerplate code needed to hook things up with Redux.
If we refresh the simulator, we now see a navigation bar appearing on top:
After all this code, you may get some errors on your simulator if anything is missing. If so, use this code snapshot to get back on track: GitHub Code Snapshot 2.
Show the Choose Color Page
Now that we have a **MainPage** inside a StackNavigator, we’re ready to add the **ChooseColorPage** so we can navigate to it.
Open the **ChooseColorPage.js** file and add the following code:
A few notes:
- The code in the
**render()**method iterates through each color, and maps it into aButton. Thetitleandcolorproperties are set. - When the button is tapped, the
onSelectColor()handler is called with the appropriate color key. - The
navigationobject is accessible viaprops. In fact, it is injected into all the screens in our**AppNavigator**. - Calling
this.props.navigation.goBack()takes us back to the previous screen in the**AppNavigator**. - At this stage,
colorNameis not yet used to set any state.
Next, we have to make our **AppNavigator** aware of the new **ChooseColorPage** screen. Let’s update it in the **AppNavigator.js** file:
Finally, add the code to navigate to the ChooseColorPage when the **Choose Color** button is tapped on the **MainPage**.
If we refresh the simulator now and tap on **Choose Color**, the app navigates to the new screen, which shows three buttons:
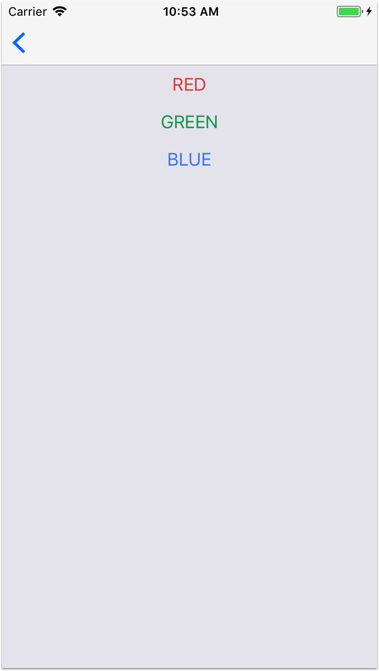
Note: Calling navigation.navigate('ChooseColor') works because we have named **ChooseColor** as one of the routes in our **AppNavigator**.
Tapping on the back button or on any of the color buttons brings us back to the main page, but the background color doesn’t change according to our selection.
Let’s fix that in the next section.
Again, if something is not working, you can get my saved code snapshot to this point: GitHub Code Snapshot 3.
Managing application state
We’ll use Redux to set the background color of our **MainPage** as our application state.
To do this, we need to define a Color Changed action, and a Color Reducer.
Open the **ColorChangedAction.js** file and add the following:
Then, open **ColorReducer.js** add add this:
In order for this reducer to be used, we need to add it to the **AppReducer.js** like so:
Now, we’re ready to call our colorChanged action when the user selects a color in the **ChooseColorPage**. This is the updated **ChooseColorPage.js** file:
Note that we have made three changes:
- Imported the
**colorChanged**action at the top - Connected it with
connect()and**mapStateToProps** - Used it inside
onSelectColor(colorName)
At this stage, we can refresh the simulator and run. If we choose a different color, the background color of the **MainPage** still doesn’t change.
This is because we haven’t told **MainPage** to use the new state.
Easy to fix. Open **MainPage.js** and add the required code:
A few notes:
**mapStateToProps**now sets thecolorNamefrom the state in the**ColorReducer**- This is then accessible via the
propsobject and can be used insideselectedColor() - Don’t forget to
import { connect } from 'react-redux';at the top
If we try the app again in the simulator, we are now able to change the background color. ?
Updated snapshot: GitHub Code Snapshot 4.
Bonus: Presenting the Color Selection Page Modally
When we tap the **Choose Color** button in the **MainPage**, the **ChooseColorPage** slides in from the right. This is the default navigation animation inside **StackNavigator**.
What if we wanted to present the **ChooseColorPage** modally instead?
This is easily done by changing the configuration of our **AppNavigator** like so:
Note the addition of **navigationOptions** with a **headerLeft: null** property inside **ChooseColor**, and the **mode: ‘modal’** parameter.
If we try this on the simulator, the **ChooseColorPage** now slides in from the bottom.
React Navigation is very customizable. I recommend spending some time reading the documentation for the project, to learn all the things you can do with it.
Wrap Up
We have learned how to:
- Setup and use Expo to run a mobile app on the simulator
- Build an app with two different pages and navigate between them with React Navigation
- Use actions and reducers to modify state from a screen, and use it to update the UI on another
You can find the complete source code on GitHub here.
I also shared the project publicly on Expo here.
I hope you enjoyed this tutorial. A good next step from here is to look at the official React Navigation Examples, as well as the other tutorials from the community.
Comments and feedback are appreciated. ?
And if you ???, I may even do a step-by-step video tutorial. ?
About me: I’m a freelance iOS developer, juggling between contract work, open source, side projects and blogging.
I’m @biz84 on Twitter. You can also see my GitHub page. Feedback, tweets, funny gifs, all welcome! My favourite? Lots of ???. Oh, and chocolate cookies.