

Have you heard about the Parking Lot challenge? If not, let me explain briefly.
The Parking Lot is challenge where you are asked to write a class that manages an imaginary parking lot.
In this tutorial we will do that in JavaScript. And to make it a bit more interesting, we will create a small React app that will visualize the workings of our class.
Let's begin. 🎉
Challenge Requirements
For this challenge, you have to implement a class in JavaScript. That class should consist of variables and methods that simulate how a parking lot works. Here are the details:
We should be able to create the parking lot with a given size (number of parking spots)
We don’t differentiate between different vehicles – we consider them all the same
Our class provides a method for parking new cars in the parking lot
Our class provides a method for removing already parked cars, and
Our class provides a method for getting the size of the parking lot (total count of slots)
Parking Lot Challenge Solution
First, let’s take a look at the class logic itself.
It’s pretty straightforward, so there probably won’t be any surprises for most of you – especially if you already have some programming experience in OOP and class-based languages.
class ParkingLot
I will give you the code first and then I'll follow up with a short explanation on the implementation.
class ParkingLot {
  slots = [];

  constructor(parkingSize) {
    this.slots = new Array(parkingSize).fill(null);
  }

  park(carId) {
    console.log(`Parking car: ${carId}`);
    if (this.slots.every((slot) => slot !== null)) {
      return false;
    }

    for (let i = 0; i <= this.slots.length; i++) {
      const slot = this.slots[i];

      if (slot === null) {
        this.slots[i] = carId;
        return true;
      }
    }
  }

  remove(carId) {
    console.log(`Leaving car: ${carId}`);
    if (this.slots.every((slot) => slot !== carId)) {
      return false;
    }

    for (let i = 0; i <= this.slots.length; i++) {
      const slot = this.slots[i];

      if (slot === carId) {
        this.slots[i] = null;
        return true;
      }
    }
  }

  getSlots() {
    console.log(`Parking slots: ${this.slots}`);
    return this.slots;
  }

  getSize() {
    console.log(`Parking size is: ${this.slots.length}`);
    return this.slots.length;
  }

  getAvailable() {
    const availableSlots = this.slots.filter((s) => s === null).length;
    console.log(`Available parking slots: ${availableSlots}`);
    return availableSlots;
  }

  isFull() {
    return this.getAvailable() === 0;
  }
}

export default ParkingLot;
Starting from the beginning – our class has one property, slots, which is going to be an array that stores info about the parking slots (whether they're free or occupied).
Then we have a constructor method that gets executed every time you create an instance of this class. Here is where we use an input number parameter, called parkingSize, to create an empty array with length equal to that number.
Technically speaking, this array is not empty, as we initialize it with null values. This means that after the code executes in the constructor, we will end up with an array filled with null values, depending on the number we passed in.
For example, if we execute this:
const parking = new ParkingLot(5);
It will result in this:
[null, null, null, null, null] // lenght = 5

instead of [] // empty array, length 0
After going through the constructor, let’s take a look at the rest of the methods in the class.
park() – This is where we do the actual parking of a car. This method iterates over the slots array, checks if there are free spots (that is, slots that are still equal to null), and adds in the car in those empty spots.
Cars are given by carId. This is just an identifier we use to signify that we have a car in a certain spot. Note that this method returns false if there are no free slots or true if parking was successful.
getSlots() – Helper method that just returns the array we use to store the parking slots.
remove() – This is how we remove cars from the parking lot. This method also iterates over the slots array.
💡As you may have noticed up until now, in almost every case when we need to manipulate data stored in a data structure like array, we have to iterate over this structure so that we can access its elements.
Different programming languages provide different data structures and methods to work with them, but the main idea is always the same: when you need to do something with this data, you need to iterate over it in some way.
To remove a car from the parking lot, we use the aforementioned identifier. We look for such items in the slots array, and if we get a match, we have a car to ‘un-park’. We perform the actual removal by just setting that specific slot to null again.
Now you can guess why we decided to initialize our slots array with nulls in the first place.
This method also returns a boolean result depending on whether there was a successful removal or not.
We should be able to use this feedback when building some kind of UI that is able to react to such changes. The same is valid when adding cars to the parking lot (look at the park method).
getSize() – Another helper method that we use to check the parking lot size.
getAvailable() – This one shows us how many available slots we currently have.
isFull() – Tells us if the parking lot is full, that is that there are no more available slots.
How to Build the React App
Parking Lot app - main screen
Here is where the fun starts. 🕺
We are going to create an interactive app, visualizing the tasks which we can perform with the help of our implementation above.
Our app will provide basic UI controls allowing an (imaginary) operator to work with the parking lot software_._ And in order to make their work a bit more pleasing to the eye, we will try to animate the basic functions our software provides.
Let’s see how! 📺
Demo
Here is the live demo for those of you who doesn’t care about the details and just want to ‘taste’ it: 🥪
Source Code
Here is the repo with the app's source code.
Let me give you a brief summary on the what and the why.
The app is built with vite. The reason for this is that I've been playing around recently with it and I am really happy with the speed and the performance it provides.
No matter that it’s still in the relatively early stages of development – if I am about to start a new project and am in a position to choose, I will go with vite.
This is not to say I have anything against its big brother CRA. On the contrary, I have built multiple apps with it and I am still using it in some of my projects. It’s just that vite is much faster and often gives me everything I currently need.
💡Just keep in mind that selecting a given technology always depends on your specific needs for a specific project. That is to say that there is no silver bullet. It’s always a matter of requirements and priorities.
Structure of the React App

App structure
The app's structure is straightforward. At the root level we have two folders – assets and src. The first contains the assets used in the app (in this case it’s just a car image). The later contains all the files with the source code.
Let’s take a closer look inside the source folder.
Here we have the following folders:
components – contains all React components used in the app
lib – contains the parking lot class, responsible for the main logic of the app
pages – contains two sub-directories, for the two main screens in the app – Landing and Main, respectively
utils – contains a helper method for generating fictitious car license plates that we use later when representing a parking slot as busy
And several files, most of them are related to the entry point of the app, except the favicon ones – their role should be clear to you. If not, take a look at the tab of your browser 😉

Browser tab with favicon
App Pages
As mentioned earlier, the main pages (also called screens) in the app are called Landing and Main. These are React components themselves. They serve as skeletons for everything you see in the welcome page – where you land initially and where you can select how many parking slots you want to have in your parking lot.

Welcome page
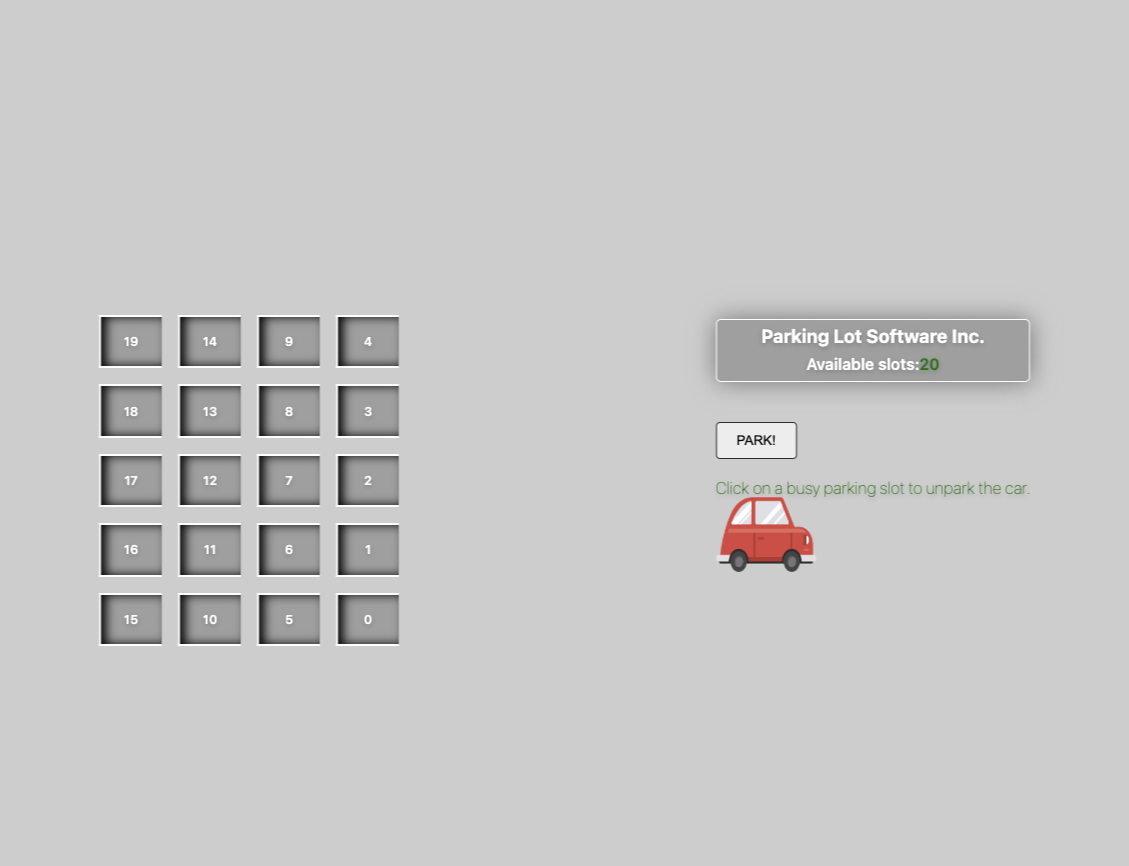
And the page you go to after clicking the big, pink submit button - the main screen where your operator is able to manage the parking lot.

Main page
App Functionality
The app provides very basic functionality for managing an imaginary parking lot. When the user select how many slots they want (max 20), they'll be transitioned to the main screen. There, the user will be able to see all free parking slots.
When a car is parked, via the PARK! button, the relevant spot will be visualised as busy and will show the registration number of the car being parked there. The operator can un-park cars by clicking on a busy slot, that is on the car they want to “remove” from the parking lot.
💡The simple animation of the moving red car is just for visual effect and doesn’t have any real influence on the way the parking lot works.
I used CSS modules for styling the app. I also tried to make the app a bit mobile friendly, in case you decide to try it on your mobile device.
Be my guest and give a try 🧪
Conclusion
My initial idea behind this post was to describe the parking lot class itself. You know, just for educational purposes. To show you how can you write such a class in JavaScript.
But then I thought it’s kind of boring 🥱. I wanted to create something funnier 💃🏻, something more gamified 🕹️ so to speak.
And this is how I ended up with this mini game-like app 🎮.
While building it, my 5 year old daughter 🧒🏻 saw it and wanted to play with it. And she had a lot of fun actually!
Yes, yes, of course! I am not saying that if it was something funny for a 5 year old, it will be for you too 😀.
My only goal was to catch your attention through the game, so that the knowledge 📖 behind it stays longer with you.
Thanks for reading! 🙏