
By Linh Nguyen My
For the past three weeks, I have been trying to create a React app from scratch to understand the set-up with Webpack. My aim was to set up a simple configuration which can then be grown upon. It’s been a struggle to understand Webpack. But thanks to this tutorial by Valentino Gagliardi, I’m much enlightened.
What I’m planning to do is to make a search functionality with some fake JSON data (or real). In this blog post, I will go through the set up of my project. In the next one, I am planning to show how to set up testing. I would also like to add a server to this using Node.js, but not sure if the scope of my project would need that.
(Note: I have provided my Webpack setup at the end of this blog post)
Without further ado, let’s get on with the set up!
Make a new project and cd into it:
mkdir react_searchcd react_search
Create a package.json file:
npm init
If you want to skip all the questions, add the -y flag:
npm init -y
We need to install webpack as a dev dependency and webpack-cli so that you can use webpack in the command line:
npm i webpack webpack-cli -D
- i: install
- -D: — save-dev
Create a src folder with index.js and place the following code as an example:
console.log("hello");
Now add the following scripts to your package.json (in bold):
{
  "name": "react_search",
  "version": "1.0.0",
  "description": "Search app using React",
  "main": "index.js",

"scripts": {
    "start": "webpack --mode development",
    "build": "webpack --mode production"

},  "keywords": [],
  "author": "",
  "license": "ISC",
  "devDependencies": {
    "webpack": "^4.0.1",
    "webpack-cli": "^2.0.10"
  }
}
Webpack 4 now has two modes, development and production where code is minimised in the latter.
See it for yourself by running:
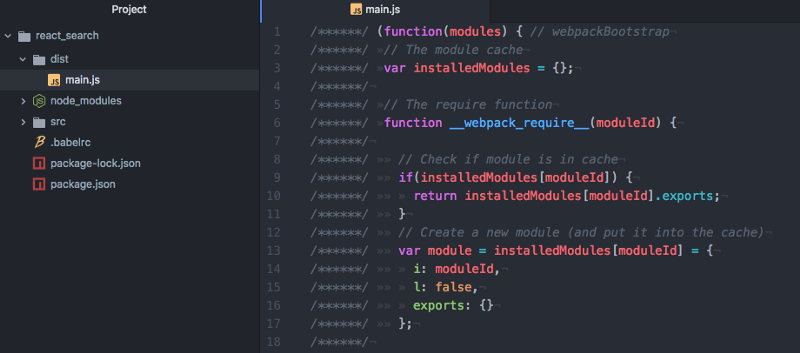
npm run start
This will create a dist folder with main.js file inside (containing your src code).
If you now run:
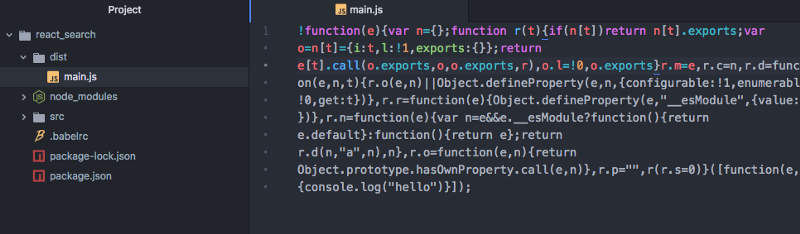
npm run build
The following output is now like this:
Setting Up React and Babel
To work with React, we need to install it along with Babel. This will transpile the code from ES6 to ES5, as not all browsers support ES6 yet (for example Internet Explorer).
Install react and react-dom as a dependency
npm i react react-dom -S
- -S: — save
Then install babel-core, babel-loader, babel-preset-env and babel-preset-react as a dev dependency:
npm i babel-core babel-loader babel-preset-env babel-preset-react -D
- babel-core: Transforms your ES6 code into ES5
- babel-loader: Webpack helper to transform your JavaScript dependencies (for example, when you import your components into other components) with Babel
- babel-preset-env: Determines which transformations/plugins to use and polyfills (provide modern functionality on older browsers that do not natively support it) based on the browser matrix you want to support
- babel-preset-react: Babel preset for all React plugins, for example turning JSX into functions
We need to create a webpack.config.js file to state the rules for our babel-loader.
module.exports = {
  module: {
    rules: [
      {
        test: /\.js$/,
        exclude: /node_modules/,
        use: {
          loader: "babel-loader"
        }
      }
    ]
  }
};
We then need to make a separate file called .babelrc to provide the options for babel-loader. You can include it in the webpack.config.js file, but I have seen that most projects have this separated. This results in clearer readability, and it can be used by other tools unrelated to webpack. When you state that you’re using babel-loader in your webpack config, it will look for .babelrc file if there is one.
{
  "presets": ["env", "react"]
}
Next, change your index.js file to render a component:
import React from "react";
import ReactDOM from "react-dom";

const Index = () => {
  return <div>Hello React!</div>;
};

ReactDOM.render(<Index />, document.getElementById("index"));
We will also need to create an index.html file in the src folder where we can add our section element with id index. This is where we render our main react component:
<!DOCTYPE html>
<html lang="en">
<head>
  <meta charset="UTF-8">
  <meta name="viewport" content="width=device-width, initial-scale=1.0">
  <meta http-equiv="X-UA-Compatible" content="ie=edge">
  <title>React and Webpack4</title>
</head>
<body>
  <section id="index"></section>
</body>
</html>
Now we need to install html-webpack-plugin and use this in our webpack config file. This plugin generates an HTML file with