By Shawn McKay
Statecharts and state machines offer a promising path for designing and managing complex state in apps. For more on why statecharts rock, see the first article of this series.
But if statecharts are such an excellent solution for managing UI & state in Javascript (JS), why isn’t there more momentum behind them?
One of the main reasons statecharts have not grown in popularity within the front-end world is that best practices have yet to be established. It’s not abundantly clear how to use state machines with popular component-based UI libraries such as React, Vue, or Angular.
While it may be too early to declare best practices for statecharts in JS, we can explore some patterns used by existing state machine integration libraries.
Statechart machine
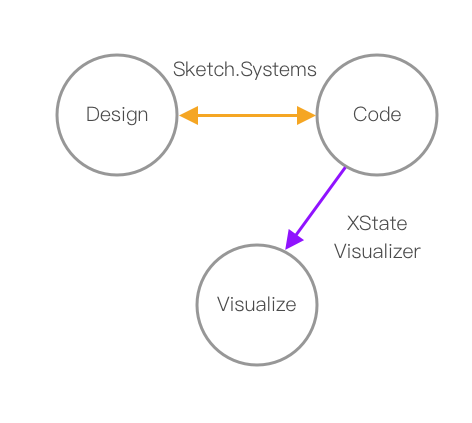
Statecharts work both for visual design and as the underlying code for a graph-based state machine.
Bear in mind that we’re in the early days of using statecharts with JS, and it may be worth experimenting with a variety of libraries or even developing your own. That being said, XState is currently leading the pack for statechart machine libraries in JS.
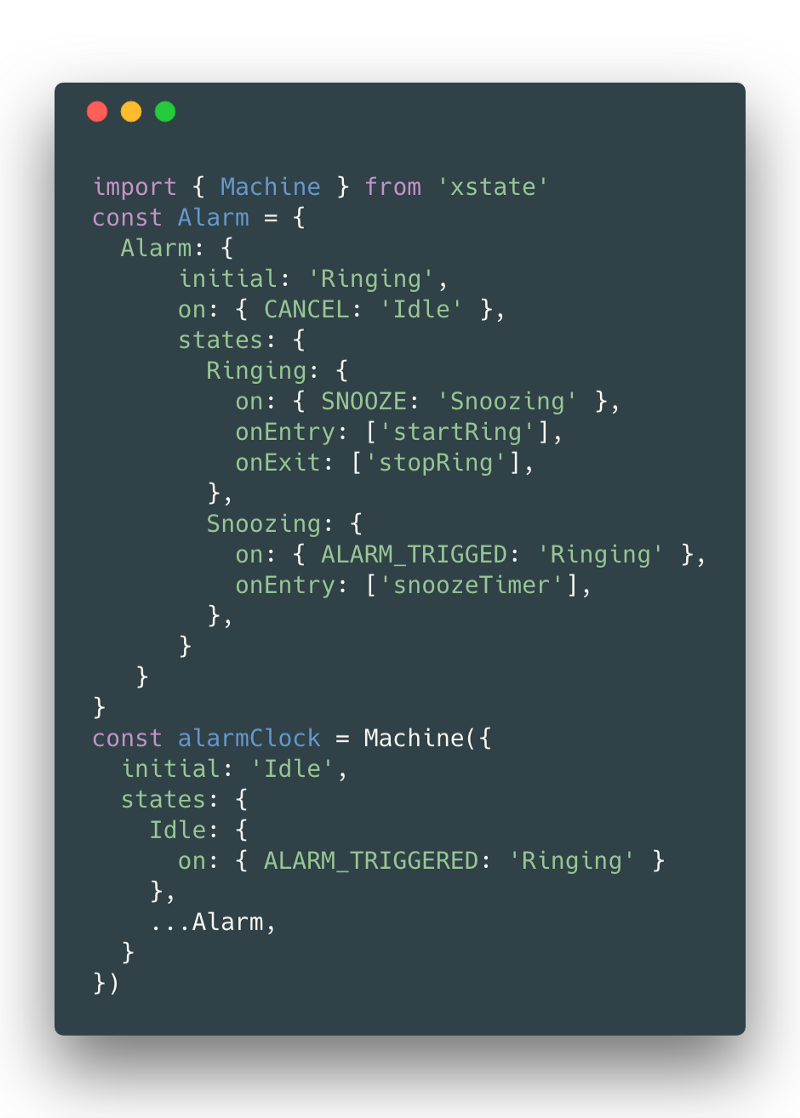
The above state machine code can generate a much more readable statechart diagram when passed as JSON to the XState Visualizer.
You can even work the other way, starting by visually designing and then exporting to an XState configuration using sketch.systems. We don’t have all the pieces in one place yet, but there are no serious technical barriers to an open source solution.
Now that we have an idea of what XState does, let’s look at what it doesn’t do.
XState Tagline: “stateless finite state machines and statecharts”.
So what does it mean for a state machine to be stateless?
Stateless machines
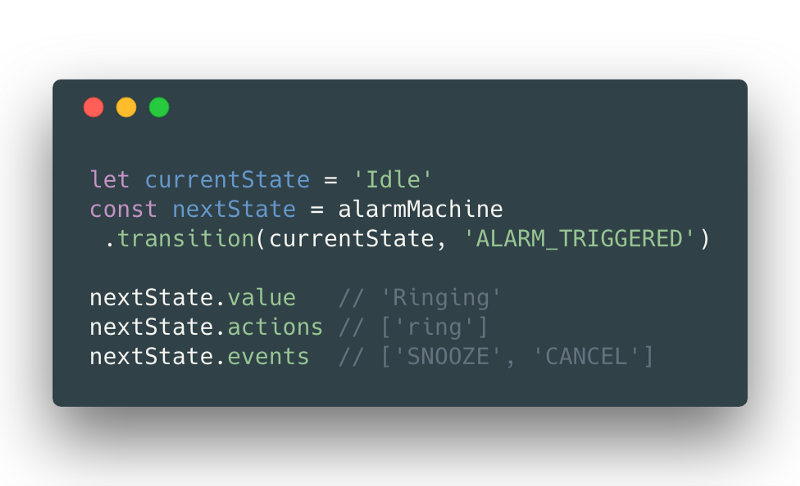
Stateless machines offer an unopinionated blueprint for state management — a kind of “roll your own” solution that doesn’t dictate where or how state in your application is stored.
Much like a presentational component, a stateless machine is made of pure functions, is immutable, and maintains no state. It tracks no past, current, or future — but it can be used to help you calculate each.
Managing your state can be as easy as storing it in a local state variable.
Stateless machines don’t give you much out of the box. To trigger a transition, we must always pass in the current state node in to find the next. XState can let you know which actions should be fired on each state change, but you’ll have to find a way to manage the actions yourself.
If you’re interested in a more complete solution, consider making your state machine stateful.
Stateful machines
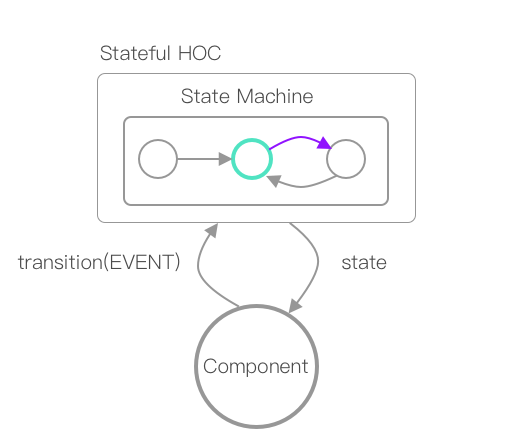
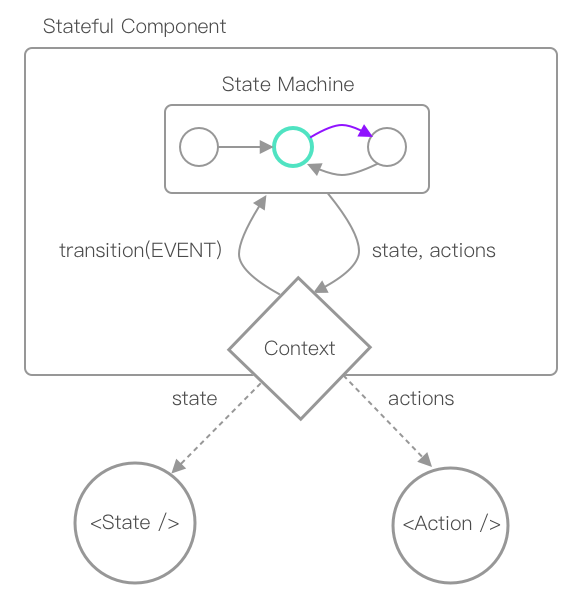
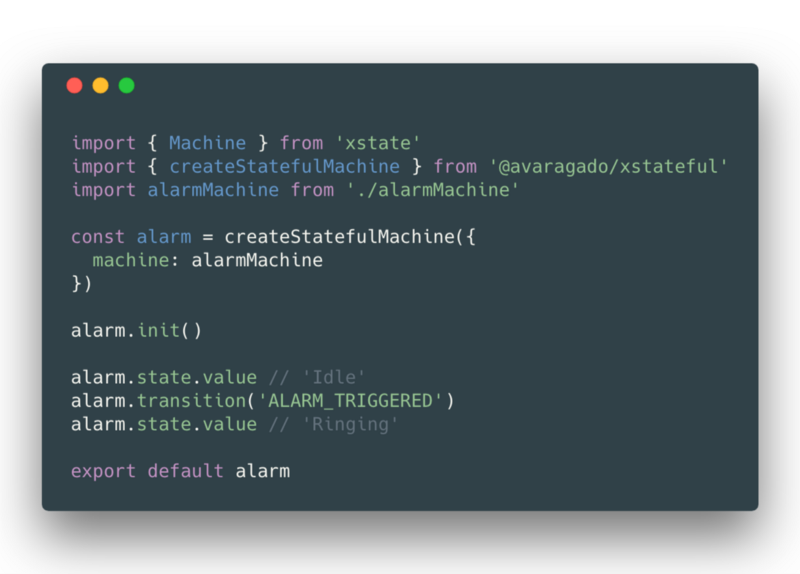
A stateful machine tracks your node position on the state graph and manages the firing of actions. There is no need to pass in the current state on transitions — it tracks your current state node.
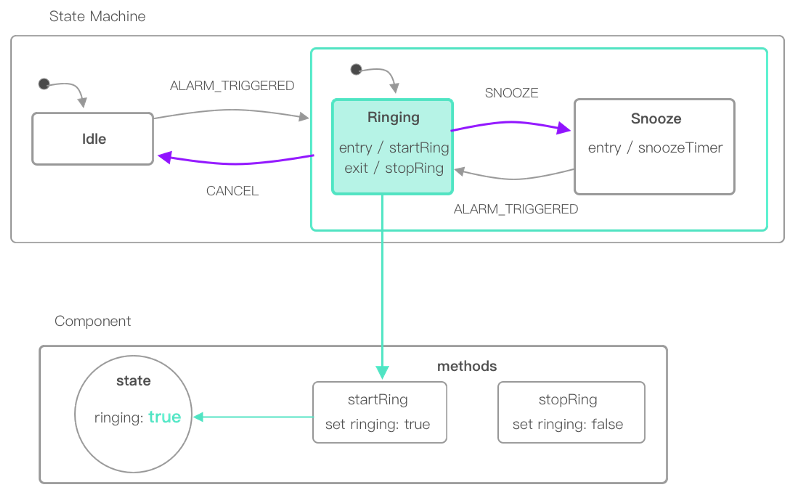
As a summary, the instance of the stateful machine above:
- determines the green state position at “Ringing”
- limits the possible purple’active transition events to
CANCELorSNOOZE - fires the
startRingaction on entry - fires the
stopRingaction on leaving the state
Of course, there is more than one way to create a stateful machine. We’re back to the question of where to manage state:
- within the existing component state?
- in a connected state machine?
Let’s explore some design patterns with examples, starting with stateful components.
Stateful components
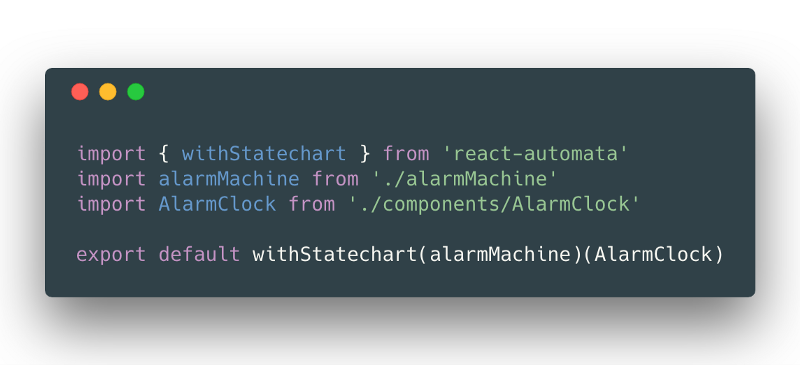
A stateful component, as you might imagine, manages state within the component, or within a wrapping higher-order component. In React, this would be as state. Storing state within a UI library ensures that changes won’t be missed and will trigger re-renders.
This is the approach of a library called React-Automata that uses a higher-order component initiated by withStatechart.
React-Automata offers several patterns for using statecharts with components:
- state from props
- conditional rendering from a context
- state from actions
We’ll go over each pattern and consider the pros and cons.
State from Props
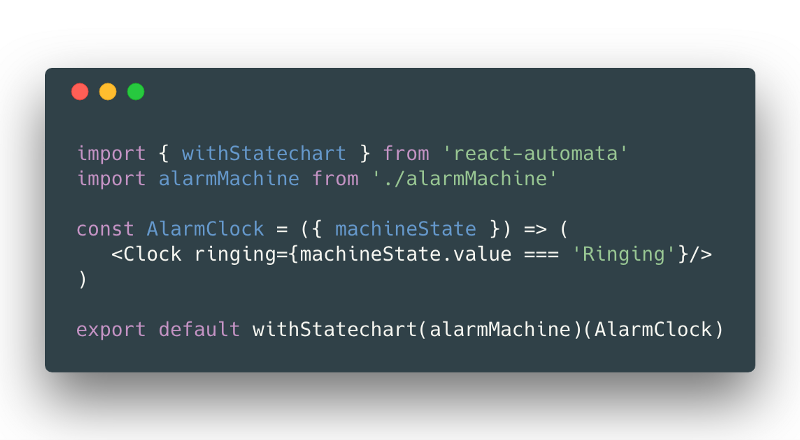
Passing state directly into components seems like the most obvious solution.
In React-Automata, state can be passed by accessing it on the machineState prop — a reference to the actual state machine.
But be wary, this is by no means best practice. In the example above, the integration has coupled the statechart to the component, leading to a poor separation of concerns.
Consider that the statechart and components can allow for a clean divide as they solve different problems:
- statecharts: when things happen, for example, enter state, actions fired
- components: how and what happens, for example, the view, user interactions
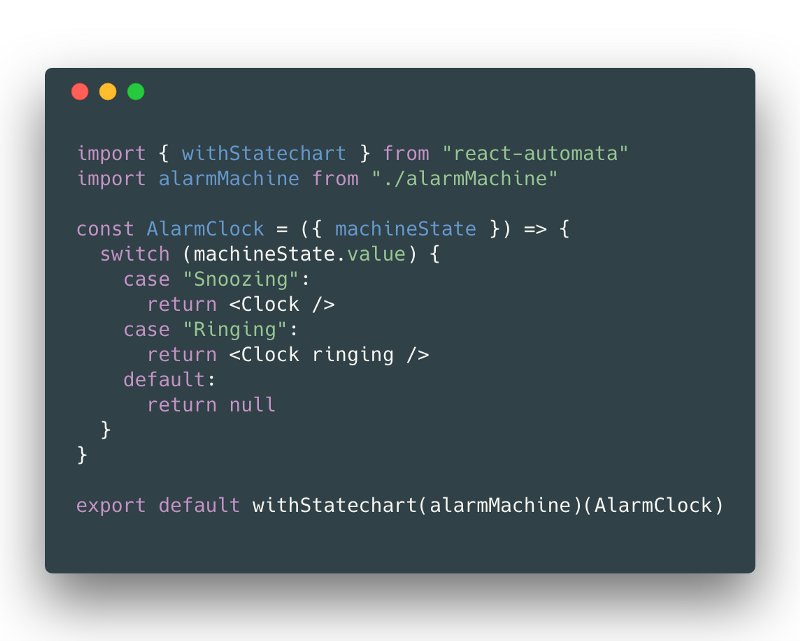
Alternatively, you could decouple the component from the state machine by conditionally rendering with a default of no render.
Certainly, there must be a more natural way to set up conditional rendering without having to turn all your renders into if/else and switch statements.
Conditional rendering from a context
State accessed by a context doesn’t need to be passed directly.
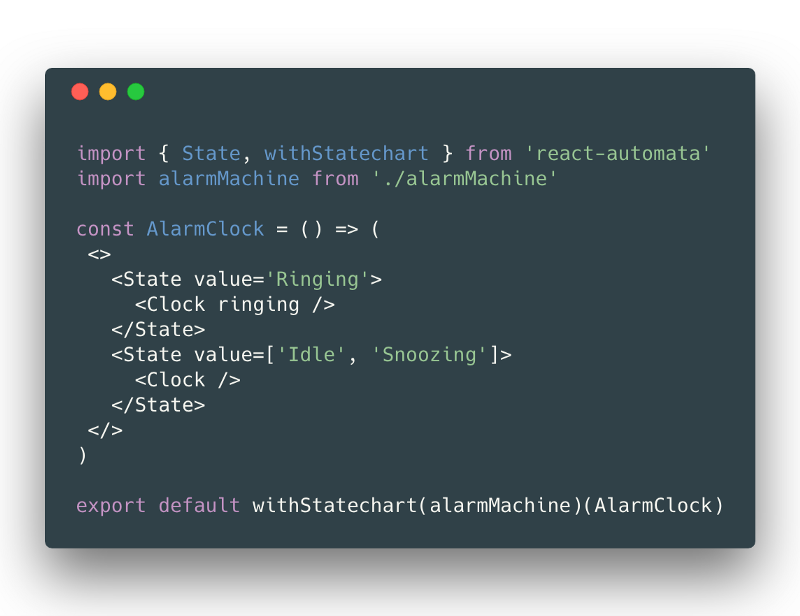
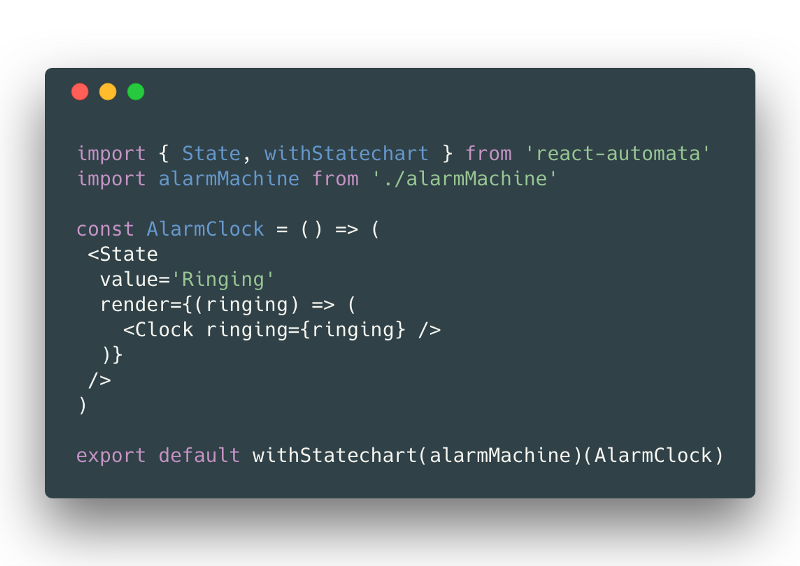
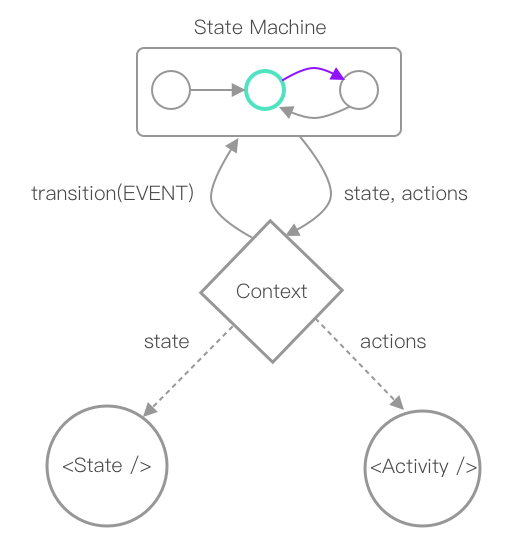
React-Automata provides a pattern for conditional rendering of child components using React’s context and a <State> component. Note that the value property can match on a string, array of strings, or even a glob-based pattern.
If the state value matches Ringing, the children inside of the State component will render. Otherwise, nothing.
State from context can help clarify the number of possible finite state view combinations. As in the case above, it’s clear there are only two possible configurations.
If view configurations start to get out of hand, React-Automata offers a render prop pattern that passes in a boolean based on the value.
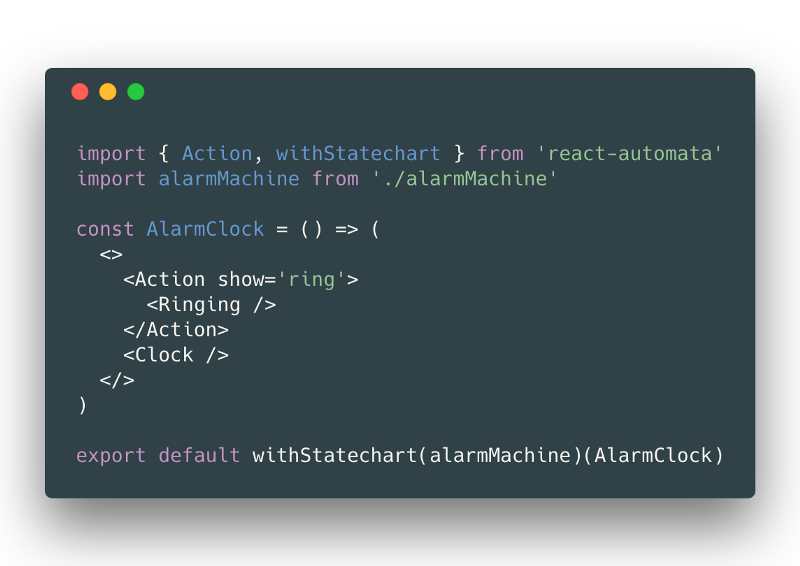
Similarly, it’s possible to conditional render based on context actions.
Conditionally rendering based on state or actions maintains a coupling between the statechart and components, but less explicitly through context. How might you give components their isolated state apart from statecharts?
State from actions
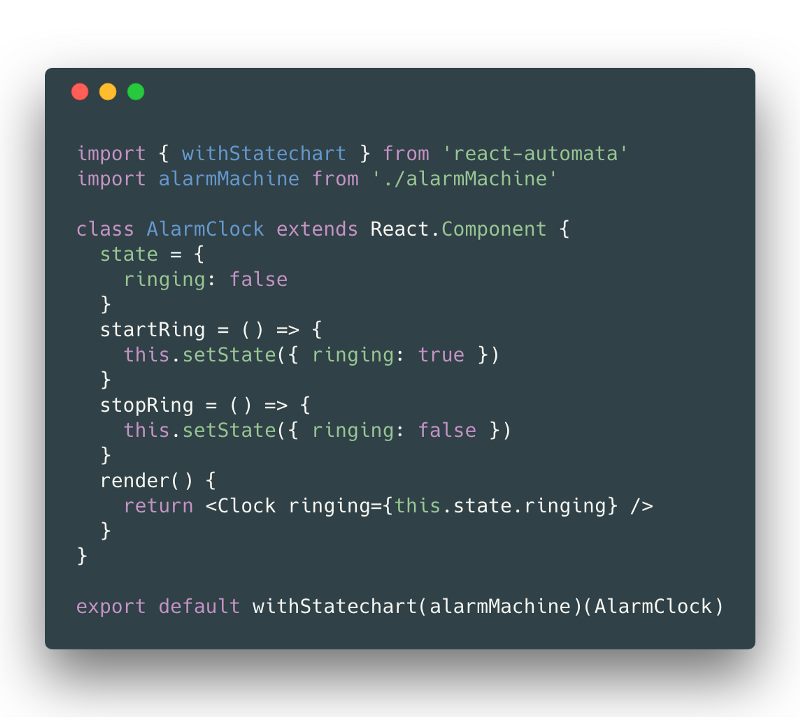
It’s possible to use statecharts to update the internal state of a linked component using actions as triggers.
React-automata checks the methods on a component and calls the functions if the names match the actions being fired.
As an example, the onEntry action startRing is fired as the state machine enters Ringing, causing the AlarmClock state to change to ringing. On leaving the Ringing state, stopRing is fired, and ringing is set to false.
Note that, although of these methods are called with params, the methods already have access to whatever they need from machineState through props.
Using internal component state managed through actions leads to a strong decoupling of components from state charts. However, it can also create a degree of clutter or confusion in components. It is not explicitly clear how or when methods will be called without examining the names of actions in the statechart. For this reason, I often call my actions and methods enterX or exitX in order to make it explicitly clear why and where they are being fired.
External state machines
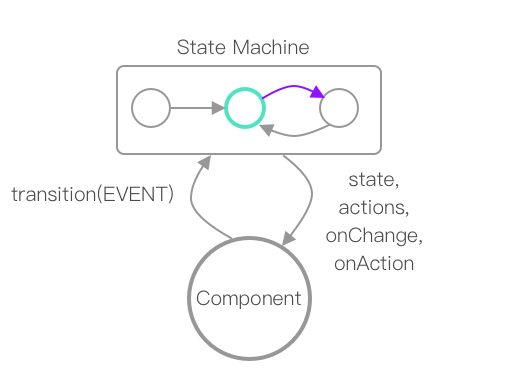
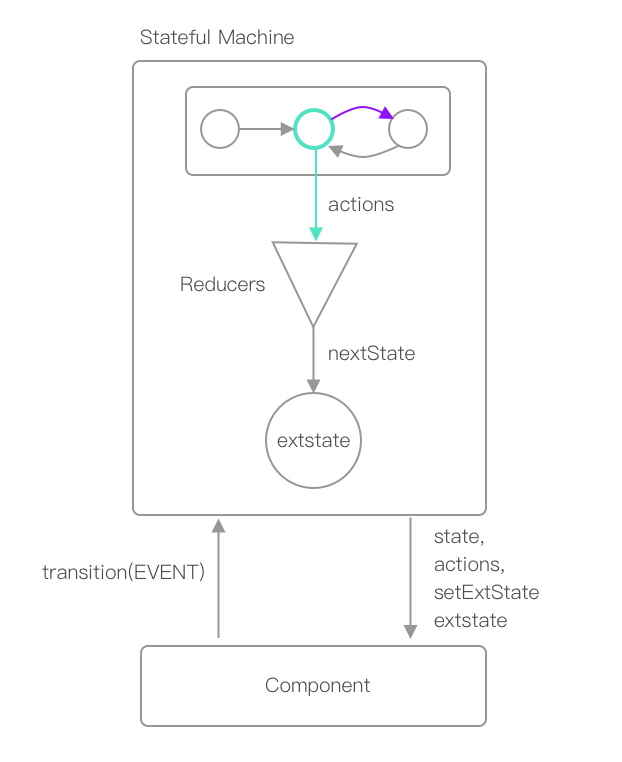
Another option worth considering is storing state outside of your UI framework. As with other state management libraries like Redux, components can be connected to an external state machine and updated with “on state change” and “on action” events.
As an example, XStateful is a wrapper around XState that handles state, transitions, emitting events, triggering actions, and more.
XStateful works well with a React connector called XStateful-React.
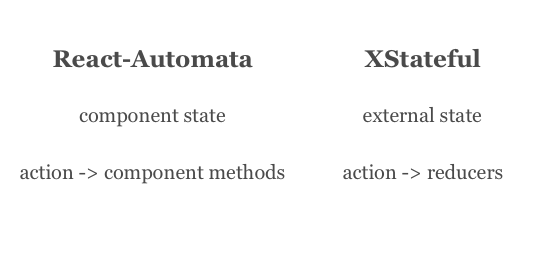
XStateful-React has much in common with React-Automata. But there is at least one signficant difference — the state machine instance is not managed within any component.
So how does external state from reducers work in XStateful?
State and data
Applications often require more than just the state node in a state graph— they require data as well. Often this data needs to be synced across components, in a way that can be frustrated if it must be passed from the uppermost shared parent.
There are existing popular solutions for syncing data, such as Redux, or my state management wrapper for Redux. Unfortunately, these don’t play well with many state wrappers such as React-Automata due to an open issue with passing refs in React Redux (see this open issue with connect() and React.forwardRef).
A complete state solution should manage both state and data.
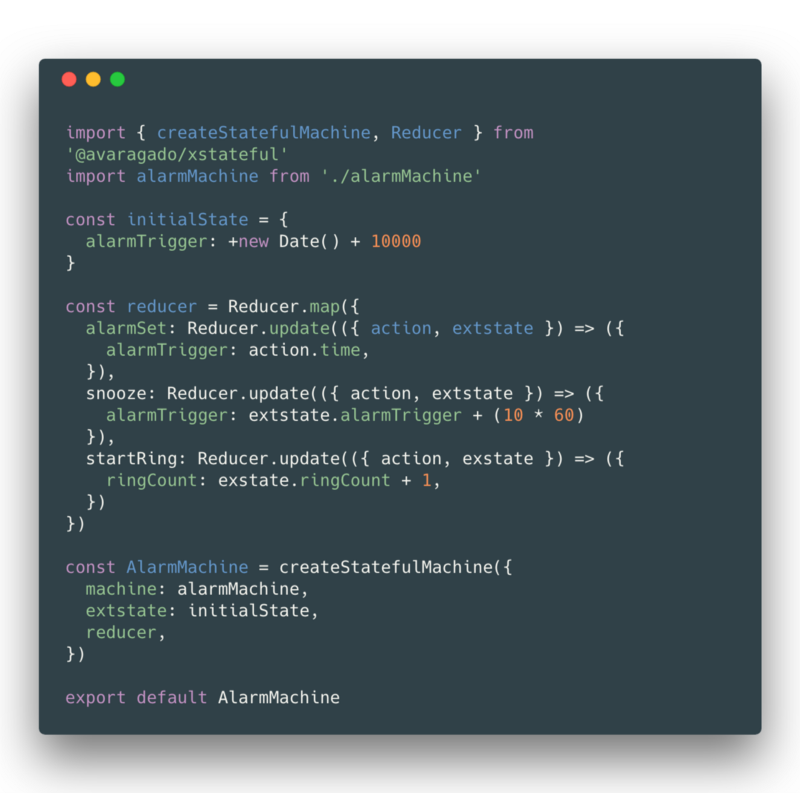
XStateful offers just such a state and data solution using a state reducer pattern, similar to Redux.
State machine subscribers listen and update changes based on actions emitted from the state machine. Note that XState refers to data as extended state, or extstate.
This particular Reducer pattern may seem unfamiliar, however, it’s heavily used in projects such as ReasonReact.
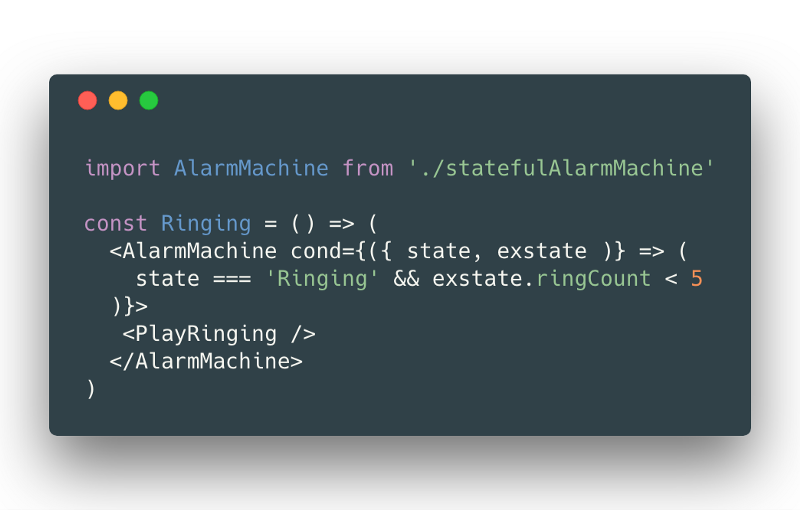
Data can also be accessed in conditional renders on the property cond.
Be careful with using state to conditionally render components, as it creates a non-deterministic set of possible states. No longer are you limited to the number of states, but now to the number of state and data combinations. You lose out on deterministic features, discussed later in the testing section.
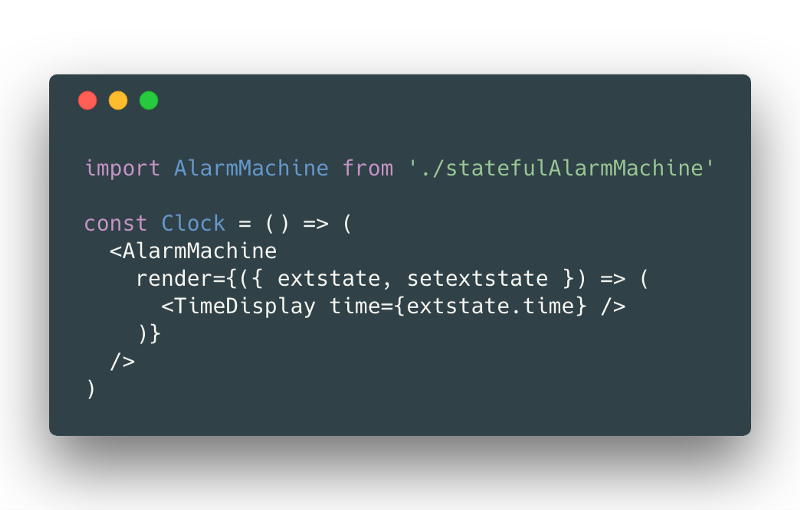
This data can be passed into your component using a render prop pattern.
There is less of a need for state management tools like Redux if data can be stored within a complete state machine tool like XStateful.
Testing
State machines also offer a better path for front-end testing.
The deterministic nature of state machines creates the possibility of simplified front-end testing.
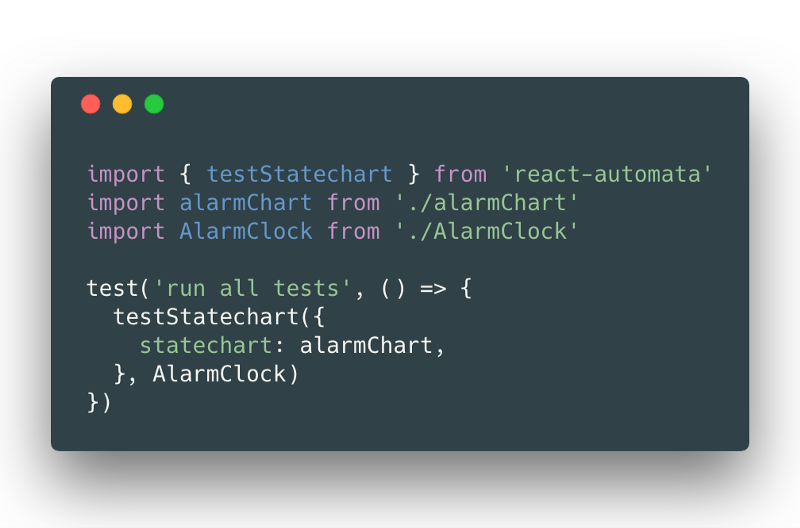
In React-Automata you can autogenerate snapshot tests using testStatechart, a method that takes the XState configuration and the component.
testStatechart runs through the state graph and creates a Jest snapshot test for each possible configuration of the component. It will toggle on and off your various <State />, <Action /> components, leading to a recording of all possible conditional rendering combinations.
Devtools
Devtools play an active role in what makes a library developer-friendly — debugging can be the hardest or most straightforward part of your job.
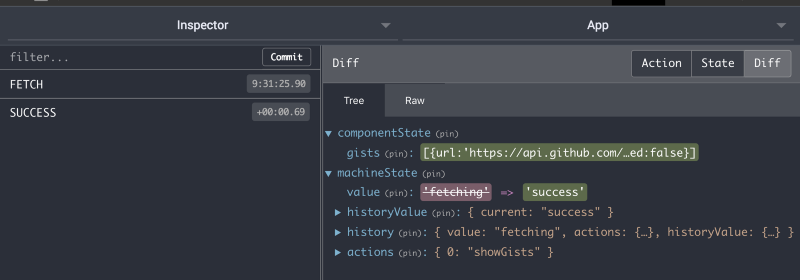
In this respect, React-Automata offers a helpful integration via Redux Devtools. Each connected component becomes a named instance in the devtools, and each transition and action are displayed chronologically as actions are presented in Redux devtools.
XState offers an entirely new set of variables to track. Consider the following example by Erik Mogensen on the kinds of information an XState debugger may track.
This is not to say that state machine devtools need to look like our existing devtools. State machine devtools present an opportunity for a more visual debugging experience.
Conclusion
While we’re still in the early days of statecharts in JS, there are enough options available to start developing applications on top of XState. We can learn from these development patterns to both improve available libraries and to create tools to support the enormous potential of visual-based programming.
Having developed applications with statecharts over the past three months, I’ve personally found these new patterns to be a breath of fresh air. Collaboration has become much more comfortable, as team members can visually grasp the underlying logic of a significant and growing system.
My hope is that this article will help others find statechart-based development more approachable. If you found it helpful, give a clap and pass it on :)


