by Avanthika Meenakshi
How to build a meme-maker with React: a beginner’s guide
If you’re in the middle of learning React, you have probably already been through lots of tutorials on how to build a to-do list. At some point, you’ll look for alternate ideas to try and learn but you’ll keep bumping into different versions of the default to-do list example.
This alternate idea in this article is for you, the curious ones. The codebase can be found in my GitHub and it is bootstrapped from create-react-app. I’ve collected meme-templates from google and other sources. The Impact font can make any image a meme, so we’ve got no choice but to add it.

This is a good do-and-learn-project to start with. We will be dealing with many event listeners/user interactions and state mutations.
Building the gallery
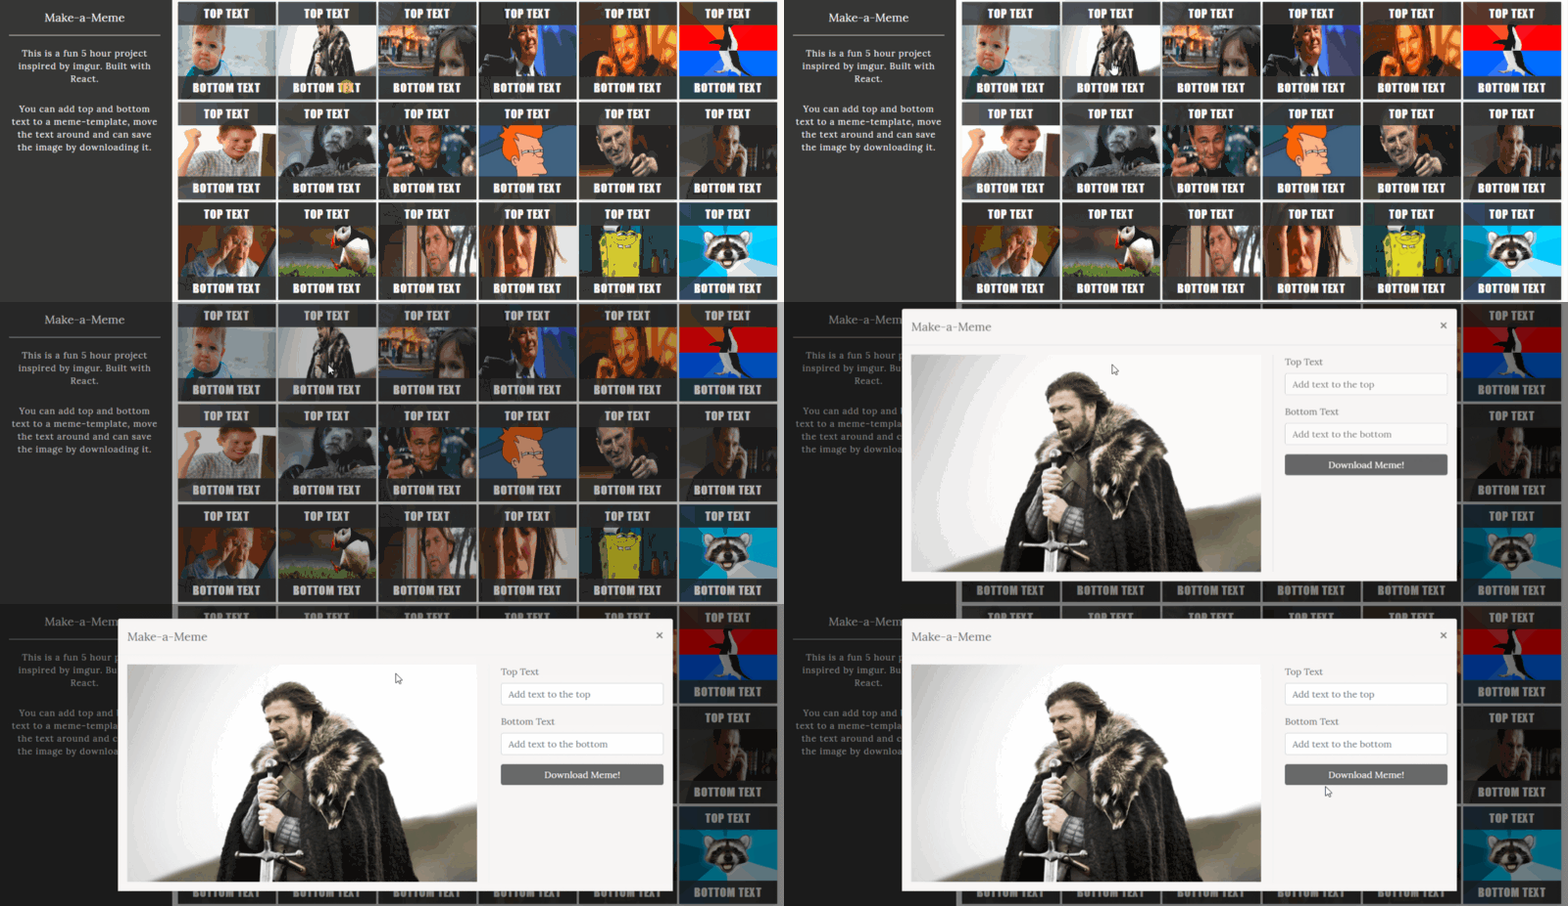
Initially, we will be building an image gallery to allow the users to select a meme-template. I’ve stored the images I have collected as an array, and I’m building a simple gallery out of it.
In the following code,
- We map through the photos array, show each meme-template in a img tag, and display a gallery.
- We determine the current selected image through an onClick on the img tag.
- We have a initialState object with initial settings of the captions and their positioning. The position, content and drag-status of the top and bottom texts can be later modified by triggering state mutations.
As you can decipher, every image in the gallery has got its own onClick event. It finds the currently selected image, converts it to data URI and opens up a reactstrap modal. The modal is going to be the work-station for creating the meme.

The Meme-Maker workstation
We use svg, image and text tags inside the modal to hold the image and the meme-caption. We prefer SVG because you can zoom in and out as much as you like, and it will never lose clarity. And converting SVG to PNG while exporting the meme is relatively simple task.
Each image in the collection has got different height and width. To avoid stretching and compressing the image, I’m doing a little workaround to fix the aspect ratio. I’m fixing the width to 600, and calculating the height based on the width-height ratio. I’m supplying the calculated height and width to the SVG.
The overall structure inside the SVG is pretty straightforward. It holds the image and the captions.
<svg width={newWidth} height={newHeight} ...otherAttributes> <image xlinkHref="image-path" /> <text x="top-x-position" y="top-y-position"> {this.state.toptext} </text> <text x="bottom-x-position" y="bottom-y-position"> {this.state.bottomtext} </text> // And we will have event listeners attached to the <text /> tags to move them around. We'll see it in later part of the article.</svg>The x and y coordinates of the top and bottom<text /> tags are maintained in the state (refer to the initialState object in the MemeMaker component). As the user drags and positions the text tags, the X and Y coordinates change.
Note: The image tag’s xlinkHref will be embedded(base64) path. Raw src URLs cannot be converted to PNGs while downloading.
Here’s how the whole code looks like:
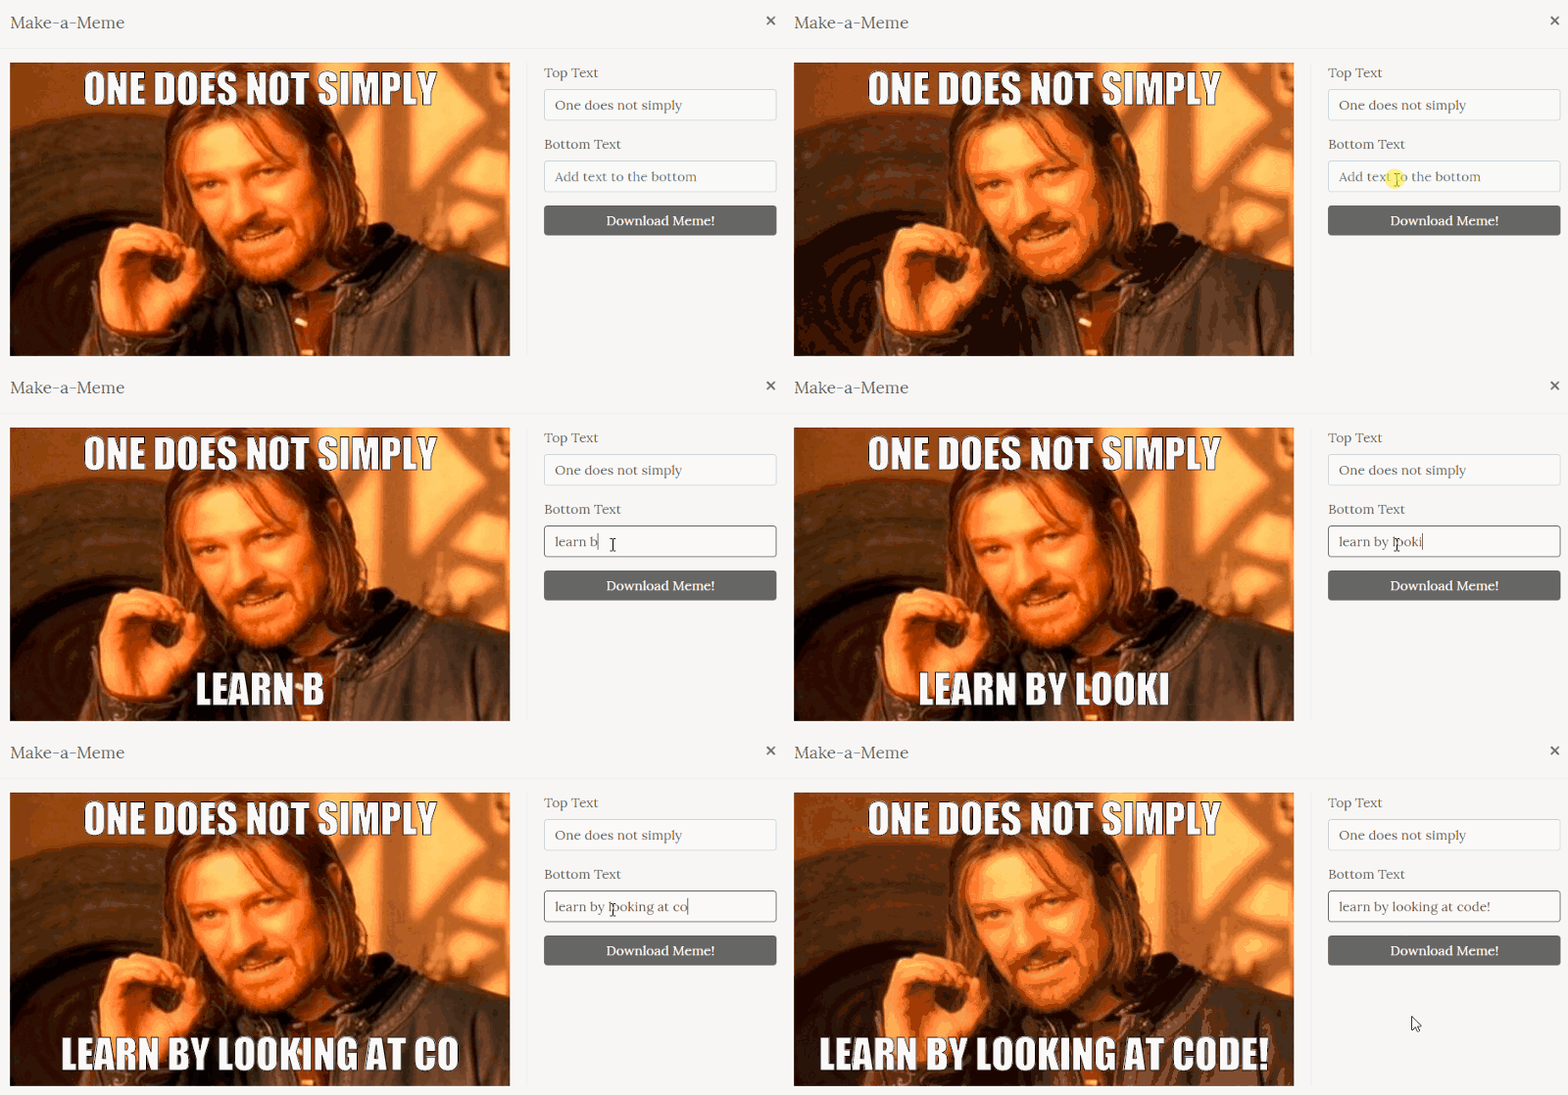
Other than the SVG, we have two <input />; tags to allow the user to input their top and bottom captions for the meme. The onChange event captures the top-caption and bottom-caption, and sets them in the state as and when we change it.

Dragging the text around!
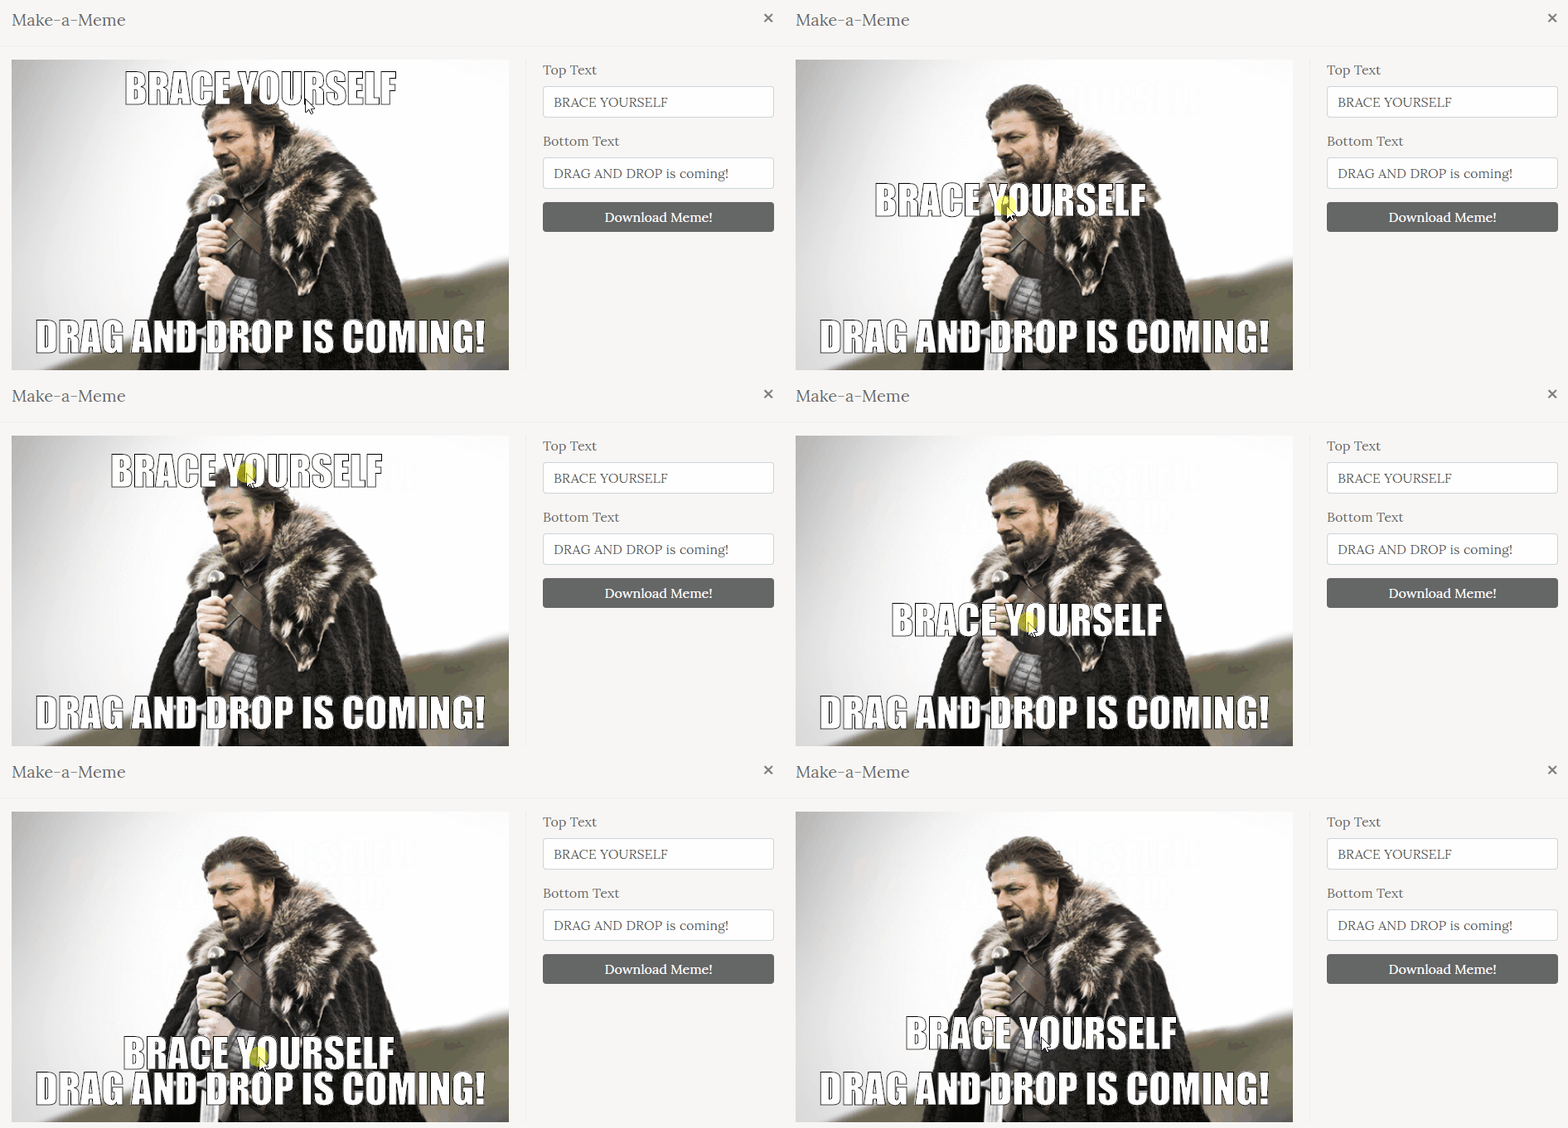
Let’s try re-positioning the top and bottom captions now. The drag and drop interactions of the text tags are tied to event listeners.
- Mouse press —onMouseDown — Finds the selected text tag, determines current X and Y positions, and attaches “mousemove” event listener to it.
- Mouse move — onMouseMove — Finds the current position(x and y) of the text tag as the mouse is held and moved.
- Mouse release — onMouseUp — Finds the drop position or release position. Determines the X and Y where text is dropped. Removes the “mousemove” event listener from the element and terminates drag and drop.
To track mouse press, hold and drag. We include the following event listeners to the text tags.
onMouseDown={event => this.handleMouseDown(event, ‘top’)}onMouseUp={event => this.handleMouseUp(event, ‘top’)}We then attach the “mousemove” event listener to track mouse movements on “mousedown”. Once the text tag is dropped, we remove the attached mouse move event listener in “mouseup”.
Here’s how the code does that:
Now that the drag and drop is done, you can move your text around and re-position it where-ever you want.

Downloading the meme
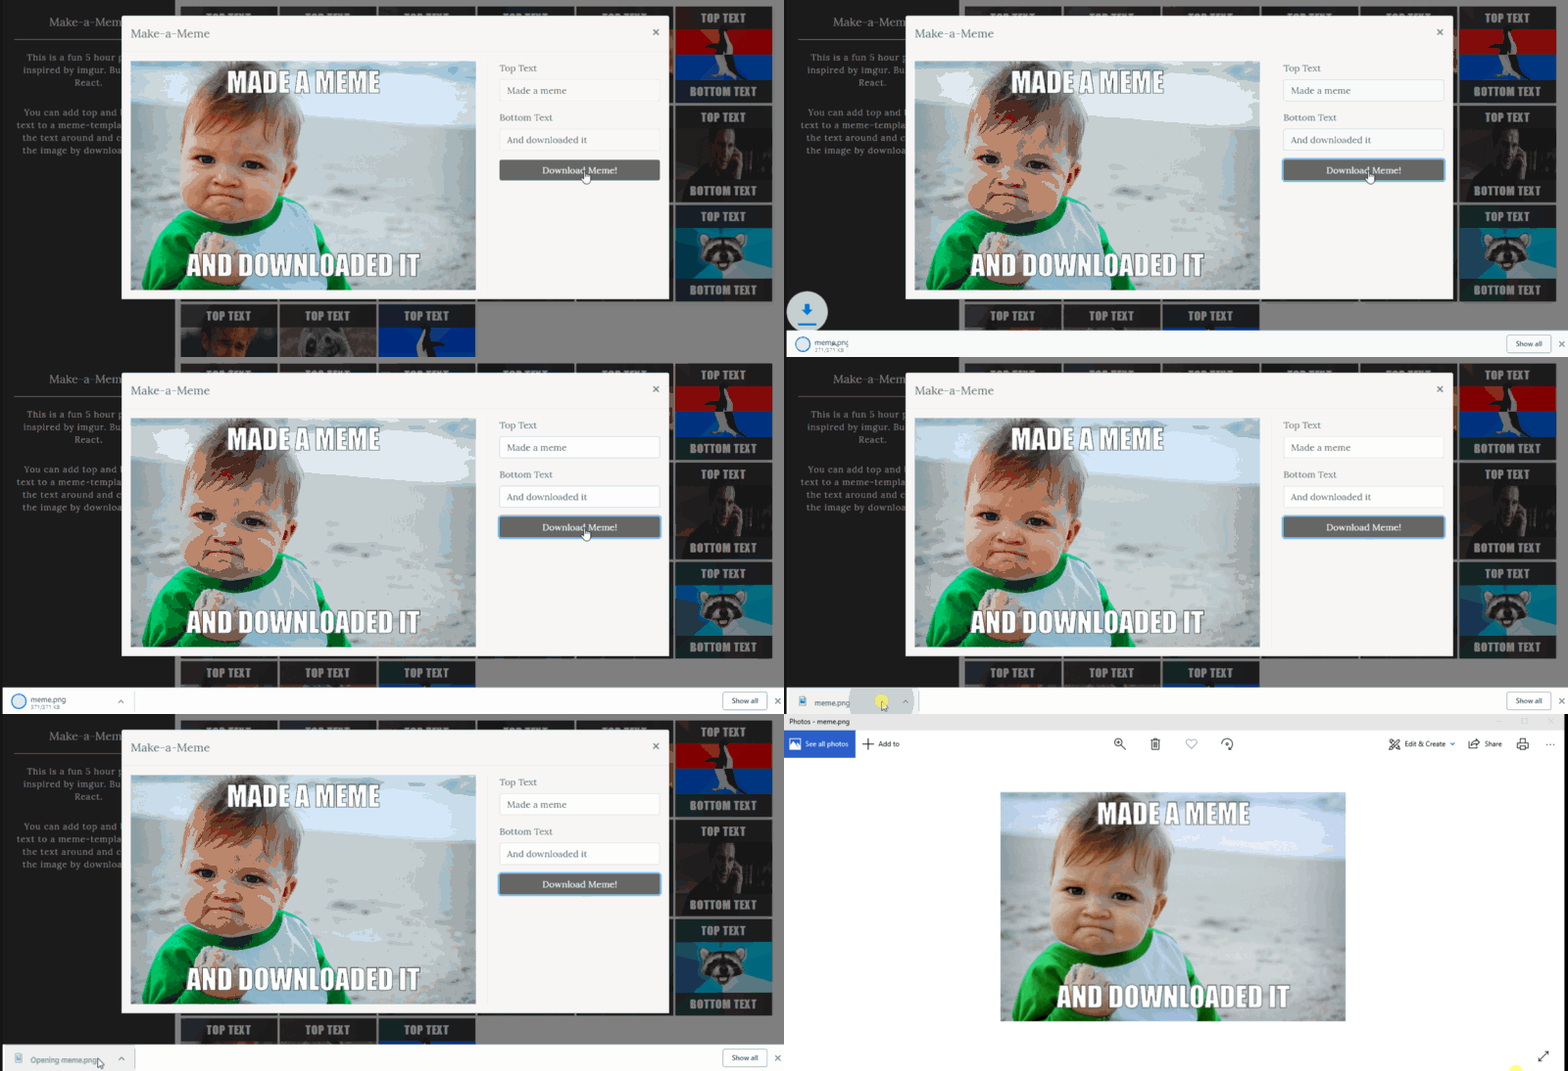
When a user clicks the download button, we are converting the SVG to an XML serialised string and drawing it in an HTML5 canvas. We use toDataUrl() method of html canvas (generates a base64 image URI) to generate an “image/png” mime-type image!

As you learn more, there’s much more you can do to this little project.
- You can try to fetch images from open source APIs and build a gallery.
- You can try to add provisions to share them in facebook, whatsapp and twitter.
- You can try to allow the user to upload their own image, scale it and create a meme.
- You can try font resizing.
There’s much more you can do to improve the project that’ll ultimately improve your coding skills. ? Happy coding! ?