By Ben Church
I took the time to figure out how to read and write from HealthKit so you don’t have to!
 Let me show you what Apple makes hard to find ?
I absolutely love the route Apple has been going with their iOS SDK’s. (Their hardware not so much). Apple’s focus on security has allowed it to become a reliable company to trust your sensitive information with. This has allowed iPhones to make headway as the device best suited to host medical data. As a result, they’re also the best device to make software that interfaces with a user’s sensitive personal info.
With this in mind, I believe it’s essential to know how to read and write from Apple’s HealthKit so that we as developers can leverage the position Apple has put itself in. So today’s tutorial is going to focus on Reading and writing Mindful Minutes from Apple’s HealthKit.
By the end of this tutorial, you will have learned how to:
- Setup a basic iOS app
- Request permission to read and write data from HealthKit
- Read and query data from HealthKit
- Write data back to HealthKit
Alright let’s jump into setting up the XCode Project. ?
Setup the Skeleton
Every great project starts from the same screen (if you’re just looking for code, then you can skip this section).
1. Create a new project
Let’s kick this off by creating a new Single View App project in XCode.
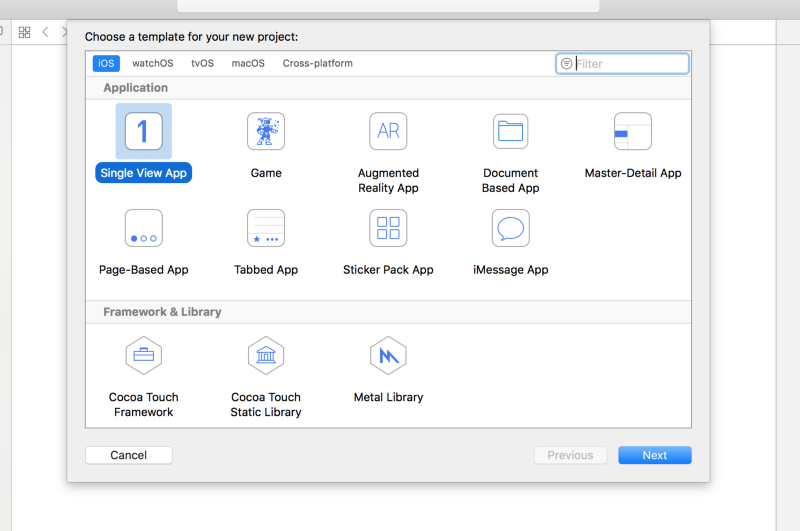 Start by going to File > New
 > Project
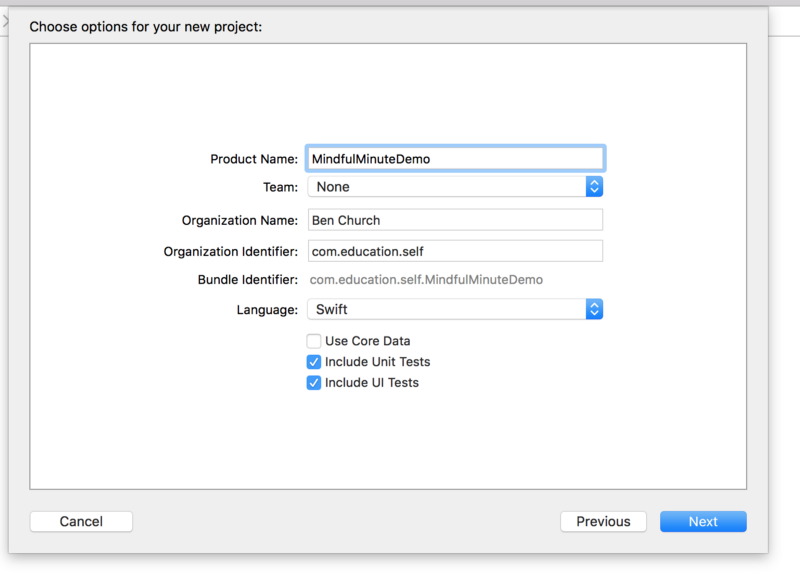 You should be able to leave this all the same with the exception of my name.
2. Include HealthKit
Once we’ve created the project, we need to bundle HealthKit with our application:
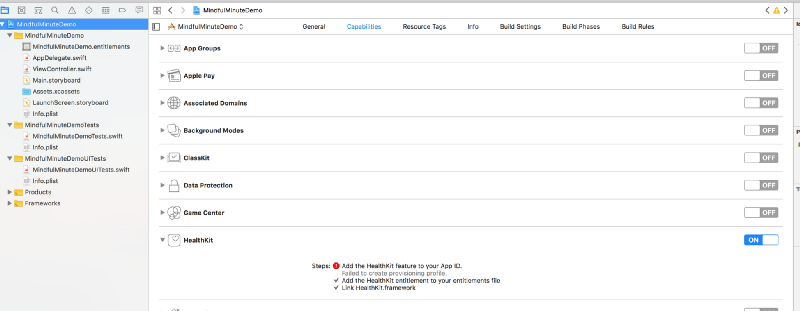 Include HealthKit into our App
and update the info.plist file to contain what the user will see when we ask for their permission to access their data.
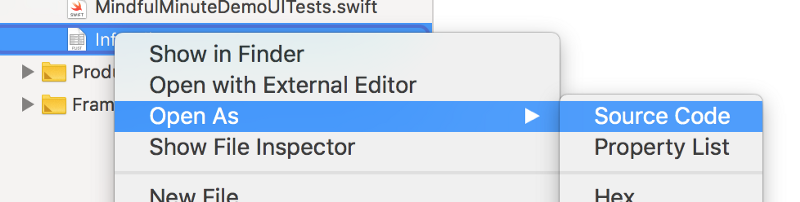 You need to edit the source code of this file.
Add the following xml to the info.plist file:
3. Create a basic UI
To finish up the setup, we will want to create a simple UI that will allow us to view the data we have read from the HealthKit and provide an action that will allow us to trigger a write back to the HealthKit.
Start by opening the storyboard and:
- Add a label and connect it to the
ViewController.swiftfile under the namemindfulMinuteLabel - Add a button and connect it to an
Actionin theViewController.swiftfile titledaddMinuteAct
 Creating our UI
Breath some life into it…
Now that we’ve put the infrastructure in place, it’s time to write the logic that will do all the interfacing with HealthKit we have been talking about.
1. Ask for permission
Every HealthKit app needs to explicitly ask for a user’s permission for every type of read and write it needs to do. To accomplish this, we want to ask on viewDidLoad for permission to read Mindful Sessions and for permission to write Mindful Sessions.
Now when the app is run, you should be prompted by the screen below.
If you are running this right now, you will want to comment out
self.retrieveMindfulMinutes()
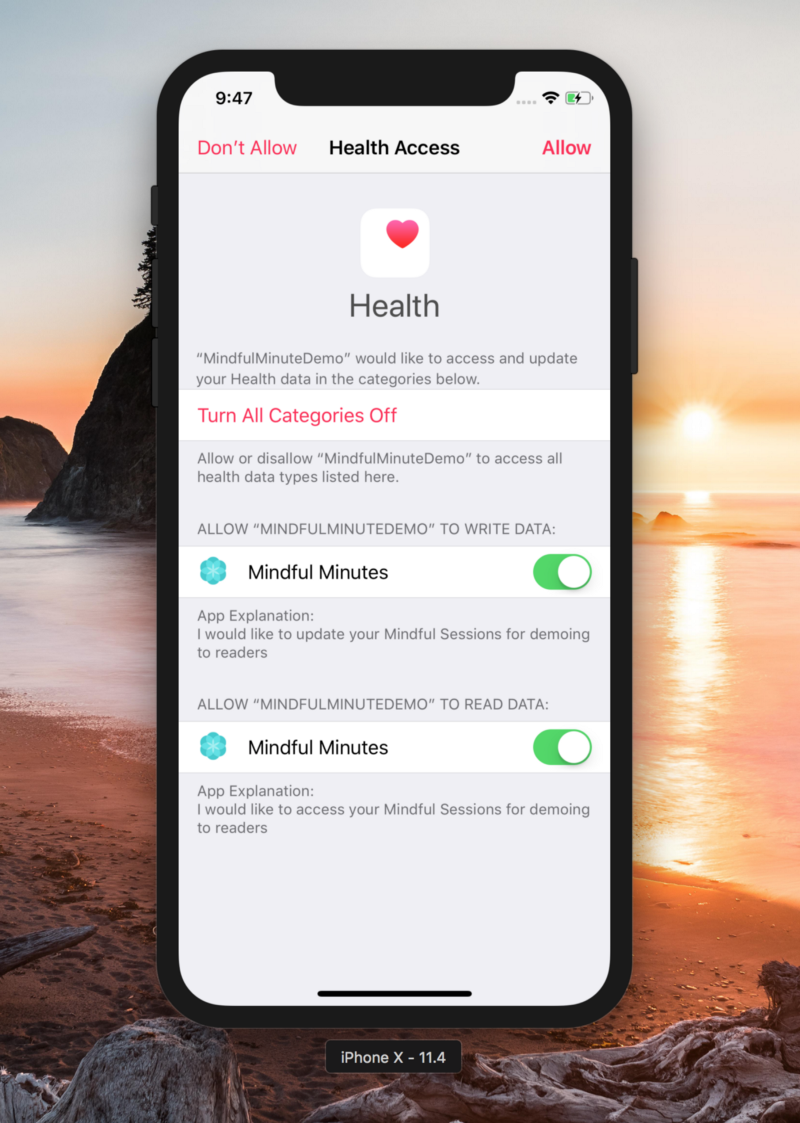 Our Permission Screen
2. Reading Mindful Minutes
So far this has been very straight forward: Create UI, ask for permission. Next we’re going to come into reading from HealthKit. While Apple gives us a powerful UI, it’s not necessarily intuitive. So I’m going to begin by showing you the code, and then I’ll explain it after.
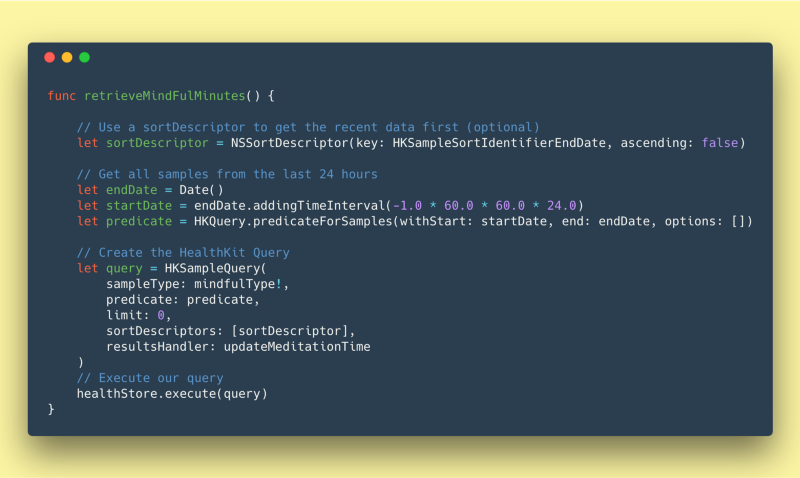
The query we execute to retrieve our Mindful Sessions can be broken into four components:
1. Sort by End Date
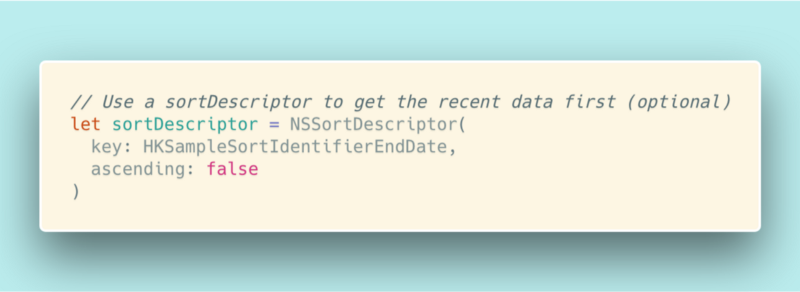 Get the most recent Sessions
The first section of this code is optional but useful to know. What we are doing is asking the query to give us the list of Mindful Sessions ordered by their end time with the most recent session being first.
2. Use the Predicate to define the Query
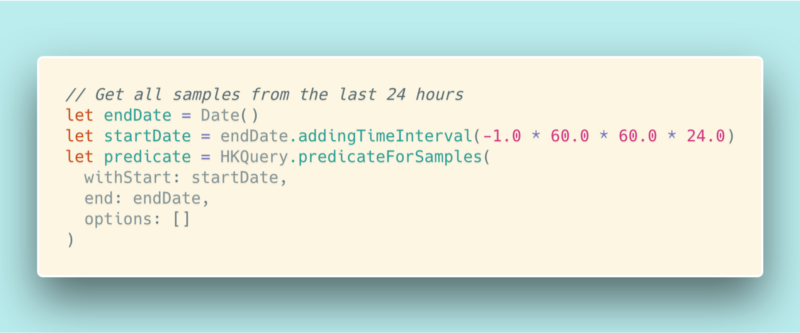 Look for all sessions in the last 24 hours
The next portion of our code deals with the actual specifics of a “query”: What subset of data are we looking for. In our case, we want all samples from the last 24 hours.
3. Compose and Run your Query
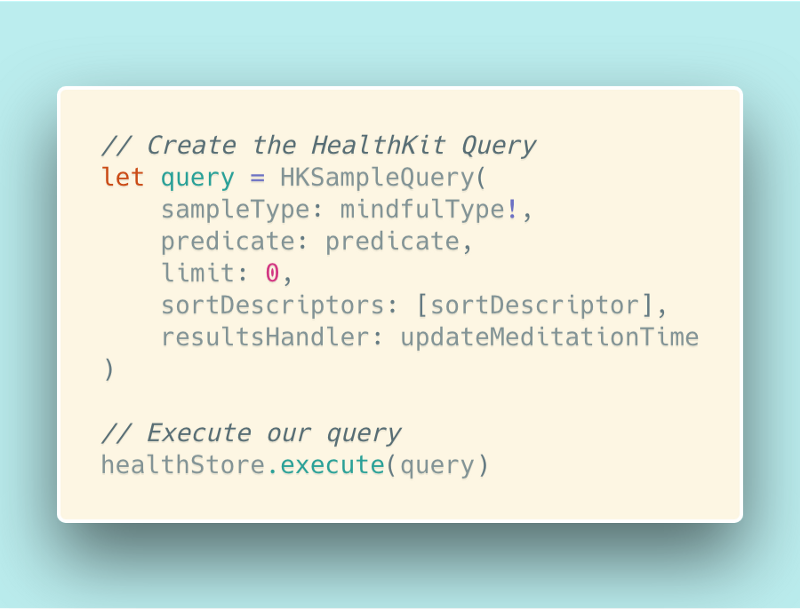 Run it!
Finally, we want to combine the sortDescriptor, the predicate, and the sampleType we want from the HealthKit together with the function that will handle whatever is returned by the query (resultsHandler). After this is all composed into a HKSampleQuery, the only step left is to execute it!
4. Aggregating the session data and updating the UI
Inside the function we defined as our resultsHandler in the previous section, we want to:
- Get the total time for each Mindful Session
- Sum all total times to get the total number of Mindful minutes over the last 24 hours.
- Update our label with the total.
This should all be relatively straightforward if you understand the concepts of map and reduce. If these are new to you, I recommend taking the time to learn them. They are found in most programming languages and are a great introduction into the wonderful world of Functional Programming.
The only piece that may not be straightforward is why we wrap
self.meditationMinutesLabel.text = labelText
in DispatchQueue.main.async . The reason we do this is so we can update the UI without blocking the main thread of the application. This is a convention enforced by the compiler itself!
Writing the data
In the above, we went over how to read from HealthKit. But how do we write data to it? Thankfully the process is a lot simpler. The following code is going to:
- Complete
addMinuteActfunction we added during setup, and as a result, the rest of the application. - Create a
MindfulSessionof 1 minute starting now - Save this new
MindfulSessionto the HealthKit - Update the label to reflect the new total Mindful Minute count
Start it up!
With all that finished and the code written, you should be able to start this app in your simulator, accept the request to read and write from your HealthKit, and begin viewing how often you’ve Meditated in the last 24 hours!
 Amazing!
Wrap up
At the beginning of this project, I was very excited to jump into HealthKit. I do see it being positioned to change the way we and others interact with sensitive personal information.
However, I think that Apple, in contrast to other platforms, makes their API’s a little too hard to discover both through their documentation and through XCode. Hopefully they will improve this experience, but until they do, learning how to use HealthKit can be an exercise in pulling teeth.
I hope this post saves you from having to stumble around and can get you shipping your products faster!
? This is open source! you can find it here on Github
❤️ I only write about programming and remote work. If you follow me on Twitter I won’t waste your time.