
By Tarique Ejaz
Performance is an essential parameter to consider when you're designing any piece of software. It is particularly important when it comes to what happens behind-the-scenes.
We, as developers and technologists, adopt multiple tweaks and implementations in order to improve performance. This is where caching comes into play.
Caching is defined as a mechanism to store data or files in a temporary storage location from where it can be instantly accessed whenever required.
Caching has become a must have in web applications nowadays. We can use Redis to supercharge our web APIs - which are built using Node.js and MongoDB.
 "Caching would apparently still play a super important role 100 to 200 years down the line."
Redis: A Layman's Overview
Redis, according to the official documentation, is defined as an in-memory data structure store which is used as a database, message broker, or cache storage. It supports data structures such as strings, hashes, lists, sets, sorted sets with range queries, bitmaps, hyperloglogs, geospatial indexes with radius queries and streams.
Okay, that is quite a lot of data structures right there. Just to make it simple, almost all the data structures supported can be condensed into one form of string or the other. You will get more clarity as we run through the implementation.
But one thing is clear. Redis is powerful, and when used properly can make our applications not only faster but amazingly efficient. Enough talk. Let's get our hands dirty.
Let's Talk Code
Before we start off, you will need to get redis setup in your local system. You can follow this quick setup process to get redis up and running.
Done? Cool. Let's start. We have a simple application created in Express which makes use of an instance in MongoDB Atlas to read and write data from.
We have two major APIs created in the /blogs route file.
...

// GET - Fetches all blog posts for required user
blogsRouter.route('/:user')
    .get(async (req, res, next) => {
        const blogs = await Blog.find({ user: req.params.user });

        res.status(200).json({
            blogs,
        });
    });

// POST - Creates a new blog post
blogsRouter.route('/')
    .post(async (req, res, next) => {
        const existingBlog = await Blog.findOne({ title: req.body.title });

        if (!existingBlog) {
            let newBlog = new Blog(req.body);

            const result = await newBlog.save();

            return res.status(200).json({
                message: `Blog ${result.id} is successfully created`,
                result,
            });
        }

        res.status(200).json({
            message: 'Blog with same title exists',
        });
    });

...
Sprinkling Some Redis Goodness
We start off by downloading the npm package redis to connect to the local redis server.
const mongoose = require('mongoose');
const redis = require('redis');
const util = require('util');

const redisUrl = 'redis://127.0.0.1:6379';
const client = redis.createClient(redisUrl);
client.hget = util.promisify(client.hget);

...
We make use of the utils.promisify function to transform the client.hget function to return a promise instead of a callback. You can read more about promisification here.
The Redis connection is in place. Before we start writing any more caching code, let us take a step back and try to understand what are the requirements we need to fulfill and the likely challenges we might face.
Our caching strategy should be able to address the following points.
- Cache the request for all blog posts for a particular user
Clear cache every time a new blog post is created
The likely challenges we should be careful of as we go about our strategy are:
The right way to handle key creation for storing cache data
- Cache expiration logic and forced expiration for maintaining cache freshness
- Reusable implementation of caching logic
All right. We have our points jotted down and redis connected. On to the next step.
Overriding the Default Mongoose Exec Function
We want our caching logic to be reusable. And not only reusable, we also want it to be the first checkpoint before we make any query to the database. This can easily be done by using a simple hack of piggy-backing onto the mongoose exec function.
...

const exec = mongoose.Query.prototype.exec;

...

mongoose.Query.prototype.exec = async function() {
    ...

     const result = await exec.apply(this, arguments);

    console.log('Data Source: Database');
    return result;
}

...
We make use of the prototype object of mongoose to add our caching logic code as the first execution in the query.
Adding Cache as a Query
In order to denote which queries should be up for caching, we create a mongoose query. We provide the ability to pass the user to be used as a hash-key through the options object.
Note: Hashkey serves as an identifier for a hash data structure which, in layman terms, can be stated as the parent key to a set of key-value pairs. Thereby, enabling caching of a larger number of query-value set. You can read more about hashes in redis here.
...

mongoose.Query.prototype.cache = function(options = {}) {
    this.enableCache = true;
    this.hashKey = JSON.stringify(options.key || 'default');

    return this;
};

...
Having done so, we can easily use the cache(<options argument>) query along with the queries we want to cache in the following manner.
...

const blogs = await Blog
                    .find({ user: req.params.user })
                    .cache({ key: req.params.user });

...
Crafting The Cache Logic
We have set up a common reusable query to denote which queries need to be cached. Let's go ahead and write the central caching logic.
...

mongoose.Query.prototype.exec = async function() {
    if (!this.enableCache) {
        console.log('Data Source: Database');
        return exec.apply(this, arguments);
    }

    const key = JSON.stringify(Object.assign({}, this.getQuery(), {
        collection: this.mongooseCollection.name,
    }));

    const cachedValue = await client.hget(this.hashKey, key);

    if (cachedValue) {
        const parsedCache = JSON.parse(cachedValue);

        console.log('Data Source: Cache');

        return Array.isArray(parsedCache)
                ?  parsedCache.map(doc => new this.model(doc))
                :  new this.model(parsedCache);
    }

    const result = await exec.apply(this, arguments);

    client.hmset(this.hashKey, key, JSON.stringify(result), 'EX', 300);

    console.log('Data Source: Database');
    return result;
};

...
Whenever we use the cache() query along with our main query, we set the enableCache key to be true.
If the key is false, we return the main exec query as default. If not, we first form the key for fetching and storing/refreshing the cache data.
We use the collection name along with the default query as the key name for the sake of uniqueness. The hash-key used is the name of the user which we have already set earlier in the cache() function definition.
The cached data is fetched using the client.hget() function which requires the hash-key and the consequent key as parameters.
Note: We always use
JSON.parse()while fetching any data from redis. And similarly, we useJSON.stringify()on the key and data before storing anything into redis. This is done since redis does not support JSON data structures.
Once we have obtained the cached data, we have to transform each of the cached objects into a mongoose model. This can be done by simply using new this.model(<object>).
If the cache does not contain the required data, we make a query to the database. Then, having returned the data to the API, we refresh the cache using client.hmset(). We also set a default cache expiration time of 300 seconds. This is customizable based on your caching strategy.
The caching logic is in place. We have also set a default expiration time. Next up, we look at forcing cache expiration whenever a new blog post is created.
Forced Cache Expiration
In certain cases, such as when a user creates a new blog post, the user expects that the new post should be available when they fetche all the posts.
In order to do so, we have to clear the cache related to that user and update it with new data. So we have to force expiration. We can do that by invoking the del() function provided by redis.
...

module.exports = {
    clearCache(hashKey) {
        console.log('Cache cleaned');
        client.del(JSON.stringify(hashKey));
    }
}

...
We also have to keep in mind that we will be forcing expiration on multiple routes. One extensible way is to use this clearCache() as a middleware and call it once any query related to a route has finished execution.
const { clearCache } = require('../services/cache');

module.exports = async (req, res, next) => {
    // wait for route handler to finish running
    await next();

    clearCache(req.body.user);
}
This middleware can be easily called on a particular route in the following way.
...

blogsRouter.route('/')
    .post(cleanCache, async (req, res, next) => {

    ...

    }

...
And we are done. I agree that was a quite a lot of code. But with that last part, we have set up redis with our application and taken care of almost all the likely challenges. It is time to see our caching strategy in action.
Redis in Action
We make use of Postman as the API client to see our caching strategy in action. Here we go. Let's run through the API operations, one by one.
- We create a new blog post using the
/blogsroute
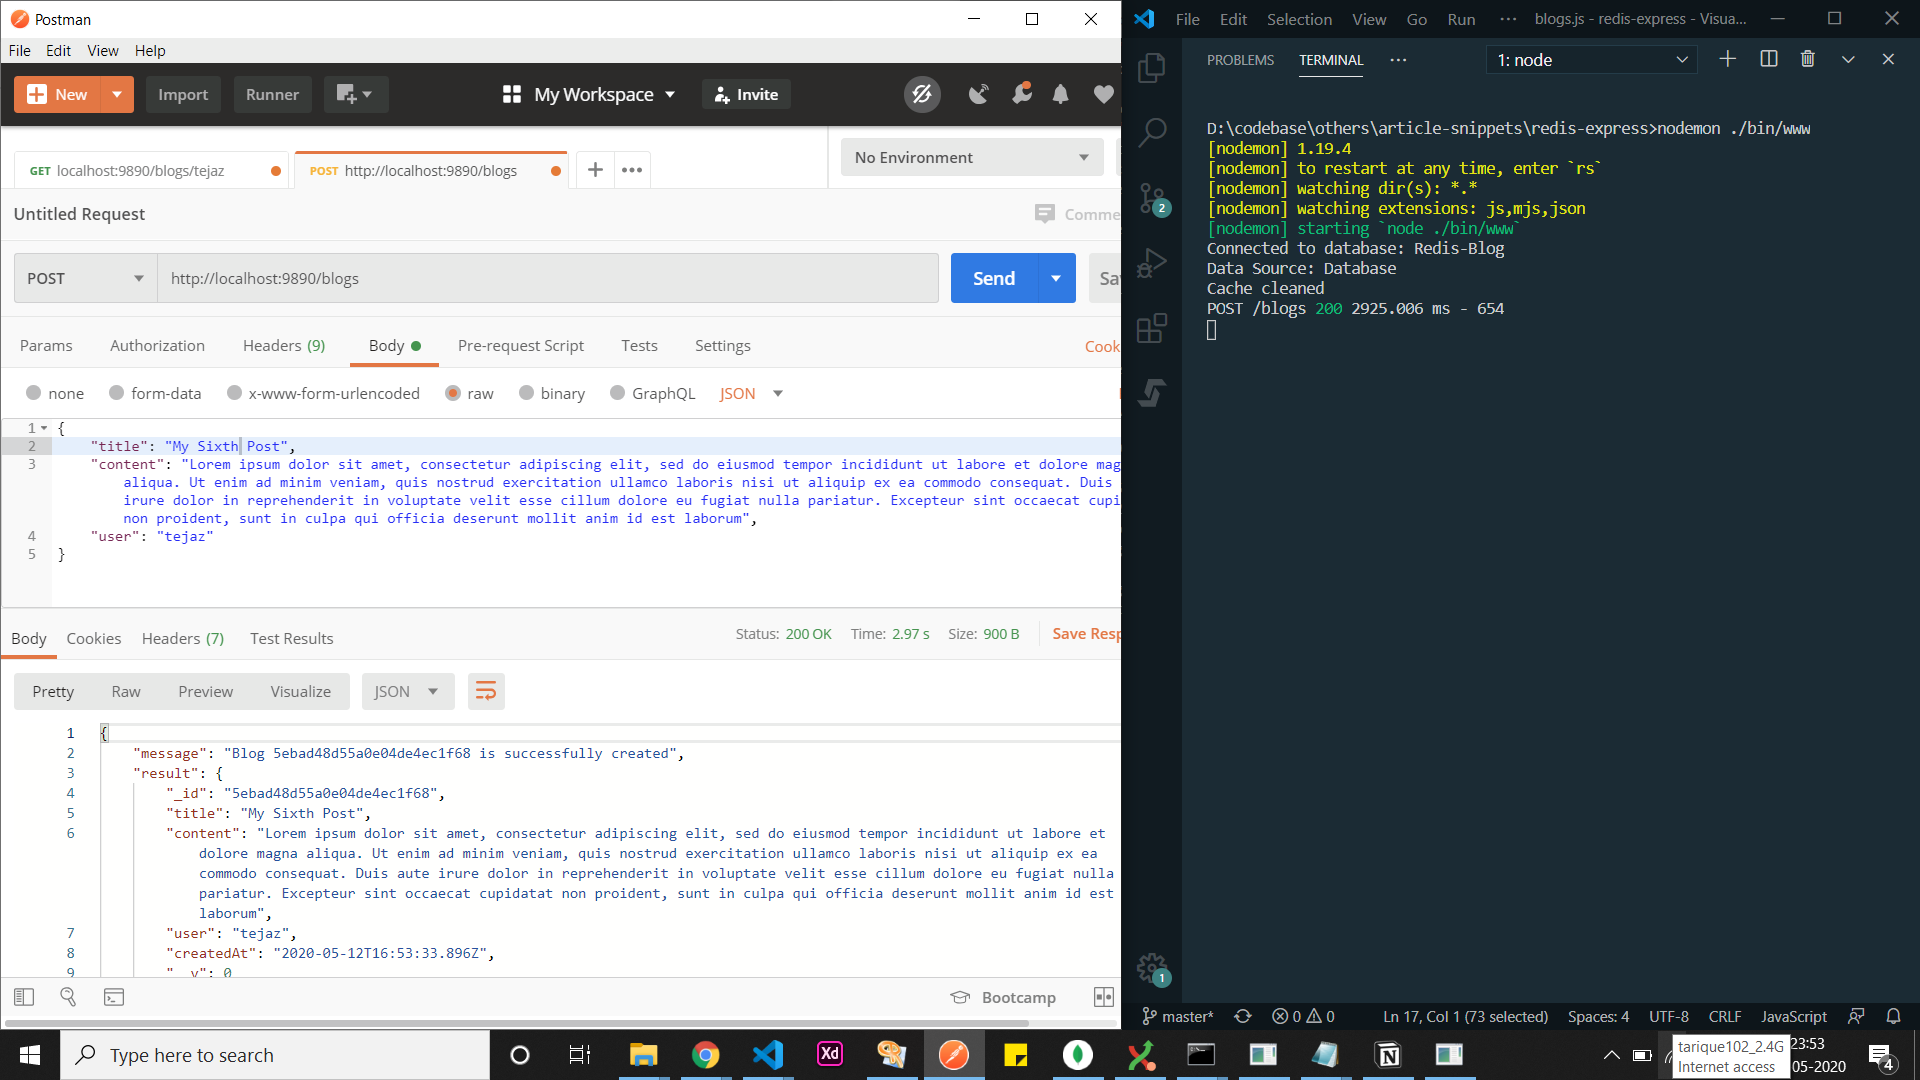 New Blog Post Creation
- We then fetch all the blog posts related to user
tejaz
 Fetching all Blog Posts for User tejaz
- We fetch all the blog posts for user
tejazonce more.
 Fetch all Blog Posts for User tejaz Once More
You can clearly see that when we fetch from the cache, the time taken has gone down from 409ms to 24ms. This supercharges your API by decreasing the time taken by almost 95%.
Plus, we can clearly see that cache expiration and update operations work as expected.
You can find the complete source code in the redis-express folder here.
Conclusion
Caching is a mandatory step for any performance-efficient and data-intensive application. Redis helps you easily achieve this in your web applications. It is a super powerful tool, and if used properly it can definitely provide an excellent experience to developers as well as users all around.
You can find the complete set of redis commands here. You can use it with redis-cli to monitor your cache data and application processes.
The possibilities offered by any particular technology is truly endless. If you have any queries, you can reach out to me on [LinkedIn](https://www.linkedin.com/in/tarique-ejaz/).
In the mean time, keep coding.