

Screencasting is a cool feature that was built into the Windows 10 Anniversary update in 2019.
It's also called Wireless Display. It lets you project your phone display to a Windows 10 computer – which can help you out in a lot of ways, especially if you’re a YouTuber.
Getting around the configurations and necessary setup to establish a wireless connection with an Android phone on Windows 10 can be tricky. It took me days to figure it out.
And so, in this article, I’m going to show you how to do it.
How to Cast Your Android Screen to a Windows 10 Computer.
To cast your Android screen to a Windows 10 laptop, you need to enable wireless display by installing the Connect app on your computer. It doesn’t come as a pre-installed app anymore, so you need to download it.
How to Set it Up on a Windows 10 Computer
The steps below show you how to set up the Connect app on Windows 10:
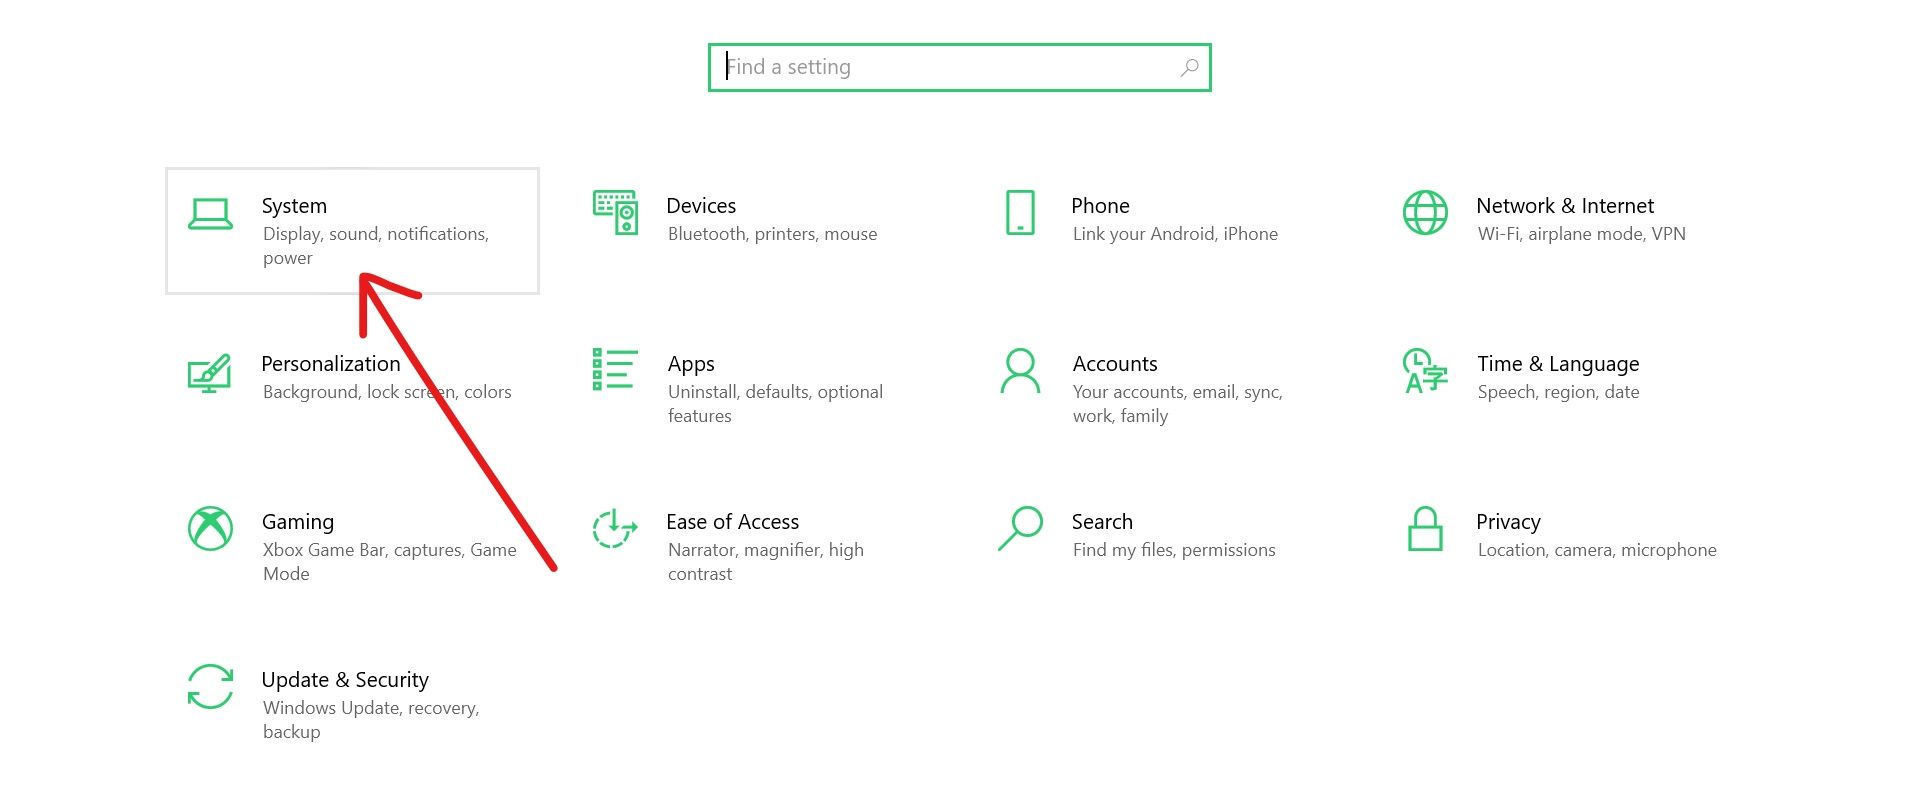
Step 1: Head over to Settings by pressing WIN (Windows logo key) + I on your keyboard.
Step 2: Select System from the menu tiles.
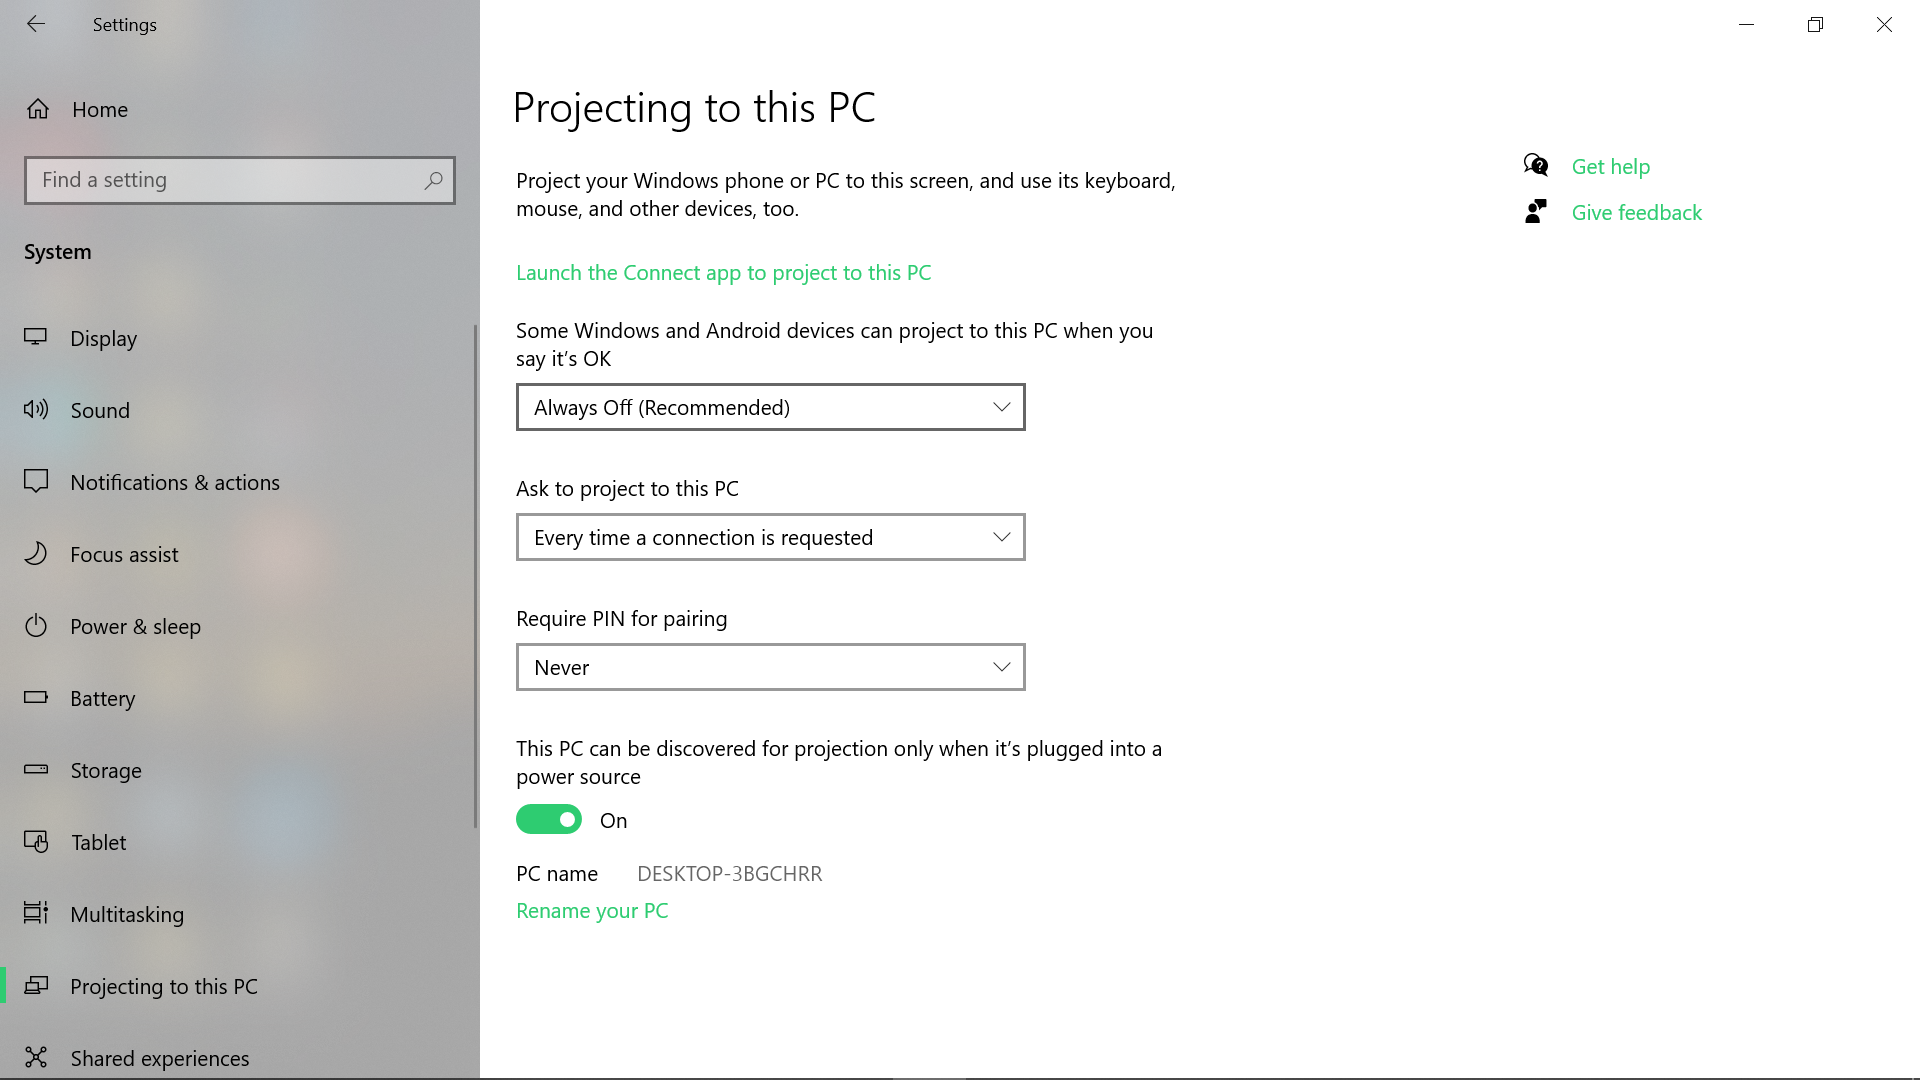
Step 3: Switch to the “Projecting to this PC” tab and click the Optional features link.
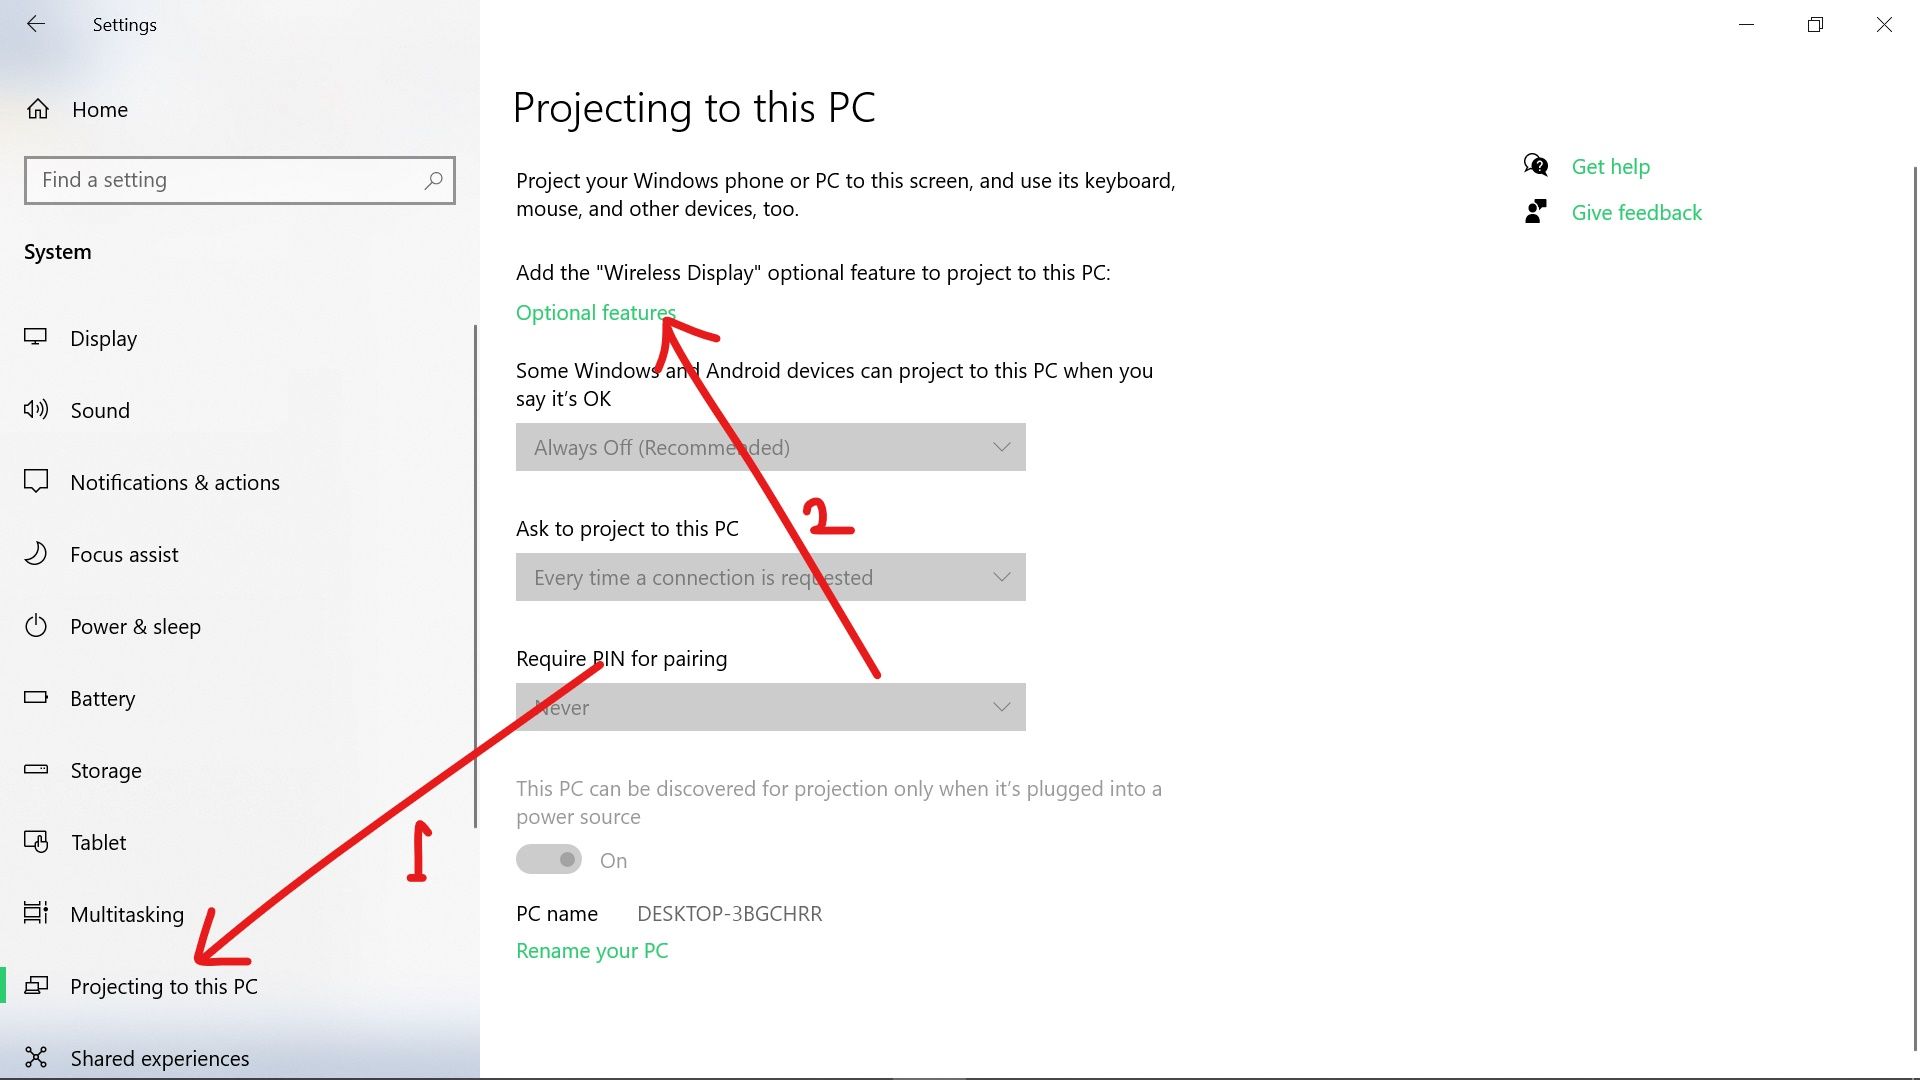
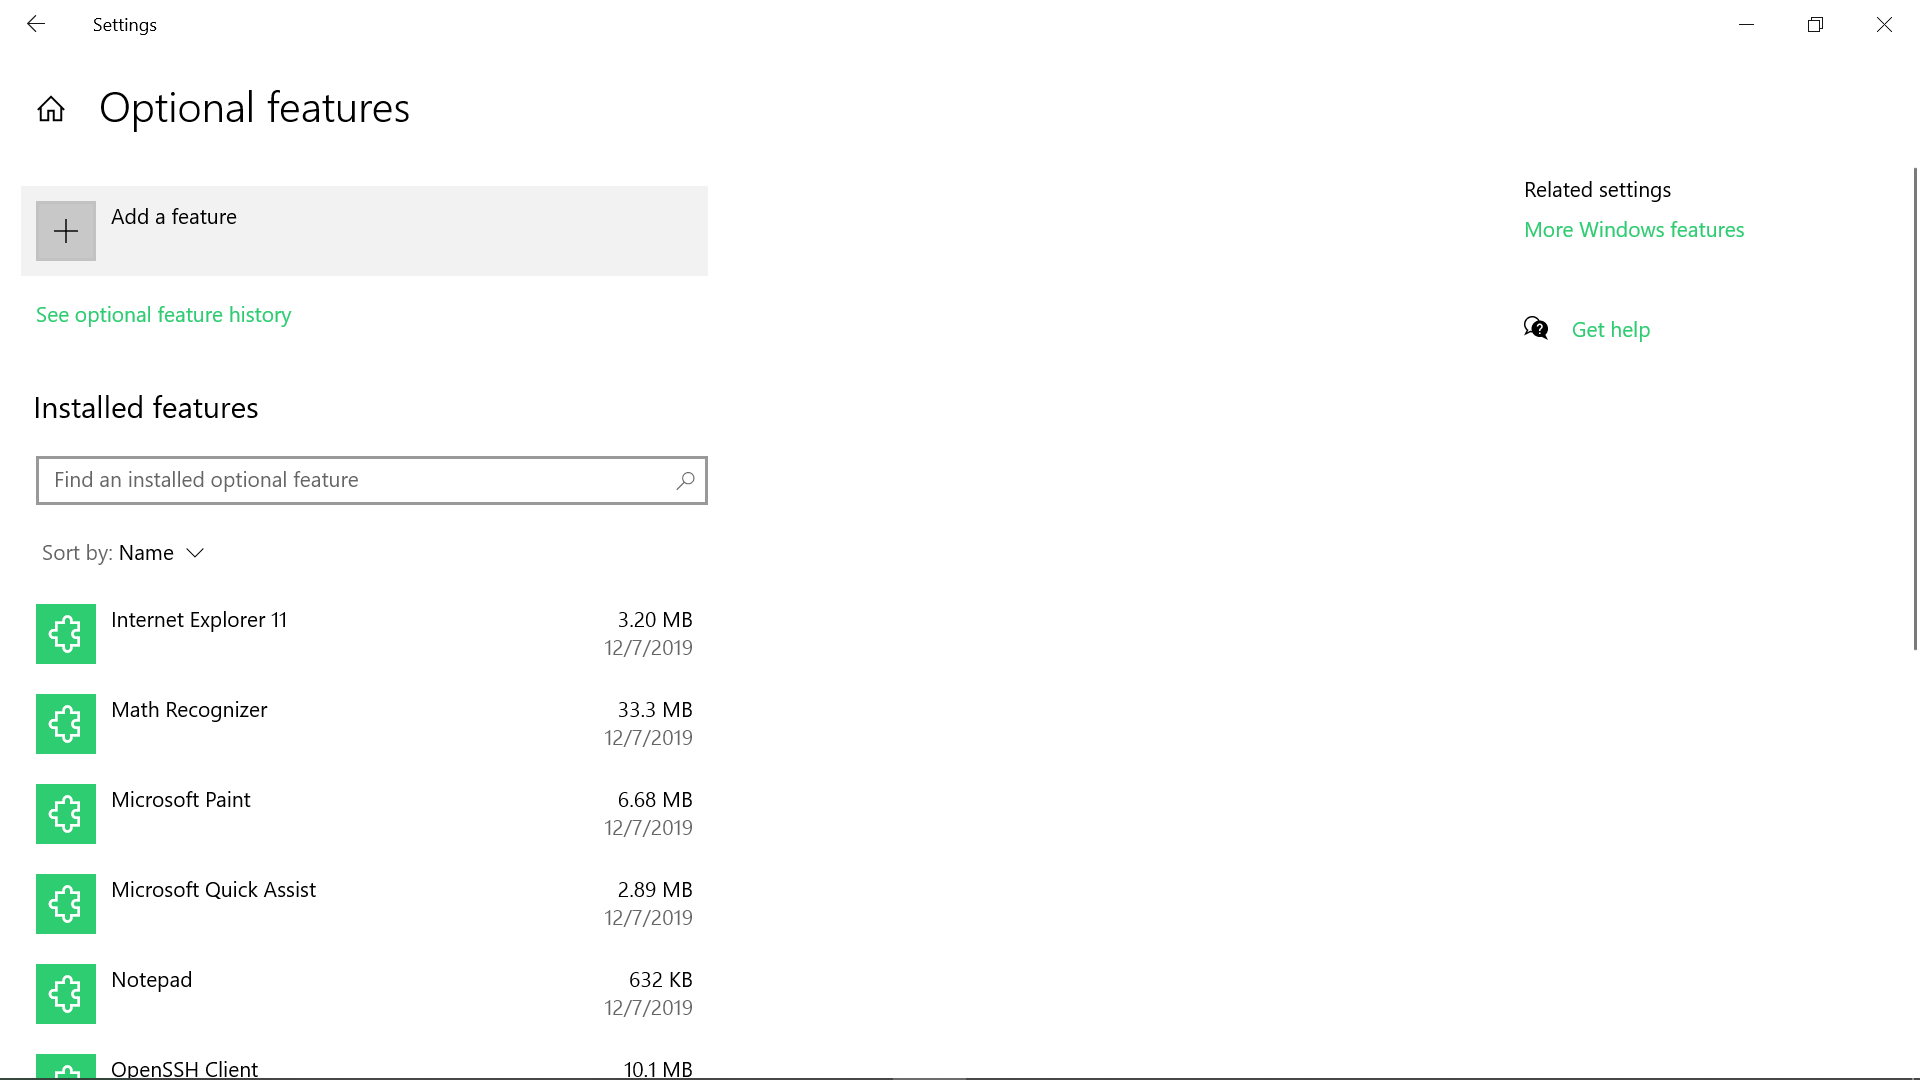
Remember that the wireless display isn’t pre-installed, so you need to add it by clicking on the “Optional feature” link. Once you click the link, you will see several additional features you can add to your computer.
Step 4: Locate Wireless Display from the list and check it, then click install.
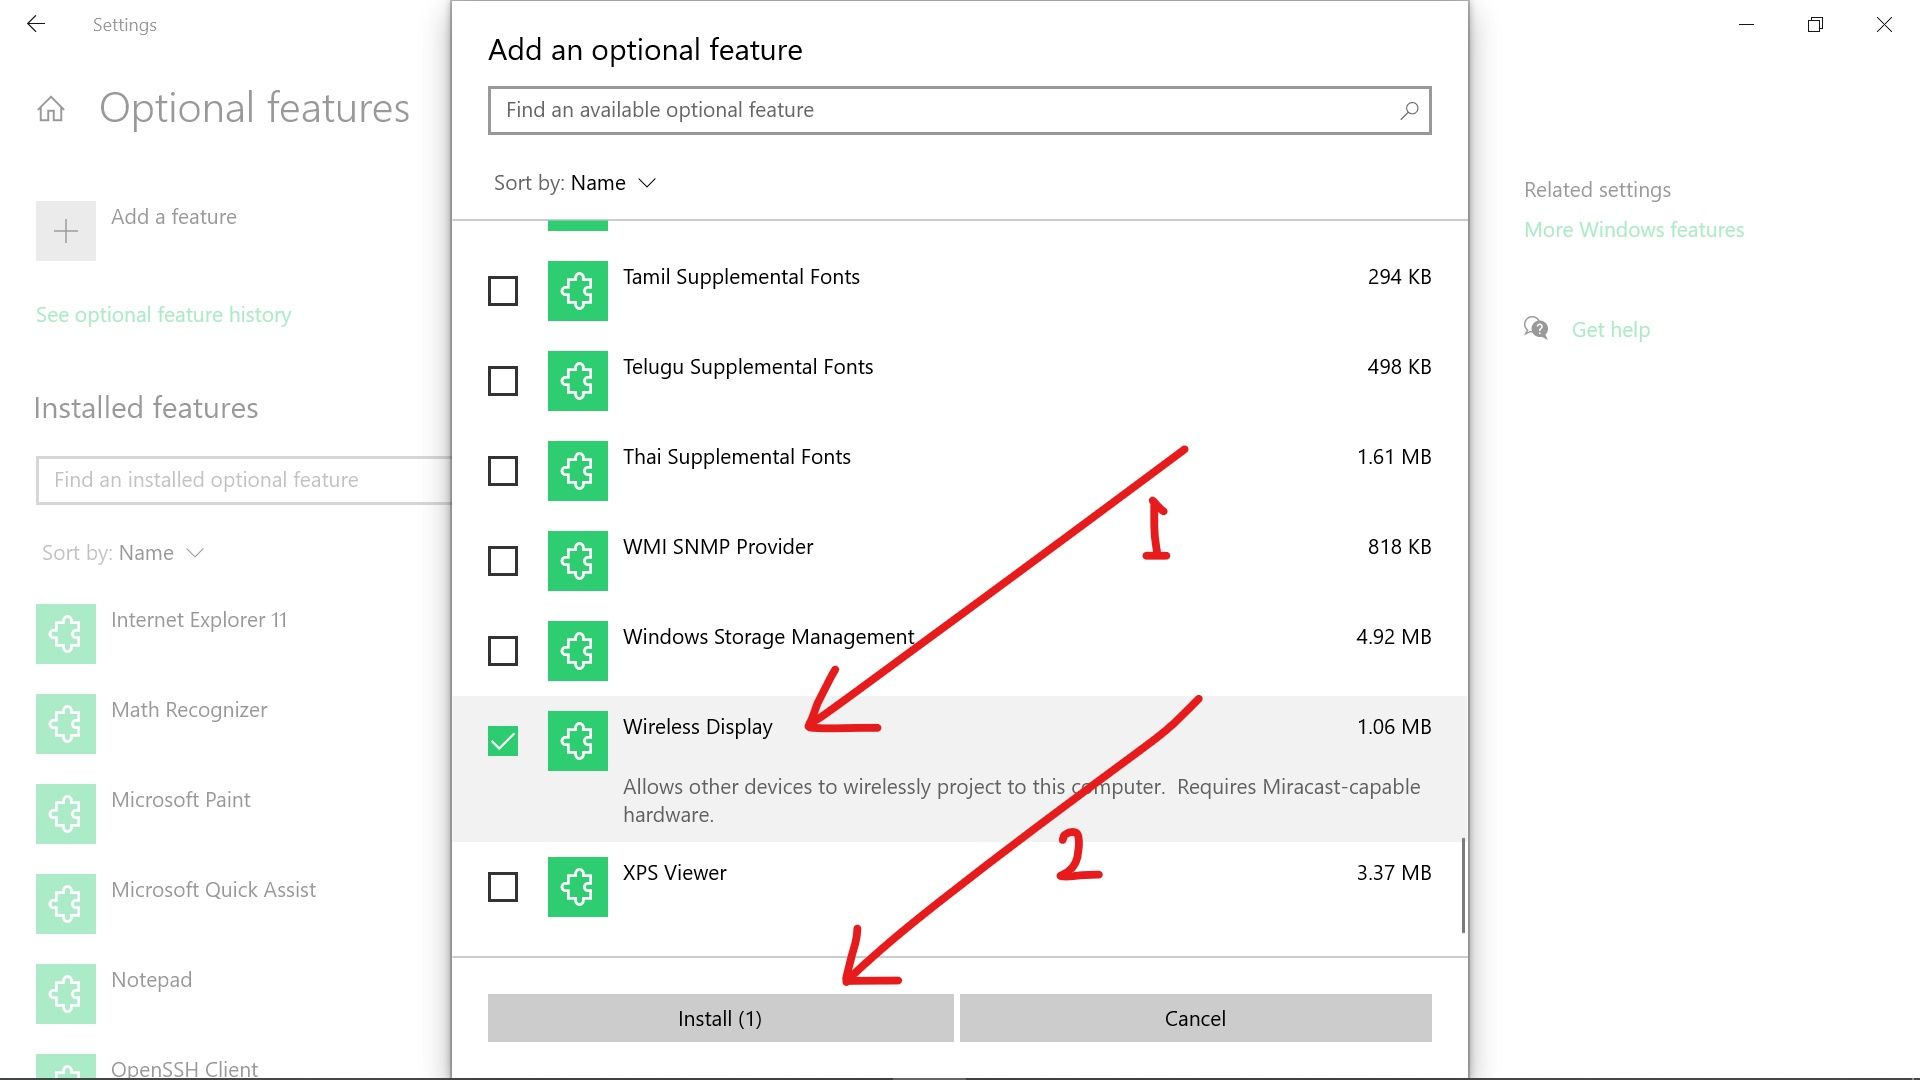
Note that if your current internet connection is metered, this feature will not install. So, make sure you’re not on a metered network.
When the wireless display is installed, the several projecting options that were not available in Step 3 should now be available. And most importantly, you now have access to the Windows 10 Connect app.
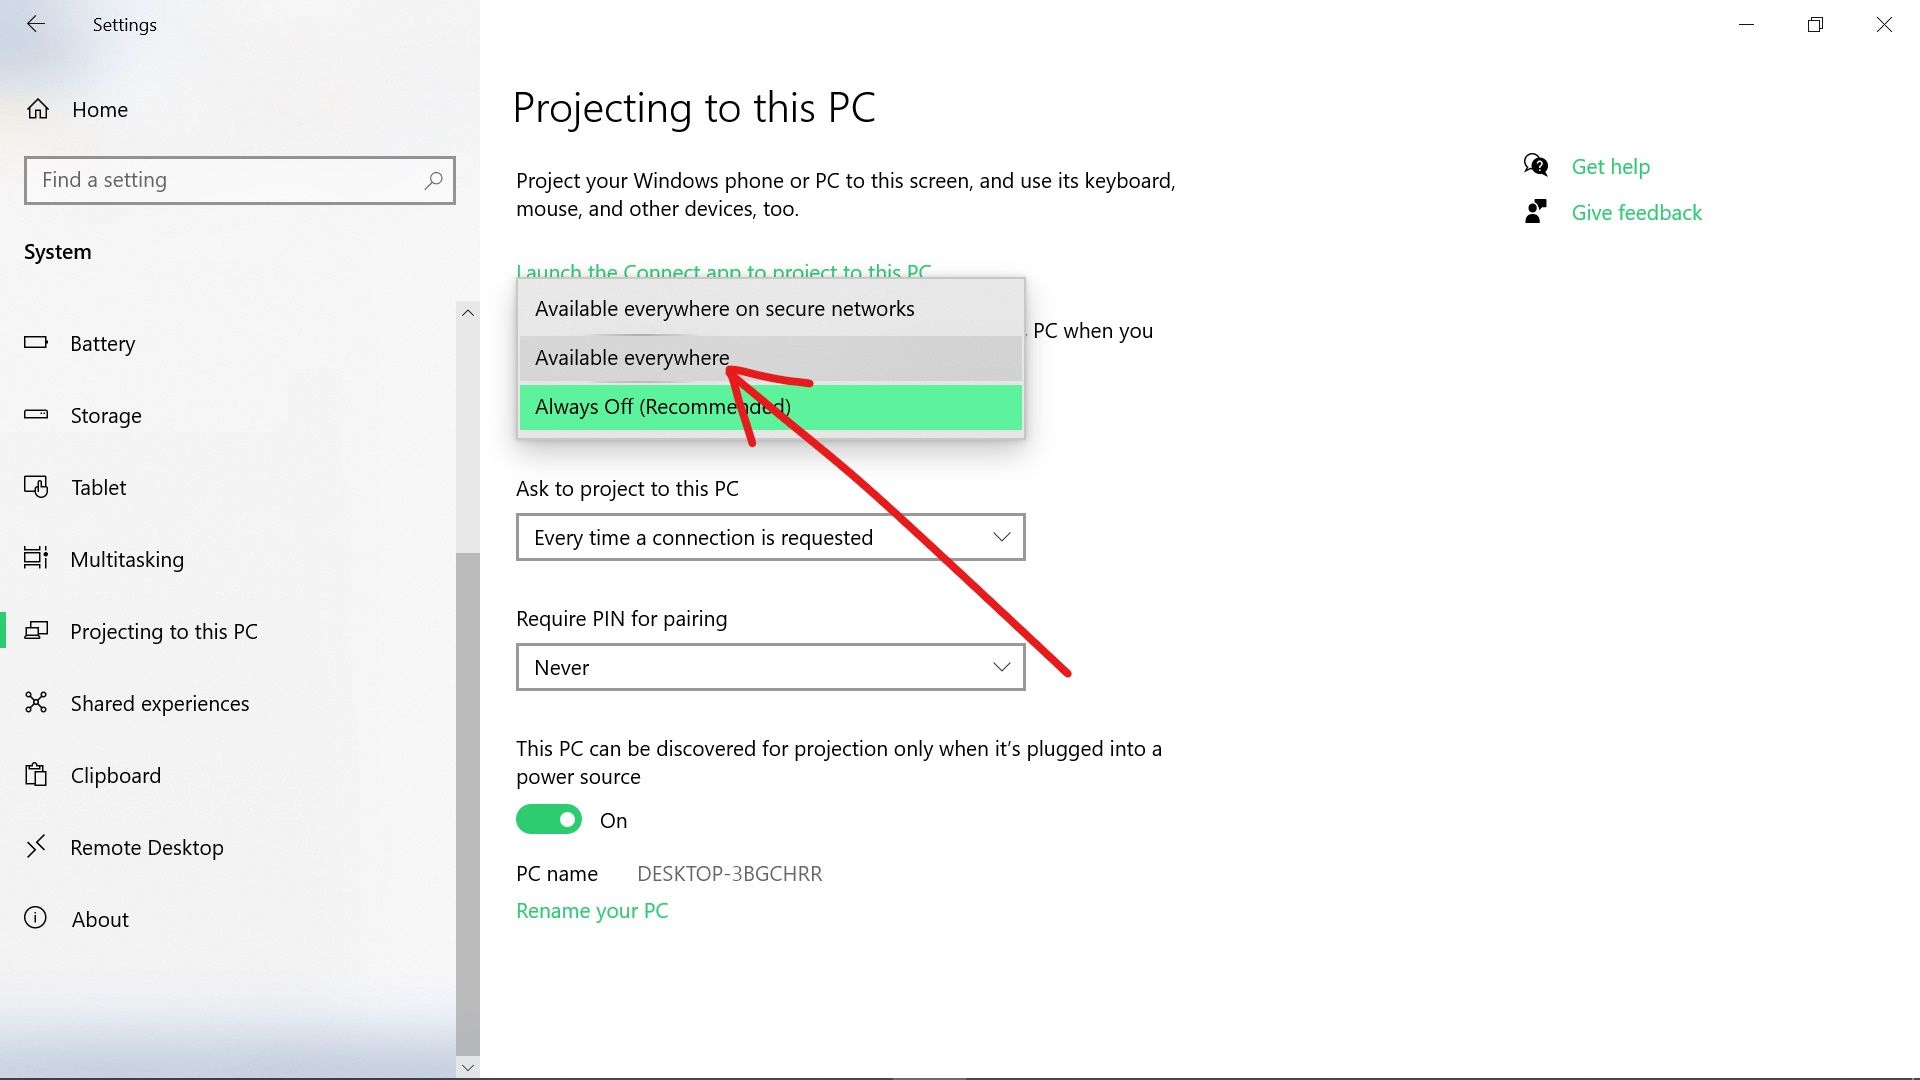
Step 6: Change the first option to available everywhere so the display (screen) of Android devices can connect to your computer wirelessly.
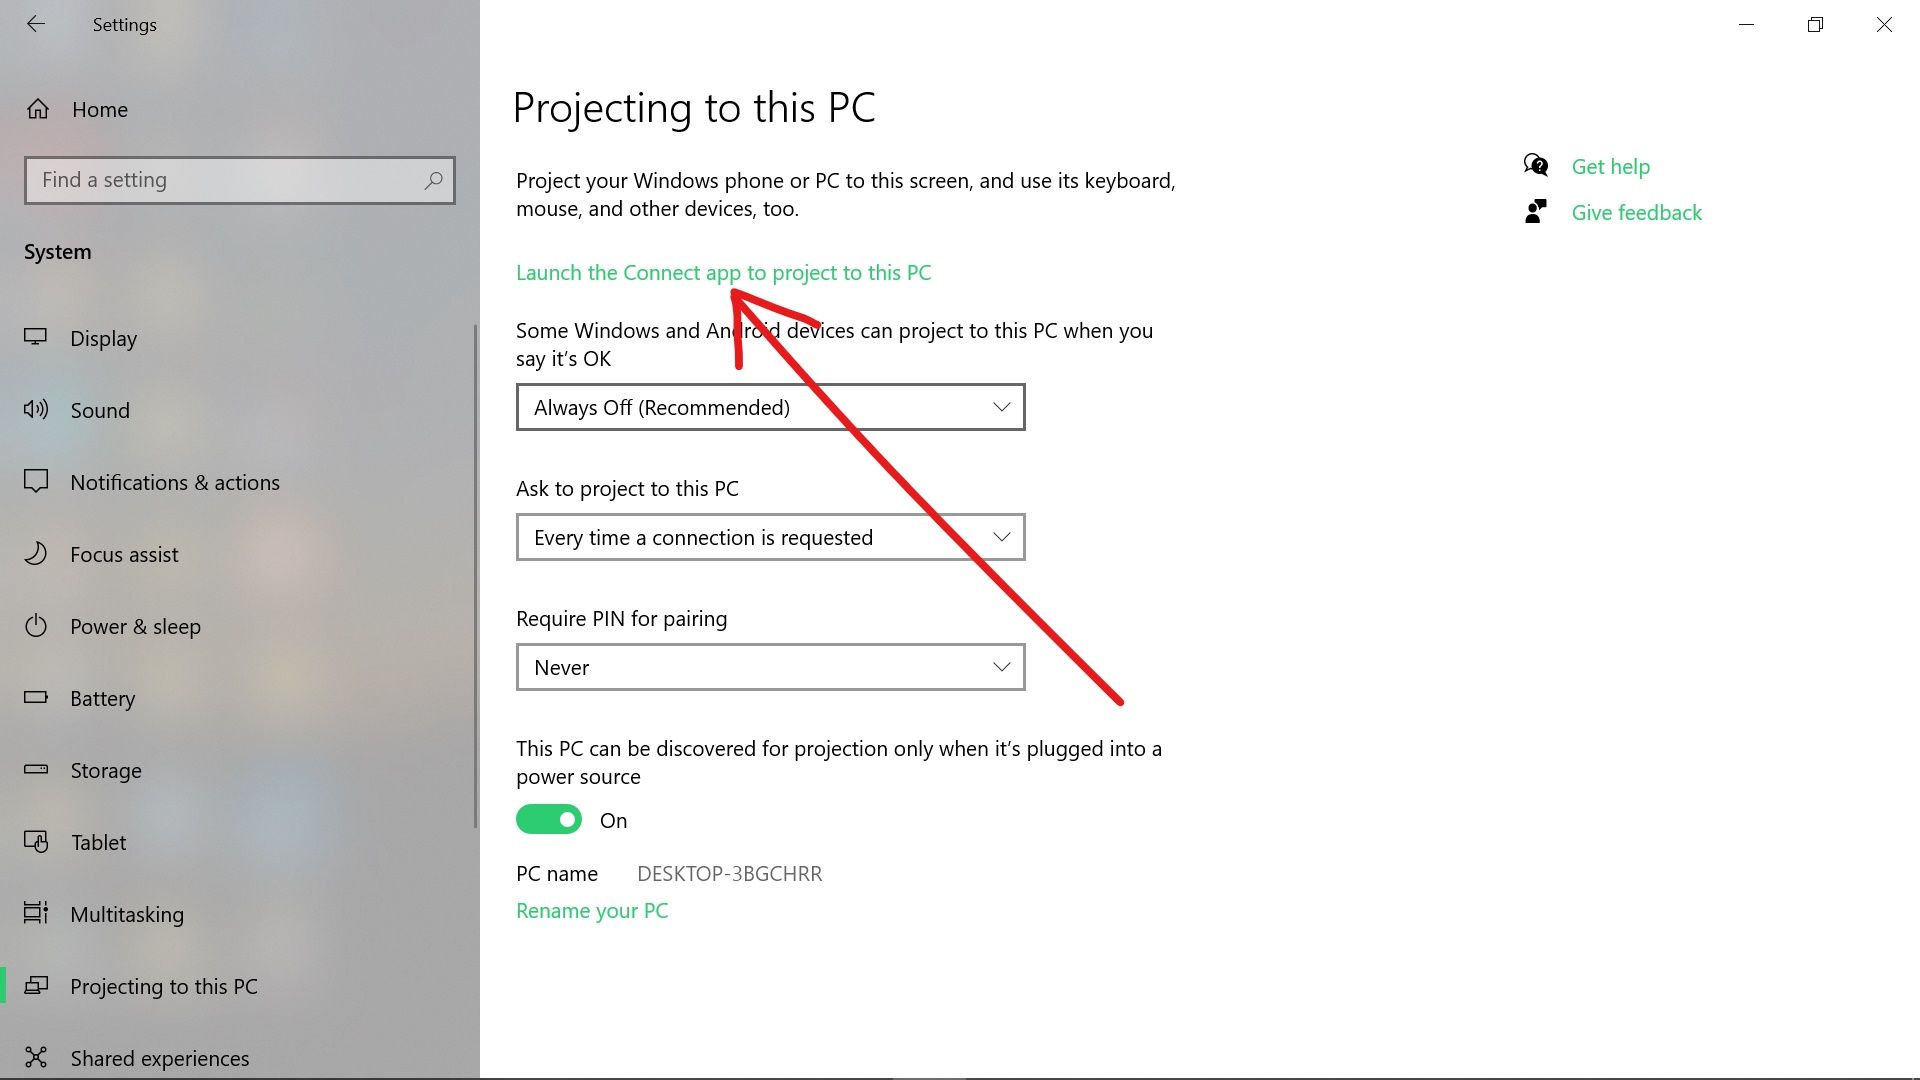
Step 7: Click on the link that says “Launch the Connect app to project to this PC”.
When you launch the Connect app, you should see a screen like the one below:
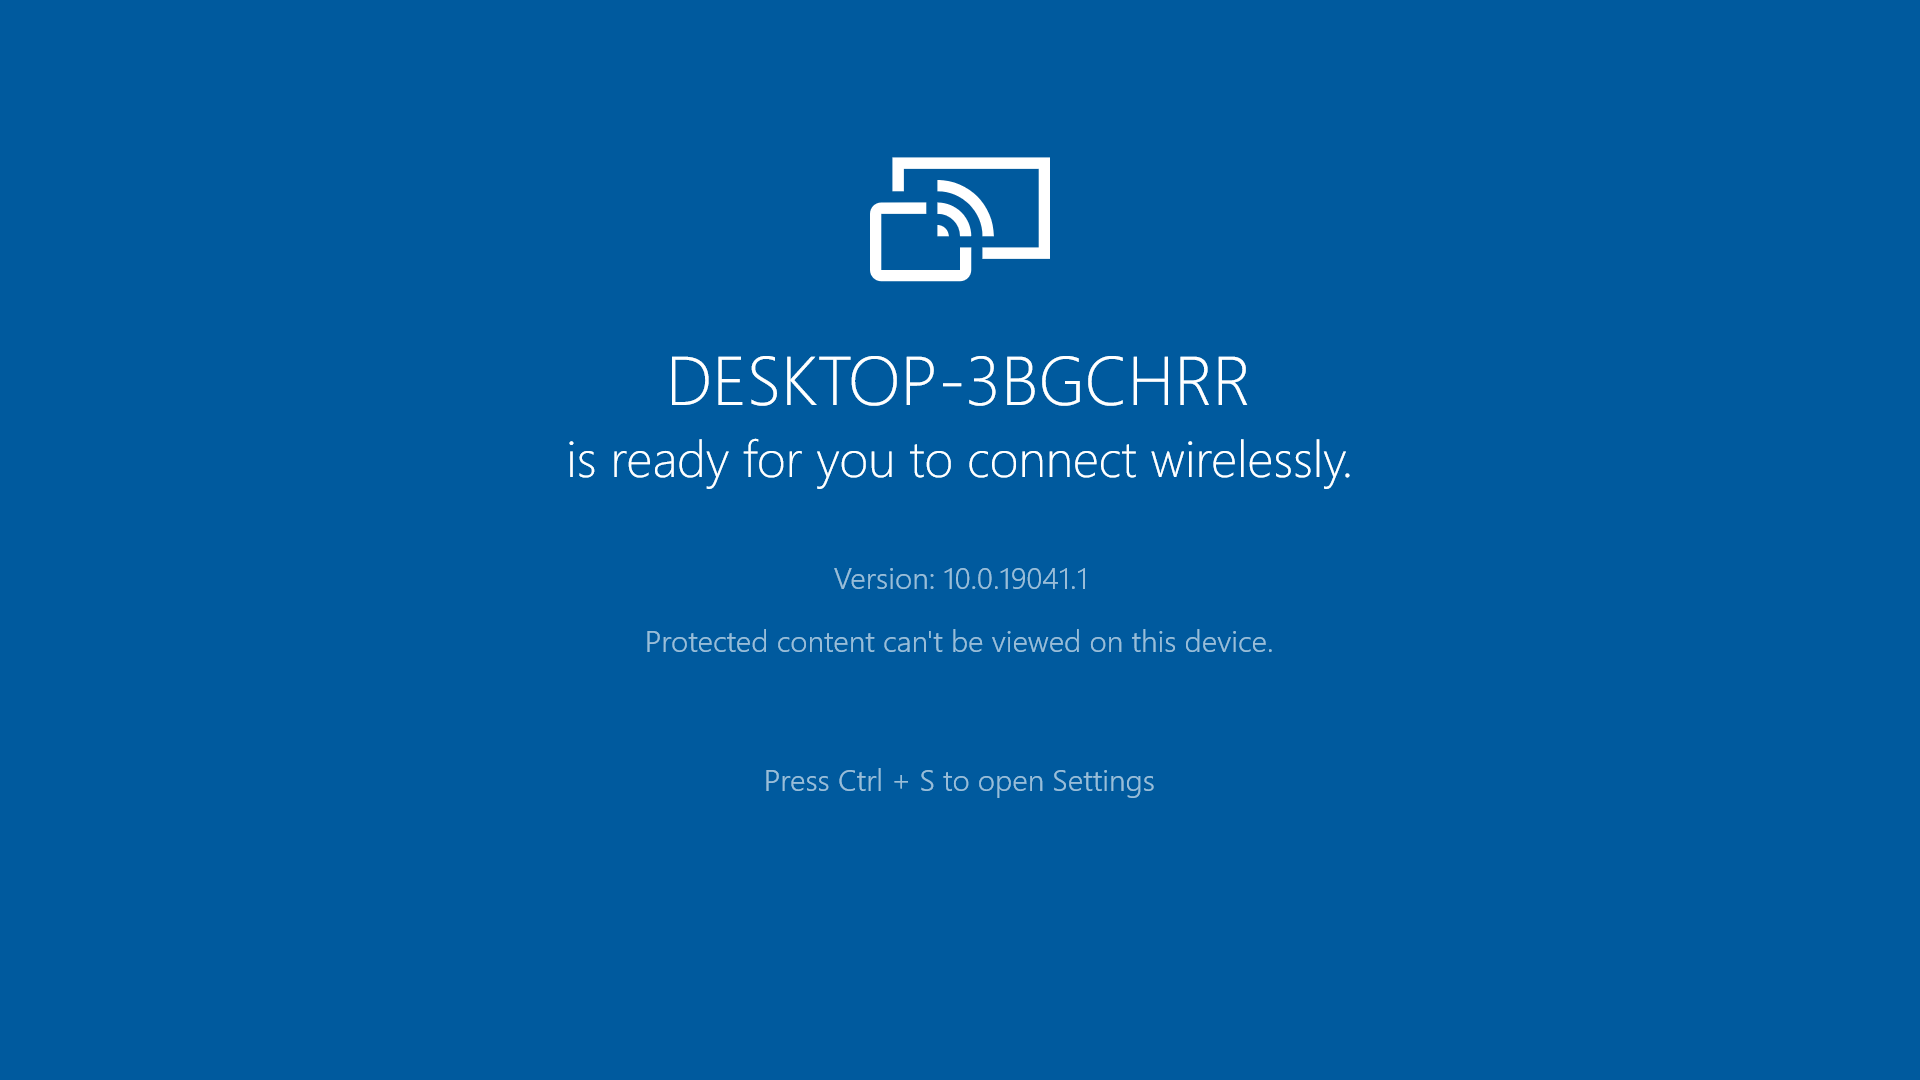
The rest of the setup should now be done on your Android phone.
How to Set it Up on an Android Phone
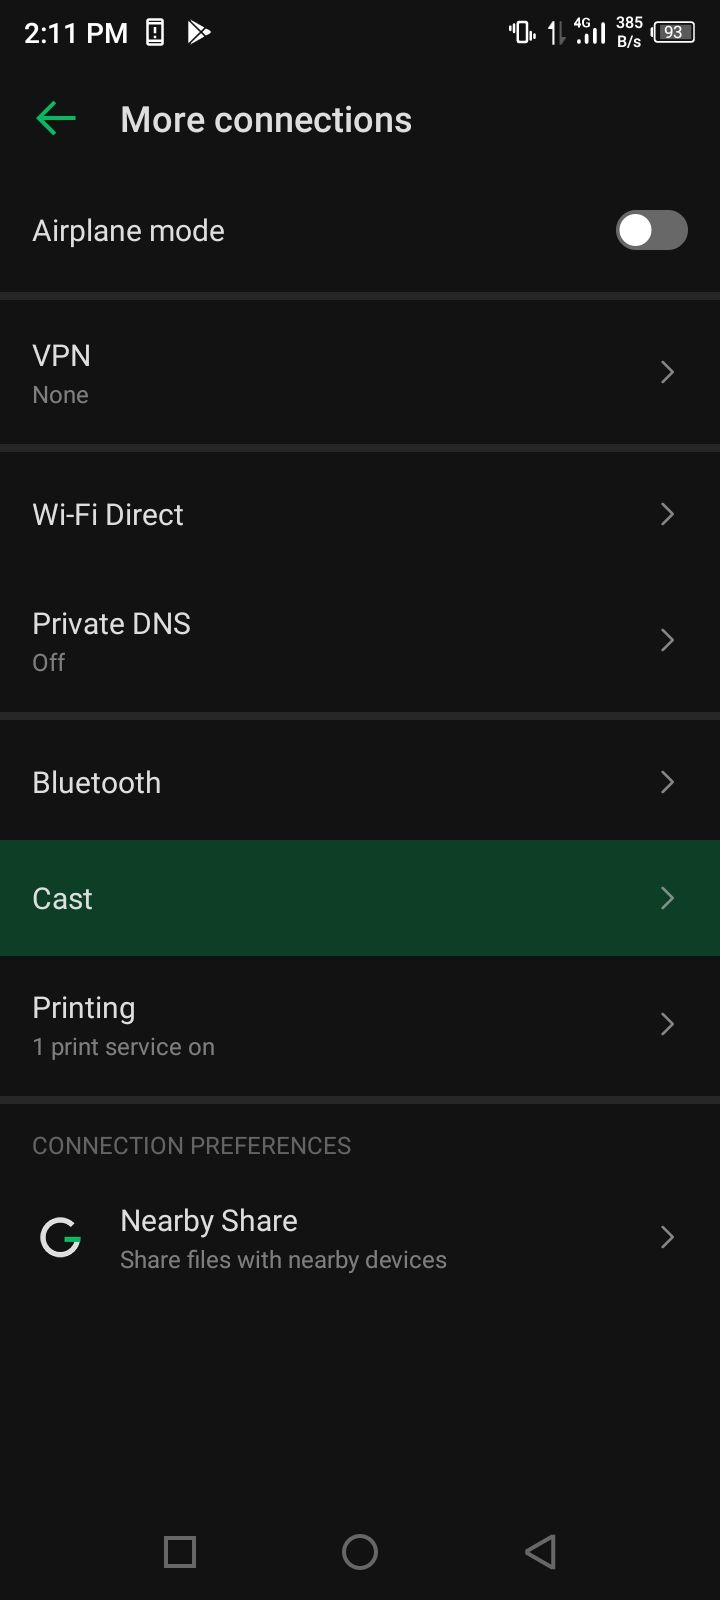
Each Android manufacturer has what they call the casting feature. On Tecno and Infinix phones, it is called “Cast”, and on HTC, it is called “HTC Connect”. On other phones, it could be available as smart share, smart mirroring, and so on.
In this guide, I will be using an Infinix Smart 10i phone.
To set the feature up and request a connection to your Windows 10 computer, follow the steps below:
Step 1: Launch Settings, search for “cast”, and click the search result.
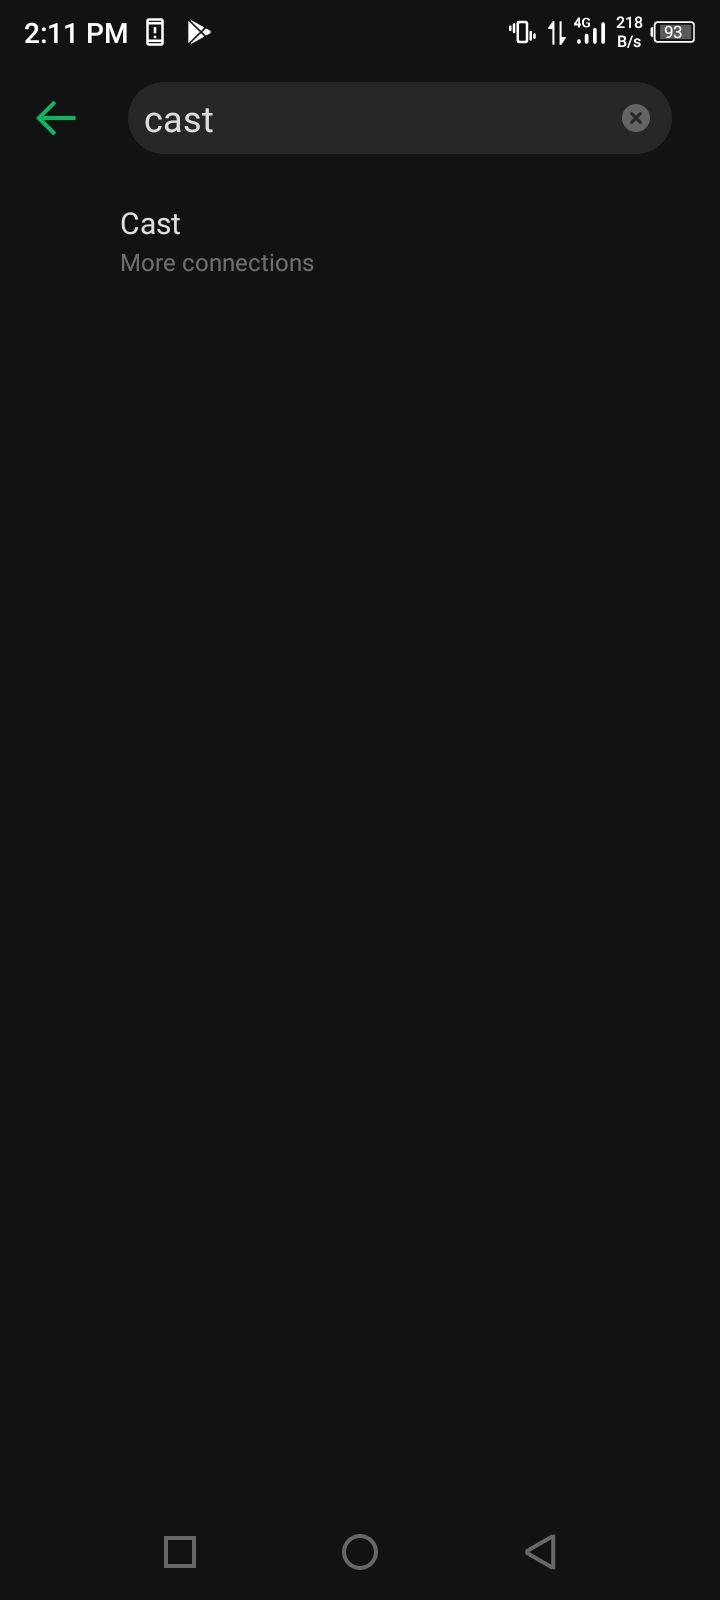
Step 2: Tap Cast.
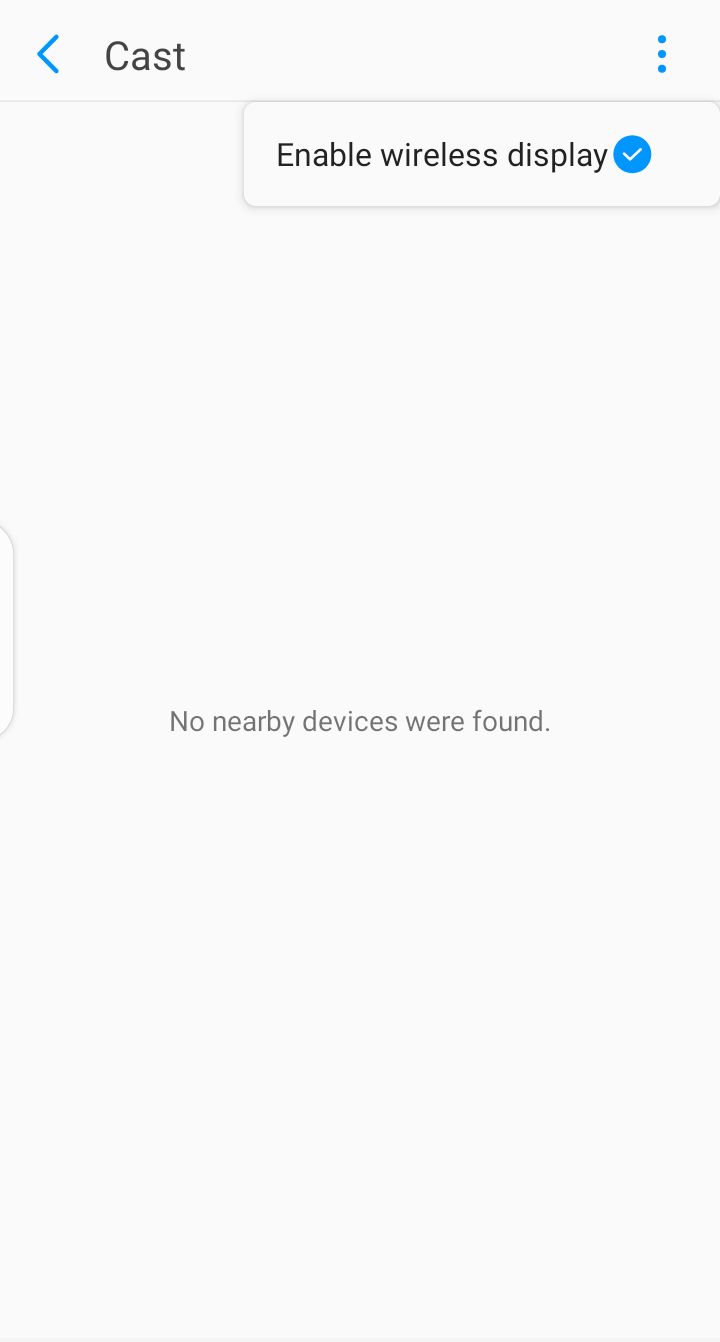
Step 3: Click the 3 dots on the top-right corner and tick-mark “Enable Wireless Display”.
Step 4: Your Windows 10 Device name should now appear. Tap it.
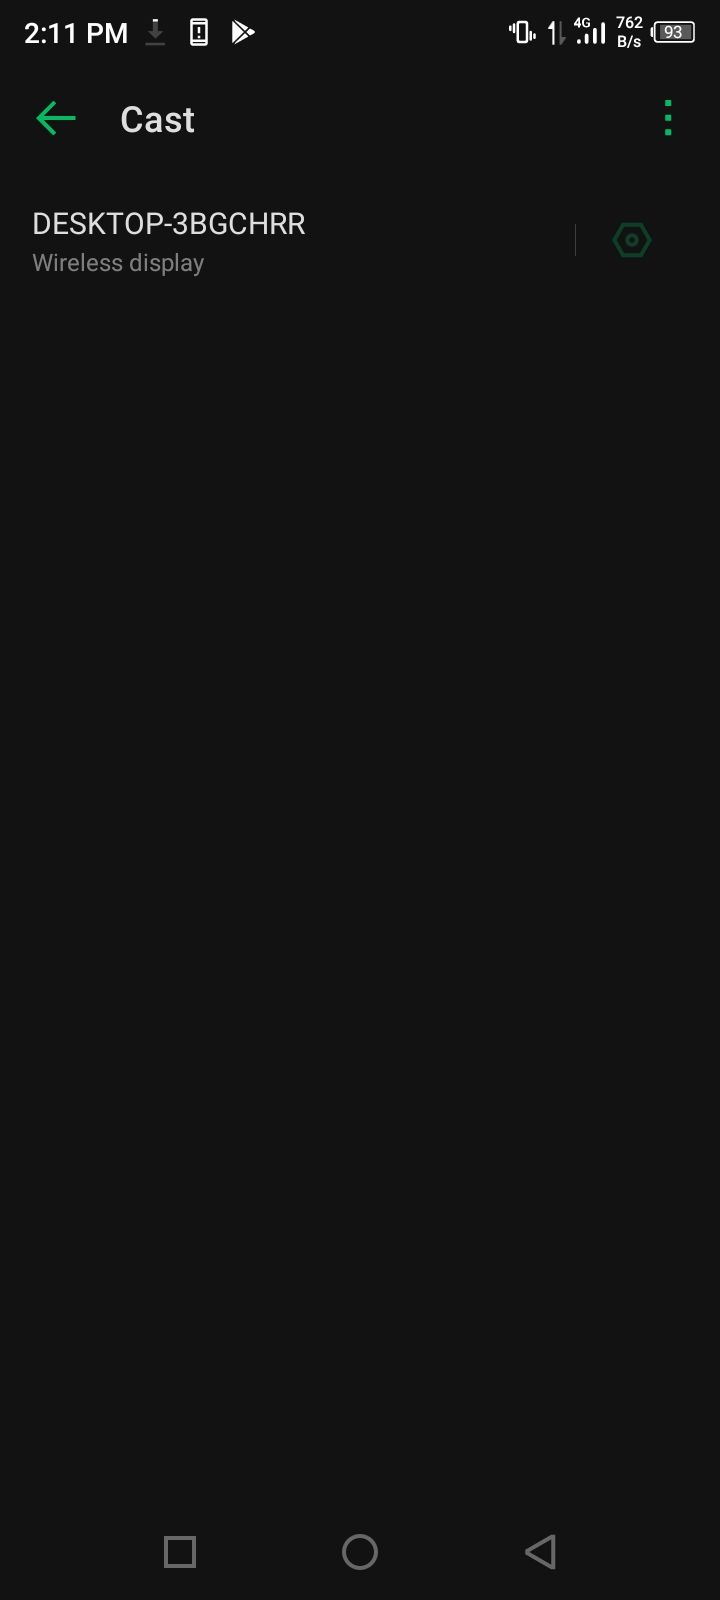
Step 5: Your Android display will now be cast to your Windows 10 PC.
Whatever you do on your phone will now show up on your Windows 10 PC. How cool is that?
Thank you for reading this article. If you find it useful, please share it with your family and friends. I would really appreciate that.