By Arjun Krishna Babu
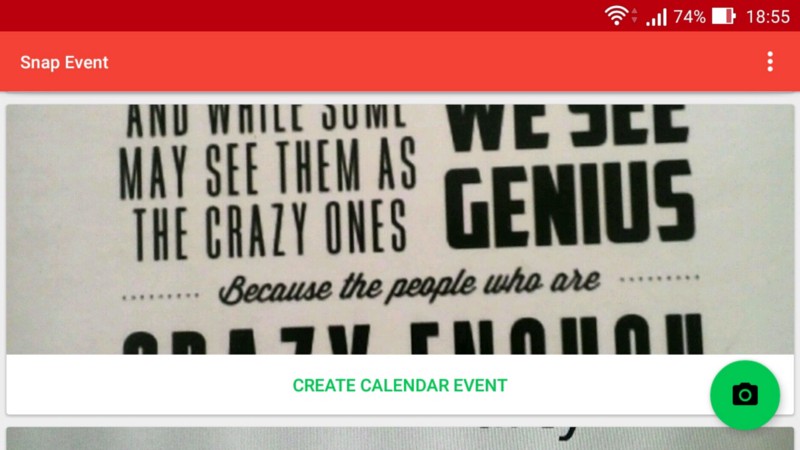
Google just published my first Android app, Snap Event, in their Play Store. Snap Event creates calendar events from photographs of the event’s poster.
The app is by no means perfect, but it’s functional and is a proof of concept that the idea works.
This article is a write-up of how I built and published this app.
Motivation
People say the best way to learn a new programming language or framework is to do a project with it. Sure, you need some familiarity with the basics of whatever it is that you’re trying to learn. But past that stage, projects are the way to go.
There were three motivating factors behind the development of this app:
- My previous attempt at learning Android two years ago had failed. I wanted to give it another shot.
- I already had a project idea in mind.
- One of my professors asked us each to build an Android app. We’d get credit for it.
Whenever I saw a poster for some event, such as a concert or conference, I took its picture to keep track of what exactly was on the poster. Most people I knew did this. I searched, but I couldn’t find an app that converts images of posters into calendar events. This was surprising. Or maybe I did not search well enough.
So my friend Alexander “Alex” Kaberlein and I decided to build this app.
App Development
Creating calendar events from their posters comes down to three things:
- Detect text from the image.
- Make sense of the detected text.
- Create calendar event.
Our focus was to ship a working app as early as possible, and then iron out its shortcomings. As a consequence, we made some compromises during the design phase. This was supposed to be a learning experience, after all. We have zero intentions of making money from this app.
Detecting Text From The Image
Though in retrospect step two was harder, our project could’ve been shelved right away if we had failed to detect text from the image. I had no knowledge whatsoever about computer vision. Alex had some familiarity with OpenCV, but we did not have enough time to come up with our own image recognition models.
Based on what I read on the internet, I was aware of certain off-the-shelf libraries and services for image recognition. In particular, the three services we considered were:
It didn’t take long for us to zero in on Google Mobile Vision:
- Amazon Rekognition was supposed to be pretty good at detecting objects within the image. But we did not know how well it worked with text.
- Cloud Vision was capable of detecting text, but it’s not free (despite being inexpensive).
- Mobile Vision was capable of detecting text, free, and likely worked well with Android.
So we chose Mobile Vision.
Next up, we wanted to be sure that Mobile Vision detected text to our satisfaction. We didn’t want to discover at the last moment if Mobile Vision wasn’t up to the task. For this, we built a small toy-app to detect text from images we hard-coded into the app. You can find it here.
The prototype worked well, and we decided to proceed with the main app.
Capturing the image and saving it on the phone was easier than I thought. However, I wanted to display all the images taken by the app in vertically scrolling cards. That’s where I ran into my first major set of problems:
- The high-resolution images take up a lot of memory, causing the scrolls to jitter. This was despite using
[RecyclerView](https://developer.android.com/guide/topics/ui/layout/recyclerview.html). - Centering images within the cards was harder than I thought. You have to fiddle around with a
[Bitmap](https://developer.android.com/reference/android/graphics/Bitmap.html)object and make non-trivial mathematical calculations.
The Android documentation (precisely this page) pointed me to solutions for both these problems. There is a library called Glide which handles the complexities associated with pulling multiple images into your app. It also handles annoyances like centering your images properly into your ImageView.
Documentation for Glide could have been better. I had to resort to 3rd party websites to figure out certain use-cases. Speaking of which, you might want to read this excellent introduction to Glide.
Text Recognition using Mobile Vision
Mobile Vision supports:
- Face detection
- Barcode detection
- Text detection, which is what we wanted.
The library is capable of providing us text in whichever format we desire. It can be entire blocks of text, lines, words, and so on. Our plan of attack was to extract every single line of text in the poster, and then figure out what each of those lines meant.
There were a couple of things I noticed about text detection using Mobile Vision:
- It does not work well with handwritten text.
- Extracted lines of text are not always in the top-to-bottom order.
- Detected text sometimes differs for the same image on multiple runs — an unexpected non-deterministic behavior.
- It occasionally crashes when using the
.jpgformat for the images. I resorted to using.pngformats. - Use the
ARGV_8888methodology for storing pixels in memory. It took me hours to figure out why my app kept crashing. Part of my app was usingRGB_565by default, and another part was expecting images inARGV_8888. See this page to know more about what those configurations mean.
Making Sense of the Text
Alex and I concluded that for any calendar event, the three crucial pieces of information are:
- Schedule
- Title
- Location
The problem with dates is that they are written in different ways in different parts of the world. For instance, “05–07–2017” is May 7th in the United States and July 5th in almost every other country. Weird ideas involving tricks with the geographic location of the user crossed my mind, but it didn’t feel right. Besides, in countries like the United States where people from all over the world are present, this idea is not foolproof.
Due to these complications, we decided to infer the month only when it is written out in full, such as “January” (or its abbreviated form “Jan.”). Though not always true, it is somewhat safe to assume that the date and the year would be on the same line as the month.
Our methodology for detecting the event title and location is so terrible that I’d rather not talk about it. For a given a line of text, I have no reliable strategy to conclusively determine if it is an event title, location, or some other information.
To compensate for this, we dump every single line of text we detect into the description field of the calendar event.
Creating the Calendar Event
A trivial task in the grand scheme of things.
Android stores all calendar events to a central repository called the Calendar Provider. This is why calendar events you create using any calendar app show up on any other calendar app you install. Think of it this way — all media files in your phone would show up on whatever media player you installed.
Once all the information needed to create a calendar event is ready, it’s just a matter of starting an activity to create the calendar event.
We chose to open the calendar app populated with the event information to give users an opportunity to review the event before it is saved. Otherwise, it would silently create the calendar event in the background.
Publishing on Google Play Store
Like most other things by Google, the steps for publishing an Android app are well-documented. Once I felt ready to launch the app, I followed the official launch checklist.
It wasn’t a quick process, though. It took them over 24 hours to verify my one-time registration fee of $25, and 6 more hours for my app to show up on the Google Play store after I clicked the button to rollout and publish the app.
What I Learned From Developing This App
- Basic Android programming. I’m now confident about reading through the documentation (as well as other resources) to figure out how to get things done. Now I can create more complex Android apps in the future.
- How to actually publish the Android app.
- How to use the Glide library to display multiple images efficiently.
- How to set up and use Google’s Mobile Vision library.
Shortcomings
I’ve already covered many of the shortcomings of the app in the App Development section above. But I’ll summarize the issues here:
- Date detection happens only if the date is written out in full.
In the real world, dates are not always written out in full. This severely limits the usability of the app. - Date detection fails if it contains ordinal suffixes like “st,” “nd,” “rd,” or “th.” However, this can be quickly fixed.
- Event title and location detection are not perfect. I’m contemplating using machine learning models to accomplish this task, but it’s still quite far away.
- The images are saved onto the phone using a terrible strategy that I’m ashamed to mention here. Even though it works perfectly. This would be evident only if you read through the source-code.
- User experience can be improved.
What Next
I’ll fix the relatively easy things I mentioned in the shortcomings section. But I likely won’t pursue this project too much further due to reasons I mention next.
Google Lens
Among the host of exciting things Google announced during Google I/O 2017 is Google Lens. Google Lens does exactly what our app does (along with a bunch of other cool things). And Google Lens does it rather well, much better than what I have created through Snap Event.
And I’m happy and excited about the fact that Google did it. At least I expect it to be a lot more reliable and useful.
Get Snap Event
- As mentioned, Snap Event is now available on Google Play.
- The source-code of the app is available on GitHub.
You can read about more of my projects on my blog.