

User authentication is extremely important in the context of web development. The way users log in affects their overall experience and engagement with an application. It also affects how they initially perceive it.
Authentication techniques are continually evolving as social media sites continue to grow in popularity. The ability to log into web apps using social network accounts is a helpful advance in this area.
This article discusses how you can enhance the user login process for web applications by employing social media authentication through Firebase. It goes into the benefits, setup methods, and integration approaches while offering helpful guidelines.
Here's what we'll cover:
- Why Use Social Media Authentication?
- Prerequisites
- What is Firebase and Why Use it for Authentication?
- How to Set Up Firebase for Social Media Authentication
- How to Set Up Your React App
- How to Integrate Social Media Authentication in Your App
- Offering Both Social Media and Email/Password Authentication
- Conclusion
Why Use Social Media Authentication?
I'm sure you've grown weary of the usual username-password routine when logging into a new platform. It often entails creating a new password on the spot or resorting to insecure password conventions that could grant unauthorized access to your many accounts.
Fortunately, social media authentication offers some advantages:
- Effortless User Experience: Social media login choices simplify the registration process, making it convenient for users to initiate their app usage.
- Heightened Security: Social media platforms implement strong security measures that can bolster the safety of your app's users.
- Elimination of Password Hassles: Through social media authentication, users are relieved from the burden of remembering numerous passwords, reducing the inconvenience of managing credentials.
- Reduced Account Abandonment: Social media login prompts users to join and interact with your app, minimizing the chances of them leaving the registration process unfinished.
- Access to Trustworthy User Information: Social media platforms provide substantial user information, which can be harnessed to personalize the experience offered by your app.
- Streamlined Account Recovery: In instances of forgotten passwords, social media authentication presents a straightforward approach for users to regain entry to their accounts.
In summary, social media authentication offers a convenient and secure method for users to join and use your app. It leads to an improved user experience, and decreased account abandonment, and grants you access to valuable user insights.
Prerequisites
This article is intended for those with a solid grasp of the following concepts:
- HTML, CSS, and JavaScript
- React and React Routing
- Fundamental familiarity with using Firebase
What is Firebase and Why Use it for Authentication?
Firebase serves as a comprehensive platform, providing developers with backend services and tools to create web and mobile applications.
One of its key offerings is an authentication service that streamlines the process of integrating authentication features into apps.
With Firebase, implementing authentication becomes more straightforward, thanks to its provision of pre-built user interface components, developer-friendly APIs, and support for various authentication methods.
How to Set Up Firebase for Social Media Authentication
Step 1: Create a Firebase Project
- Go to the Firebase Console and sign in with your Google account.
- Click the "Add Project" button.
- Enter a name for your project and select a location for your data storage.
- Click the "Create" button.
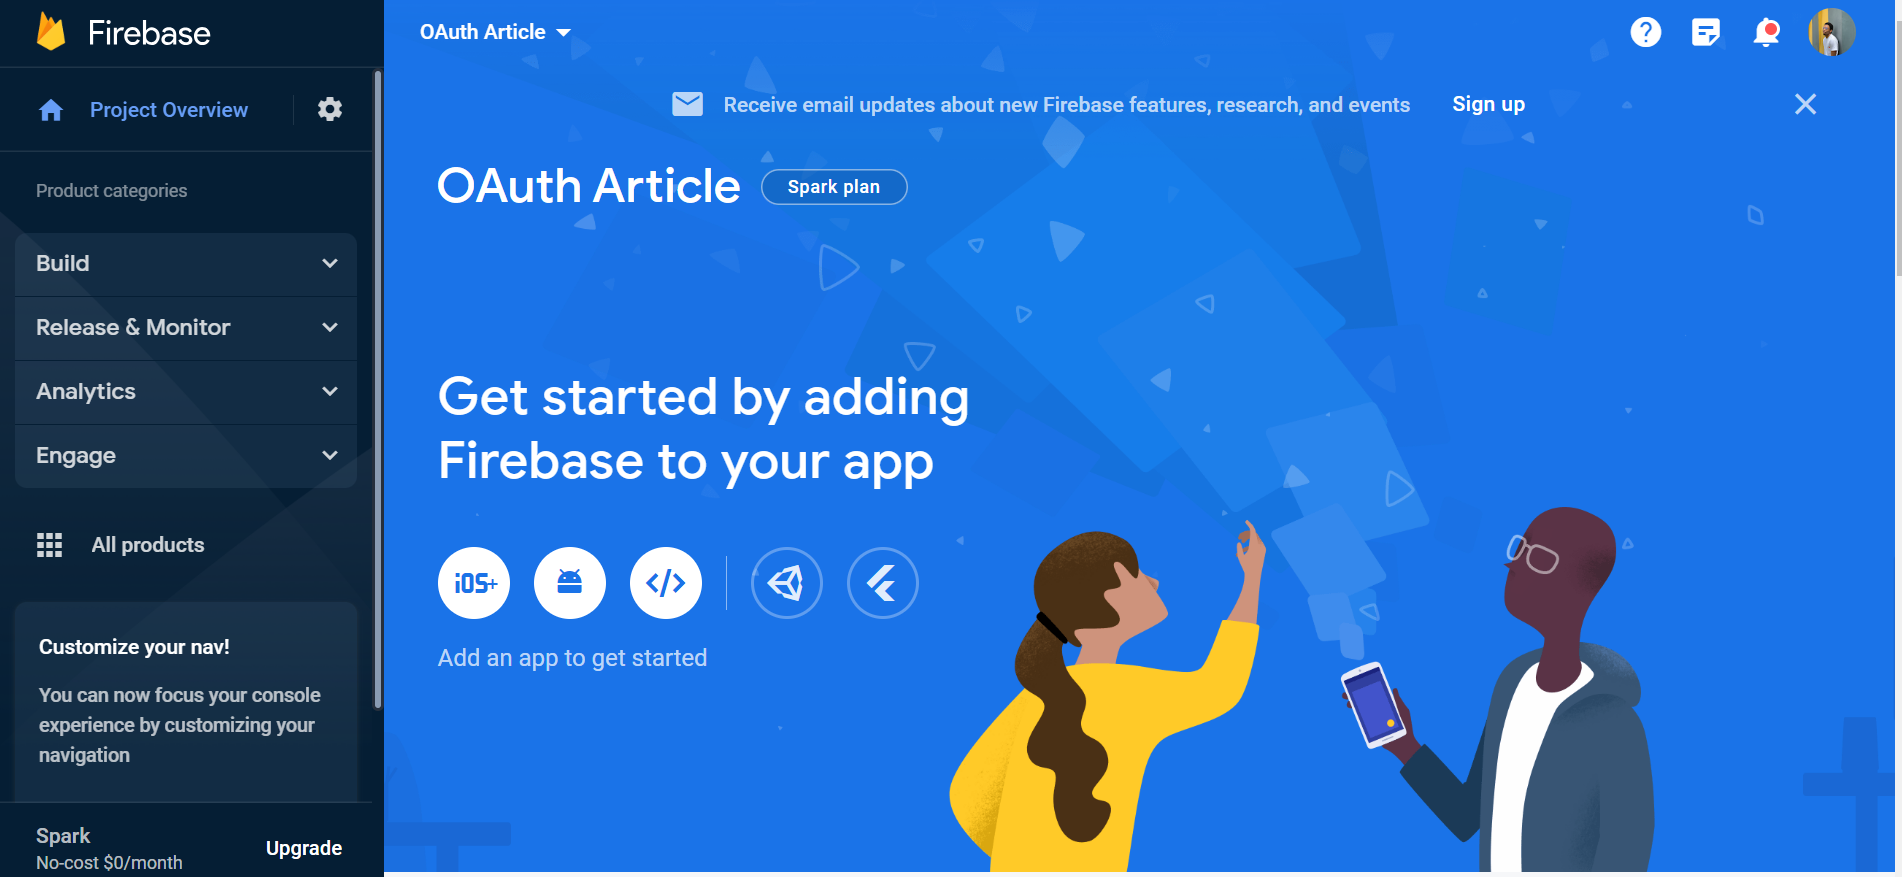 Firebase console homepage
Step 2: Register a Web app
This feature enables you to register your web applications to access the features of Firebase via web apps.
- In the Firebase Console, click the "Web" (</>) icon.
- Click the "Add App" button.
- Enter a name for your app and select the "Web" app type.
- Click the "Register" button.
After you have created a Firebase project and registered a web app, you can start using Firebase for social media authentication.
Step 3: Discover Social Media Sign-In Methods
To do this, once your project is created, you'll need to navigate to the "Authentication" section on the left-hand menu.
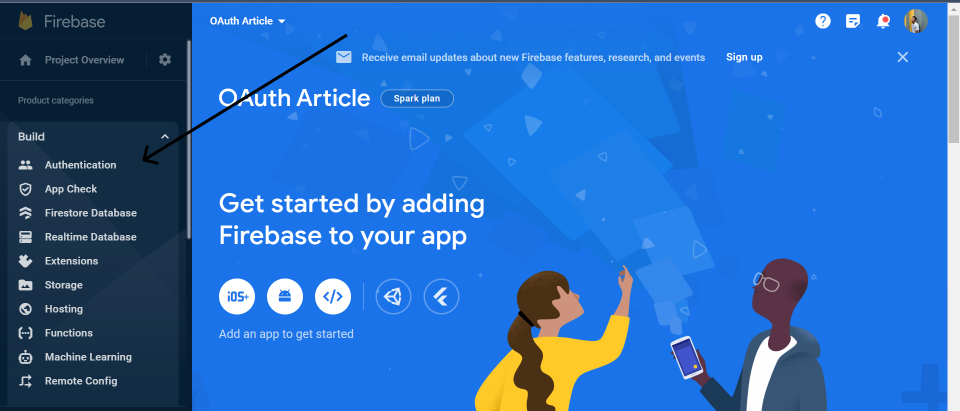 Showing the Authentication sidebar
Under the "Sign-in method" tab, you'll find a list of authentication providers from which you can choose one:
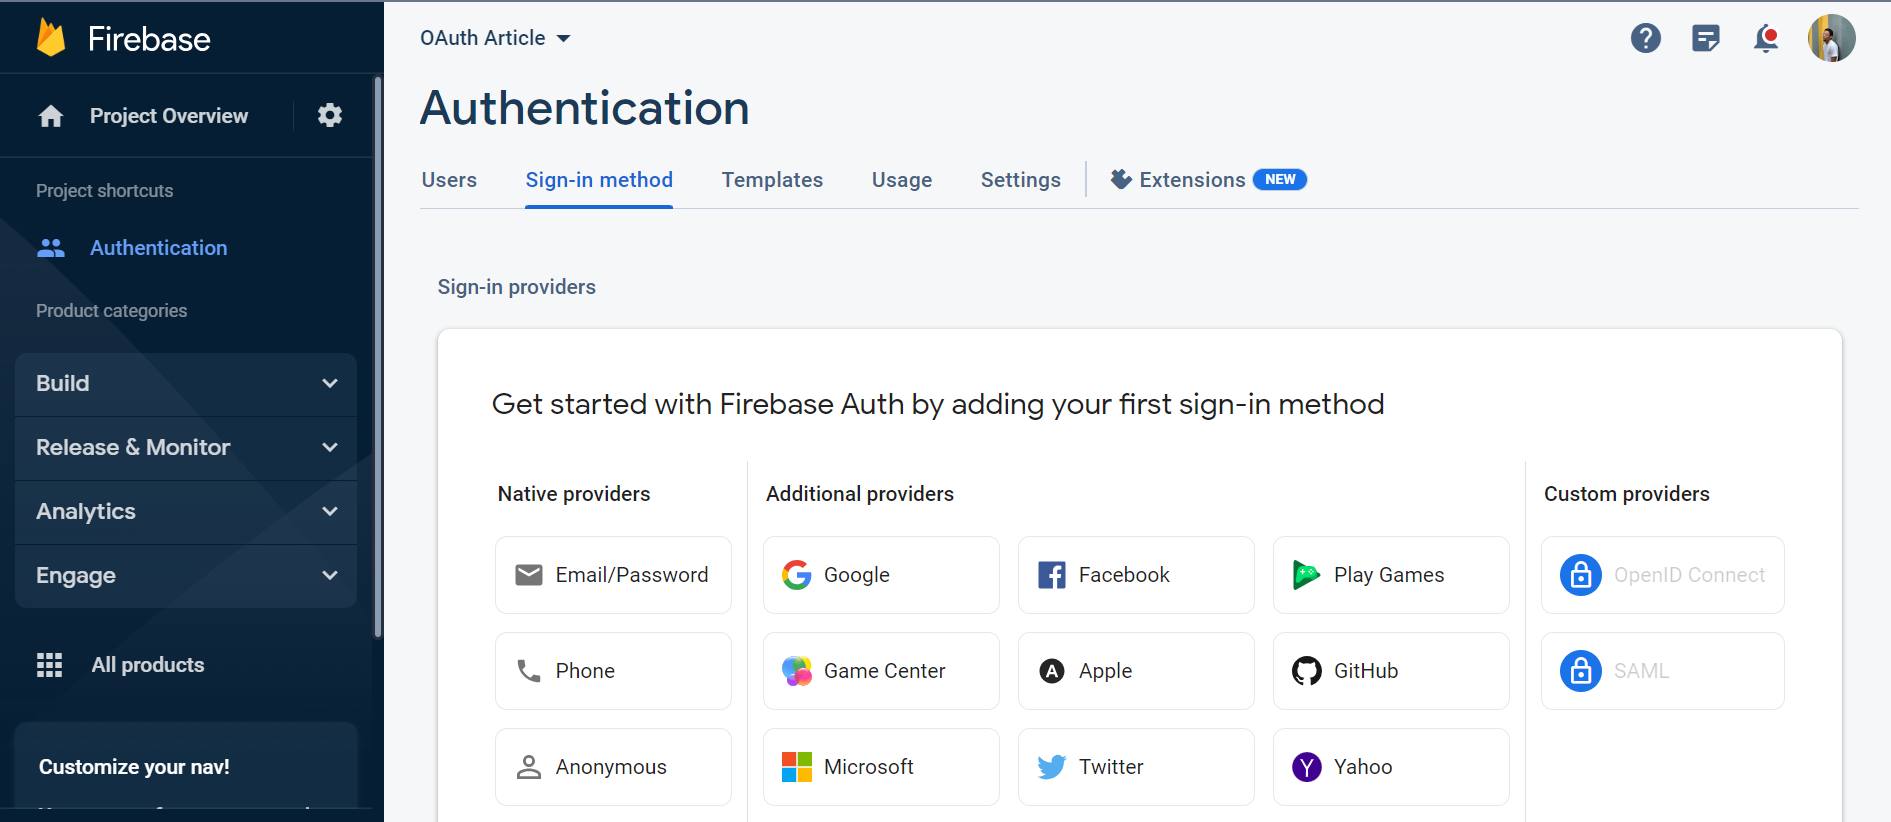 Displaying various Authentication methods
Step 4: Configure Social Media Providers
How to configure Google auth:
To configure Google auth, simply add a support email, and you’re all set.
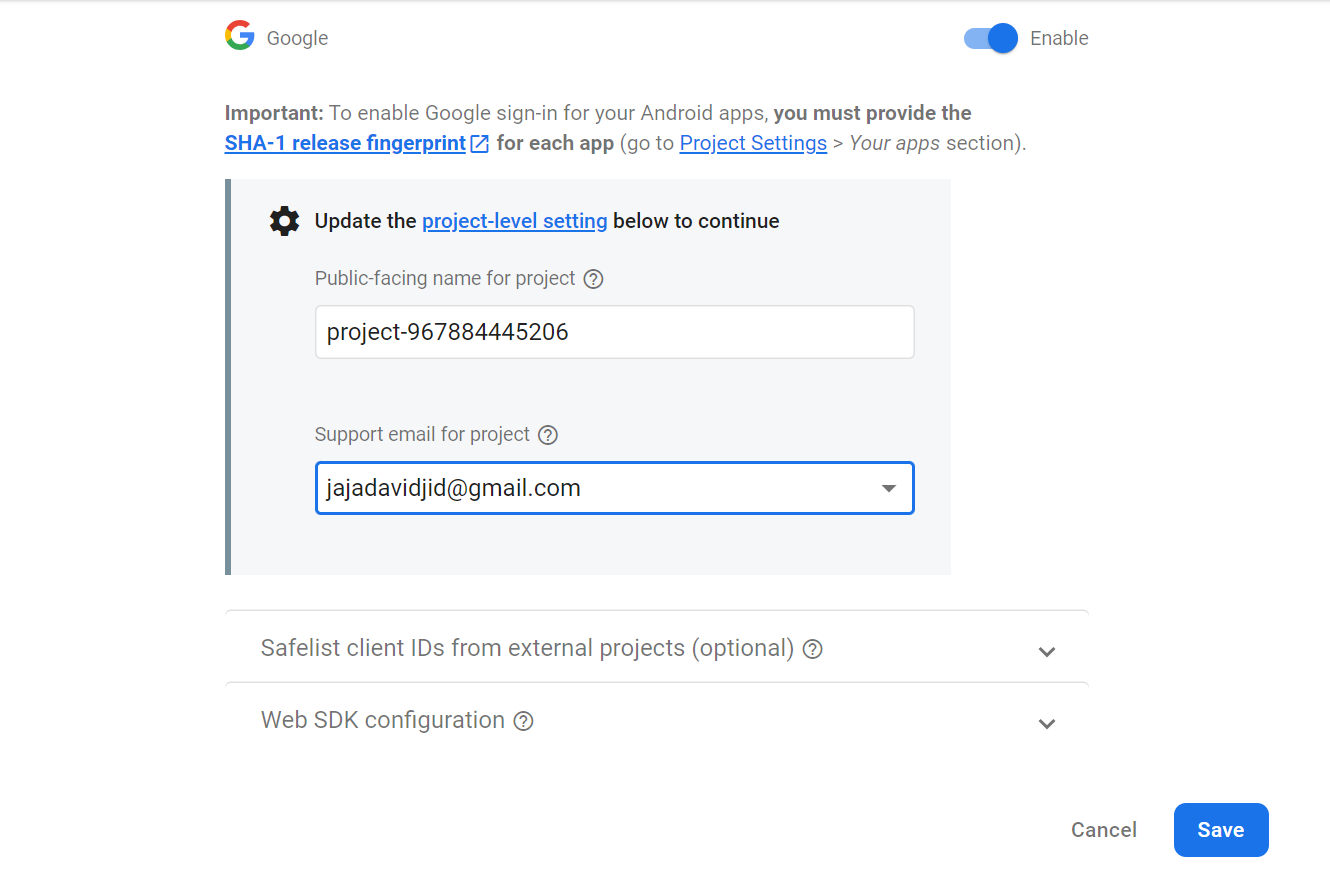 Adding a support mail for google auth
How to configure GitHub auth:
To configure GitHub auth, you'll need a Client ID and Client Secret. To get these, sign in to your GitHub account and go to Settings > Developer settings.
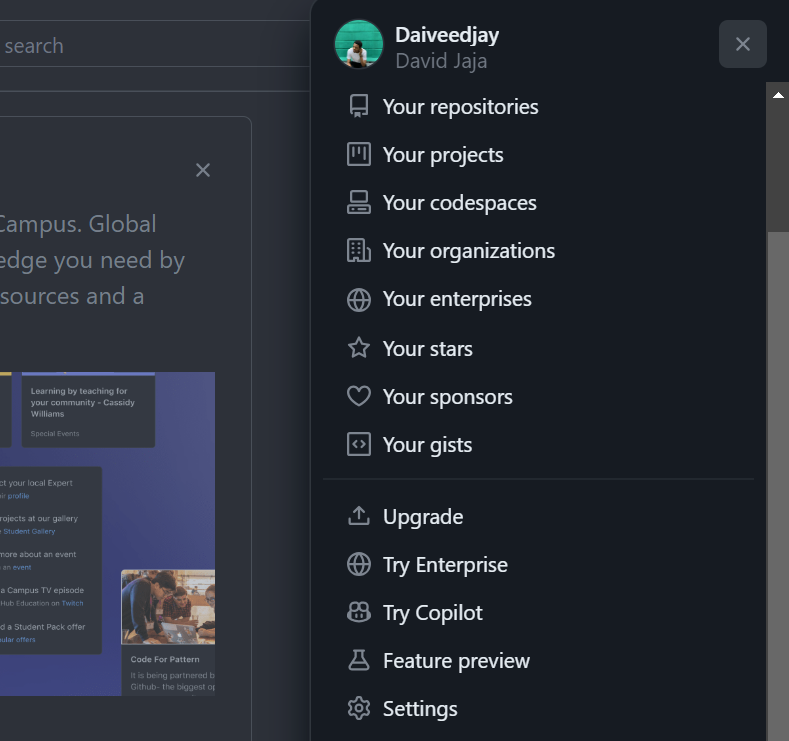 Github settings panel
Then, navigate to OAuth and create a new OAuth application.
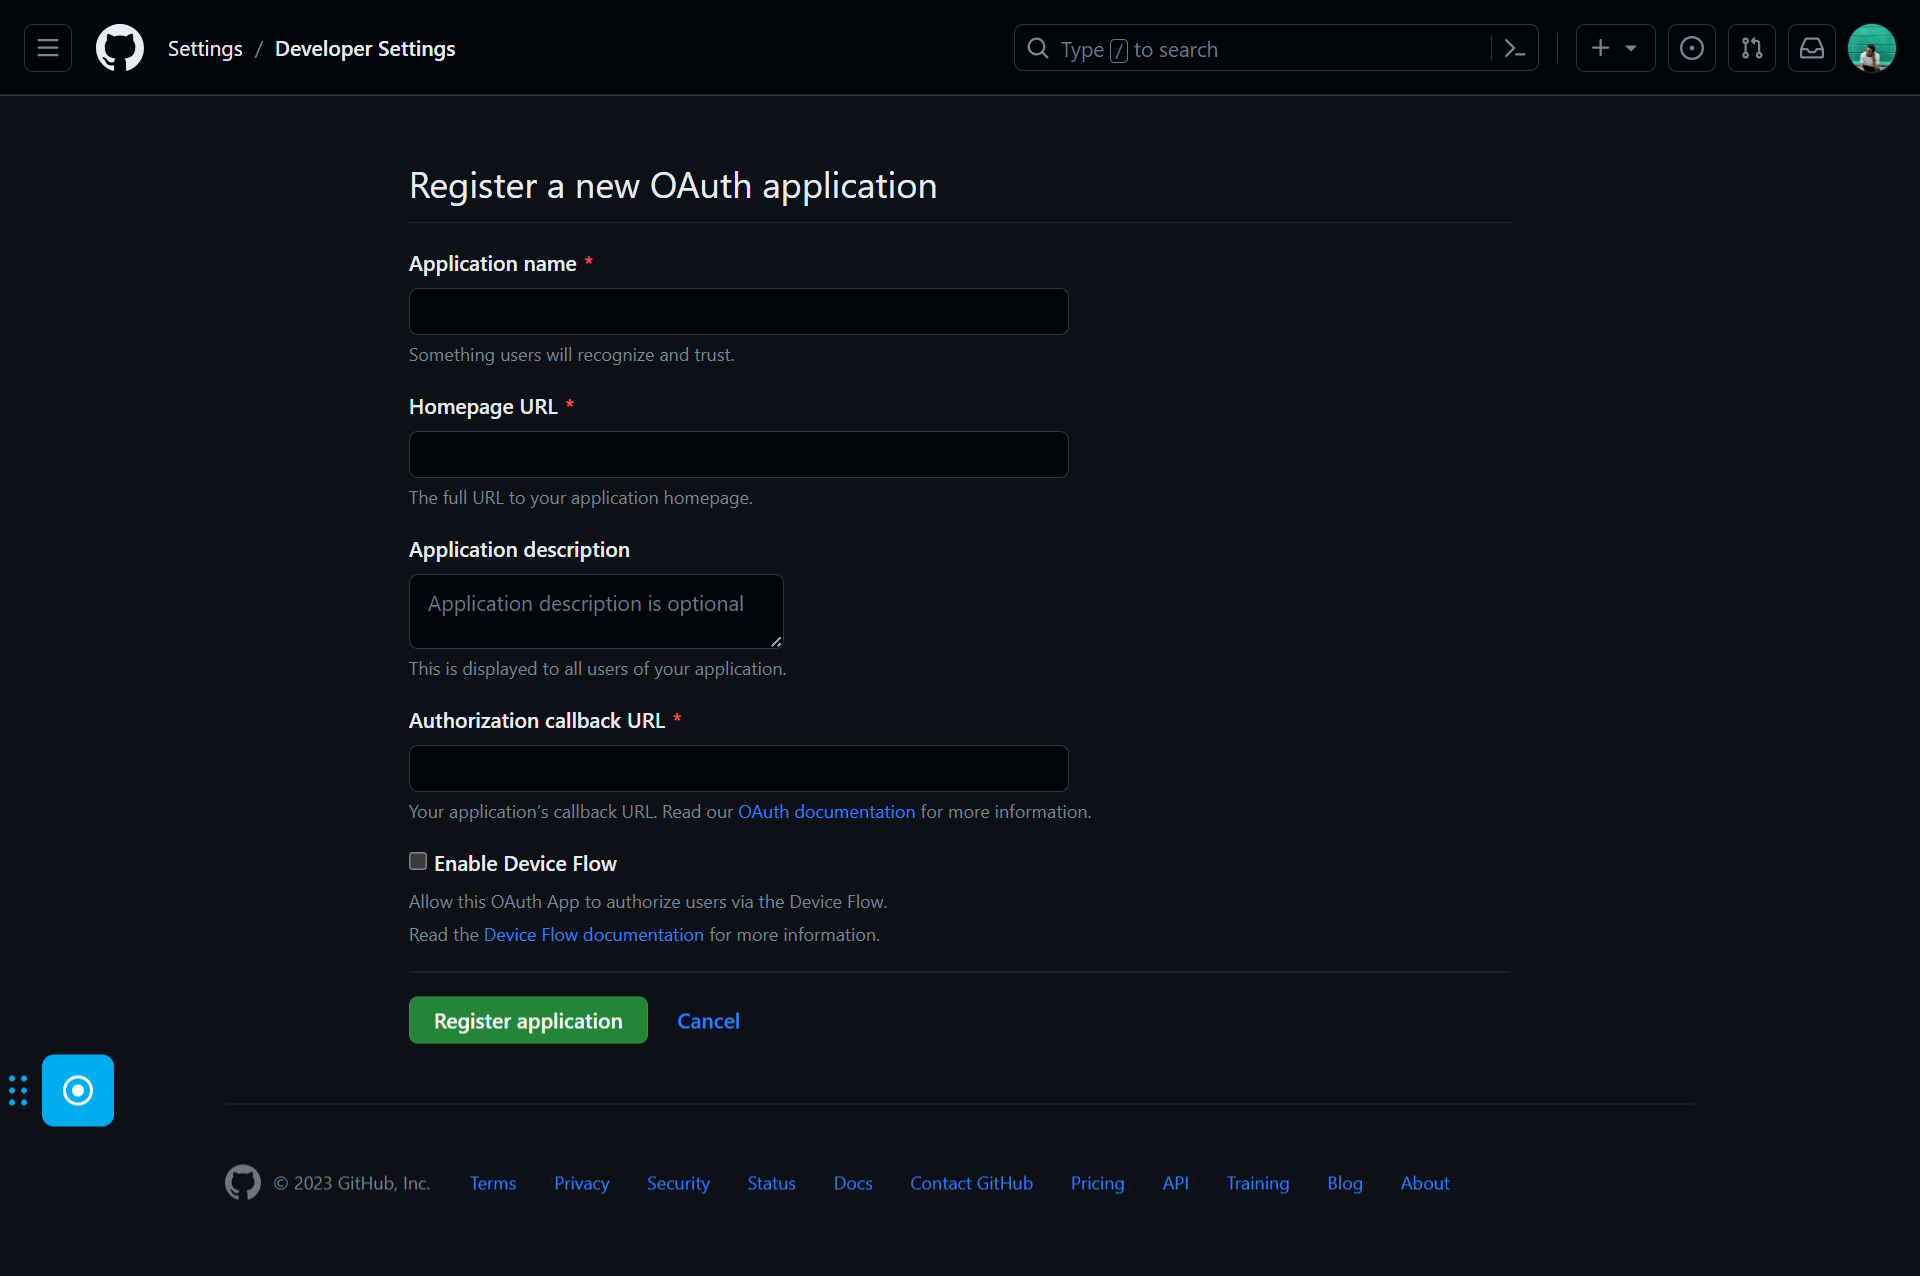 Creating a github OAuth application
In order to get the Authorization callback, go back to your Firebase console and copy the URL in the GitHub setup.
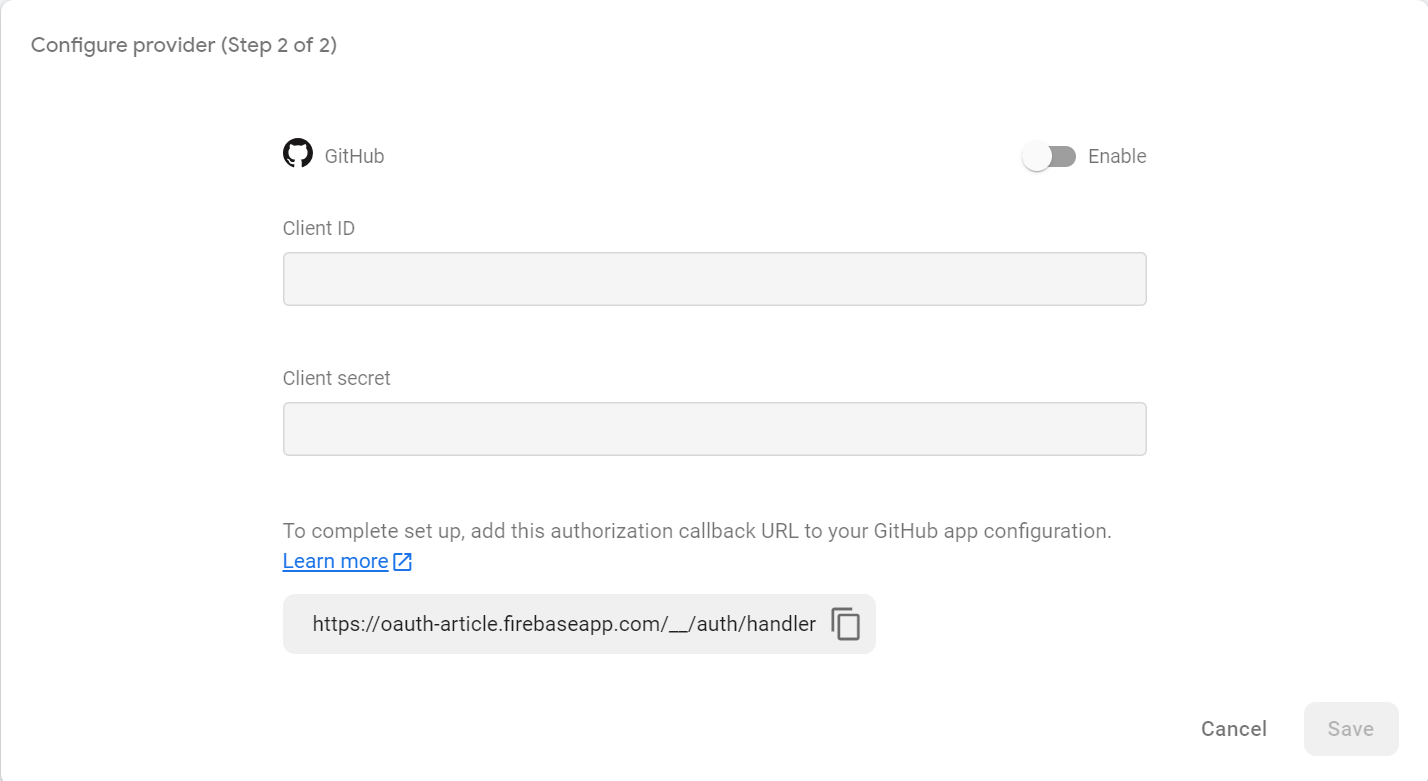 GitHub callback URL
Note: To complete this process, you’d need to have your app already hosted or at least a URL to where your app is going to be hosted.
Next, you’ll be routed to a page where your app has been registered and you have your Client ID and Secret.
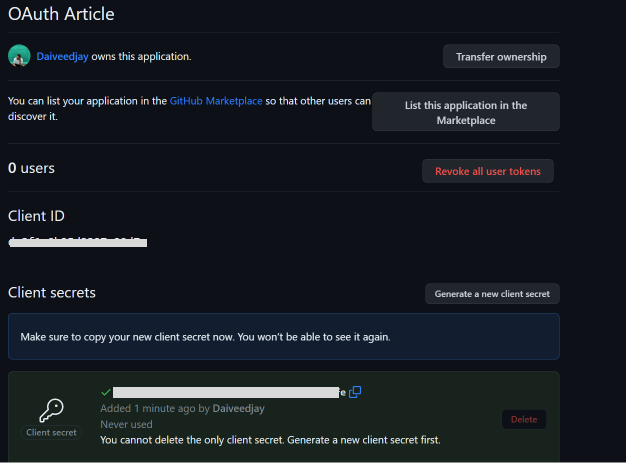 GitHub Client ID and secret Generated
Copy those details and use them to register GitHub as an auth service on Firebase.
 Filling GitHub details on Firebase
How to configure Twitter auth:
Similar to Github, start by logging into your Twitter developer account. If you don’t have one, sign up with the Twitter Developer Portal. It looks something like this:
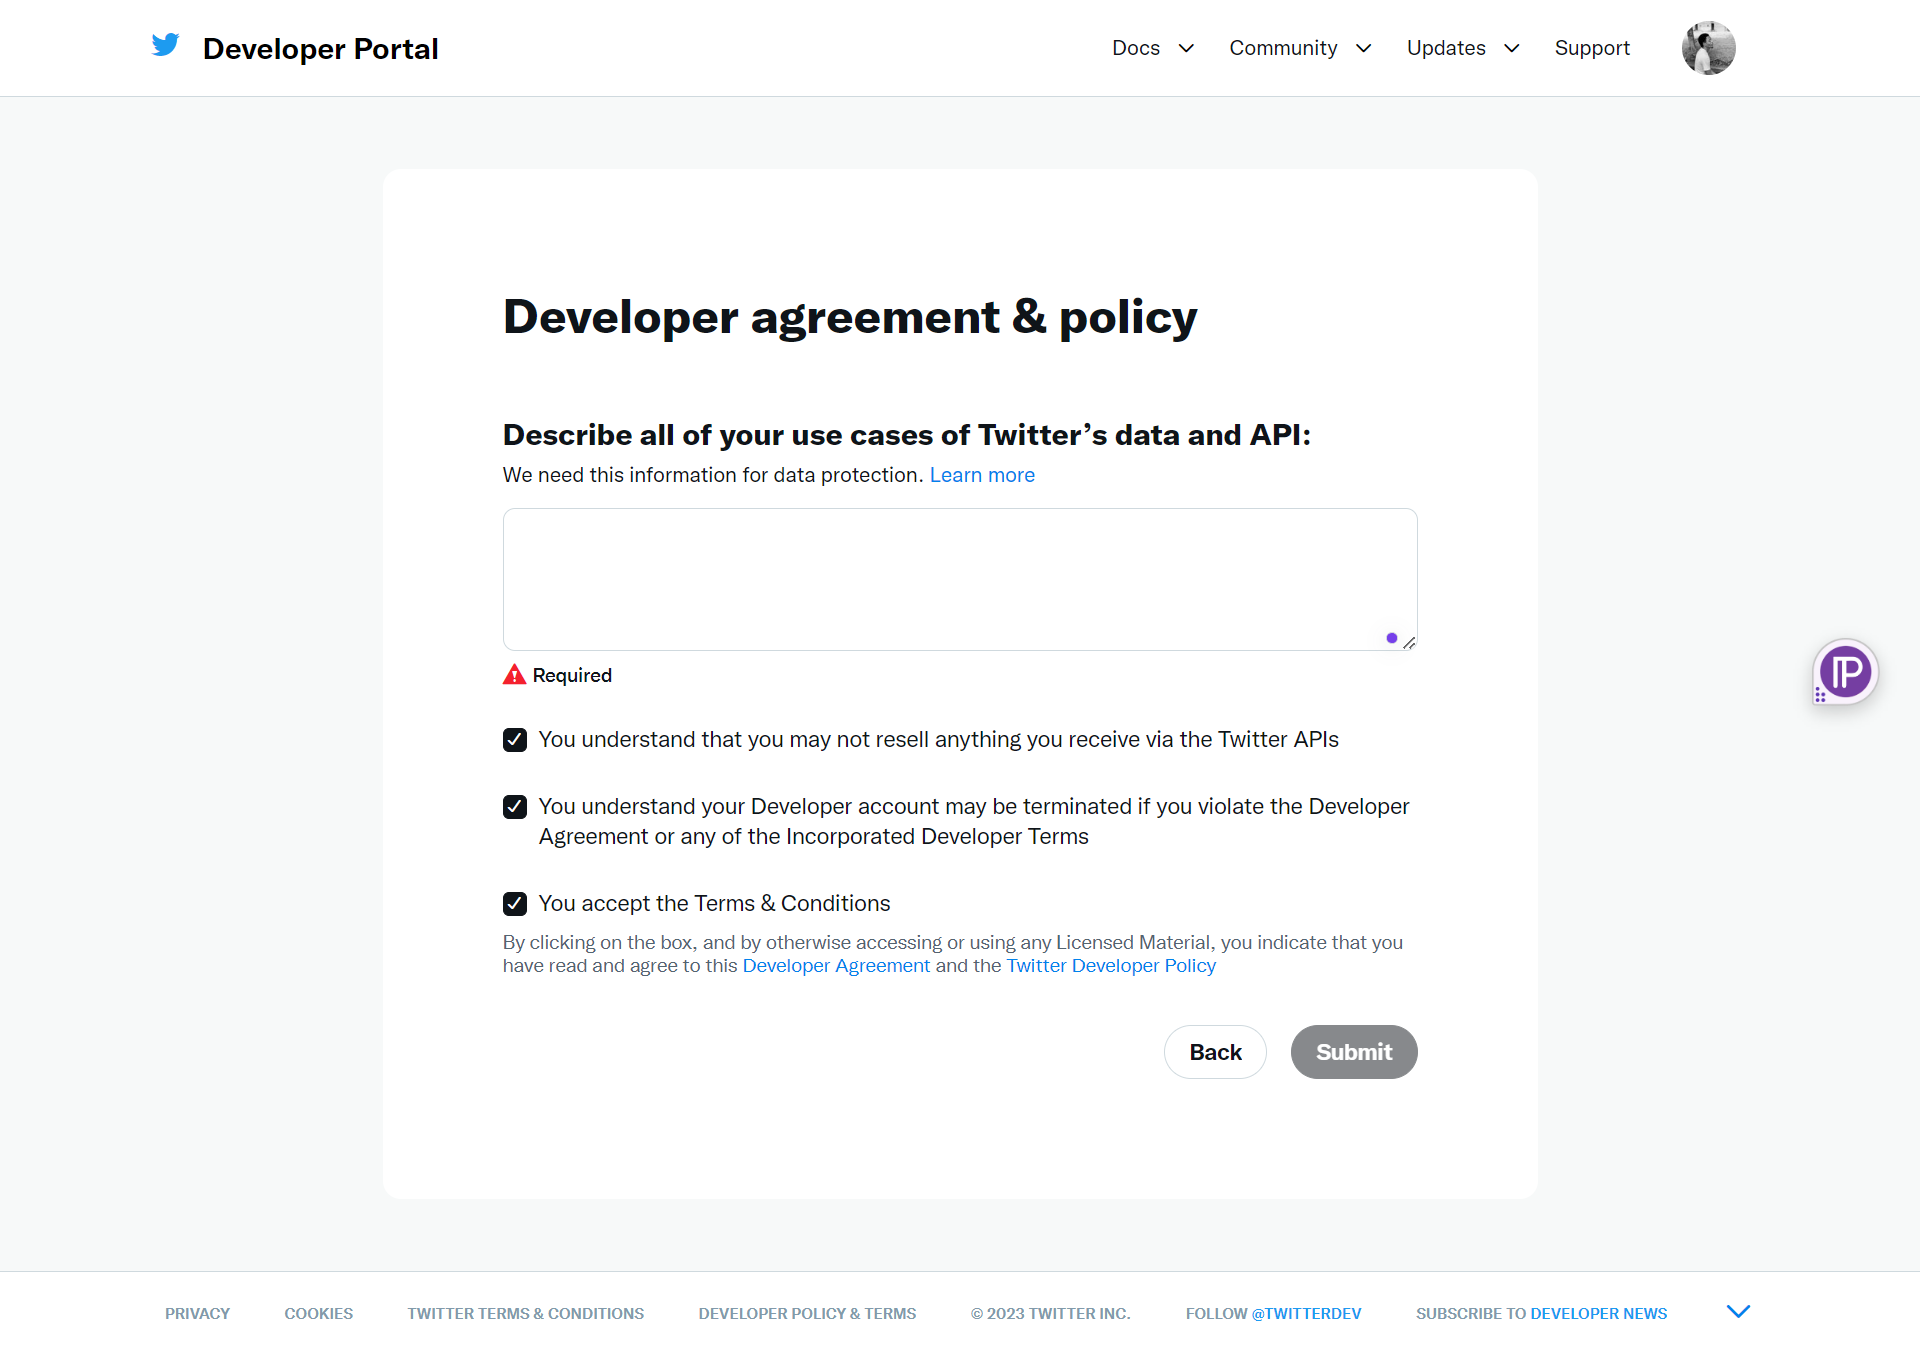 Twitter Developer Signup
After filling in the details, you’ll be routed to the homepage.
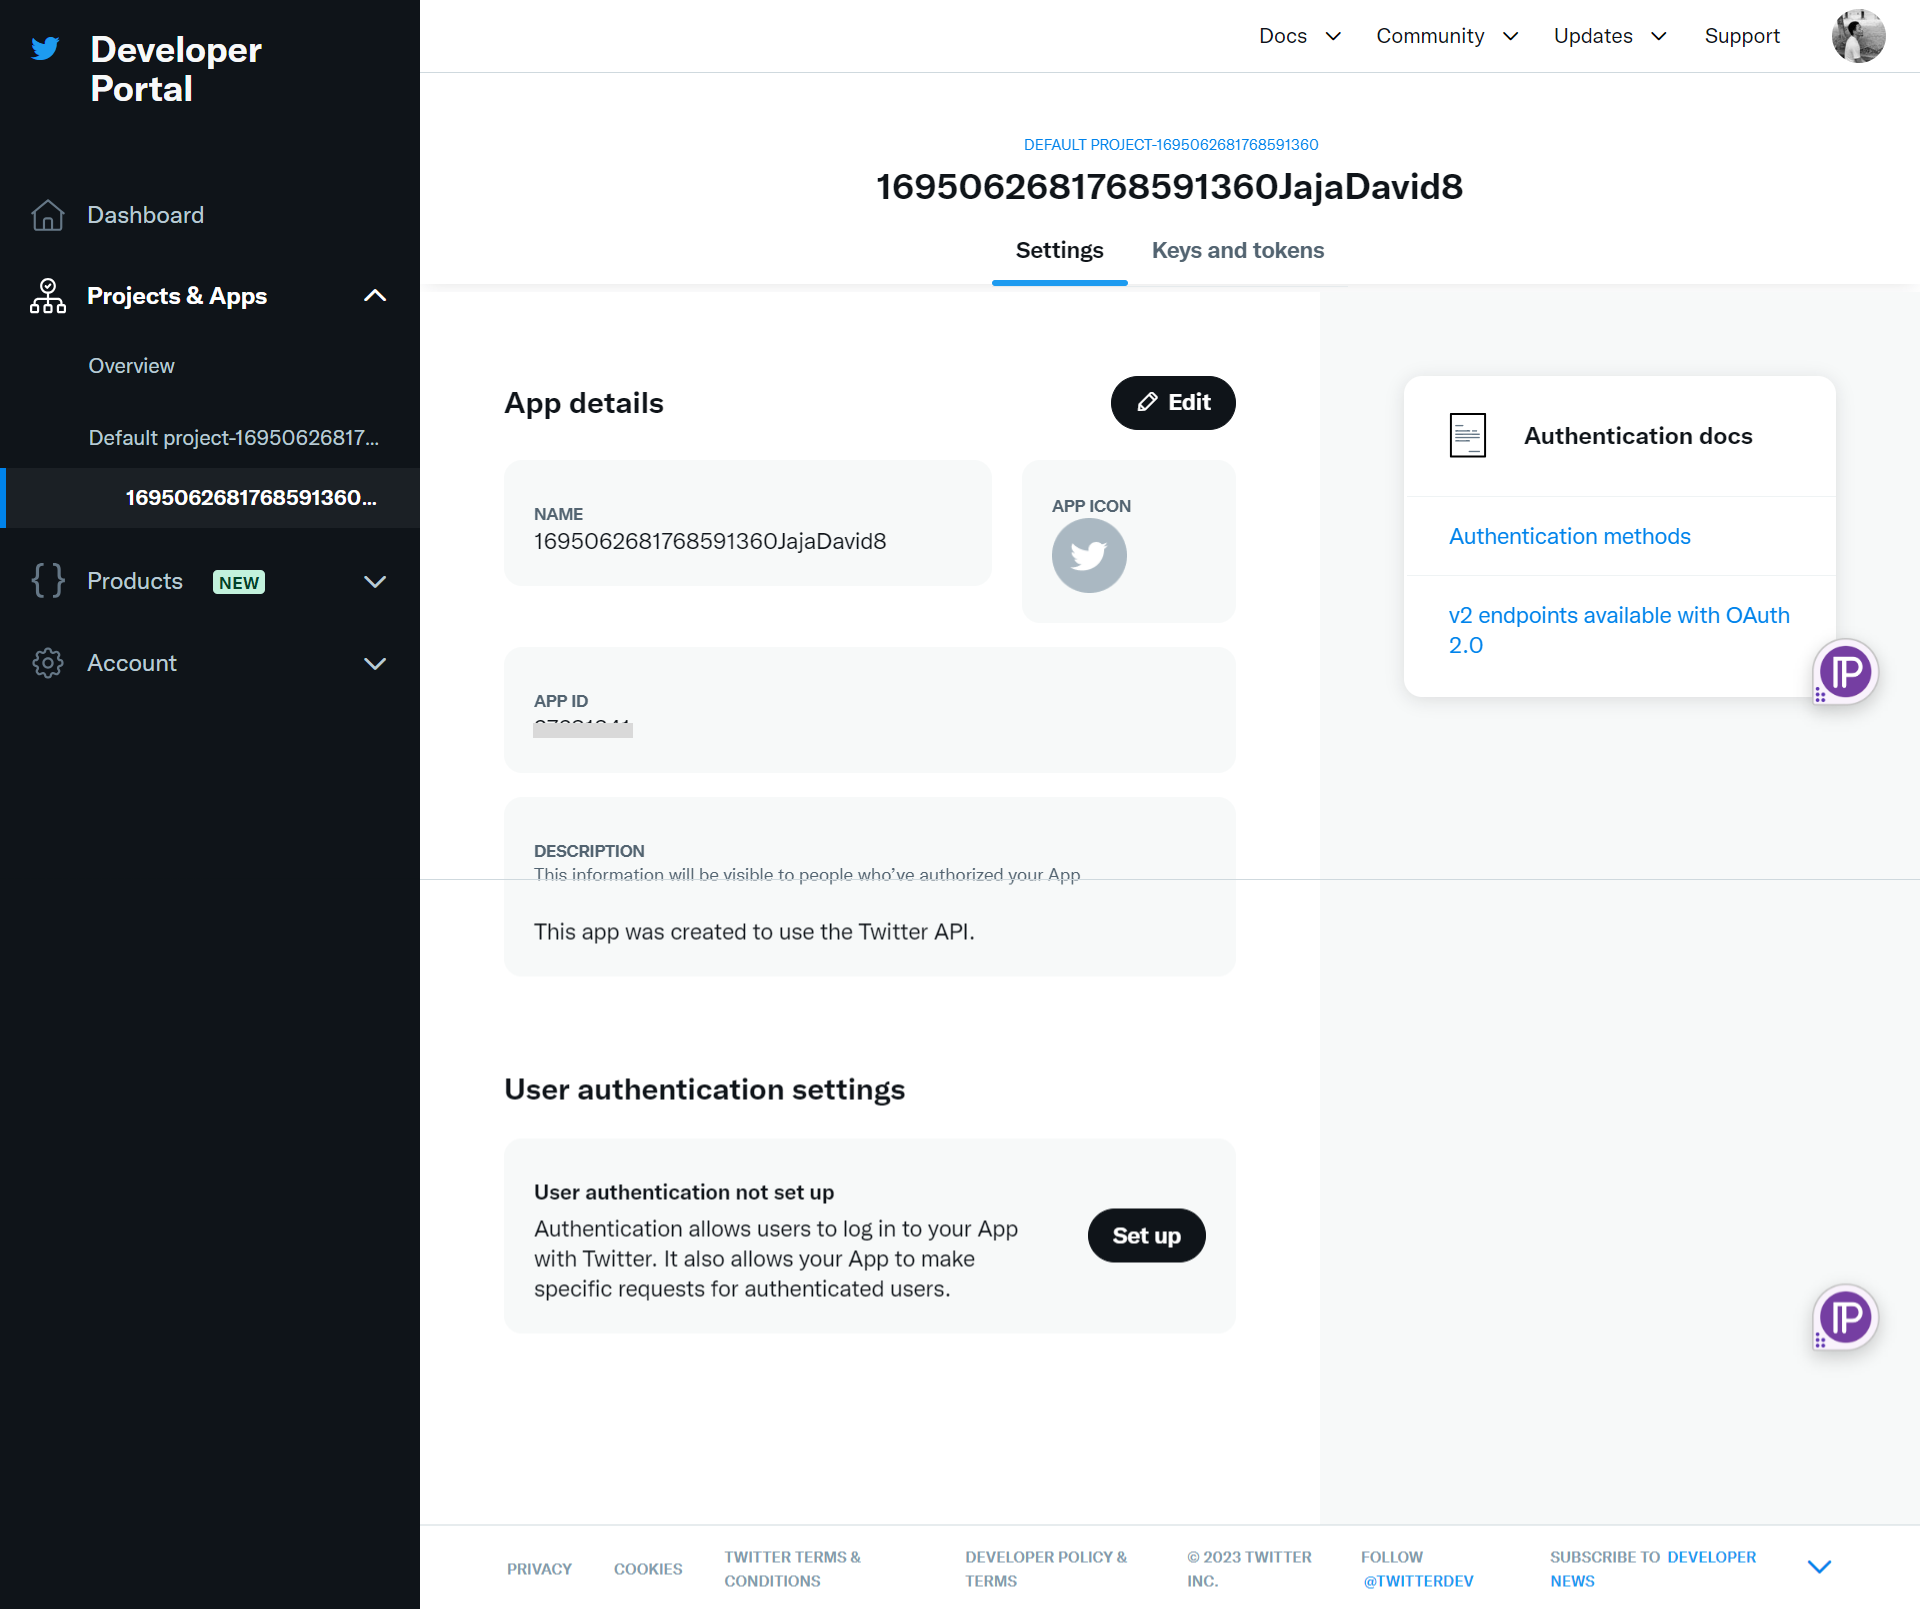 Twitter Dev homepage
Click on your default app, and set up user authentication.
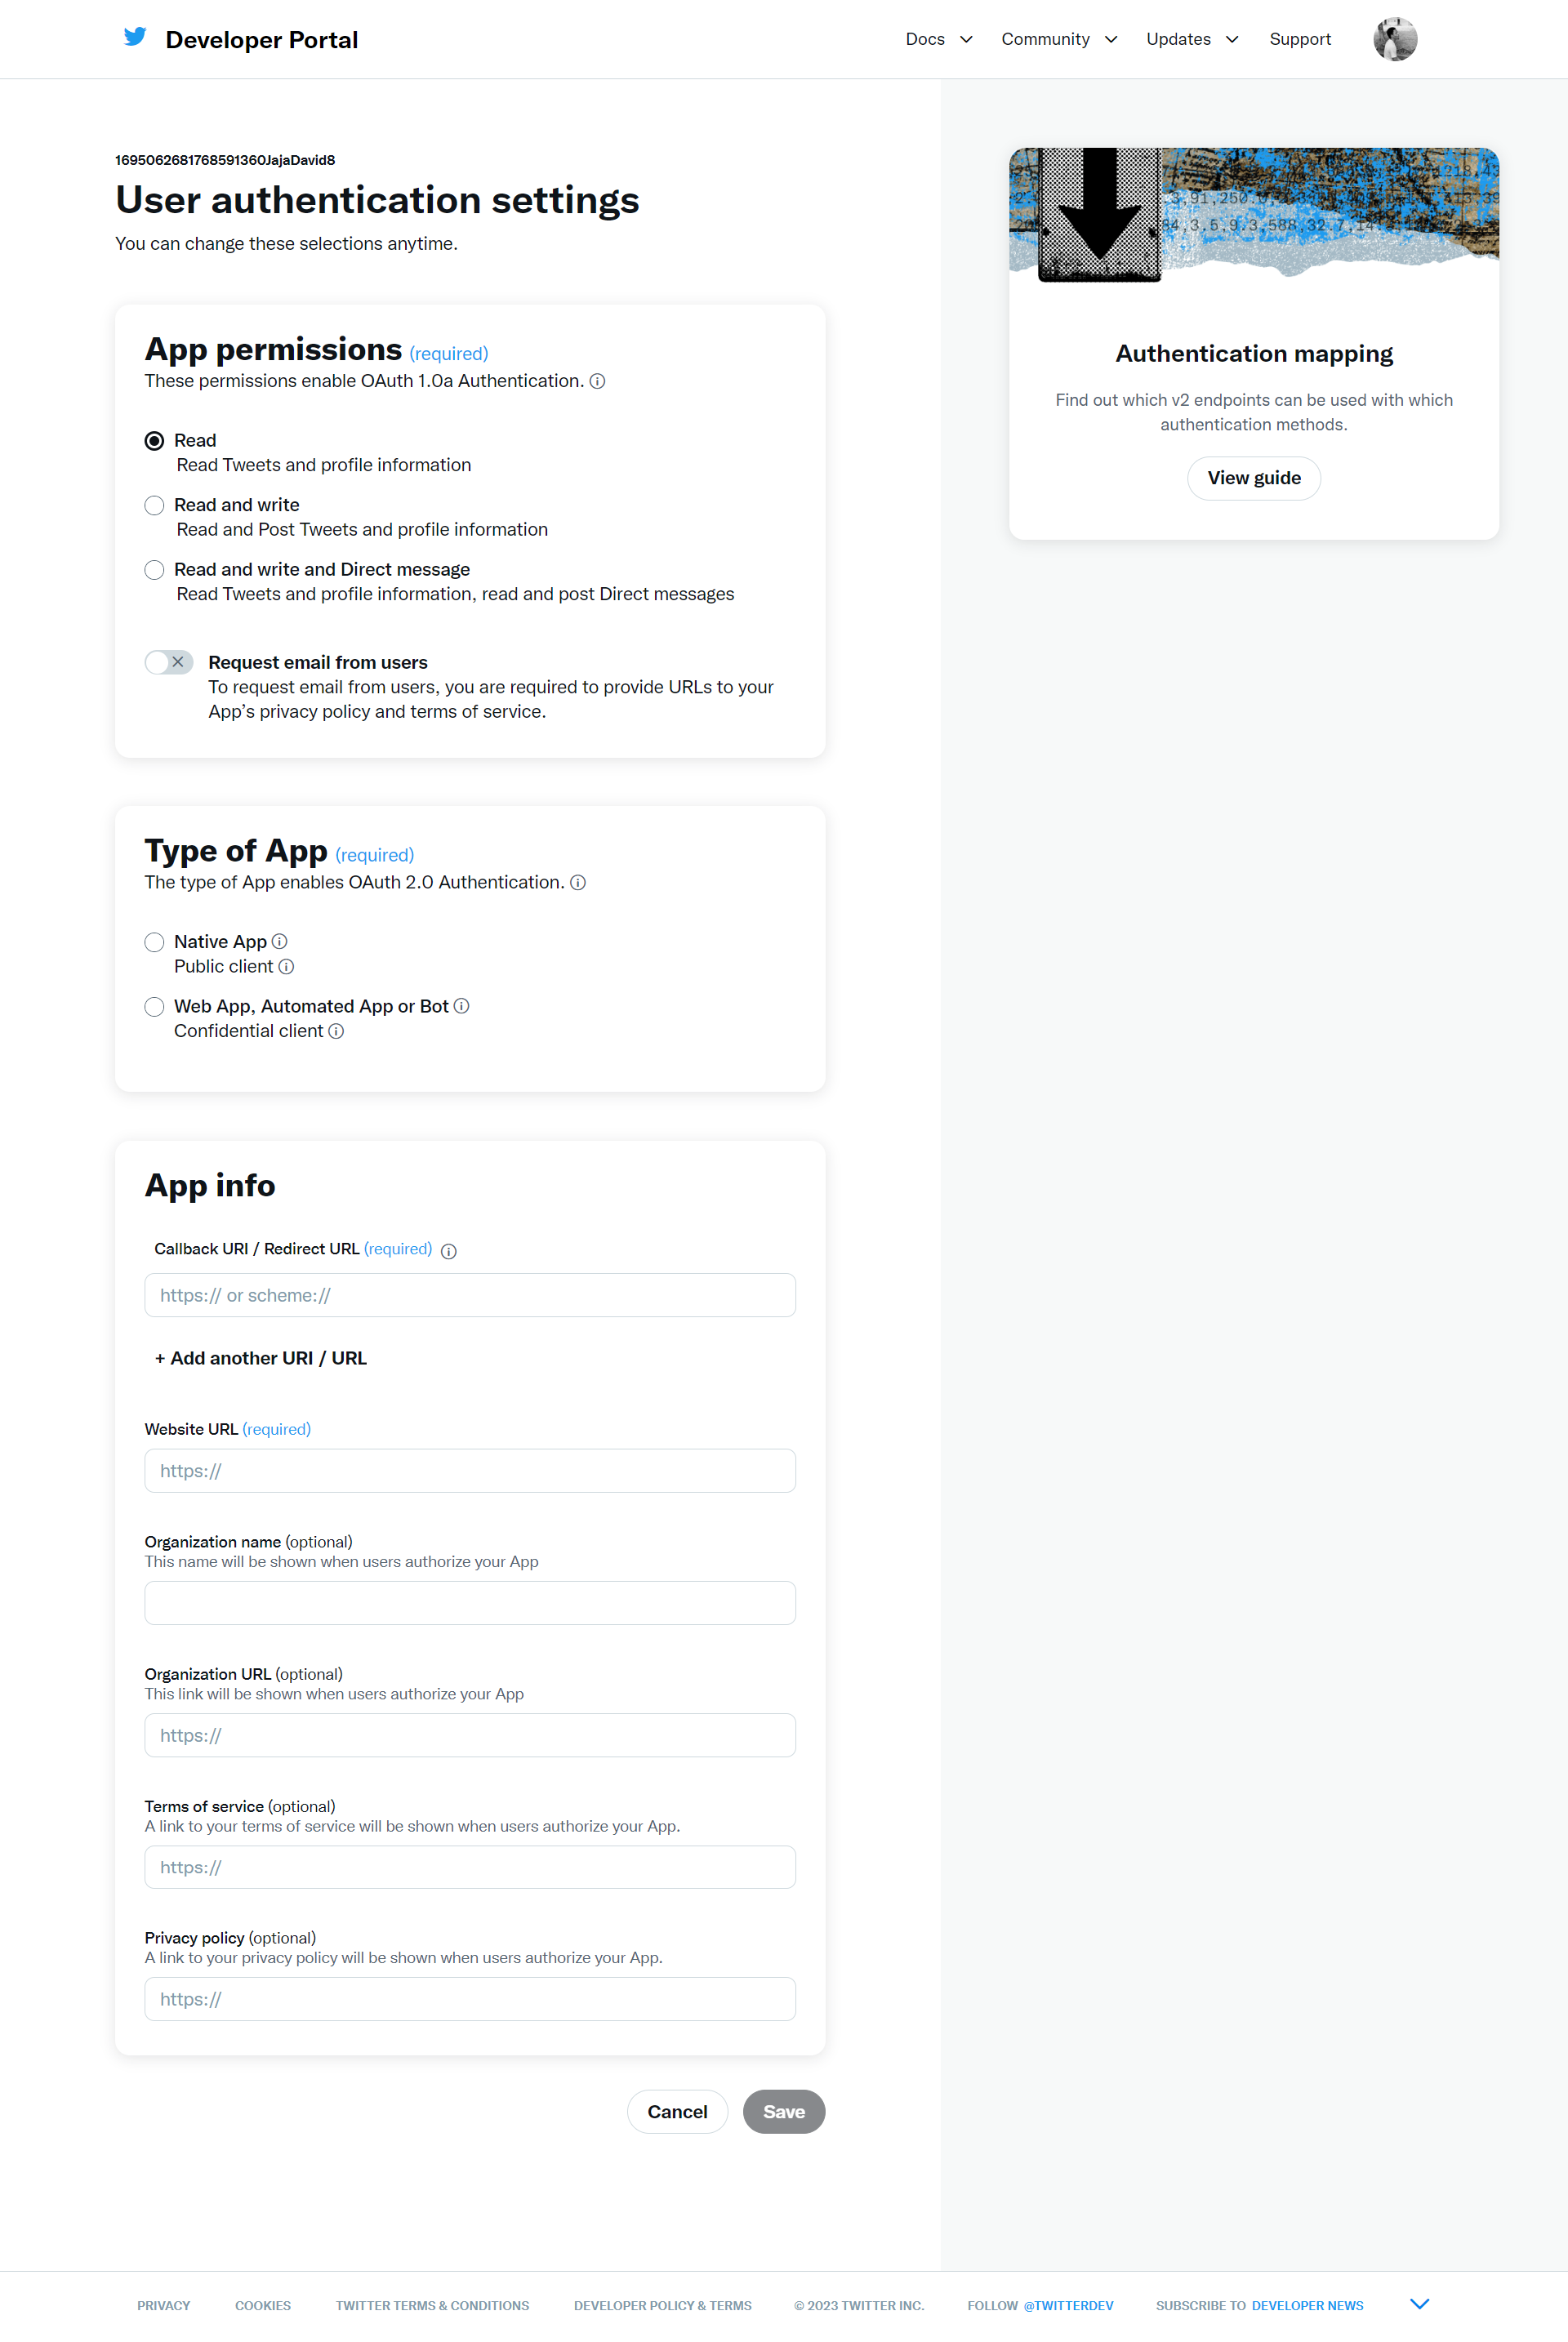 Twitter OAuth app setup
Don’t forget to get the callback URL from Firebase and set the Website URL to the URL where your app is hosted.
After setting it up, navigate to your project’s keys and tokens and generate new ones.
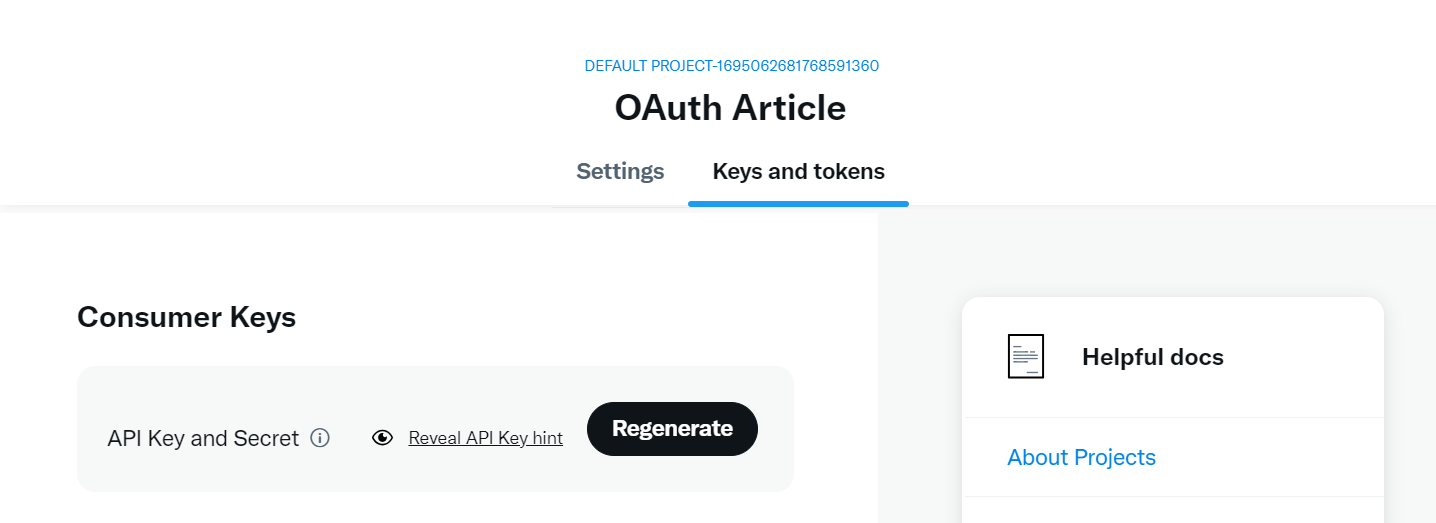 Generating new App Key and Secret
Paste those details back in Firebase to set up Twitter auth.
And with that, your three social media platforms have be set up for authentication.
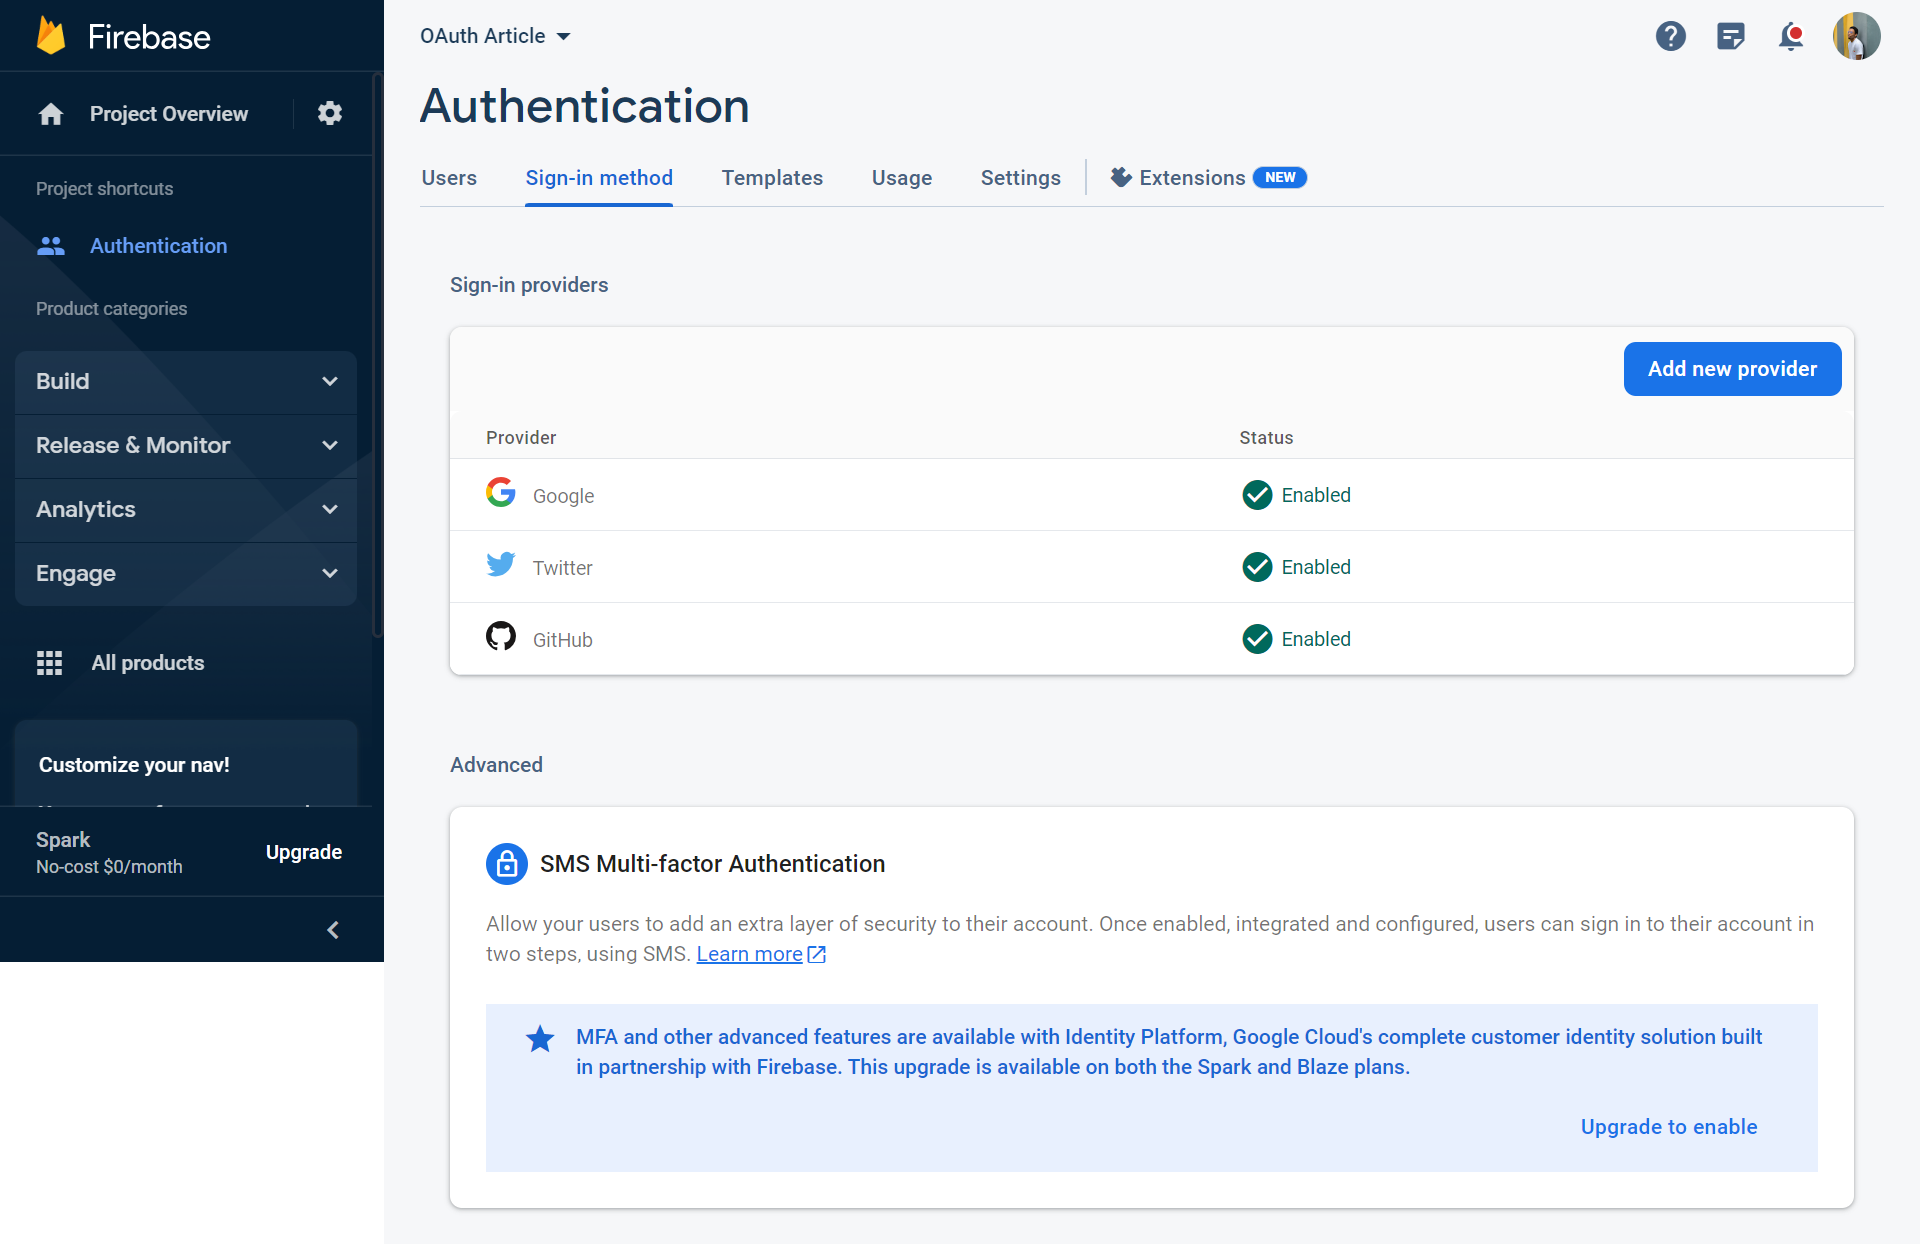 All Auth's set up
How to Set Up Your React App
Now we need to get your React app set up. You'll start by creating a new React app using Vite.
Create a folder on your computer and open that folder with your preferred IDE. Open that IDE’s terminal and run this command:
npm create vite@latest
When the details load, select React and wait for the installation to complete.
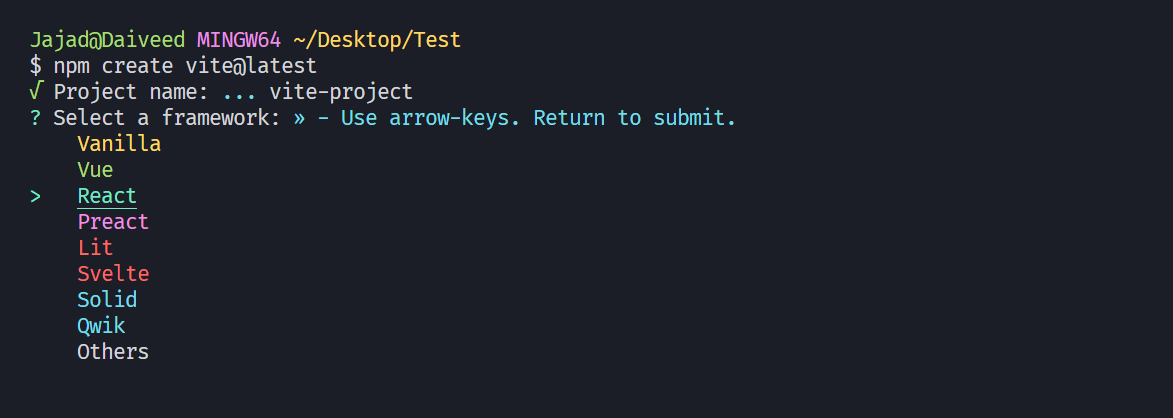 Creating a React App with Vite
You’ll be left with a handful of files and some boilerplate code that you can get rid of.
Next, run npm run dev in the terminal to start a development server on port http://localhost:5173/.
 React app running in browser
To use Firebase in your app, you must first define a Firebase config file. This file contains all the necessary data used to identify your Firebase app.
So create a folder in your src directory called firebase. Then nest a config.js file in that folder and paste the config file details from your Firebase console you saved earlier.
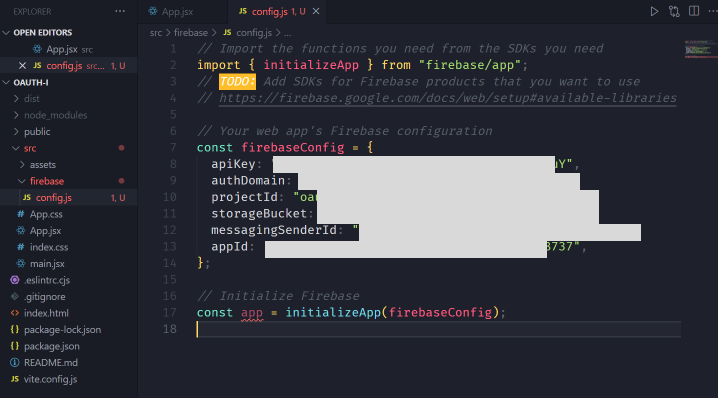 Firebase config details
Finally, install Firebase via your terminal to use its services in your app.
npm i firebase
How to Integrate Social Media Authentication in Your App
Considering how large this section would be, it’ll be divided into several sub-sections.
- Setting up the UI logic for authentication
- Setting up the Authentication logic
- Implementing Global Authentication State
- Creating a custom hook for Social Media Authentication
- Creating Routes and Implementing Routing
- Social Media Authentication
- Route Guarding via the User State
- Creating a useLogout hook
- Testing the logout functionality
How to set up the UI logic for authentication
Create a folder (pages) in the src directory that houses the pages you want in your application.
For this implementation, there will be 2 files in the pages folder, Auth.jsx and Home.jsx. These files will act as the pages the user can see either when authenticated or not.
How to set up the authentication logic
Start by importing and initializing Firebase auth, as well as the social media platforms enabled on Firebase in your config.
import {
  getAuth,
  GoogleAuthProvider,
  GithubAuthProvider,
  TwitterAuthProvider,
} from "firebase/auth";

// Initialize Firebase
const app = initializeApp(firebaseConfig);
const auth = getAuth(app);

const googleProvider = new GoogleAuthProvider();
const githubProvider = new GithubAuthProvider();
const twitterProvider = new TwitterAuthProvider();
Then export these initialized functions to use them in other parts of your application.
export { auth, googleProvider, githubProvider, twitterProvider };
How to implement Global Authentication State
To ensure a consistent authentication state throughout your application, consider using the React Context approach.
Step 1: Create an AuthContext
Start by generating a context folder within your src directory and then create an AuthContext.jsx file within it. In the AuthContext file, import essential hooks from React and Firebase.
import { createContext, useReducer, useEffect, useContext } from "react";
import { auth } from "../firebase/config";

export const AuthContext = createContext();
Step 2: Define a reducer function
Construct a reducer function to manage state changes for authentication-related actions using the following code:
export const authReducer = (state, action) => {
  switch (action.type) {
    // When the action type is "LOGIN", update the state with the new user information
    case "LOGIN":
      return { ...state, user: action.payload };

    // When the action type is "LOGOUT", update the state to remove the user information
    case "LOGOUT":
      return { ...state, user: null };

    // When the action type is "AUTH_IS_READY", update the state with user information and
    // set a state to indicate that the authentication process is complete
    case "AUTH_IS_READY":
      return { user: action.payload, authIsReady: true };

    // For any other action type, return the current state without any changes
    default:
      return state;
  }
};
Step 3: Create AuthContextProvider Component
Create a provider component that wraps your entire App component, using the reducer for authentication state management.
import { useEffect, useReducer } from "react";
import { onAuthStateChanged } from "firebase/auth";


// Authentication context provider component
export const AuthContextProvider = ({ children }) => {
  // Initialize authentication state using a reducer
  const [state, dispatch] = useReducer(authReducer, {
    user: null,
    authIsReady: false,
  });

  // Effect to determine initial authentication state and update context
  useEffect(() => {
    // Subscribe to authentication state changes
    const unsub = onAuthStateChanged(auth, (user) => {
      // Dispatch an action to update the state with the user information
      dispatch({ type: "AUTH_IS_READY", payload: user });

      // Unsubscribe to avoid further unnecessary updates
      unsub(); // Unsubscribe once the initial auth state is determined
    });
  }, []);

  // Provide authentication state and dispatch function to children components
  return (
    <AuthContext.Provider value={{ ...state, dispatch }}>
      {children}
    </AuthContext.Provider>
  );
};
Step 4: Implement useAuthContext custom hook
You can simplify access to the authentication context with a custom hook, like this:
import { useContext } from "react";

// Custom hook to access the authentication context
export function useAuthContext() {
  // Get the authentication context from the nearest AuthContextProvider
  const context = useContext(AuthContext);

  // Check if the context was successfully obtained
  if (!context) {
    throw Error("useAuthContext must be used inside an AuthContextProvider");
  }

  // Return the authentication context object for use in components
  return context;
}
How to integrating the AuthContextProvider
Finally, integrate the AuthContextProvider into your main application setup
import React from "react";
import ReactDOM from "react-dom/client";
import App from "./App.jsx";
import "./index.css";
import { AuthContextProvider } from "./context/AuthContext.jsx";

ReactDOM.createRoot(document.getElementById("root")).render(
  <React.StrictMode>
    <AuthContextProvider>
      <App />
    </AuthContextProvider>
  </React.StrictMode>
);
With that, all parts of your app can access the context values from the AuthContext.
How to create a custom hook for Social Media Authentication
Firebase authentication processes are similar in pattern and code structure. So it's a good idea to follow the DRY principle and create a utility hook that performs authentication for all social media platforms. This allows you to reuse the same code for each platform, making your code more efficient and easier to maintain.
Here is the step-by-step process to follow to create a custom hook for social media authentication.
Step 1: Create the custom hook
In your source directory, establish a hooks folder and within it, create a file named useSocialSignup.jsx.
Step 2: Import dependencies
Import the necessary functions from React and Firebase into your useSocialSignup file.
import { useEffect, useState } from "react";
import { signInWithPopup } from "firebase/auth";
import { auth } from "../firebase/config";
import { useAuthContext } from "../context/AuthContext";
Step 3: Define the hook function
Develop the useSocialSignup function, which takes a provider as a parameter and returns an object containing an error state, pending state, and the sign-in function for the social provider.
export const useSocialSignup = (provider) => {
  // State variables to manage sign-up process
  const [error, setError] = useState(null);
  const [isPending, setIsPending] = useState(false);
  const [isCancelled, setIsCancelled] = useState(false);

  // Accessing the authentication context's dispatch function
  const { dispatch } = useAuthContext();

  // Function to initiate the social sign-up process
  const signInWithSocial = async () => {
    setError(null);
    setIsPending(true);

    try {
      const res = await signInWithPopup(auth, provider);

      dispatch({ type: "LOGIN", payload: res.user });

      if (!isCancelled) {
        setIsPending(false);
        setError(null);
      }
    } catch (err) {
      setError(err.message);
      setIsPending(false);
    }
  };

  // Effect hook to set isCancelled to true when component unmounts
  useEffect(() => {
    return () => setIsCancelled(true);
  }, []);

  // Return values and functions for component usage
  return { error, isPending, signInWithSocial };
};
This hook encapsulates the process of signing in with social providers. It manages error, pending, and cancellation states, interacts with Firebase authentication, and utilizes the authentication context to dispatch actions.
How to create routes and implementing routing
To ensure smooth navigation and user experience, setting up routes becomes crucial after implementing authentication logic. These well-organized steps guide you through the process.
Step 1: Install react-router-dom
Install the react-router-dom package, a popular choice for managing routing in React applications.
npm i react-router-dom
Step 2: Import dependencies
In your App.jsx file, import necessary components and functions for routing.
import { BrowserRouter, Navigate, Route, Routes } from "react-router-dom";
import "./App.css";
import Home from "./pages/Home";
import Auth from "./pages/Auth";
Step 3: Define routes
Wrap your application content in a BrowserRouter component and use the Routes component to define your routes. Utilize the Route component to map each route path to its corresponding component.
function App() {
  return (
    <BrowserRouter>
      <Routes>
        <Route path="/" element={<Home />} />
        <Route path="/auth" element={<Auth />} />
      </Routes>
    </BrowserRouter>
  );
}
At the moment, you can freely navigate between routes, like so:
 Moving between Routes without Auth
Social Media Authentication
To ensure your efforts haven't been in vain, head over to the Auth.jsx to implement authentication.
Step 1: Import dependencies
In your Auth.jsx file, start by importing necessary providers, context, and the custom signup hook.
import {
  googleProvider,
  twitterProvider,
  githubProvider,
} from "../firebase/config";
import { useSocialSignup } from "../hooks/useSocialSignup";
import {useEffect} from ‘react’

import {useAuthContext} from “../context/AuthContext”
Step 2: Create instances of the hook
Create instances of the useSocialSignup custom hook for each authentication provider.
const google = useSocialSignup(googleProvider);
const twitter = useSocialSignup(twitterProvider);
const github = useSocialSignup(githubProvider);
Step 3: Add buttons for social sign-up
Create buttons for each social sign-up option (Google, Twitter, GitHub) and attach onClick event handlers to call the signInWithSocial function from the respective hook.
return (
  <div className="utility__page">
    <h1>Welcome to my Auth Page</h1>

    <button onClick={google.signInWithSocial}>
      <img src={GoogleIcon} alt="" />
      <span>Google</span>
    </button>

    <button onClick={twitter.signInWithSocial}>
      <img src={TwitterIcon} alt="" />
      <span>Twitter</span>
    </button>

    <button onClick={github.signInWithSocial}>
      <img src={GithubIcon} alt="" />
      <span>GitHub</span>
    </button>
  </div>
);
Step 4: Apply styling
You can use the provided CSS below to style your components for a clean and organized appearance.
* {
  box-sizing: border-box;
  margin: 0;
  padding: 0;
}

html {
  font-size: 62.5%;
  color: #121212;
}

.utility__page {
  display: flex;
  width: 100%;
  height: 100vh;
  justify-content: center;
  align-items: center;
  font-family: "Segoe UI", Tahoma, Geneva, Verdana, sans-serif;
  row-gap: 2rem;
  flex-direction: column;
  background: #e2dbd9;
}

h1 {
  font-size: 5rem;
}

button {
  padding: 1rem 4rem;
  font-size: 2rem;
  border: none;
  cursor: pointer;
  border-radius: 5px;
  display: flex;
  justify-content: center;
  align-items: center;
  gap: 1rem;
}

button img {
  width: 20px;
  height: 20px;
}

.user {
  font-size: 3rem;
  display: flex;
  align-items: center;
  column-gap: 1rem;
}

.logout {
  background: rgb(208, 84, 84);
  color: #fff;
}

.profile_img {
  width: 5rem;
  height: 5rem;
  border-radius: 50%;
}
At the moment, your auth page looks something like this:
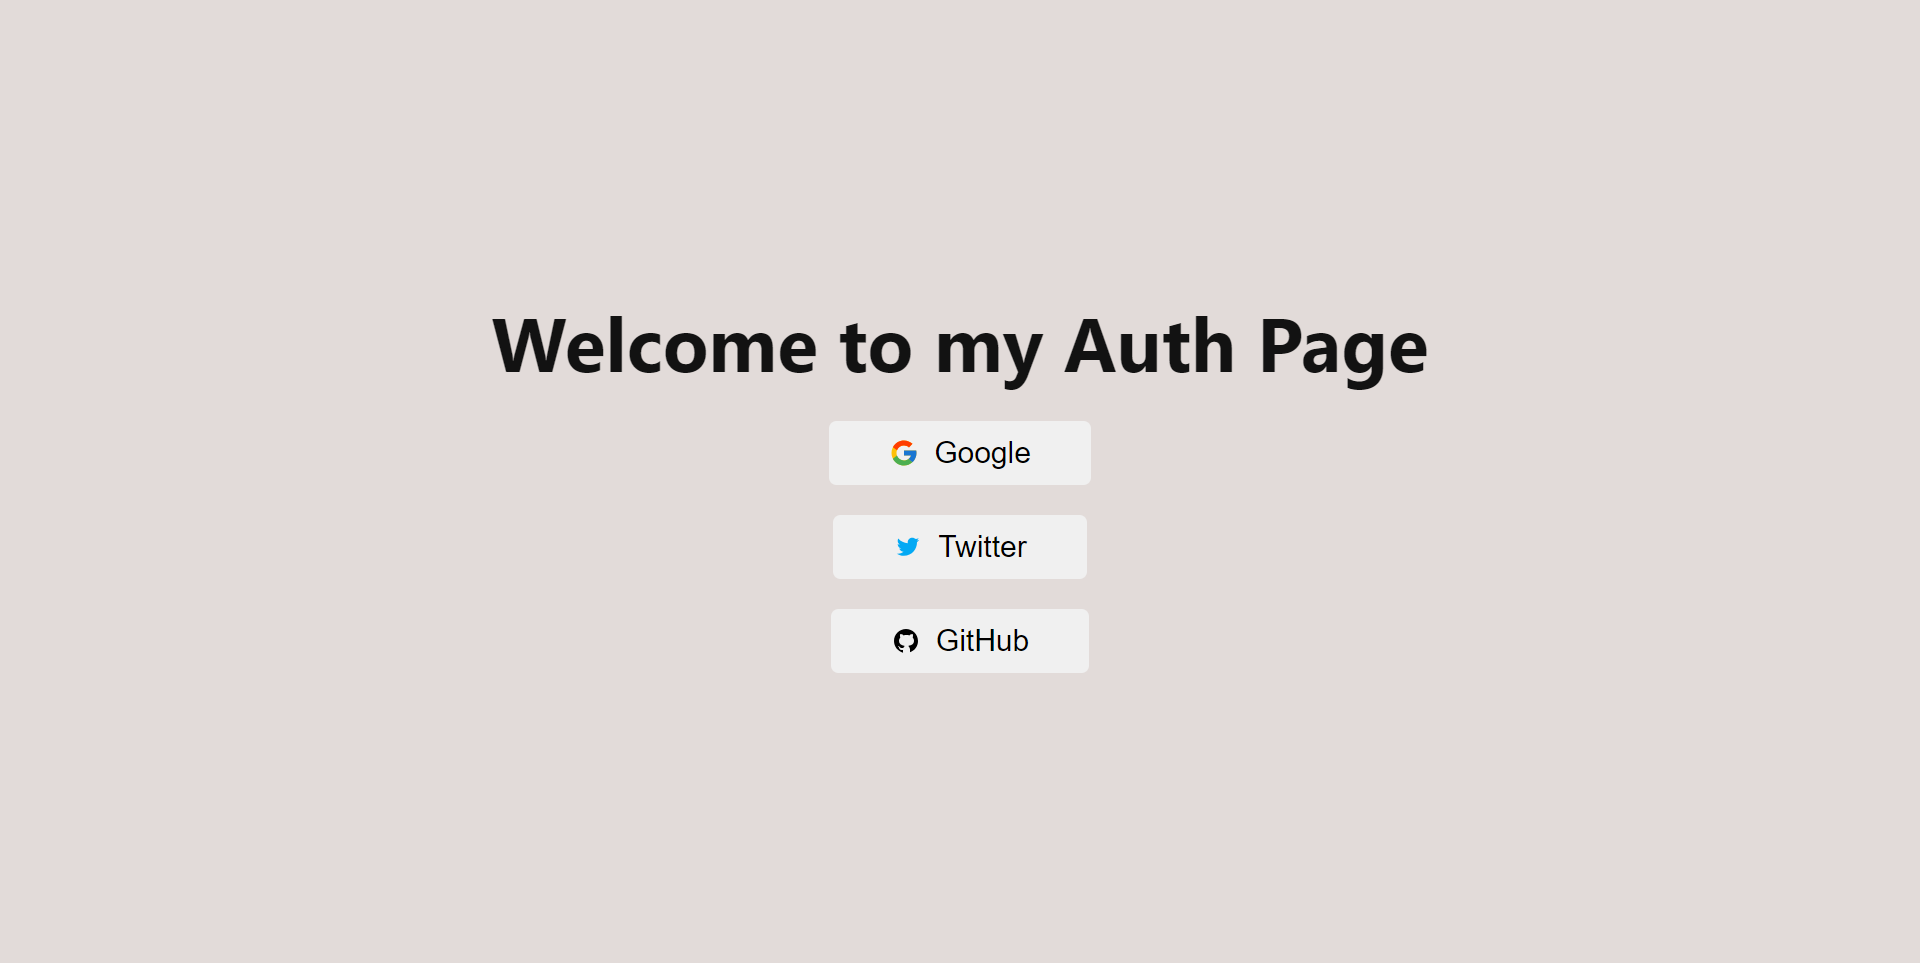 Auth page after applying styling
Step 5: Test the authentication
To test authentication, import the user from your AuthContext and log it to the console using a useEffect.
  const { user } = useAuthContext();
  useEffect(() => console.log(user), [user]);
Testing the auth now gives the following:
 Authentication confirmed in the console via the user object
As you can see, you’ve successfully logged a user in using Social Media Authentication. Kudos!
To confirm, head over to your Firebase auth page and check for valid users.
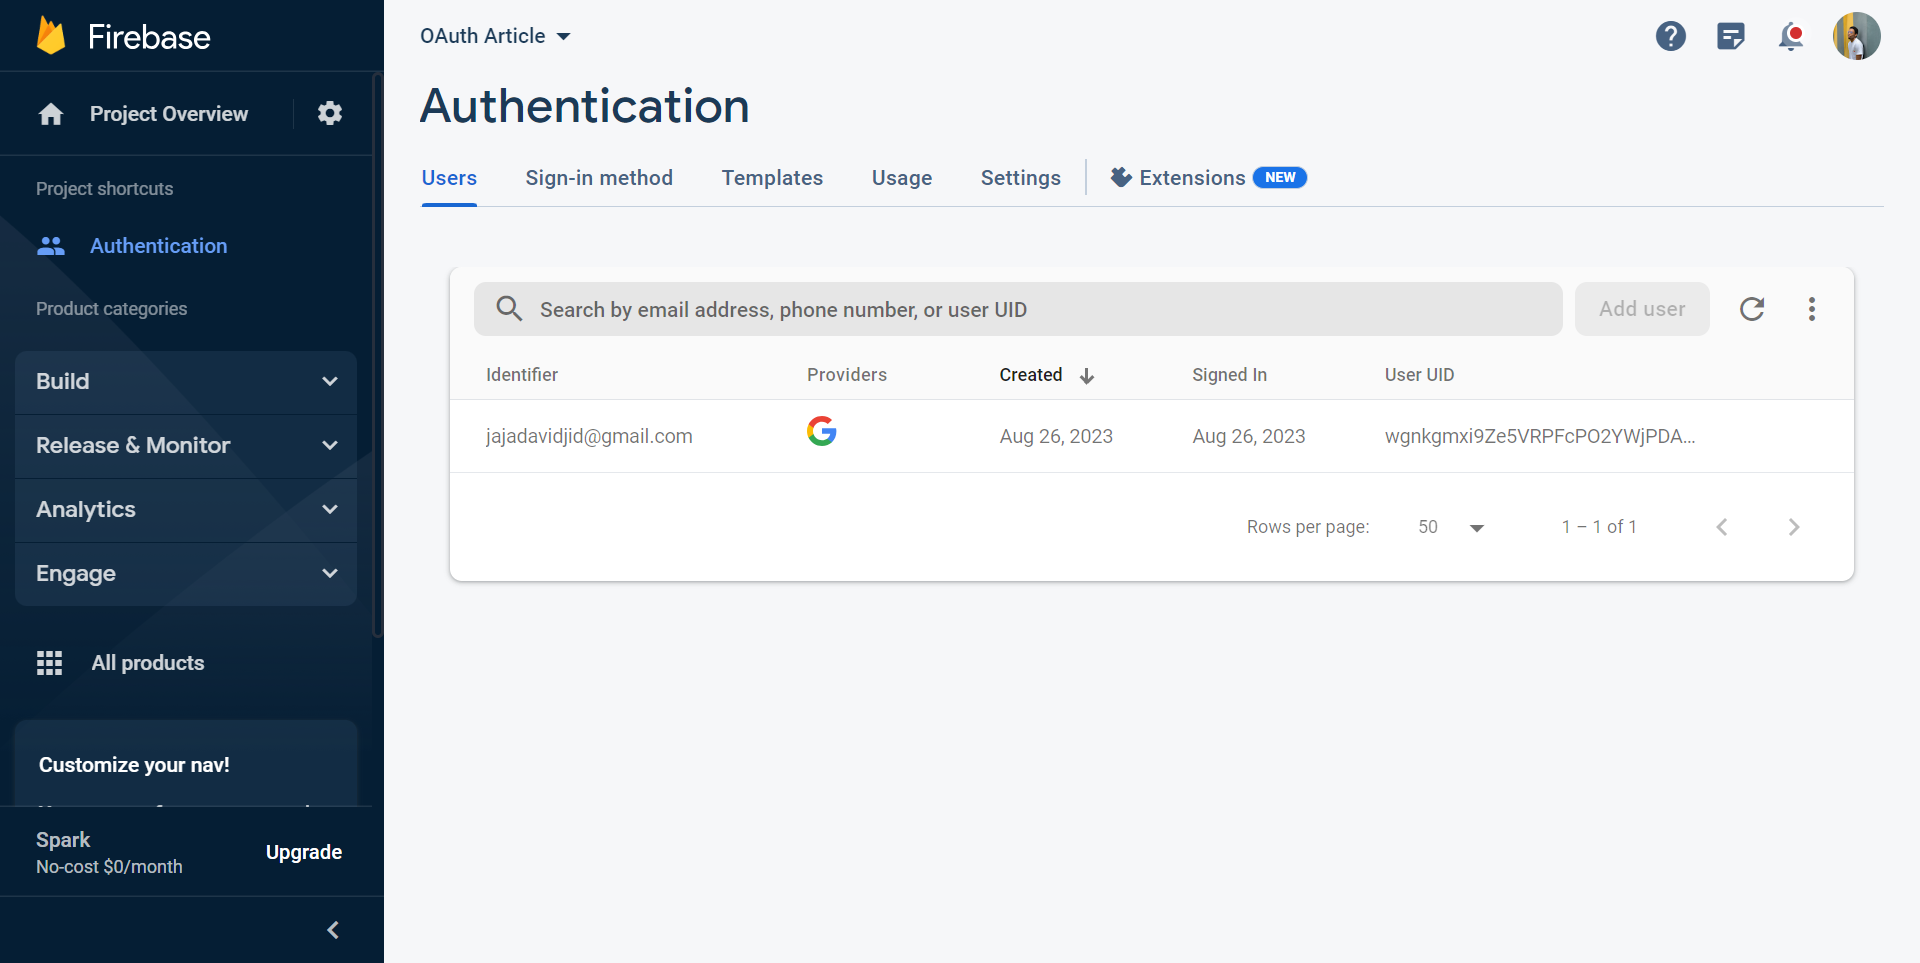 Confirming signed up user on Firebase
Feel free to try other login methods as they all work the same.
Route Gaurding via the User State
To prevent unauthorized access, set up route guards that check the user's authentication state in your App.jsx file.
const { user, authIsReady } = useAuthContext();

if (!authIsReady) {
  return null; // Return null while waiting for authIsReady
}

return (
  <BrowserRouter>
    <Routes>
      {user ? (
        <>
          {/* Authenticated routes */}
          <Route path="/" element={<Home />} />
          {/* Route guards */}
          <Route path="*" element={<Navigate to="/" />} />
        </>
      ) : (
        <>
          {/* Authentication routes */}
          <Route path="/auth" element={<Auth />} />
          {/* Route guards */}
          <Route path="*" element={<Navigate to="/auth" />} />
        </>
      )}
    </Routes>
  </BrowserRouter>
);
 Routed to home page after adding route guards
As you can see, you’ve been routed to the home page, and even if you attempt to go the auth page, you’d be routed back here.
How to customize the home page
For the home page, fetch the user's details and display them if a user is authenticated.
import { useAuthContext } from "../context/AuthContext";
export default function Home() {
const { user } = useAuthContext();
return (
<div className="utility__page ">
<h1> Home Page</h1>
{user && (
<>
<div className="user">
<p> You're logged in as: </p>
<span>{user.displayName} </span>
<img className="profile_img" src={user.photoURL} alt=""/>
</div>
</>
)}
</div>
);
}
 Home page showing custom user details
And voilà! You’ve been able to fetch some details about that user based on the info on the social media they used to log in.
How to create a useLogout hook
The final step to complete your authentication process is to provide users with the ability to log out of your application. Here's how to create a useLogout hook:
Step 1: Create the hook
Create a new file called useLogout.jsx in your hooks folder. Import the necessary hooks and functions.
import { useEffect, useState } from "react";
import { auth } from "../firebase/config";
import { signOut } from "firebase/auth";
import { useAuthContext } from "../context/AuthContext";
Step 2: Create the hook states
Create states to manage the logout process, including error, pending, and cancellation states.
// Error state for potential errors during logout
const [error, setError] = useState(null);
// State to indicate if logout is in progress
const [isPending, setIsPending] = useState(false);
// State to track if the operation is cancelled
const [isCancelled, setIsCancelled] = useState(false);
Step 3: Extract the dispatch function from the authentication context
This function will be used to indicate a logout action has been called:
const { dispatch } = useAuthContext();
Step 4: Create the hook logic
Use a try-catch block create the logic of logging a user out:
try {
// Initiating the logout using Firebase's signOut function
    await signOut(auth);
    dispatch({ type: "LOGOUT" }); // Dispatching a LOGOUT action
// If the operation wasn't cancelled, reset pending state and error
   if (!isCancelled) {
       setIsPending(false); // Resetting isPending after the asynchronous call completes
       setError(null); // Clearing any error that might have occurred
     }
   } catch (err) {
      // Handling logout error
     if (!isCancelled) {
        console.log(err.message); // Logging the error message
        setError(err.message); // Setting the error state in case of an error
        setIsPending(false); // Resetting pending state if an error occurs
   }
}
Step 5: How to handle unmounting
In the case where the component is unmounted (the page closes or there’s a route change), you’ll want to handle that occurrence to prevent errors.
// Effect hook to set isCancelled to true when component unmounts
   useEffect(() => {
       return () => setIsCancelled(true); // The cleanup function runs when the component unmounts }, []);
Step 5: Exporting values
Return the relevant values and functions for other components to use.
return { logout, error, isPending };
For ease of accesibility, here’s the full useLogout hook.
// Importing necessary hooks and functions
import { useEffect, useState } from "react";
import { auth } from "../firebase/config"; // Importing Firebase auth instance
import { signOut } from "firebase/auth"; // Importing signOut function from Firebase
import { useAuthContext } from "../context/AuthContext"; // Importing the custom hook to access the authentication context

// Custom hook for handling user logout
export const useLogout = () => {
  // State variables to manage logout process
  const [error, setError] = useState(null); // Error state for potential errors during logout
  const [isPending, setIsPending] = useState(false); // State to indicate if logout is in progress
  const [isCancelled, setIsCancelled] = useState(false); // State to track if the operation is cancelled
  const { dispatch } = useAuthContext(); // Accessing the authentication context's dispatch function

  // Function to initiate the logout process
  const logout = async () => {
    setError(null); // Clearing any previous errors
    setIsPending(true); // Indicating that the logout process is in progress

    try {
      // Initiating the logout using Firebase's signOut function
      await signOut(auth);
      dispatch({ type: "LOGOUT" }); // Dispatching a LOGOUT action

      // If the operation wasn't cancelled, reset pending state and error
      if (!isCancelled) {
        setIsPending(false); // Resetting isPending after the asynchronous call completes
        setError(null); // Clearing any error that might have occurred
      }
    } catch (err) {
      // Handling logout error
      if (!isCancelled) {
        console.log(err.message); // Logging the error message
        setError(err.message); // Setting the error state in case of an error
        setIsPending(false); // Resetting pending state if an error occurs
      }
    }
  };

  // Effect hook to set isCancelled to true when component unmounts
  useEffect(() => {
    return () => setIsCancelled(true); // The cleanup function runs when the component unmounts
  }, []);

  // Returning the relevant values and functions for component usage
  return { logout, error, isPending };
};
How to test the logout functionality
In your Home.jsx component, import the useLogout hook and extract the logout function. Attach the logout function to a button's onClick event to enable users to log out.
import { useLogout } from "../hooks/useLogout";
export default function Home() {
const { user } = useAuthContext();
const { logout } = useLogout(); //logout function extracted
return (
<div className="utility__page ">
<h1> Home Page</h1>
{user && (
<>
<div className="user">
<p> You're logged in as: </p>
<span>{user.displayName} </span>
<img className="profile_img" src={user.photoURL} alt="" />
</div>
//logout function used
<button className="logout" onClick={logout}>
Log out
</button>
</>
)}
</div>
);
}
At the moment, your home page looks like this;
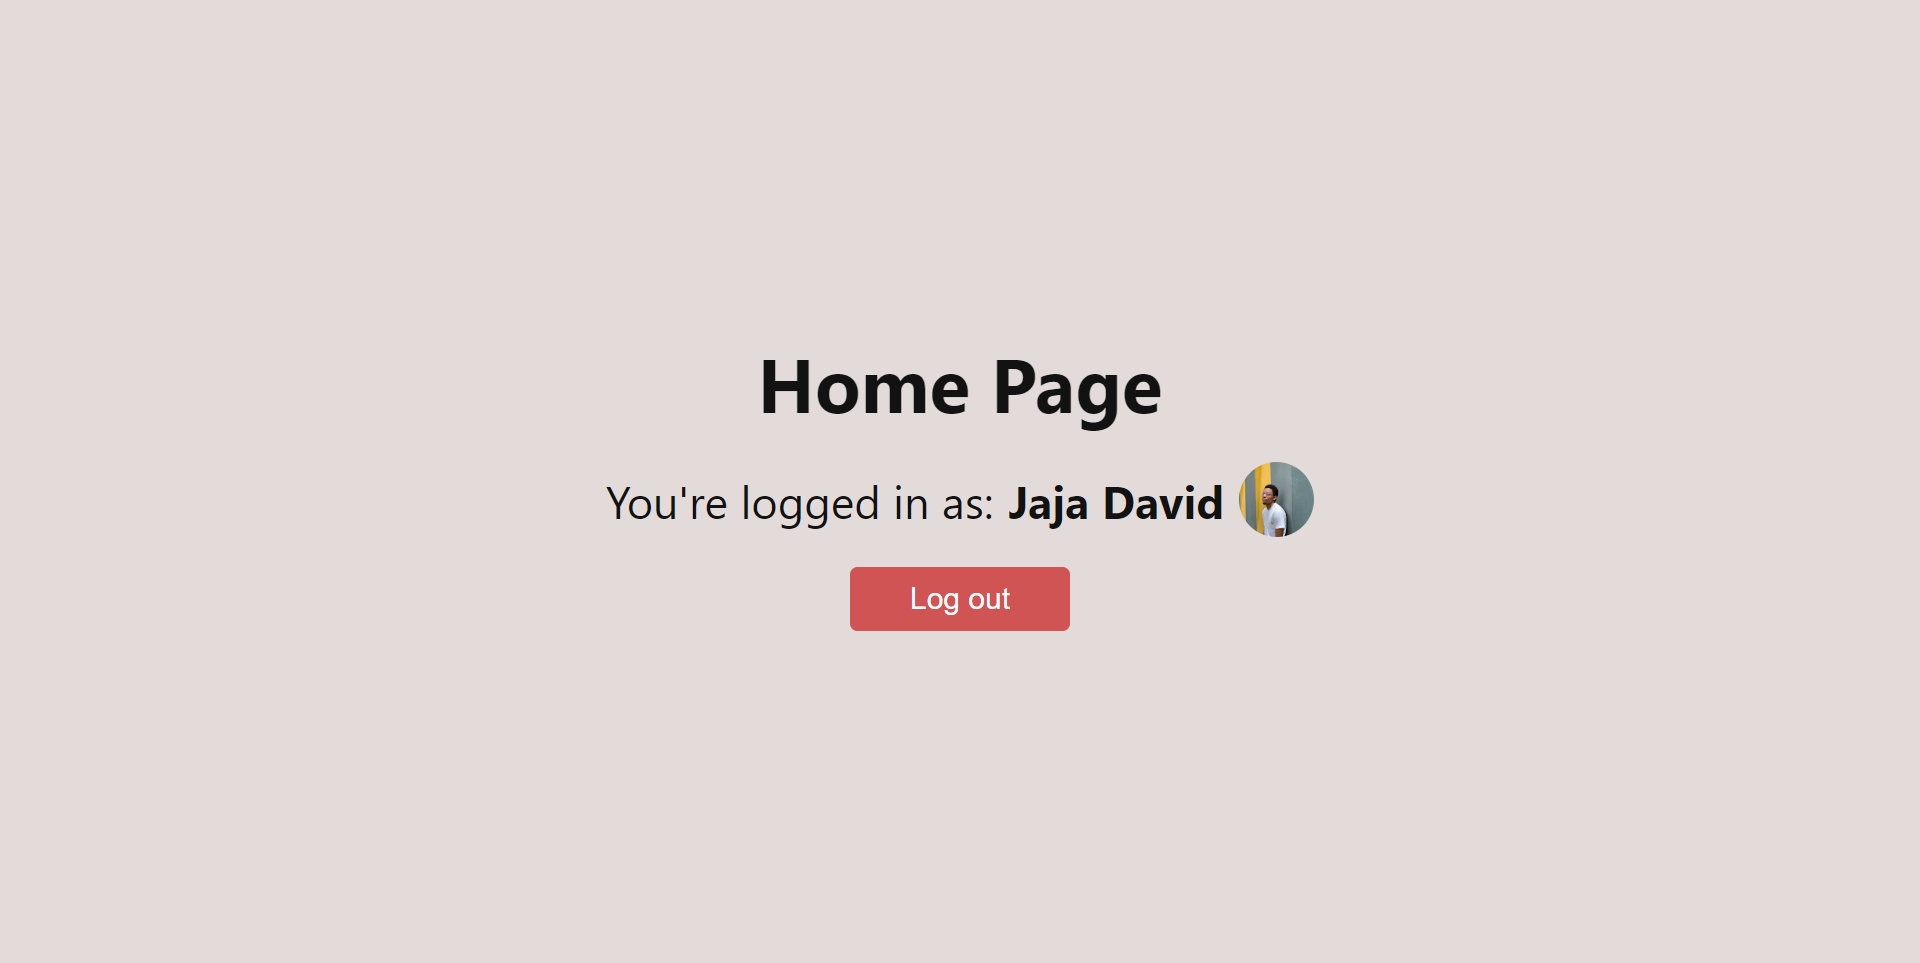 Home page before logging the user out
Click on the button and log out the user.
 Testing the log in and log out functionality
With that, your authentication process is completely set up, congrats!
Striking the Right Balance: Offering Both Social Media and Email/Password Authentication
User authentication is a key part of the user experience on any web app. Social media authentication can offer a streamlined experience and enhanced security, but it's important to strike a balance by also offering the option for email/password authentication. This ensures inclusivity, caters to various user preferences, and addresses privacy concerns.
By offering both options, you create a versatile and user-centric authentication process that contributes to a positive user experience.
An example of an ideal authentication page can be seen below.
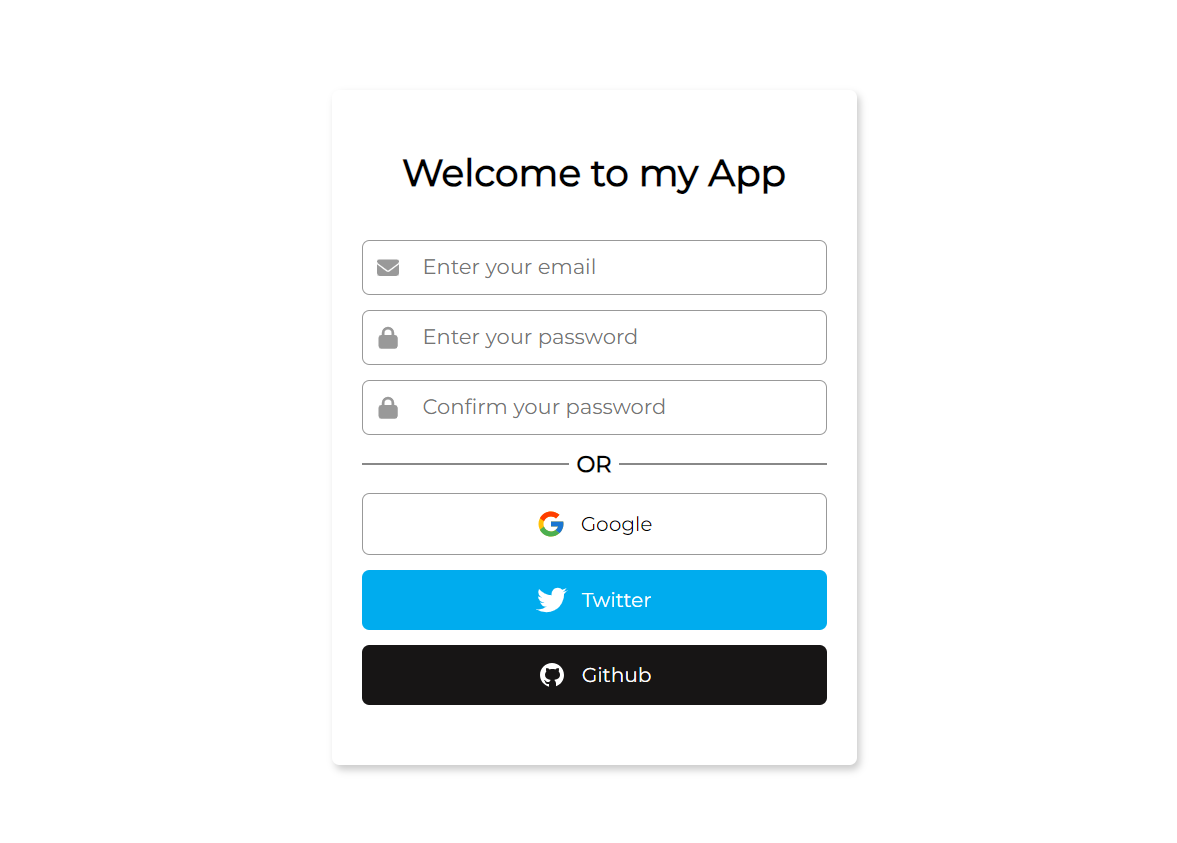 Standard Auth Page
Guidelines for Building Auth Pages
It is important to apply some basics best practices when building authentication pages, such as:
- Showing all the possible ways a user can get authenticated in a clear and concise manner.
- Using authentic company icons to build trust. You can find free company SVGs on sites like Font Awesome, Google icons, and so on.
- Use intuitive icons to label inputs such as envelope for mail and padlock for password.
- Address privacy concerns by clearly communicating how user data will be used and protected during the authentication process.
For ease of accessibility, here’s a link to the repo.
Conclusion
In conclusion, using social media login with Firebase is a smart strategy. It brings together user-friendliness, safety, and privacy.
By offering various ways to log in, websites can accommodate different user choices, be more inclusive, and adapt to new trends.
Balancing authentication options like this makes users happy and builds trust. This is important for creating modern websites and ensuring smooth, user-focused logins.
Contact Information
Want to connect or contact me? Feel free to hit me up on the following:
- Twitter / X : @jajadavid8
- LinkedIn: David Jaja
- Email: Jajadavidjid@gmail.com