By Mukul Khanna
Before we dive into the implementation, let’s get a few concepts cleared.
What is testing?
Manually trying all possible inputs to a basic form validator can be cumbersome.
It might not seem like a big deal for a small website. But for bigger and more complex web applications consisting of dozens of components along with their functions, routes, states, mutations and so on, it is not feasible or advisable to test the functioning of all these constituents.
Automating this part of the trial and error based assessments of the code we have written is known as testing or automated testing.
Edd Yerburgh, a core Vue team member and the maintainer of vue-test-utils (formerly Avoriaz), defines automated testing in his book as:
Automated testing is the practice of writing programs to run tests against your application code. Once the programs are written, they can be executed automatically.
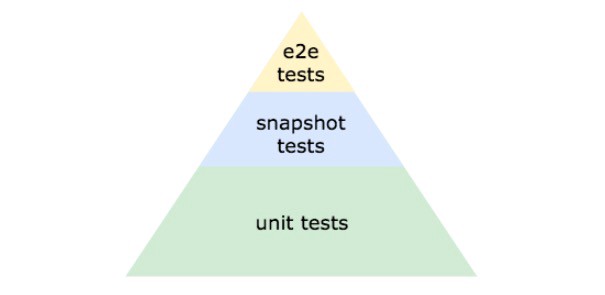
There are essentially three types of tests:
- Unit tests
- End to end tests
- Snapshot tests
Unit tests
These are basic tests that check if the atomic elements of the website (Vue components and functions) work properly. Edd calls them component contracts. Each component is expected to work as it has promised to do, and these tests make sure that they are fulfilled.
End to end (E2E) tests
E2E tests test the whole workflow of the website. It can be said that one E2E test is made up of multiple granular unit tests. They are slow, but they check the whole functionality of the website.
But they are also difficult to debug because it’s tough to locate which parts didn’t work as they were supposed to. There could be more than one reason that the tests failed.
Snapshot tests
Bugs in the code don’t only affect the functionality of the website, but also the positioning of the components in the UI. Snapshot tests check for such changes in the appearance of the application. It involves rendering the UI, capturing a screenshot, and comparing it to a reference image stored along with the test. The test fails if the two images don’t match.
These tests also help developers write proper documentation of the code, which is quite useful in large scale applications with multiple contributors.
So now that we’ve established that testing can help us save a lot of time and optimize our code, let’s see how tests are configured, created, and run.
We will be using vue-test-utils as the testing utility library for Vue.js. Now we also need to choose a test runner. There are many to choose from, but Jest and Mocha-Webpack are both equally good. They just have some tradeoffs between the configuration upfront and the support for SFCs (single file components).
We will be using the mocha-webpack configuration for this demo.
Creating the project
npm install vue
npm install --global vue-cli
vue init webpack vue-testing
cd vue-testing
npm install
npm run dev
Using the above commands, create a Vue webpack project in which we will be setting up the testing environment.
Installing dependencies
To install vue-test-utils, mocha, and mocha-webpack:
npm install --save-dev @vue/test-utils
npm install --save-dev mocha mocha-webpack
To emulate a subset of a browser environment to run our tests, we’ll install jsdom and jsdom-global:
npm install --save-dev jsdom jsdom-global
Some of the dependencies that we will be importing in our tests are difficult for the webpack to bundle. So, to be able to remove them from the bundling process and to increase test bootup speed, we install node-externals:
npm install --save-dev webpack-node-externals
Vue recommends expect as an assertion library that essentially decides whether the test fails or passes depending on the argument it receives.
npm install --save-dev expect
We need to make it globally accessible to avoid importing it in every single test. We create a directory named test in the root directory and create a file named test/setup.js . Import the modules with require:
//setup.js
require('jsdom-global')()
global.expect = require('expect')
We can also include code coverage in the test results using the istanbul plugin to get a report like this:

It is used to describe the degree to which the source code of an application is executed when a particular test suite runs.
npm install --save-dev nyc babel-plugin-istanbul
Also in the .babelrc in the plugins array, add istanbul:
//.babelrc
plugins": ["transform-vue-jsx", "transform-runtime", "istanbul"]
So we have installed all the dependencies, and it’s time to make the final configurations before we can start writing the tests.
In package.json, we need to add a test script that runs the test:
//package.json
"scripts":{
"test": "cross-env NODE_ENV=test nyc mocha-webpack --webpack-config build/webpack.base.conf.js --require test/setup.js test/**/*.spec.js"
}
We also need to specify the files that needed to be included for the code coverage in the package.json:
//package.json
"nyc":{ "include":[ "src/**/*.(js|vue)" ], "instrument":false, "sourceMap":false}
The last configuration before writing the test would be adding the following in webpack.base.conf.js:
//webpack.base.conf.js
if (process.env.NODE_ENV === 'test'){ module.exports.externals = [require('webpack-node-externals')()] module.exports.devtool = 'inline-cheap-module-source-map'}
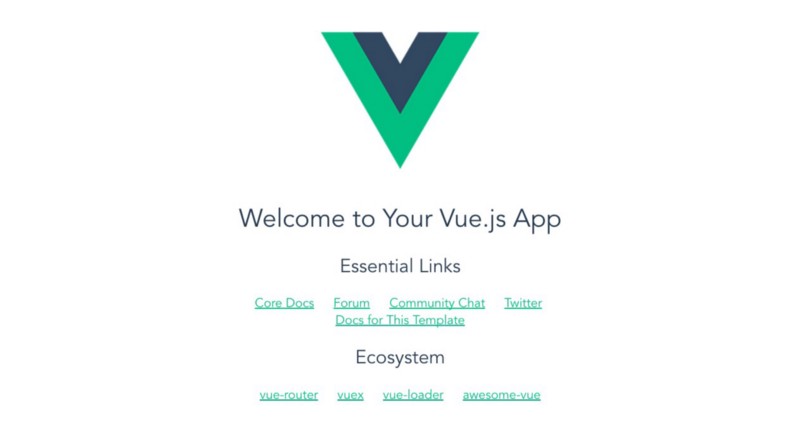
We can perform our test on the inbuilt Vue component that comes with the webpack boilerplate.
Every test file would have a ‘.spec.js’ extension.
In the test directory, we add a test file testOne.spec.js
//testOne.spec.js
import {shallow} from '@vue/test-utils'
import HelloWorld from '../src/components/HelloWorld.vue'
We start by importing shallow from the vue-test-utils. Shallow creates a wrapper for the Vue component on which we want to run the test. This wrapper is an object that contains the mounted component and methods to test parts of the code. Then we import the Vue component on which we run the test.
//testOne.spec.js
describe('HelloWorld.vue',function(){ it('Checking <h2> tag text',function(){ const wrapper = shallow(HelloWorld) const h2= wrapper.find('h2') expect(h2.text()).toBe('Essential Links') })})
Then we create what we can call a test suite, using the describe() method of Mocha’s testing framework. This test suite basically groups multiple test cases into one along with providing some information about the tests and the component.
In this describe function, we callback a function that specifies the test cases using the it() function. Each it() method describes a test case with the purpose of the test as the first parameter followed by a callback function defining the test.
Then:
- We create a wrapper of the Vue component
- Use its find() method to get all
tag elements
- Compare its text with what it is supposed to be.
Yay! Our test is ready to run.
npm run test
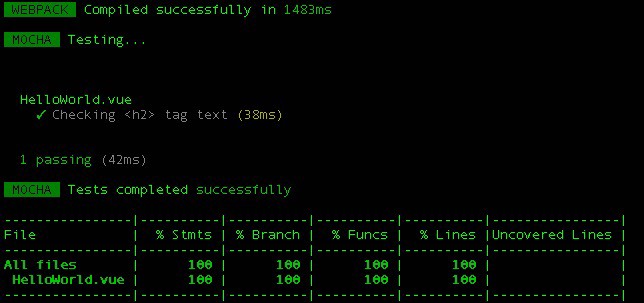
So, our test was successful — the code was able to find an
tag in the HelloWorld.vue component with ‘Essential Links’ as its text.
Now if we change the expected test to anything else, the test would fail.
I changed it to:
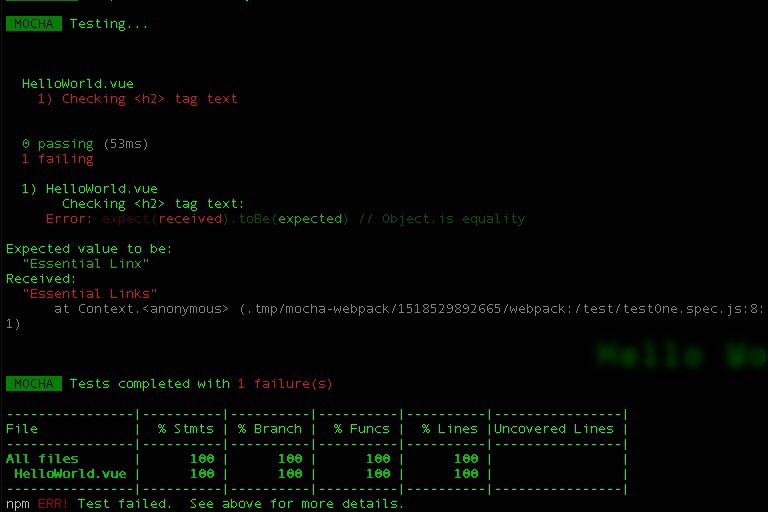
expect(h2.text()).toBe('Essential Linx')
and the test fails. The failed test error is quite descriptive, though, and you can see what the code was expecting and what it receives:
We can add multiple test cases in one test file by using multiple it() methods and expecting different conditions.
describe('HelloWorld.vue',function(){
it('Checking <h2> tag text',function(){ const wrapper = shallow(HelloWorld) const h2 = wrapper.find('h2') expect(h2.text()).toBe('Essential Links') }),
it('Checking <h1> tag text',function(){ const wrapper = shallow(HelloWorld) const h1 = wrapper.find('h1') expect(h1.text()).toBe('Welcome to Your Vue.js App') })
})
Here we are also testing if the
tag renders what it is supposed to.
So this was a pretty basic test that just gives you an understanding of how tests are configured, coded, and run without even opening the browser or starting the server.
The link to the GitHub repository is here.
Wrapping up
Edd Yerburgh’s book ‘Testing Vue.js Applications’ helped me a lot in getting a wider picture of the importance of testing and how to implement it. I would recommend it to anyone who wants to learn testing beyond the scope of beginner-level content and really dive into it.
Other than that, I have been spending some time on TDD (Test Driven Development) concepts and am looking forward to writing a beginner’s tutorial about the world of TDD with Vue.js.
Please leave a clap or two if you liked the post. Thanks :)