By Amir Off
In this article, I’ll discuss how I built a Smart Home Automation System with Angular and Node.js on a Raspberry Pi without relying on any external cloud services.
Intro
Over the last few days, I spent some nights designing and developing a home automation system based on JavaScript, with the use of Angular and Node.js. And, like with any other project, the planning involved some deep research on the internet.
It turned out that there are plenty of fish in the sea —plenty of solutions on how to implement a home automation system. Some offer paid services in “the cloud” and others explain how to build your own using a technology called MQTT.
None of the solutions made any sense to me. All options were either expensive, or had inconvenient implementations or even security flaws.
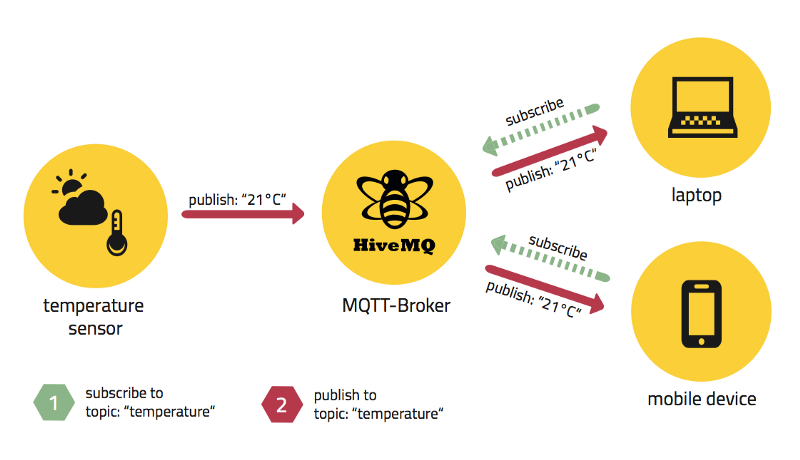
But, before we go any further, let’s explain what MQTT is. MQTT stands for MQ Telemetry Transport. It is a publish/subscribe, extremely simple and lightweight messaging protocol. MQTT is designed for constrained devices and low-bandwidth, high-latency, or unreliable networks.
The design principles are to minimise network bandwidth and device resource requirements whilst attempting to ensure reliability and some degree of assurance of delivery. These principles also turn out to make the protocol ideal for the emerging “machine-to-machine” (M2M) or “Internet of Things” world of connected devices, and for mobile applications where bandwidth and battery power are at a premium.
Why wasn’t I convinced about using MQTT, or by any of the solutions I found on the internet? Two reasons:
- While the MQTT technology seems very convenient for IoT devices, I still thought it was unnecessary. The system which I will be showing in the following tutorial operates in the same medium where the IoT devices live. All benefits that MQTT has for being “fast” and having “low-bandwidth” become irrelevant. Plus there’s all the hassle that is involved in its implementation and all the extra overhead with the additional npm packages that are required for it to work in a JavaScript environment. Instead, I will be using generic JavaScript and Node.js libraries only, nothing more!
- What about the security part? Well, I’m not a big fan of “the cloud” or cloud computing in general. In some cases it can be very beneficial, but in most cases it’s just unnecessary. Think about it: why would you have a service that is required for controlling your home appliances to be hosted somewhere else in “the cloud” and not in your own network?

One might think that “the cloud” provides the ability to access your home appliances from anywhere in the world via the internet.
But think about this: when your home network doesn’t have internet connection, “the cloud” becomes redundant. More importantly, you can still make your home automation system accessible from the internet using port-forwarding even if it’s hosted on your local network.
This is when it “clicked” for me, and I thought about hosting the whole system on a Raspberry Pi and keeping it in my local network.
The technology
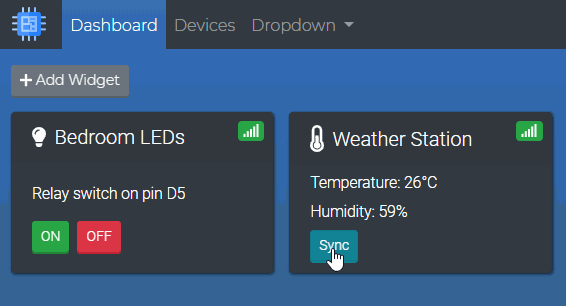
- Software: The reason why I chose Angular and Node.js is because they’re based on JavaScript and I’m already familiar with it. After all, I wanted to design and develop a progressive web app that communicates with my IoT devices via HTTP — and JavaScript offered all the functionality that I needed.
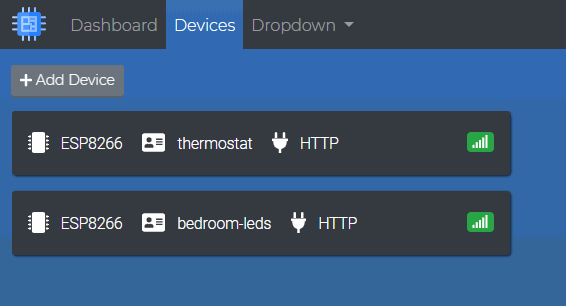
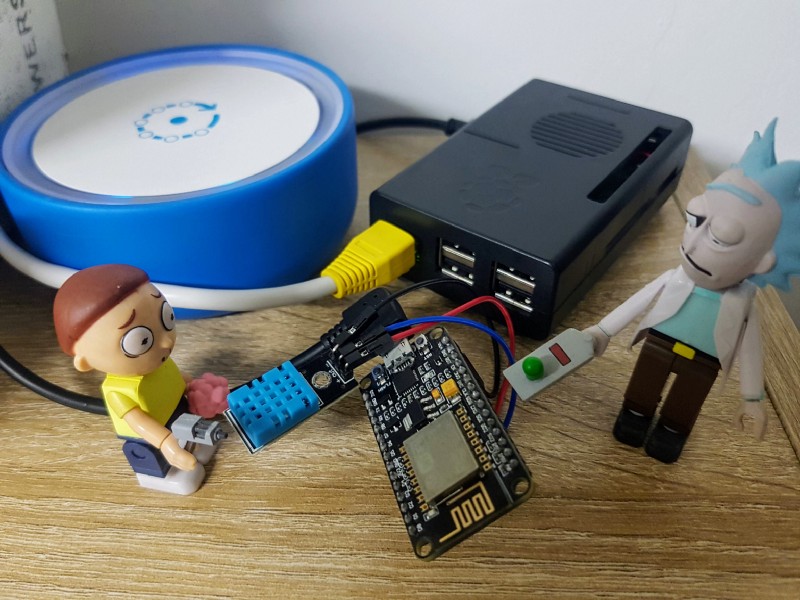
- Hardware: The system works with microcontrollers like the Arduino Uno/Mega/Du/MKR1000, Adafruit HUZZAH CC3000, and any other microcontroller with a WiFi connection. I am using the ESP8266 as a base component for my home automation system. It’s a low-cost WiFi microchip with microcontroller capability. It has everything I need and for a cheap price! Lastly, we need to host the system somewhere on our local network — so what’s better than the Raspberry Pi?
This won’t be a coding tutorial where I dive deep into coding, since this project is open-source and I will be publishing everything on GitHub. I will only demonstrate how to implement your own home automation system and will be going through each step. If you’re a developer please fork the repository and get involved in improving it.
The setup
I estimate that it will take about 40 minutes to finish this whole setup plus any time spent online searching for solutions for installation errors.
What is needed?
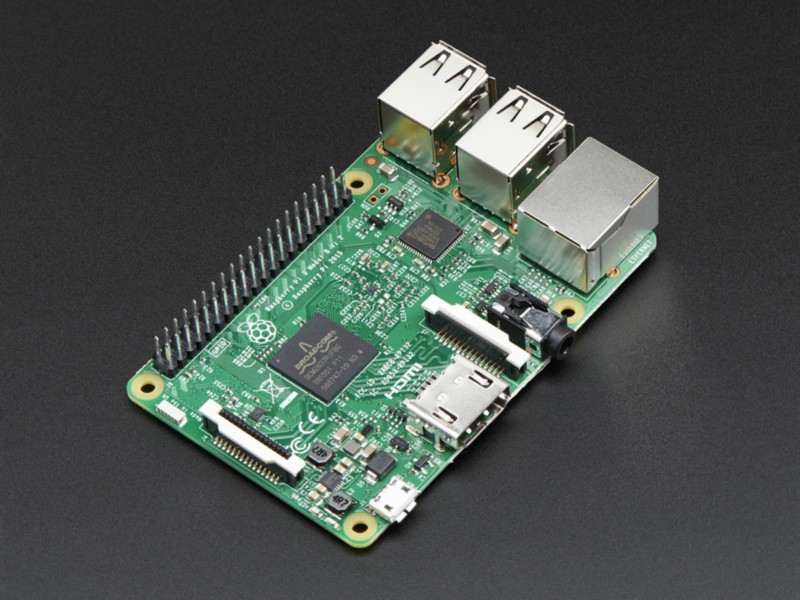
A Raspberry Pi is required. In my example I’m using a Raspberry Pi 3, but it should work with most versions. The components needed are:
- Raspberry Pi board
- MicroSD card (A class 10 with 16 GB or higher is recommended)
- A USB MicroSD card reader or SD card adapter
- HDMI monitor and a USB keyboard (only required temporarily for the first boot of the Raspberry Pi)
- Ethernet cable (not needed for Raspberry Pi 3 as it has built in WiFi)
Installing Raspbian OS on the Raspberry Pi
Raspbian is a free operating system based on Debian Linux, and it is optimized for Raspberry Pi.
I recommend the headless “LITE” version. It has no desktop environment or any graphical user interface, and it’s remotely accessible from a computer or device on the same network via SSH. We’re keeping things simple since this is the only way we are going to access the Raspberry Pi. The LITE version has all the functionality we’re looking for.
- Download the latest Raspbian image from the official Raspberry Pi website.
- Flash the Raspbian OS image to the SD card with Etcher or any other OS image burning software of your choice.
Setting up the Raspberry Pi
To get the Raspberry Pi ready to boot we need to:
- Insert the MicroSD card into the Raspberry Pi
- Connect the USB keyboard and the HDMI cable
- Connect the Ethernet cable or if you have a Raspberry Pi 3 and want to use WiFi you should set up the network in the next section
When the Raspberry Pi has finished booting up, log in using username pi and password raspberry
Enabling WiFi and connecting to the network
Skip this step if you chose to connect with an Ethernet cable.
- Open the “wpa-supplicant” configuration file
$ sudo nano /etc/wpa_supplicant/wpa_supplicant.conf
- add the following at the bottom of the file while adding your wifi name and password:
network={
ssid="your_networks_name" psk="your_networks_password"
}
3. Press Ctrl+X to save the code. Confirm with Y then Enter
4. Reboot the Raspberry Pi with the following command:
$ sudo reboot
Enabling SSH and changing the username and password
Now that the Raspberry Pi is connected to the internet, it’s recommended to change the default password.
- Open the Raspberry Pi configuration tool and click the second option “Change User Password” and follow the instructions
$ sudo raspi-config
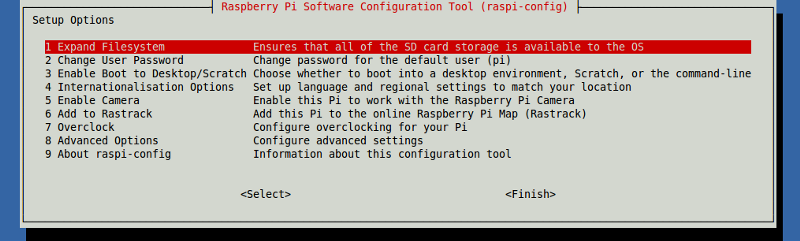
2. Select option 5 “Interfacing Options” then activate SSH
3. Reboot the Raspberry Pi. When it’s up, you have SSH enabled and it’s ready to be accessed remotely from your desktop computer
$ sudo reboot
Configuring remote access to the Raspberry Pi
Now, finally, the part when we install the required software on the Raspberry Pi. This part can be executed directly on the Pi through the terminal using a HDMI monitor and a USB keyboard. For convenience — and since we enable remote SSH connection — we’re going to connect from another desktop environment. This is the best and easiest way to remotely access and control the Pi whenever changes and configurations are needed.
So, basically, this is how you can access the command line interface of a Raspberry Pi remotely from another computer or any device on the same network using SSH. This can be done in two ways:
- Using the Command Prompt or PowerShell (I’m using Windows on a Desktop computer), replace with your username and IP address
$ ssh username@ipaddress
If you do not know the IP address, type “hostname -I" in the Raspberry Pi command line.
2. The second method is using a client program like PuTTY or any other functioning client SSH software. Here’s an easy guide for using PuTTY.
Installing the required software on the Raspberry Pi
Before installing anything, it’s recommended to update the Raspberry Pi’s operating system and packages. Doing this regularly will keep it up-to-date.
- Update the system packages list using the following command:
$ sudo apt-get update
2. Upgrade all your installed packages to their latest version:
$ sudo apt-get dist-upgrade
3. Download and install the latest version of Node.js:
// To download$ curl -sL https://deb.nodesource.com/setup_8.x | sudo -E bash -
// To install$ sudo apt-get install -y nodejs
// Check if the installation was successful:$ node -v
4. Install the Angular CLI globally:
$ npm install -g @angular/cli
5. Install the Git version-control system:
$ sudo apt-get install git
Installing the database (MongoDB)
We need a database for storing the registered users and their credentials. Here are the required steps:
- Install MongoDB
$ sudo apt-get install mongodb
- Start the MongoDB process
$ sudo service mongodb start
- Start the mongo Shell
$ mongo
- Create a database called “smarthaus”
$ use smarthaus
In MongoDB, default database is test. If you didn’t create any database, then collections will be stored in test database.
Installing Smart Haus
1. Check the current work directory using this command:
$ pwd
/* It will probably print "/home/pi" where "pi" is the current user directory */
It’s recommended to clone the project’s repository under the pi’s user directory but you can navigate somewhere else if you’re sure.
2. Clone the repository from:
$ git clone https://github.com/ameer157/smarthaus.git
Make sure to navigate inside the directory using:
$ cd smarthaus
Before installing any npm packages using “npm install” please refer to the npm guide to fix permissions to learn how to fix any “EACCESS ”errors you might face during installation. This is very important since it will prevent any npm permission errors, and allows you to install packages globally without using sudo. Using sudo with npm is not recommended and should be avoided.
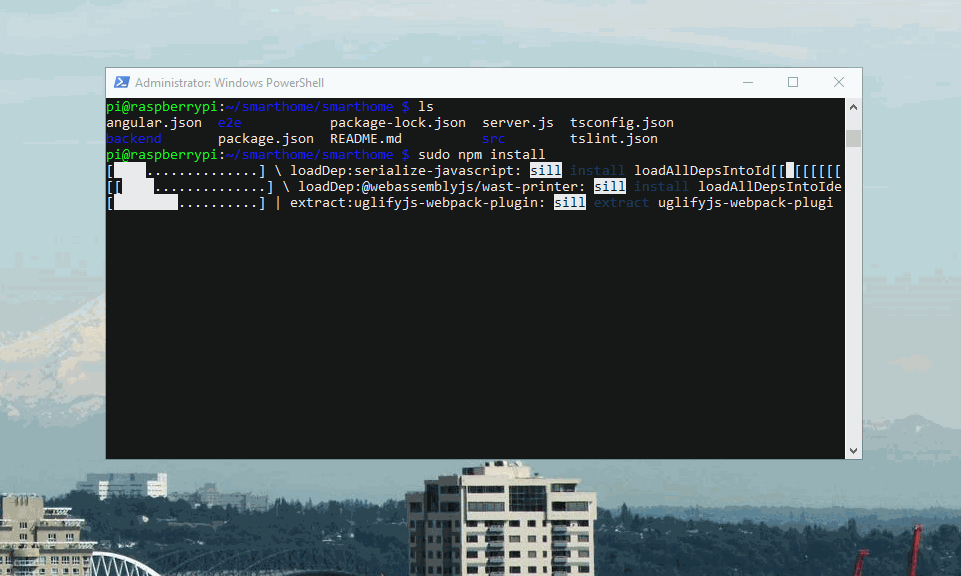
3. Install all the required packages for the project:
$ npm install
Starting the Node.js server
Before starting the server we need to build the project using the Angular CLI tool. And lastly, we configure the Raspberry Pi so that it runs the server whenever it boots up.
- Build the project using:
$ ng build --prod
2. Edit the rc.local file using nano:
$ sudo nano /etc/rc.local
3. Add the following on the line before exit 0 then exit and save the file:
su pi -c 'cd /home/pi/smarthaus/backend && sudo node server.js > log.txt &'
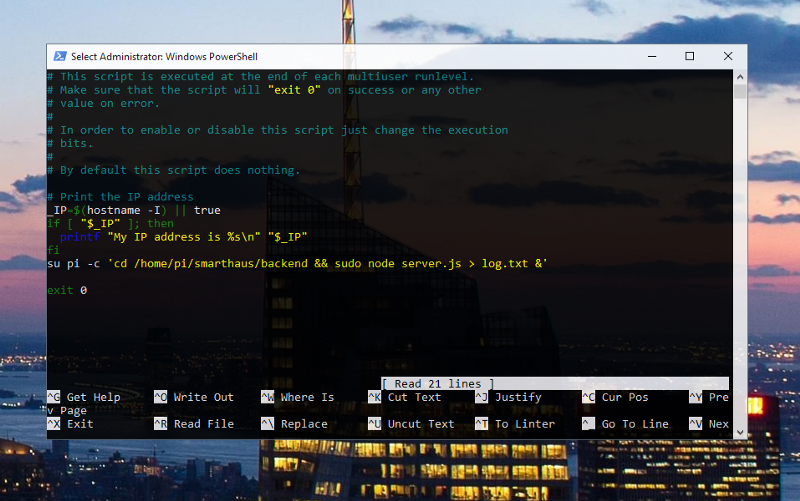
The Node.js server is now ready! It will run on every system boot up and save logs in under the same directory in a “log.txt” file.
Let’s run it now and see if it works using this command:
$ sudo node server
The system in now accessible from any device on your network via the Raspberry Pi’s IP address.
Please go ahead and fork this project and get involved in developing the missing parts ?
The end
We got ourselves a working home automation system running safely on a Raspberry Pi in our local network without the use of “the cloud” or somebody else’s server.
My Raspberry Pi sitting next to my Fingbox and router in the living room ?
I hope you enjoyed reading,
Please follow and share for more tech stuff ??