By Dalya Gartzman
Why Am I Here?
You, the reader, are here because you wrote some awesome tool in Python, and you want to make it accessible and easy to use.
I, the writer, am here because I was right where you are a few months ago. I wanted to use the Sphinx package to make a ReadTheDocs-style documentation for my project.
I found the onboarding of Sphinx nontrivial, which is why I made this GitHub repo that can be used as a template for your project.
Before we start, some basic assumptions, to make sure we are on the same page:
- You are writing in Python.
- You wrote docstrings for the pieces of code you wish to document.
- Your goal is to make a ReadTheDocs-style documentation that, at least partially, will automagically generate itself.
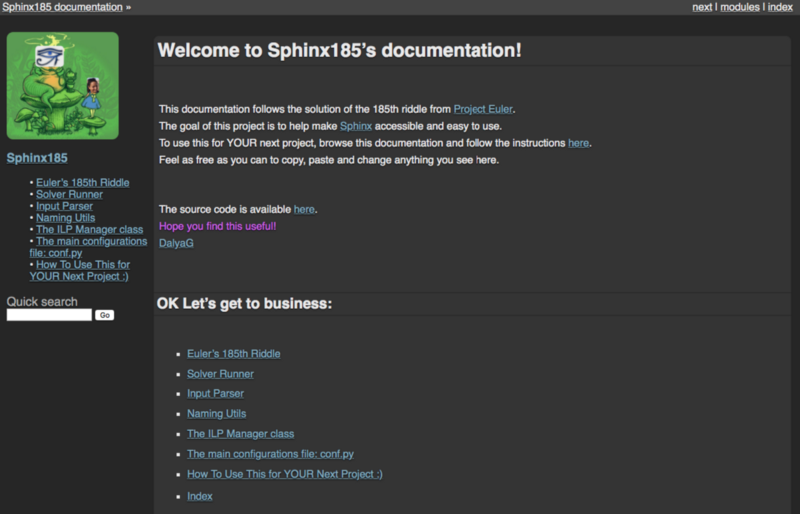
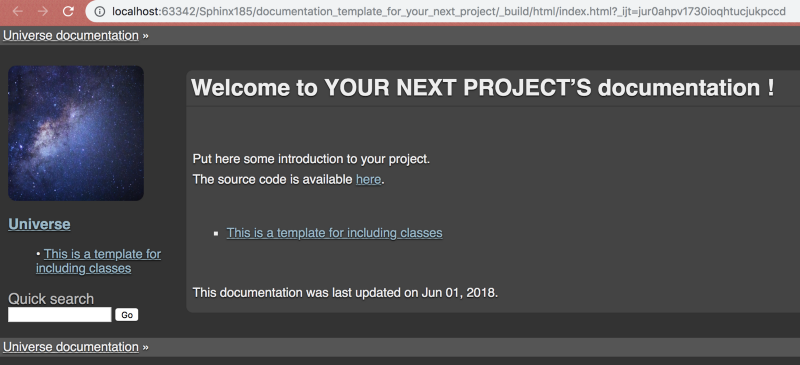
- You are aware that in 10 minutes you could publish the first version of your documentation, that is going to look something like this:
Part 1 - Setting the Stage
- Install Sphinx:
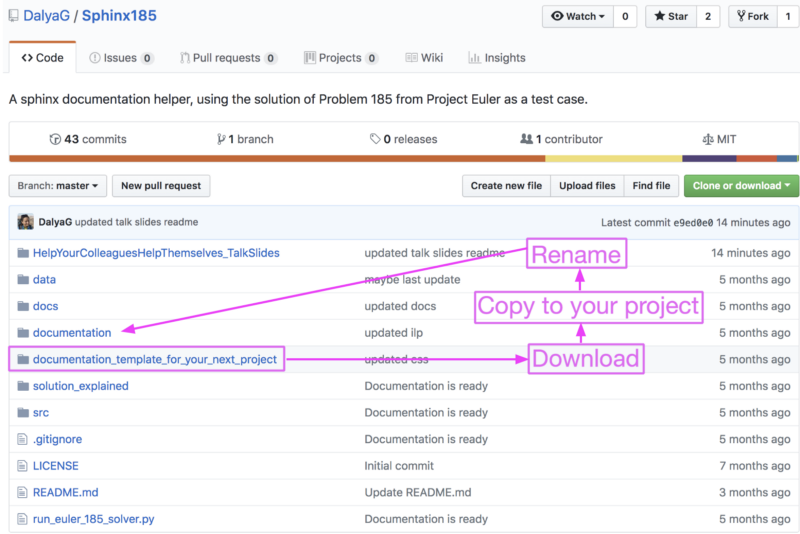
pip install sphinx - Go to github.com/DalyaG/Sphinx185:
- Download the folder
documentation_template_for_your_next_project - Copy to your project
- Rename the folder
documentation
Part 2 - Personalize
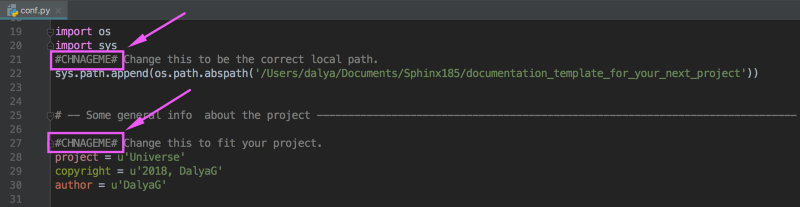
- Open the file
<your_project>/documentation/conf.py in your favorite editor. Search for the pattern #CHNAGEME# and follow the instructions. - Similarly, edit the file
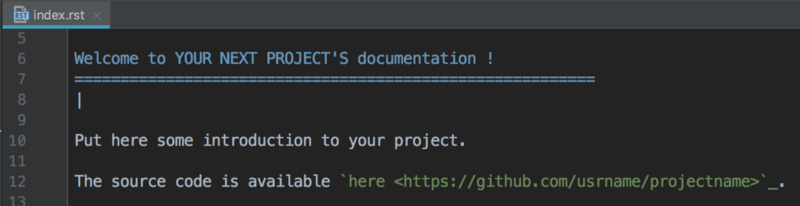
<your_project>/documentation/index.rst and follow the inline instructions.

Part 3 - Add the Content You Wish to Document
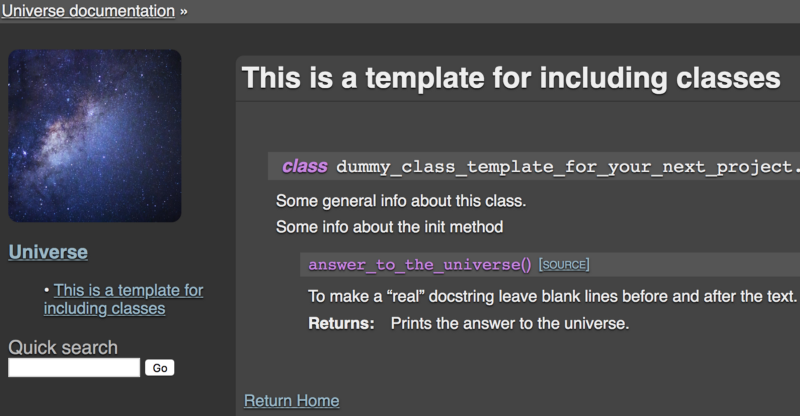
- Let’s say you have a python file called
my_amazing_class.pythat includes a class you wish to document. - In the same folder as the
conf.pyandindex.rstfiles, create a new file calledmy_amazing_class.rstand copy-paste-personalize this template:
This is a template for including classes========================================|.. autoclass:: my_amazing_class.MyAmazingClass|:ref:`Return Home <mastertoc>`
TIP: make sure the folder containing your amazing class is in your
PYTHONPATHand that it includes an init file__init__.py
- In the
index.rstfile, edit the Table Of Contents to include the name of the.rstfile:
.. toctree:: :maxdepth: 1 :name: mastertoc
my_amazing_class
Part 4 - “Compile”
- In the terminal, inside the
documentationfolder, runmake clean html. - That’s it! You have your first version of your documentation ready to view!
- Open the file
documentation/_build/html/index.htmlin your browser, and see for yourself :)
Part 5 - Host on GitHub Pages
- Under the root of your project, open a new folder called
docsand copy inside it the content of<your_project>/documentation/_build/html/ - Inside this new
docsfolder, create an empty file called.nojekyll
(This tells GitHub Pages to bypass the defaultJekyllthemes and use theHTMLandCSSin your project) - Push your changes to
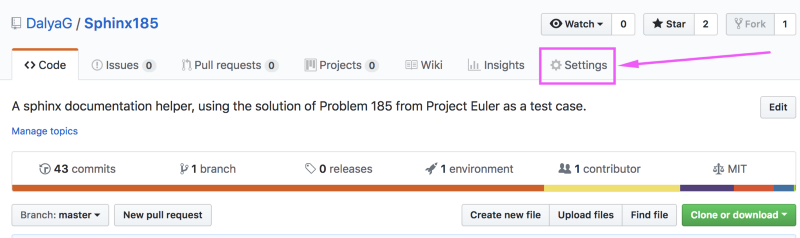
masterbranch. - In your repository on GitHub, go to
Settings->GitHub Pages->Source
and select master branch/docsfolder

Part 6 - Share!
Yup. That’s it. Wait a couple of minutes for GitHub to update. Share your beautiful documentation site at
https://<your_git_usrname>.github.io/<project_name>/
TIP: When updating documentation, you need to delete the
docsfolder and create it again. See more details here.
Epilogue
This is the part where I say something thoughtful about how wonderful it is to create new content in the world. And what a wonderful person you are for choosing to make your original content available, accessible, and easy to use.
But hey, you made it all the way here, so you already know this stuff.
So if there is something else that you still feel you don’t know, I invite you to explore the documentation website I made for this tutorial. You can watch the talk I gave about Sphinx. Hopefully these will answer some riddles you have left about Sphinx.