
By Davis David
Properly tracking your machine learning experiments is easier than you think.
When working on a machine learning project, you will conduct different machine learning experiments before you reach the final ML model with the best performance.
Here are some possible machine learning experiments you might conduct:
- Testing out a variety of algorithms in order to determine which one is the most effective for the problem you are attempting to solve (for example, a classification problem).
- Selecting important features to work on based on model performance.
- Fine-tuning your model in order to improve its performance (for example, the grid search technique).
- Addressing the effects of overfitting and underfitting on the performance of the model
- Completing a number of other tasks that are related to the problem you are solving.
Why Is It Important to Track ML Experiments?
It's important to keep track of your machine learning experiments because doing so will help you arrive at a final decision regarding the ML model that you will deploy into production. You'll be better able to do this after analyzing the results of the many different ML experiments that you have done.
The more ML experiments you conduct, the more difficult it becomes to remember what works and what doesn't. Occasionally, you might have an excellent outcome, but because it took hours or days to train, you have already modified the code. And now you can't remember the parameters you used to achieve this result!
A common practice among data scientists is to manually record their ML experiments on digital or physical paper. But using the print statement (for the Python programming language), for example, to view experiment output is ineffective. This is because when you perform another experiment, the output from the last experiment is lost.
Luckily, you can automate ML experiment tracking by keeping all results in a database called HarperDB. Not only is it simple to set up, and it adapts easily to your existing workflow, but you can also share your machine learning experiment results with your teammates by using a simple Rest API.
What is HarperDB?
HarperDB is a fast and flexible SQL/NoSQL data management platform. You can use it for a number of different things, including but not limited to rapid application development, distributed computing, edge computing, SaaS, and many more.
HarperDB is fully indexed, doesn't duplicate data, and runs on any device from the edge to the cloud.
It's also compatible with any programming language, including Python, JavaScript, Java, and others.
The following is a list of some of the features that are available on HarperDB:
- Single endpoint API
- Custom Functions (Lambda-like application development platform with direct access to HarperDB’s core methods)
- Allows JSON and CSV file insertions
- Supports SQL queries for full CRUD operations
- Supports Math.js and GeoJSON
- Limited database configuration required
HarperDB has a built-in HTTP API, custom functions for user-defined endpoints, and a dynamic schema that can help you share your experiment results with your coworkers after storing them in a HarperDB cloud instance.
You can also quickly download the findings of your ML experiment as a CSV file so that you can do additional analysis before making a final decision.
In this article, you will learn how to use HarperDB to easily manage your Machine Learning experiments results.
Let’s Get Started 🚀
How to Set Up HarperDB
HarperBB requires an account and you'll need to configure the HarperDB cloud instance before use. To do both these things, you can follow the steps below.
1. Create a HarperDB Account
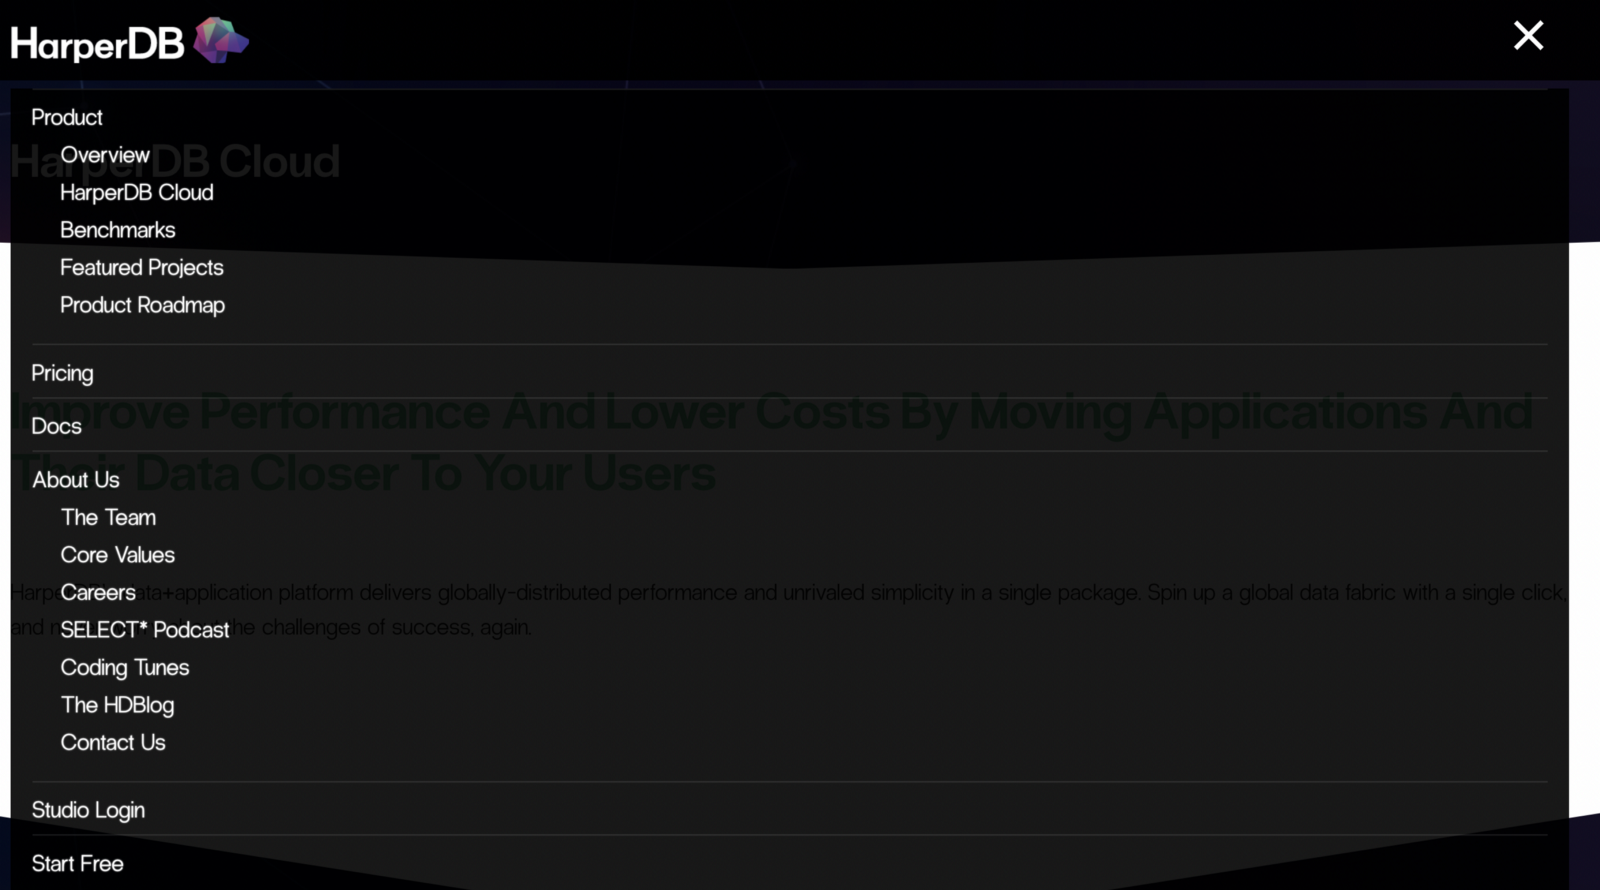
You can visit htttps://harperdb.io/ and then click the navigation bar to see a link called “Start Free.” Click it in order to create your account.
If you already have an account, use the following URL https://studio.harperdb.io/ to sign in with your credentials.
You'll need to provide details such as your name, email address, and desired subdomain during the signup process. HarperDB will automatically set up a new subdomain for you.
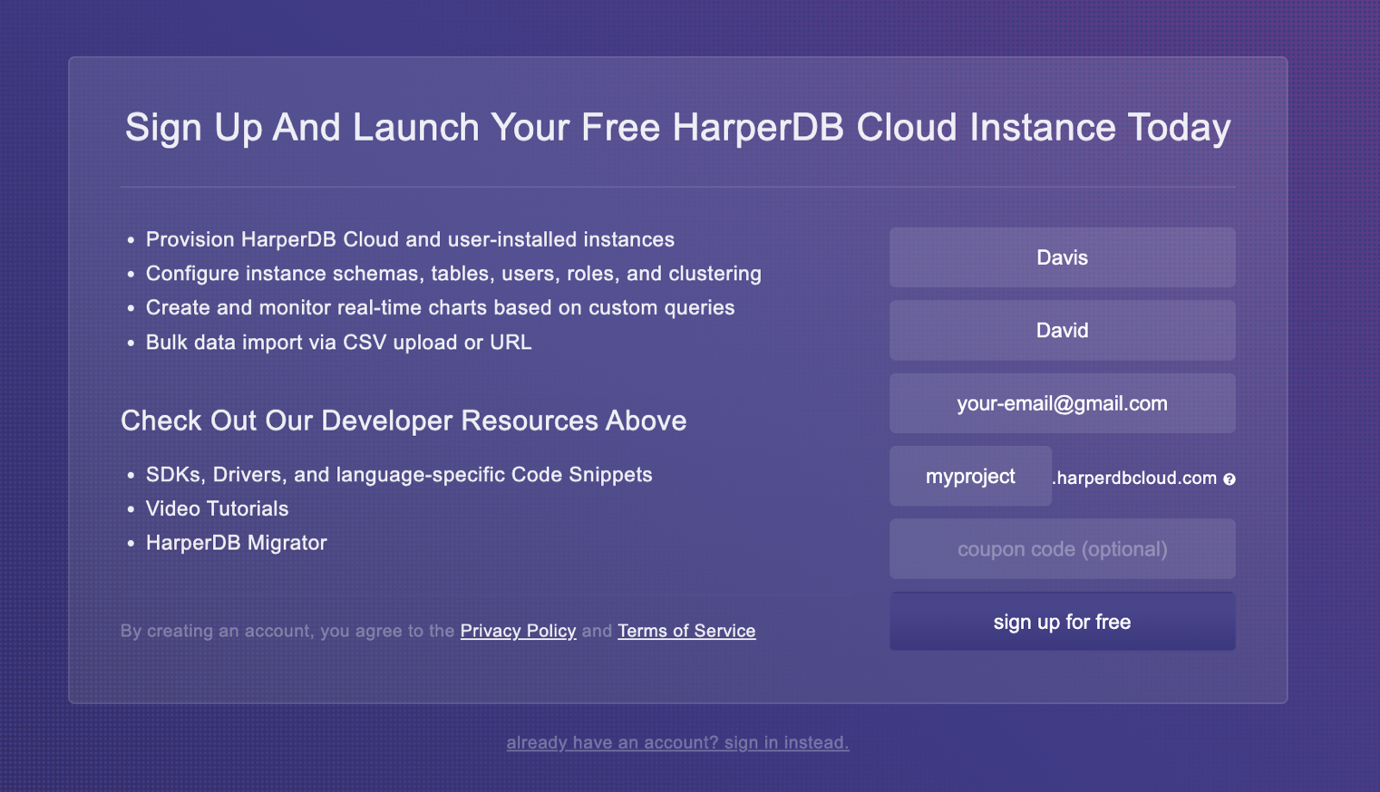
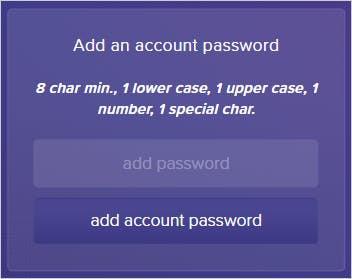
2. Add Your Account Password
The next step is to add a strong password to your account to complete your account registration process.
3. Create a HarperDB Cloud Instance
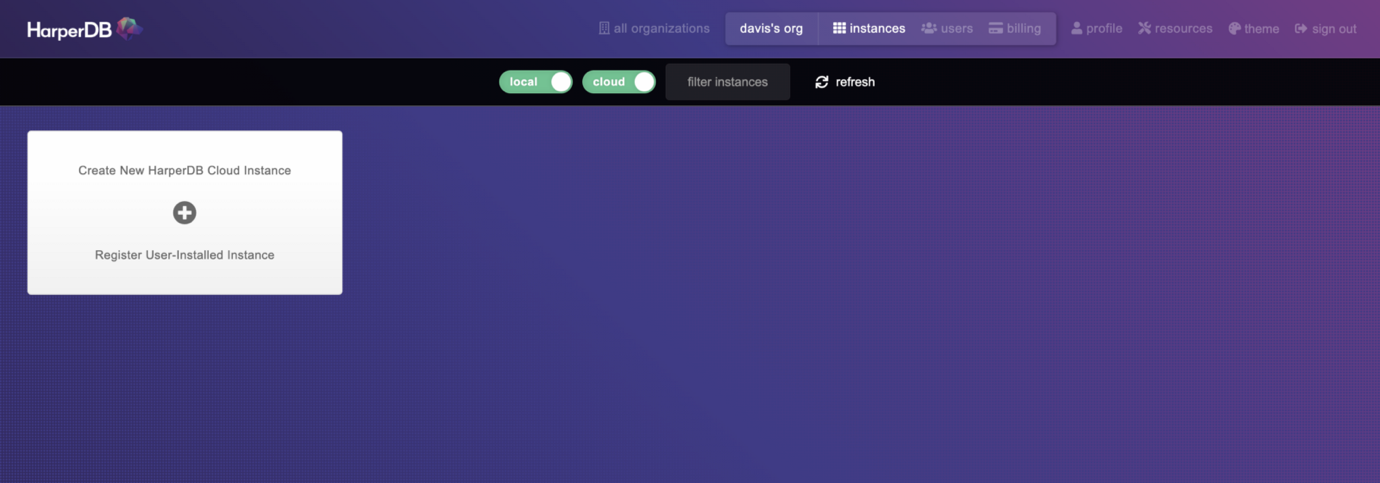
After registration, you need to create a cloud instance to store and fetch your Machine learning experiment’s results. You need to click Create New HarperDB Cloud Instance to add a new instance to your account.
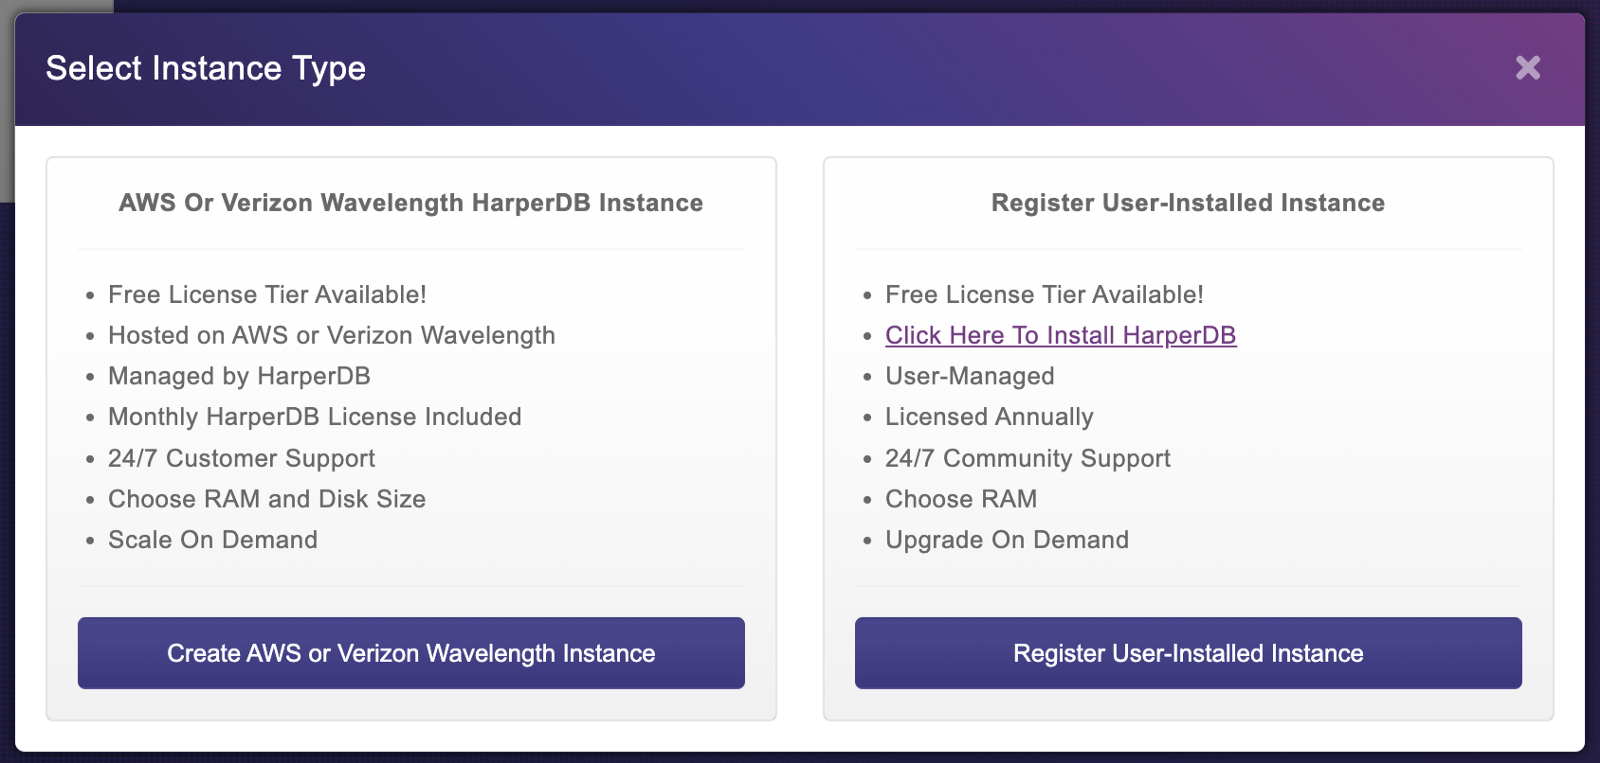
You will see the image below where you'll need to select the instance type. For this tutorial, you need to select AWS or Verizon Wavelength HarperDB Intance.
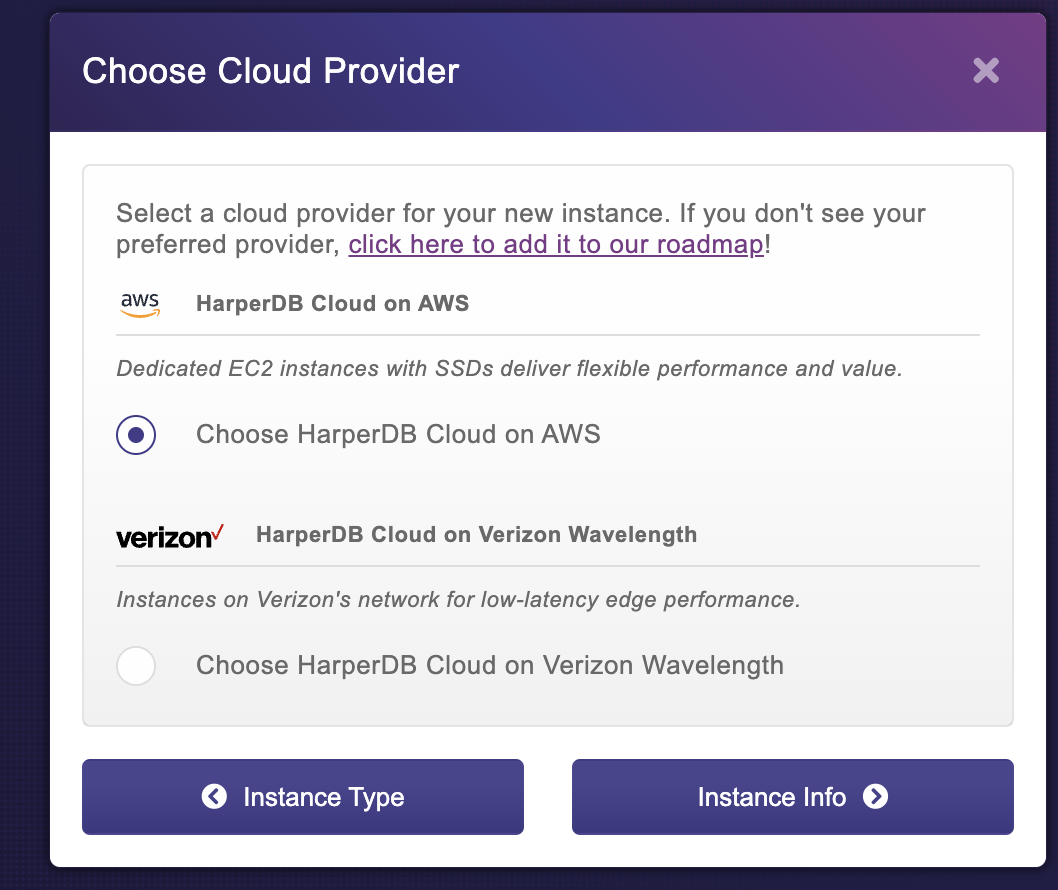
Then you need to choose the cloud provider. Here you will use the default option and then click instance info.
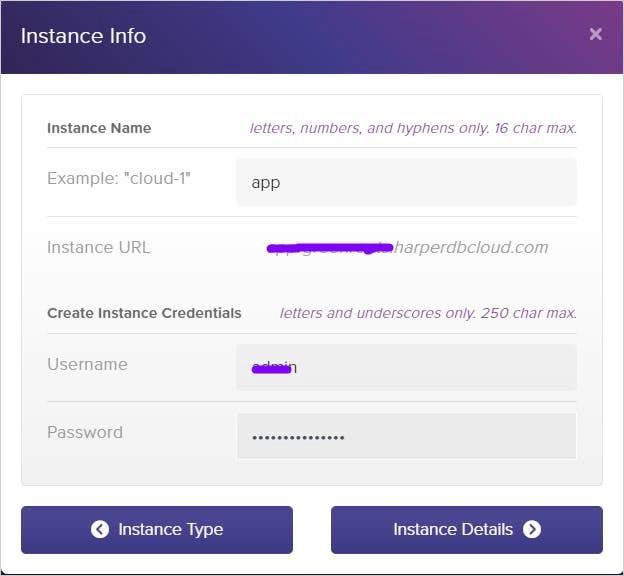
On the Instance info page, you will need to provide the name of the cloud instance and the credentials to access it.
Then click the instance details button. On the specification page, you need to select the instance RAM size, instance storage size, and instance region.
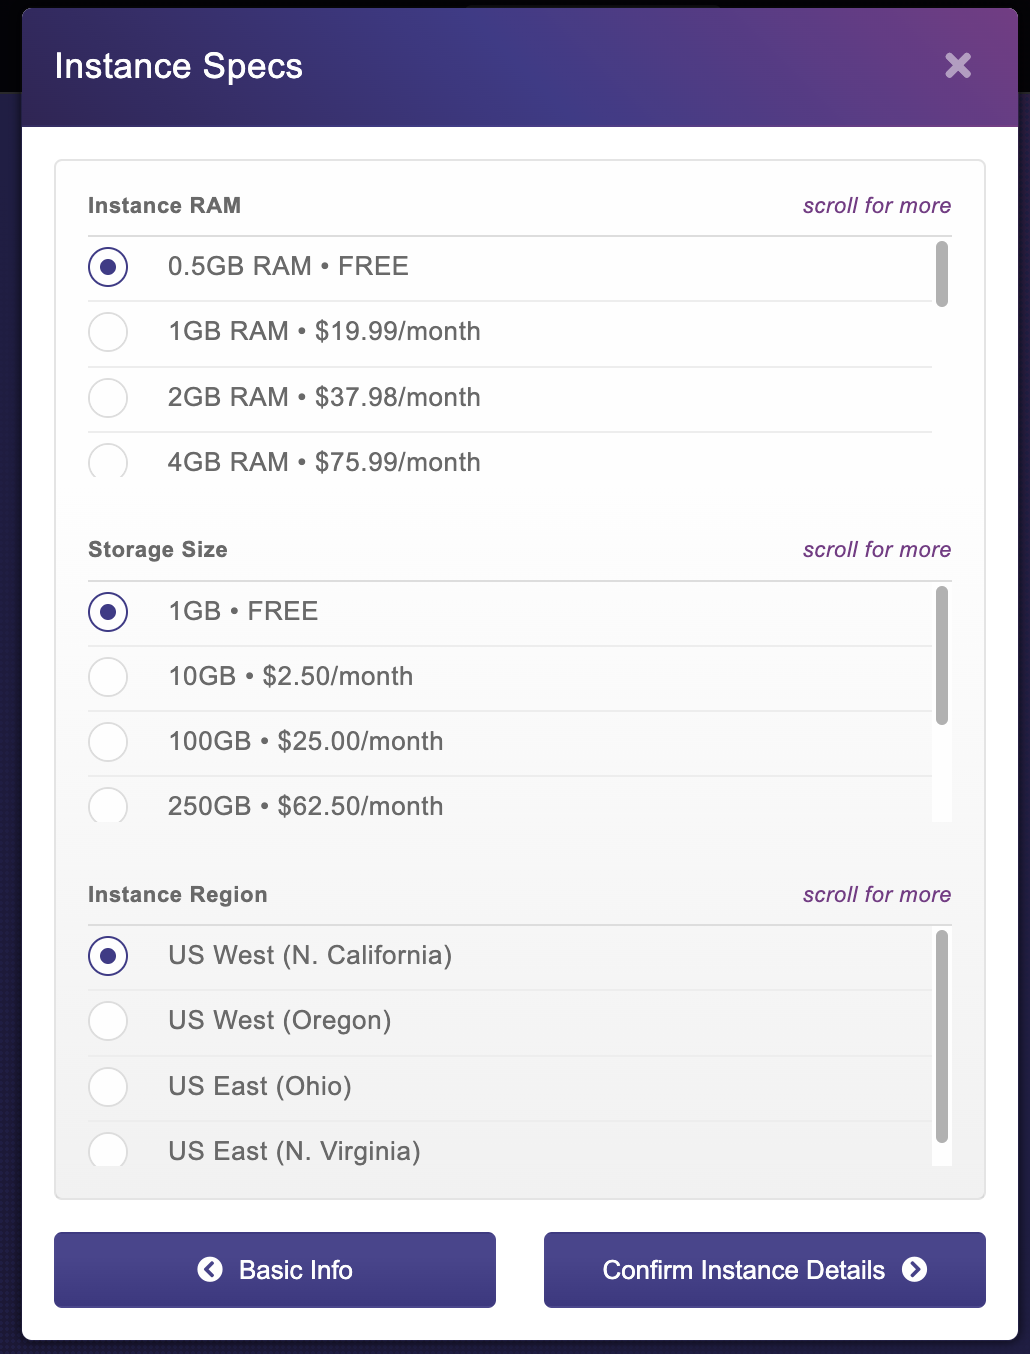
If you are using the free tier of service, you should keep all of the settings on the screen above at their defaults and then click the Confirm Instance Details button.
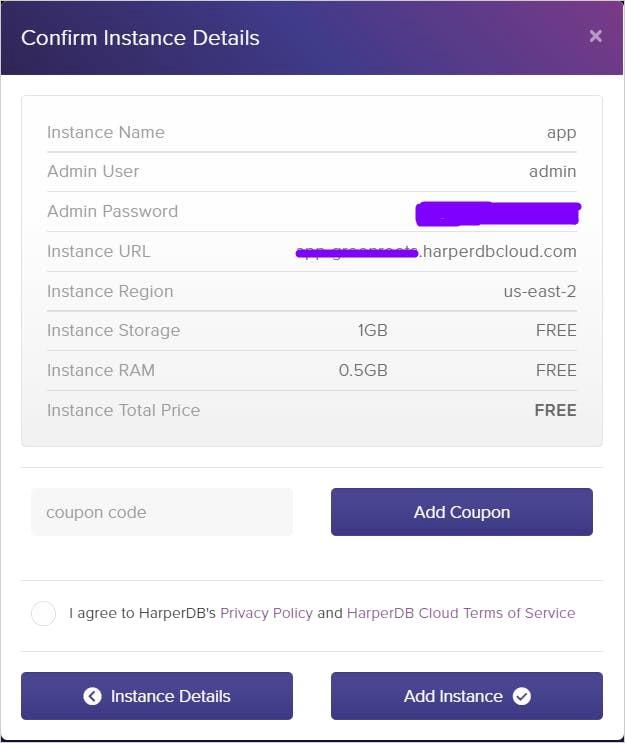
The final step is to Confirm Instance details and add the HarperDB cloud instance. Make sure you examine the details once more and then click the Add Instance button.
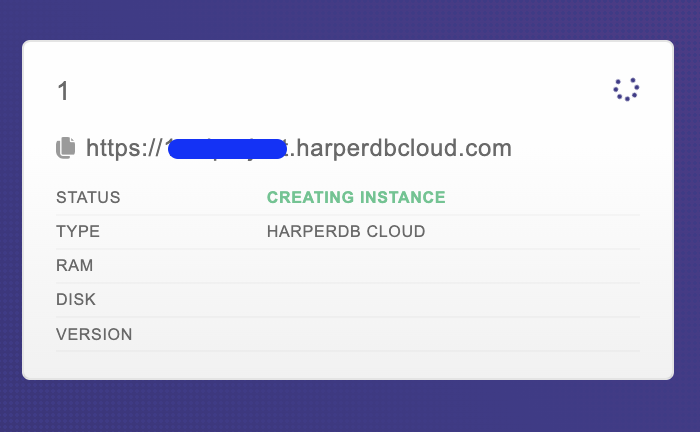
Finally, you will see that the creation of the cloud instance has started as shown below.
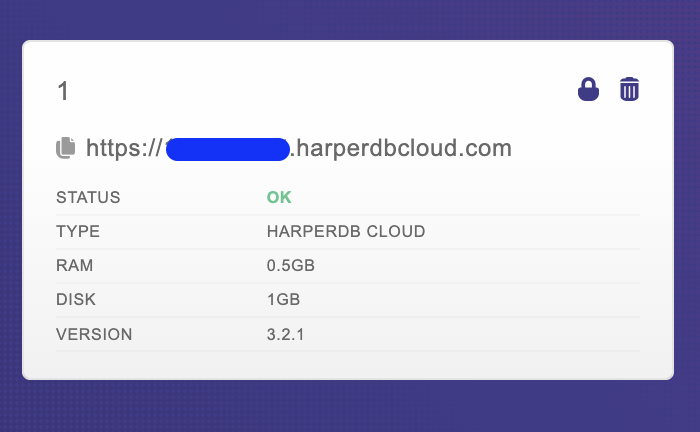
After a few minutes, when the HarperDB Cloud Instance has been created successfully, you will see the status as OK for that particular instance.
Congratulations 🎉 You have successfully completed the third step of creating a cloud instance.
How to Configure the HarperDB Schema and Table
You need to first create a schema and a table in order to insert the results of your ML experiment into the database.
To do this, all you have to do is load the HarperDB cloud instance that you have already established from the dashboard.
First, you need to create the schema by specifying a schema name. For this tutorial, the schema name is machinelearning.

Following the creation of a schema, you will be presented with the option to add tables. Let’s get started by making the first table, which we'll call experiments.
HarperDB will also ask you to specify the hash_attribute, which is equivalent to a unique identifier.
The value of hash_attribute will be automatically generated by HarperDB. Most data tables use the id as a unique identifier for each record, and that is what you will use in this table called experiments.
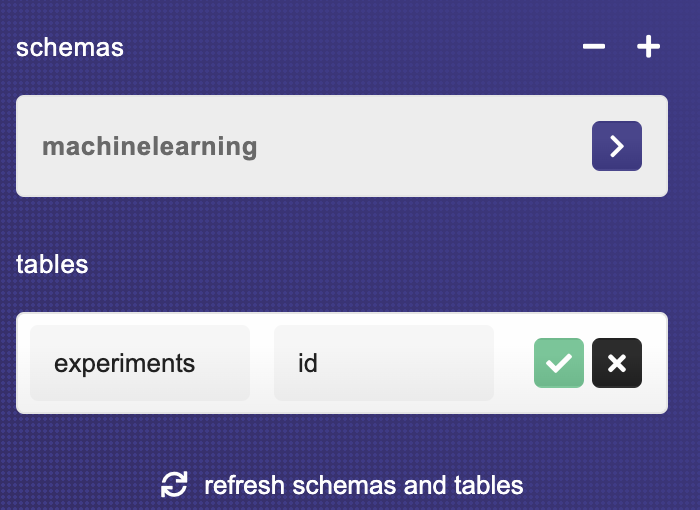
The schema, as well as the table, have both been successfully created at this point.

How to Track Your Machine Learning Experiments in HarperDB
I will use the Loan dataset to conduct Machine Learning experiments, and then record all ML experiment results into the experiments table in the HarperDB database cloud instance.
The goal of the ML experiment is to achieve high accuracy when predicting whether a consumer deserves a loan. You can download the dataset here.
Here are the steps you need to follow to run and track your ML experiments.
1. Install the Required Packages
You need to install the following package in your machine.
(a) scikit-learn
This is the machine learning library that has different algorithms to train the machine learning model on different problems such as classification, regression, and clustering.
pip install scikit-learn
(b) harper-sdk-python
This is the Python package we'll use to implement different HarperDB API functions. It also provides wrappers for an object-oriented interface.
pip install harperdb
2. Import Other Important Packages
The next step is to import Python packages to load data and preprocess the dataset and algorithms to train on the loan dataset.
#import packages

import numpy as np
import pandas as pd
from sklearn import preprocessing
from sklearn.metrics import classification_report, confusion_matrix, f1_score
from sklearn.preprocessing import StandardScaler, MinMaxScaler, LabelEncoder
from sklearn.model_selection import train_test_split
from sklearn.model_selection import cross_val_score
from sklearn.model_selection import GridSearchCV

# classifiers
from sklearn.ensemble import RandomForestClassifier
from sklearn.neighbors import KNeighborsClassifier
from sklearn.ensemble import GradientBoostingClassifier
from sklearn.tree import DecisionTreeClassifier
from sklearn.linear_model import LogisticRegression
from sklearn.ensemble import BaggingClassifier
from sklearn.ensemble import ExtraTreesClassifier
from xgboost import XGBClassifier
from imblearn.ensemble import (
    BalancedBaggingClassifier,
    EasyEnsembleClassifier,
)

# harperdb
import harperdb

import time
import json
import warnings  # To ignore any warnings

warnings.filterwarnings("ignore")

np.random.seed(123)
3. Load the Loan dataset
We will use the Pandas library to load the loan dataset.
data = pd.read_csv("data/loans_data.csv")

data.columns
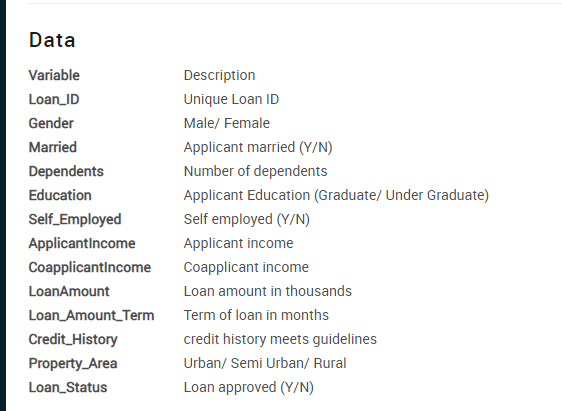
Here is the list of features available in the loan dataset.
Loan_ID
Gender
Married
Dependents
Education
Self_Employed
ApplicantIncome
CoapplicantIncome
LoanAmount
Loan_Amount_Term
Credit_History
Property_Area
Loan_Status
We have 12 independent features and a target (Loan_Status). You can read the description of each feature here.
4. Create a Python Function
Before training, you must manage missing values included in the dataset and preprocess the features. I’ve developed a straightforward Python tool for missing data and feature engineering.
# function to preprocessing the dataset


def preprocessing(data):
    # replace with numerical values
    data['Dependents'].replace('3+', 3, inplace=True)
    data['Loan_Status'].replace('N', 0, inplace=True)
    data['Loan_Status'].replace('Y', 1, inplace=True)

    # handle missing data
    data['Gender'].fillna(data['Gender'].mode()[0], inplace=True)
    data['Married'].fillna(data['Married'].mode()[0], inplace=True)
    data['Dependents'].fillna(data['Dependents'].mode()[0], inplace=True)
    data['Self_Employed'].fillna(data['Self_Employed'].mode()[0], inplace=True)
    data['Credit_History'].fillna(data['Credit_History'].mode()[0],
                                  inplace=True)
    data['Loan_Amount_Term'].fillna(data['Loan_Amount_Term'].mode()[0],
                                    inplace=True)
    data['LoanAmount'].fillna(data['LoanAmount'].median(), inplace=True)

    # drop ID column
    data = data.drop('Loan_ID', axis=1)

    #scale the data
    data["ApplicantIncome"] = MinMaxScaler().fit_transform(
        data["ApplicantIncome"].values.reshape(-1, 1))
    data["LoanAmount"] = MinMaxScaler().fit_transform(
        data["LoanAmount"].values.reshape(-1, 1))
    data["CoapplicantIncome"] = MinMaxScaler().fit_transform(
        data["CoapplicantIncome"].values.reshape(-1, 1))
    data["Loan_Amount_Term"] = MinMaxScaler().fit_transform(
        data["Loan_Amount_Term"].values.reshape(-1, 1))

    #change categorical features to numerical
    data = pd.get_dummies(data)

    return data
And if you're curious, you can also read more about how to handle missing values in a dataset here.
Let’s preprocess the loan dataset.
data = preprocessing(data)
5. Connect to the HarperDB Cloud Instance
The next step is to connect to the HarperDB cloud instance in order to insert experiment results into the table called experiments.
Here you need to provide three parameters:
- Full URL of the HarperDB instance
- Your username
- Your password
# connect to harperdb

URL = "https://{project-name}.harperdbcloud.com"
USERNAME = "your-username"
PASSWORD = "your-password"

db = harperdb.HarperDB(url=URL, username=USERNAME, password=PASSWORD)

# check if you are connected
db.describe_all()
When you execute the above code, you will see output similar to that displayed below, indicating a successful connection to your HarperDB Cloud Instance.
{'machinelearning': {'experiments': {'__createdtime__': 1656351257480, '__updatedtime__': 1656351257480, 'hash_attribute': 'id', 'id': 'd5333654-16c0-4ae5-bf30-0a6e607b1ee7', 'name': 'experiments', 'residence': None, 'schema': 'machinelearning', 'attributes': [{'attribute': 'id'}, {'attribute': '__createdtime__'}, {'attribute': 'accuracy_mean'}, {'attribute': '__updatedtime__'}, {'attribute': 'model_name'}, {'attribute': 'training_period'}, {'attribute': 'name'}], 'record_count': 0}}}
6. Create a Function to Record the Experiment Results
You also need to create a function that will save each experiment result in the other experiments table. You need to define the SCHEMA and the TABLE you will use to insert the records.
The function below will receive the experiment result as data (dictionary format) and insert it into that table by using the insert function from the harperdb-python package.
The insert function will receive three parameters:
- SCHEMA name
- TABLE name
- data (experiment results)
# define a function to record experiment results into the table

def record_results(data):

    #define the schema and table
    SCHEMA = "machinelearning"
    TABLE = "experiments"

    # insert data into the table
    result = db.insert(SCHEMA, TABLE, [data])

    return result
The function will return the status of that particular record if it's successfully inserted into the table.
7. Split the Data into Features and Target
We need to split the data into features and target. The target for this dataset is a column named Loan_Status.
# split data into train and test

X = data.drop('Loan_Status', axis=1)
y = data.Loan_Status
8. Run and Track Machine learning Experiments
Now you can train multiple classification algorithms and save the results into the table in the HarperDB cloud instance by using the record_results function.
Here you will save the following records into the table:
- The name of the experiment, for example “First”.
- The name of the classification model, for example RandomForestClassifier.
- The model’s parameter names are mapped to their values.
- The list of accuracy across from cross-validation scores.
- The average accuracy score.
- The training period.
The above mentioned records will be inserted into the experiments table.
# create a dictionary for  classifiers
models = {
    "KNeighborsClassifier": KNeighborsClassifier(),
    "RandomForestClassifier": RandomForestClassifier(),
    "GradientBoostingClassifier": GradientBoostingClassifier(),
    "DecisionTreeClassifier": DecisionTreeClassifier(),
    "BaggingClassifier": BaggingClassifier(),
    "XGBClassifier": XGBClassifier(),
    "ExtraTreesClassifier": ExtraTreesClassifier(),
    "LogisticRegression": LogisticRegression(),
    "BalancedBaggingClassifier": BalancedBaggingClassifier(),
    "EasyEnsembleClassifier": EasyEnsembleClassifier(),
}

# cross_val_score for each classifier
for model_name, model in models.items():

    start = time.time()

    scores = cross_val_score(model, X, y, cv=3, scoring='accuracy')

    end = time.time()

    training_duration = end - start

    data = {
        "name": "First",
        "model_name": model_name,
        "model_parameters": json.dumps(model.get_params()),
        "accuracy_scores": json.dumps(list(scores)),
        "accuracy_mean": scores.mean(),
        "training_period": training_duration
    }

    # insert result into the HarperDB table
    result = record_results(data)

    print(result)
    print("-------------------------------")
The following output will be generated once the code above is running.
{'message': 'inserted 1 of 1 records', 'inserted_hashes': ['d6fe4a54-69ee-4c10-8bb2-c592c57b30d7'], 'skipped_hashes': []}
-------------------------------
{'message': 'inserted 1 of 1 records', 'inserted_hashes': ['fca4307e-3287-4b76-9f8c-0c22ed1b4ac4'], 'skipped_hashes': []}
-------------------------------
{'message': 'inserted 1 of 1 records', 'inserted_hashes': ['1b0aabe7-1f31-4bb7-b195-8dc598e74a46'], 'skipped_hashes': []}
-------------------------------
{'message': 'inserted 1 of 1 records', 'inserted_hashes': ['02750d9c-8876-4e0d-8849-133d72b8ca20'], 'skipped_hashes': []}
-------------------------------
{'message': 'inserted 1 of 1 records', 'inserted_hashes': ['4ab96069-a014-49bd-ba90-6edd92b08c35'], 'skipped_hashes': []}
-------------------------------
The purpose of this output is to verify that the experiment results were added to the experiment table without any errors.
9. View the Experiments Table
If you open your HarperDB cloud instance, you will be able to see all records of your Machine learning experiments.
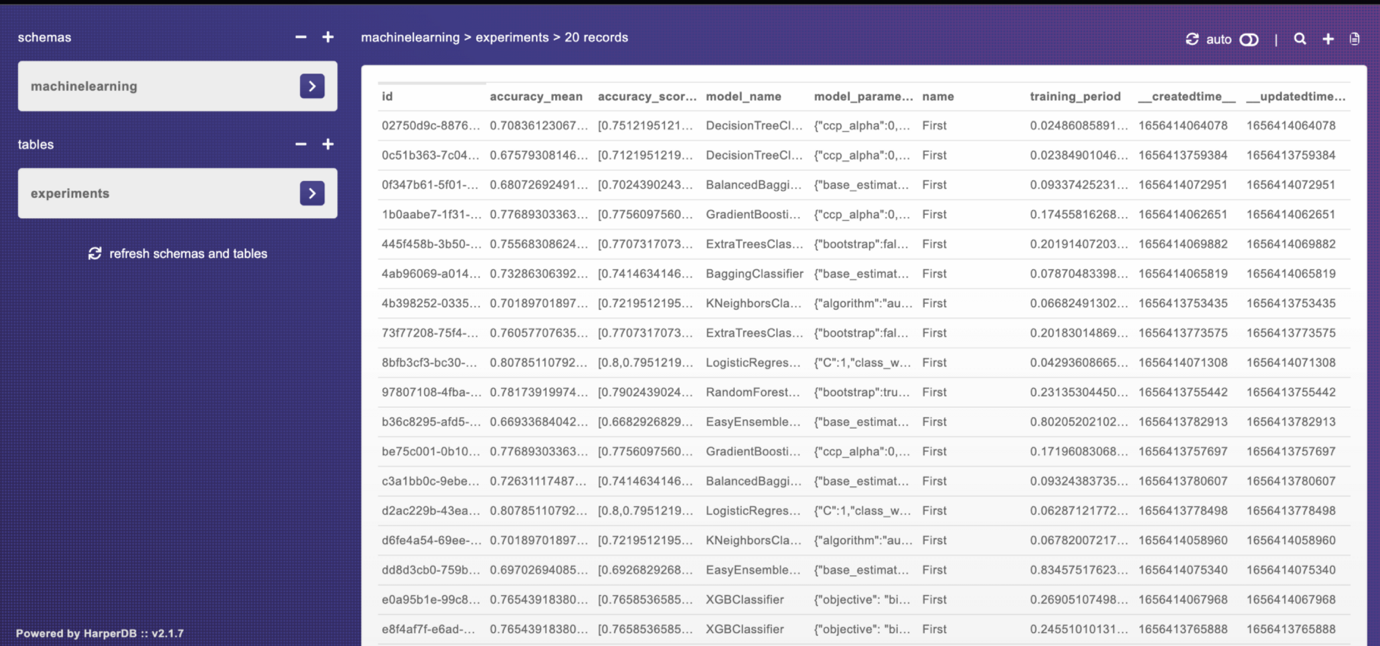
You can also click a single record in the experiments table to see all recorded data for that particular algorithm you trained on the loan dataset.
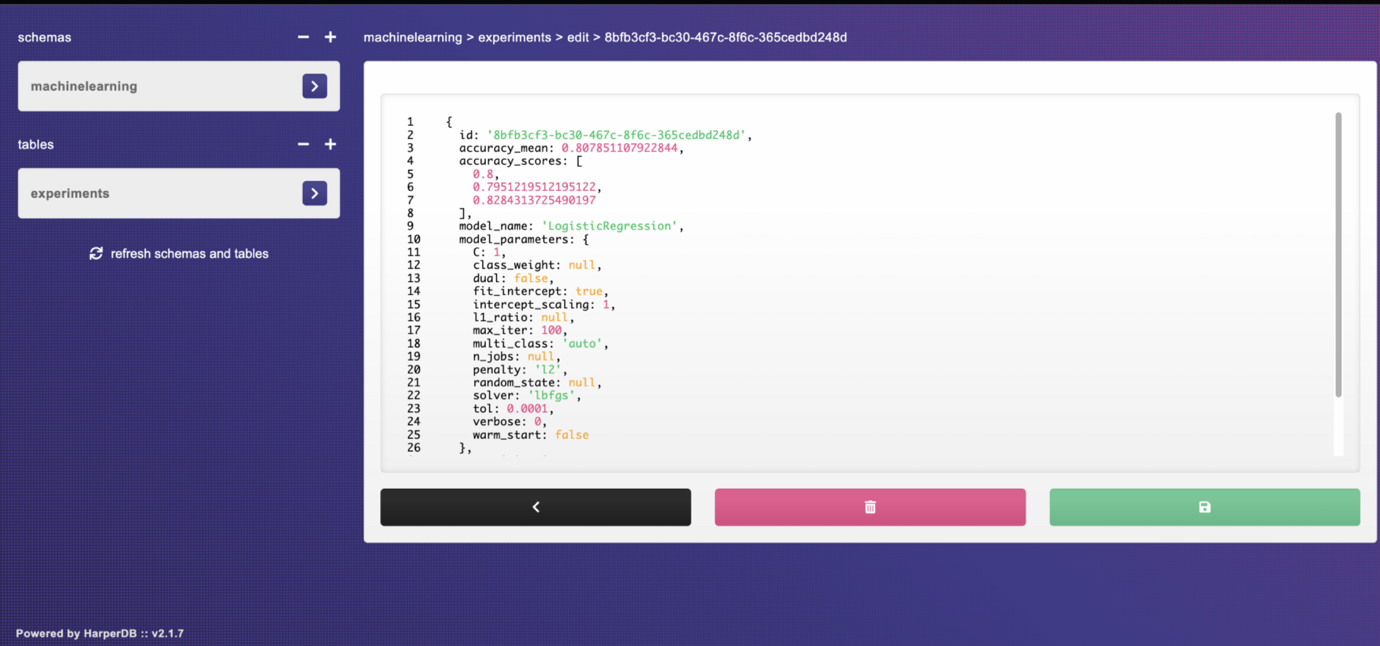
For example, the LogisticRegression model has an accuracy of 80.7%.
You are now able to carry on running a variety of ML experiments, and the outcomes of these experiments will be inserted into the HarperDB cloud instance.
When you run your next experiment, it will continue to record the experiment results in the experiments table without overriding previous results. This means you will have a chance to observe and examine the results of all of your experiments and evaluate them to find a better way to improve your model performance.
What is a Custom Function?
A Custom Function is a new feature from HarperDB as part of their 3.1+ release. The feature lets you add your own API endpoints inside HarperDB.
Custom functions are powered by Fastify, which is extremely flexible and makes it easier to interact with your data by using HarperDB core methods.
In this section, you will learn how to create your very own custom function using the HarperDB studio. This will allow you to communicate the results of your machine learning experiments with your colleagues at work using an API call.
1. Enable Custom Functions
The first step is to click “functions” in your HarperDB Studio and then enable custom functions (it is not enabled by default).

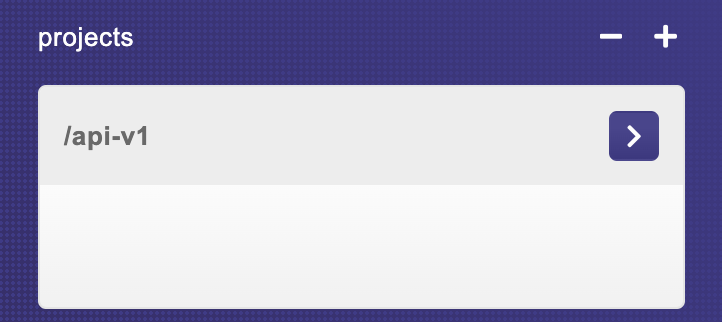
2. Create a Project
The next step is to create a project by specifying the name. For example api-v1.
It will also create setting files for the project including:
- Routes folder
- File to add helper functions
- Static folder.
Note: For this article, you will focus on the routes folder.
3. Define a Route
Let’s create the first route to fetch some data from the experiments table from the HarperDB Data store. But first you need to know that Route URLs are resolved in the following manner:
[Instance URL]:[Custom Functions Port]/[Project Name]/[Route URL]
It will include:
- Cloud Instance URL
- Custom Functions Port
- Project name you have created
- The route you have defined
In the route file (example.js) from the function page, you will see some template code as an example. You need to replace that code with the following code:
'use strict';

module.exports = async (server, { hdbCore, logger }) => {

server.route({

    url: '/',
    method: 'GET',
    handler: (request) => {
    request.body= {
    operation: 'sql',
    sql: 'SELECT model_name,accuracy_scores,accuracy_mean,training_period FROM machinelearning.experiments ORDER BY accuracy_mean'
};
return hdbCore.requestWithoutAuthentication(request);
}
});
In the code above, the route /api-v1 is defined with the GET method and the handler function will send an SQL query to the database to get model_name, accuracy_scores, and accuracy_mean,training_period from the experiments table ordered by the accuracy_mean column.
You can save the new changes you have added in the route file.
4. Try Your API Endpoint
Finally, you can now use the route you have defined to get the data from the experiments table. You can either try to access the route via the web browser, any programming language, or API tools (like Postman).
The route URL will be: https://functions-1-mlproject.harperdbcloud.com/api-v1
How to access the route via a web browser
You just need to copy the route URL and add it to your web browser to view the requested data.

This will show the data you requested according to the defined SQL query in the handler function.
How to send an API request in Python
This option allows you to send an API request by using the requests Python package.
#send an API request

import requests

# api-endpoint
URL = "https://functions-1-mlproject.harperdbcloud.com/api-v1"

# sending get request and saving the response as response object
r = requests.get(url = URL)

# extracting data in json format
data = r.json()

for experiment in data:
    print(experiment)
Here is the sample output from the above code:
{'model_name': 'EasyEnsembleClassifier', 'accuracy_scores': [0.6682926829268293, 0.697560975609756, 0.6421568627450981], 'accuracy_mean': 0.6693368404272277, 'training_period': 0.8020520210266113}{'model_name': 'DecisionTreeClassifier', 'accuracy_scores': [0.7121951219512195, 0.7024390243902439, 0.6127450980392157], 'accuracy_mean': 0.6757930814602263, 'training_period': 0.023849010467529297}{'model_name': 'BalancedBaggingClassifier', 'accuracy_scores': [0.7024390243902439, 0.6926829268292682, 0.6470588235294118], 'accuracy_mean': 0.6807269249163079, 'training_period': 0.09337425231933594}{'model_name': 'EasyEnsembleClassifier', 'accuracy_scores': [0.6926829268292682, 0.7268292682926829, 0.6715686274509803], 'accuracy_mean': 0.6970269408576438, 'training_period': 0.8345751762390137}
As you can see, HarperDB makes it simple to construct API endpoints, which lets your coworkers quickly access the results of any machine learning experiments that you conduct.
Conclusion
Congratulations 🎉, you have made it to the end of this article. You have learned:
- The importance of tracking your machine learning experiments.
- How to save the results of your ML experiments in the HarperDB cloud instance.
- How to create a custom function from the HarperDB cloud instance to share your ML experiments results with your coworkers working on the project via an API endpoint.
If you learned something new or enjoyed reading this article, please share it so that others can see it. Until then, see you in the next post!
You can also find me on Twitter @Davis_McDavid.