
By Thomas Reinecke
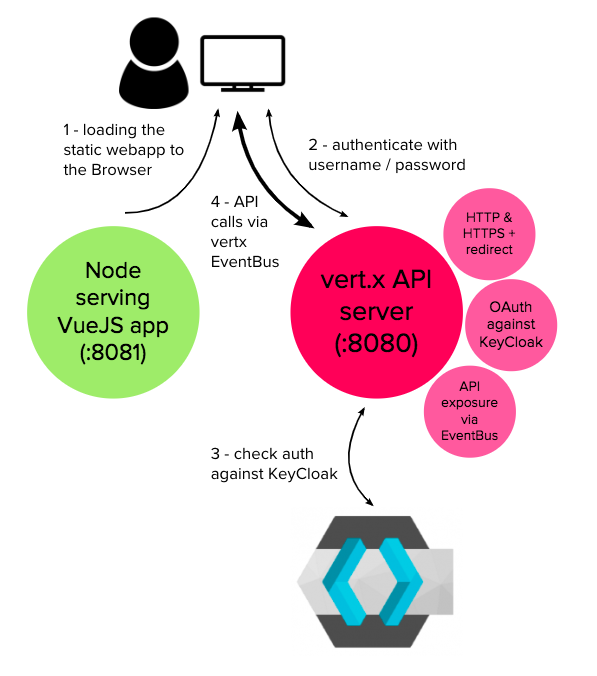
In this tutorial you will learn how to setup an application boilerplate based on Vert.x (Java) as a backend and VueJs as a frontend with a focus on User Authentication against Keycloak through OAuth2. Once a User is logged in, the vertx-vue-keycloak app also demonstrates how to query the Vert.x backend, send data (mutations) and how Publish/Subscribe works between Vert.x and VueJS.
The e2e code for this article is hosted on GH here.
Step 1 — Prep Work
Install KeyCloak
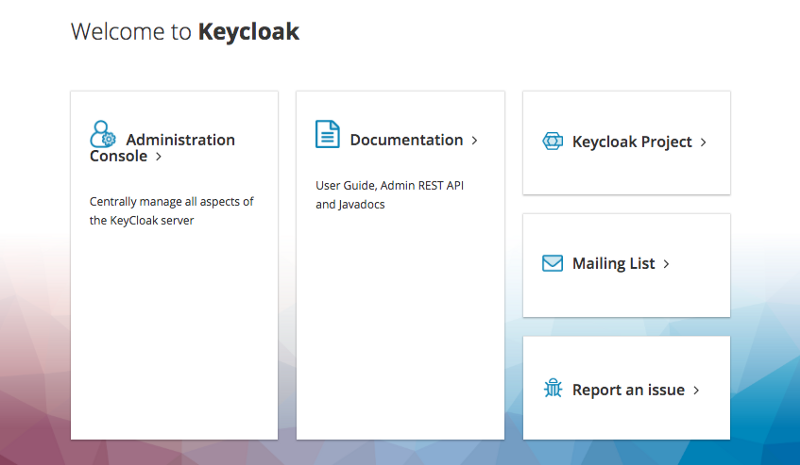
In this example we’re going to use Keycloak as Authentication and Authorization management provider. Keycloak is an open source identity and access management offering by RedHat, which provides OAuth2 and much more. Keycloak comes with a Web admin console to administrate the server. We can easily run it based on docker:
docker run -d — name keycloak -p 38080:8080 -e KEYCLOAK_USER=admin -e KEYCLOAK_PASSWORD=admin -e KEYCLOAK_LOGLEVEL=DEBUG jboss/keycloak
After starting this container, the Keycloak admin console will be available at http://127.0.0.1:38080. Be aware of the version of Keycloak — at the time this article was written it was 4.5.0.Final, so the UI might look a little different with newer or earlier versions.
Create the Keycloak client credential
For the Vert.x app we’re going to develop, we need a registered client in Keycloak. Fill out the form with the given highlighted values:
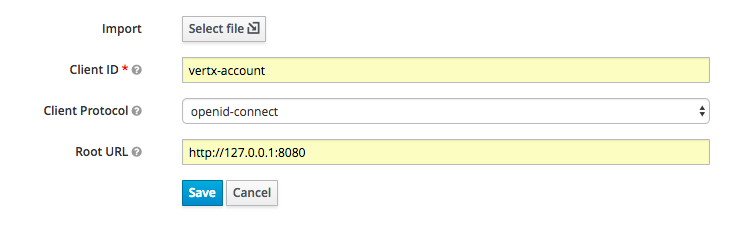
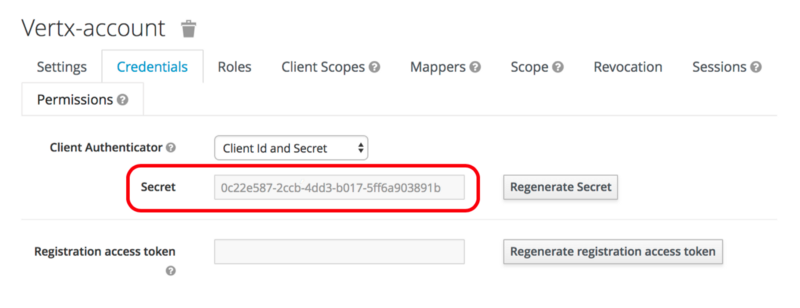
Save this, open and inspect the just created vertx-account client object:

We’ll come back to this page, in particular the information on the Credentials tab later when we embed the client details in the vertx code.
Create Roles
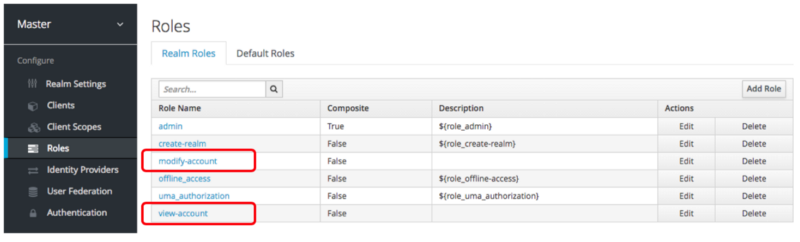
On the Roles Tab from the left sidebar in Keycloak, create two exemplary roles modify-account and view-account:
Create a User
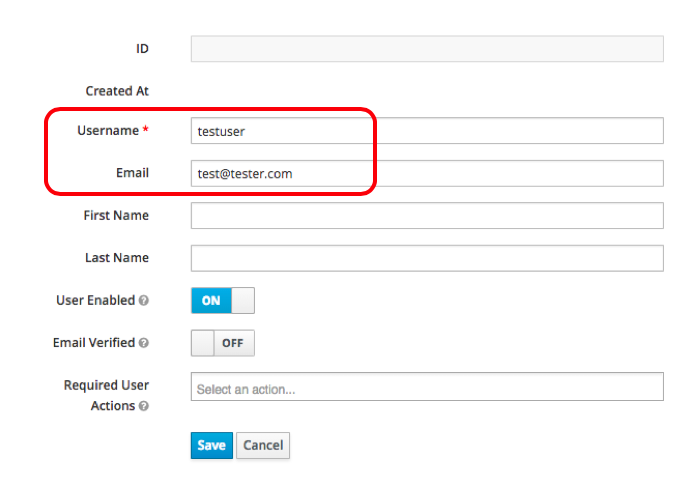
On the Manage Users tab, create a new user, give it a username testuser and an email address test@tester.com and save it:
Still on the just created users page, switch to the Credentials tab and set the password of this user to test. Also unselect the Temporary switch and click the Reset Password button. Be aware: the behaviour of this UI is a little strange. When you click this button, the Temporary flag switches back to true, but just ignore this. The password you gave should be well set.

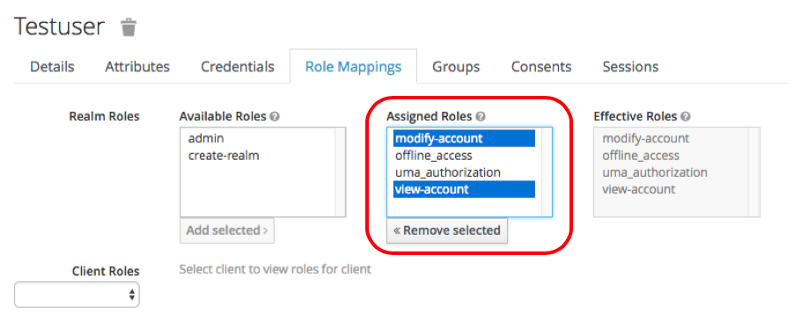
Switch to the Role Mapping tab and assign the just created roles modify-account and view-account to this user:
This completes the setup of Keycloak. Congratulations! We’re now ready to work on our vert.x backend and VueJS frontend.
More details on setting up Keycloak and configuring it for Vert.x can be found in this great article, which I also used as source for above instructions (thanks to Piotr Minkowski).
Step 2 — Create Vert.x Backend and VueJs Frontend
I used Eclipse to create a simple Maven project (without archtype selection) and from there I added vertx onto the dependency list in pom.xml. At the time this article was written, vertx was on version 3.5.4.
Clone the following repository (including the source-code for this article):
vertx-stack/vertx-vue-keycloak
_Contribute to vertx-stack/vertx-vue-keycloak development by creating an account on GitHub._github.com
git clone https://github.com/vertx-stack/vertx-vue-keycloak.git
Create Keystore file
You may want to follow whatever procedure you find appropriate to create a proper certificate chain and get it into the jks format. The example I give here is based on a self-signed certificate and it works great on local or for test environments. The repo you just cloned comes with the file, so you may skip this section. For production, please get a CA-signed certificate (a free one, for example, from LetsEncrypt).
Run the following OpenSSL command to generate your private key and public certificate. Use “testpassword” as password and leave all values default (hit enter until you’re through):
openssl req -x509 -newkey rsa:2048 -keyout key.pem -out cert.pem -days 365
Review the certificate file:
openssl x509 -text -noout -in cert.pem
Combine your key and certificate in a PKCS#12 (P12) bundle, and as the export password use “testpassword” again:
openssl pkcs12 -inkey key.pem -in cert.pem -export -out certificate.p12
Convert it into a JKS file. Use “testpassword” as the destination keystore password:
keytool -importkeystore -srckeystore certificate.p12 -srcstoretype pkcs12 -destkeystore test.jks -deststoretype jks
We now have our certificate store in test.jks, ready for use by vert.x to secure an HTTPS connection. This file also comes with the repo you just cloned.
Understand the vertx-vue-keycloak app
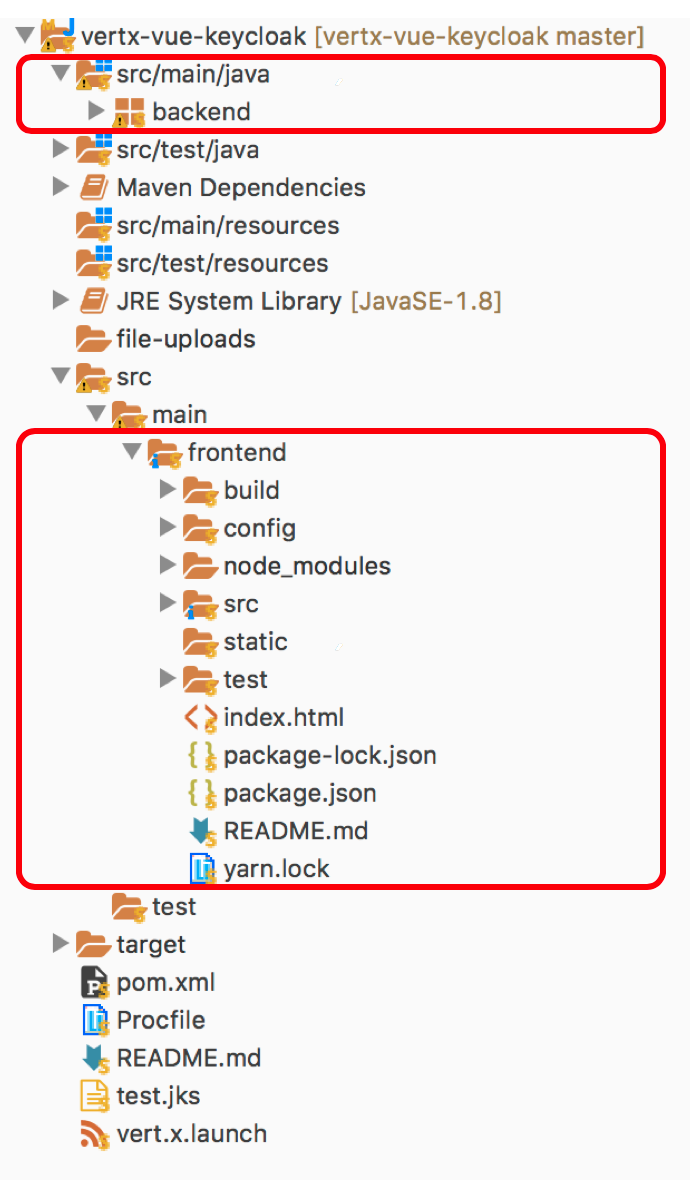
The app contains both the vertx source codes for the backend and the VueJS-based frontend code.
On the Backend (src/main/java), the MainVerticle.java is primary entry point. It’s a Vertx verticle that is creating the HTTP/HTTPS server, configuring the various routes, exposing the /login endpoint that’s integrating with Keycloak, and finally is providing the API endpoints for our frontend.
The Frontend (placed in src/main/frontend) is a regular VueJS frontend that was created with the VueJS CLI. It’s containing the assets, libraries and components.
Step 3 — Integrate with KeyCloak
Open src/main/java/backend/MainVerticle.java and inspect the method createHttpServerAndRoutes:
JsonObject keycloakJson = new JsonObject() .put("realm", "master") .put("realm-public-key", "MIIBIjANBgkqhkiG9w0BAQEFAAOCAQ8AMIIBCgKCAQEAqZeGGDeEHmmUN4/UXh2gQD0yZEZirprsrdYK7GfcE1+QF9yfYfBrIv5cQUssFQKISVpbbLcoqYolsxcOvDyVFSQedHRsumOzqNZK38RHkidPMPrSNof5C3iMIHuXOCv/6exnLZvVoeYmkq42davYEz1tpSWzkZnlUMbRZFs1CfzLMM2rsAJWsO1/5zbDm0JhFl7EFUsTki72ihac1Q5zUUSFyf1jKUEkL7rrkYINjgAaQKktE8pnubc3Y44F5llY4YyU9/bqUWqMYDx868oiDcnoBpGGd4QrUMlbULZZLRqqUKK6iG1kHxDCJQ9gaCiJoELyAqXjnnO28OODQhxMHQIDAQAB") .put("auth-server-url", "http://127.0.0.1:38080/auth") .put("ssl-required", "external") .put("resource", "vertx-account") .put("credentials", new JsonObject() . put("secret", "0c22e587-2ccb-4dd3-b017-5ff6a903891b"));
OAuth2Auth oauth2 = KeycloakAuth.create(vertx, OAuth2FlowType.PASSWORD, keycloakJson);
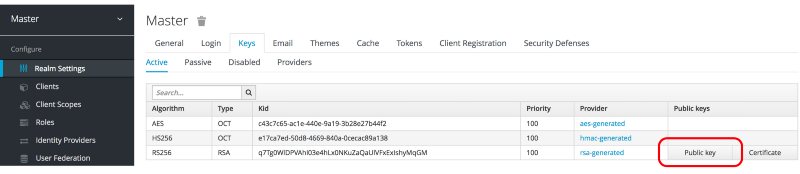
Get the realm and real-public-key from the Keycloak admin console. To get the key, click on the “Public Key” button on the Keys tab of the master realm:
As a resource, include the previously created vertx-account client. As its credentials, navigate to it on the Clients menu > vertx-account > Credentials tab and copy the Secret from there:
As the OAuth2FlowType we’re going to select PASSWORD, representing the Password Credentials Flow. More details on the OAuthFlows can be found here.
We’re now able to define the /login route to handle the actual login:
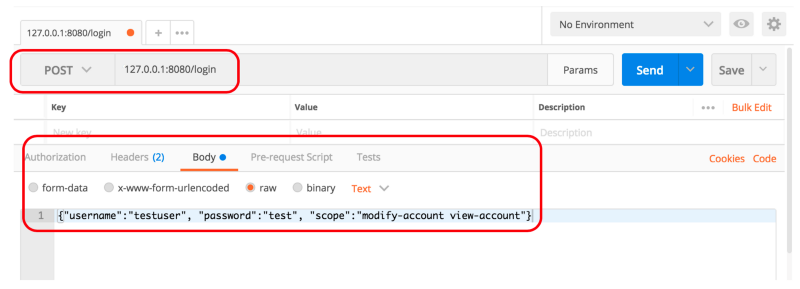
We can now run our first test of the vertx Backend by starting the vert.x launcher. Using Postman, we can now run the first user auth via a POST against 127.0.0.1:8080/login (our vertx server with the /login route). On the Body, we select raw data and enter the following JSON object:
{ "username":"testuser", "password":"test", "scope":"modify-account view-account"}
Press Send in Postman and send this to our vertx server:
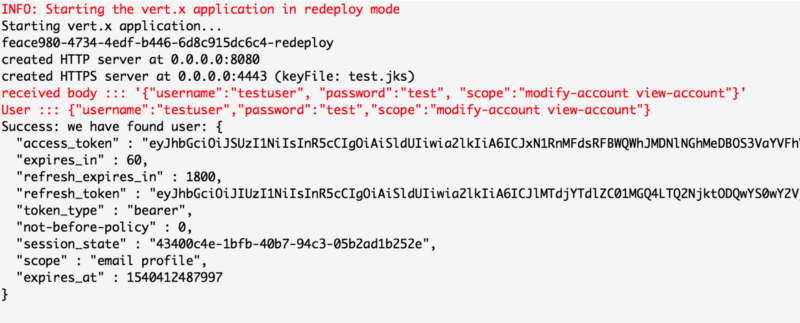
The result on the server will look like this, indicating that we have successfully found the user “testuser” on Keycloak. Good job!
Authenticate with our Frontend
Now that we have the basic Authentication working and have tested it with Postman, it’s time to get our Frontend app integrated with it. The Forntend comes at src/main/frontend. To get it going, run a quick install of the dependencies with yarn and finally start it with yarn dev. More Details here.
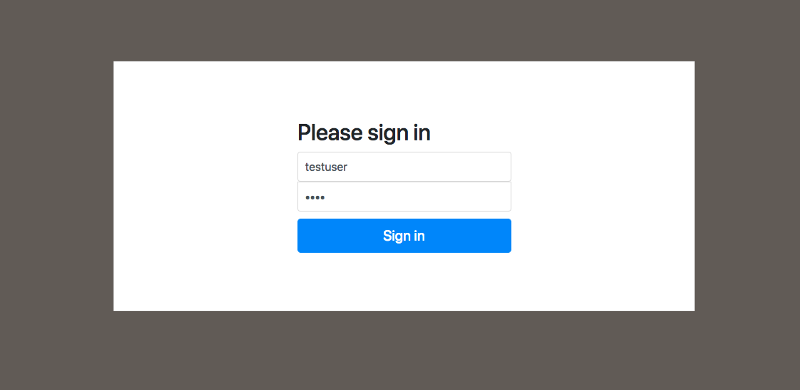
The Frontend will now start on localhost:8081. It’s going to present a fairly simple login page (bootstrap was used to style it):
I wont go into all the specifics of this app here. For many more details on how this was created, please check out this great article from Paweł J. Wal.
The only additional thing we need to change is to configure CORS on the Vert.x backend side to make sure the Frontend can speak to it.
You’re now ready to authenticate a user from the VueJS Frontend App to your Vert.x backend. Logging in with your testuser:test gets you into the protected space of your app:
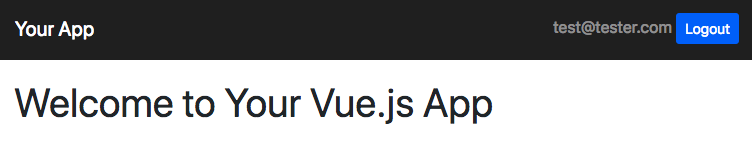
Congratulations, you now have a pretty slick way to log into a VueJS app, running against a Vert.x API and Authentication server thats integrated with Keycloak.
Step 4 — Integrate Query and Data Update logic
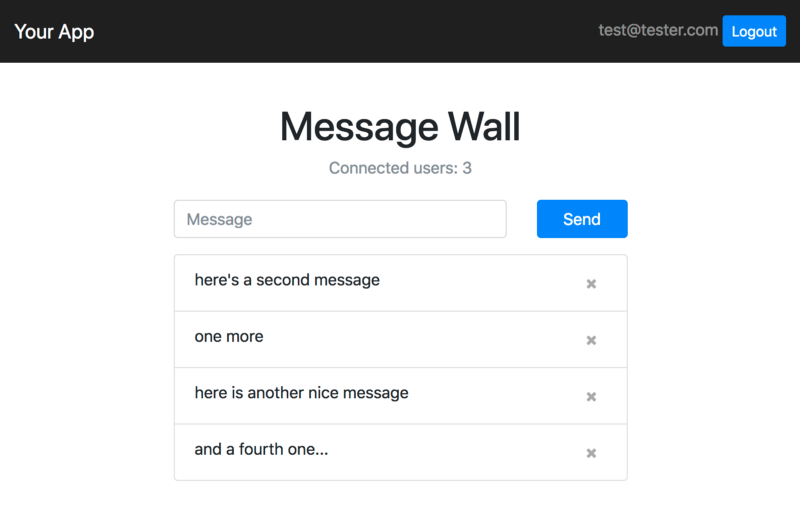
We’re going to implement a very simple message management system here as an example, which looks roughly like this:
The frontend and pieces of the eventbus integration in this example have been inspired by Mateusz Parzonka’s vertx-examples project on GitHub — thanks for that!
The proposed procedure in this example is to utilize standard message endpoints, producers and consumers on the Vertx EventBus for a fully sophisticated Client/Server communication pattern including queries, data mutations and publish/subscribe. The idea is pretty simple:
- on the backend we expose a number of message consumers which act as get, create, and delete methods.
- on the frontend we subscribe to specific data channels that allow us to send whatever from the backend to the frontend, which also greatly helps to tunnel client to client communication through the backend.
On the Frontend side, we’re going to create a vertx eventbus service that’s using vertx3-eventbus-client. The essential methods here are callApi and subscribe (for more details on pubsub, see step 5):
To get, delete and create a new message, inspect the Home.vue component, in particular the usage of the eventbus service from utils/eventbus:
As a result, you’re now able to use this UI to receive the array of known messages from the backend, create new messages, and delete them. So far so good, but wait a minute: what’s actually happening to other clients that use the same app in parallel to me? Let’s dive into PubSub finally…
Step 5 — Integrate Publish & Subscribe
We’ve already seen that the backend is publishing the full array of messages onto the Vertx EventBus whenever an update is made (which is a little bit of overkill, but let’s accept this for this example). How can the frontend finally catch these updates?
Fortunately the Vertx EventBus (which is based on SockJS) allows us to subscribe clients to channels that can be fueled by any other client (c2c communication) or also from the server.
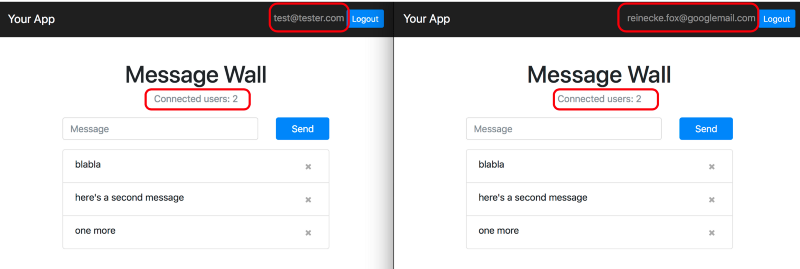
Our eventBus service provides a function to subscribe to such a channel (see the code above). This is being used again on the Home.vue component to capture changes on the message array and on the number of connections the vertx server is managing in the following way:
Here we’re capturing the messages coming from the :pubsub/connections and :pubsub/messages channels and we’re pushing the incoming data into the frontend. This allows to keep multiple browsers that run the same app perfectly in sync through the vertx EventBus.
Limitations
One of the biggest limitations of this example is the setup of the vertx Backend. In particular the security on the vertx Eventbus is not yet configured, since we don’t check whether the user that’s calling the API is actually authenticated on the backend. So do not use this code for production apps without working on this.
Another aspect is that the EventBus and also the /login handler on the Backend still work over HTTP. The redirection to HTTPS code that’s in place only relates to the static resources, not yet to the EventBus as far I have tested with limited time. I guess since we don’t really serve static HTML content through vertx, it would make sense to disable the HTTP server completely and just go with HTTPS.
Finally the HTTPS certificate was self-signed and certainly you don’t want to use this for serious use outside of localhost. Get yourself a CA-signed certificate (e.g. from LetsEncrypt) and go from there.
Other than that : happy vertx’ing !
If you need OAuth based on Google instead of Keycloak, checkout
Google OAuth2 with VueJS and Vert.x