By Per Harald Borgen
CSS (Cascading Style Sheet) is one of the three cornerstones of the web, along with HTML and JavaScript. It’s what brings life to websites through colours, styling, positioning and much more. Thus, knowing CSS is hugely valuable in today’s labour market!
So I’m happy to announce that we’ve just launched a free CSS course on Scrimba. It’s created by our brilliant instructor Eric Tirado, who also did our popular intro to HTML course.
In less than an hour, Eric will take you from zero to proficient in CSS!
Let’s have a look at how the course is laid out.
Part #1: Introduction
In the introductory video, Eric will give you an overview of what the course looks like, what the pre-requisites are, plus an overview of the topics he touches throughout the course. He also gives you a brief introduction about himself so you get familiar with him before jumping off.
Part #2: CSS Documents & The Cascade
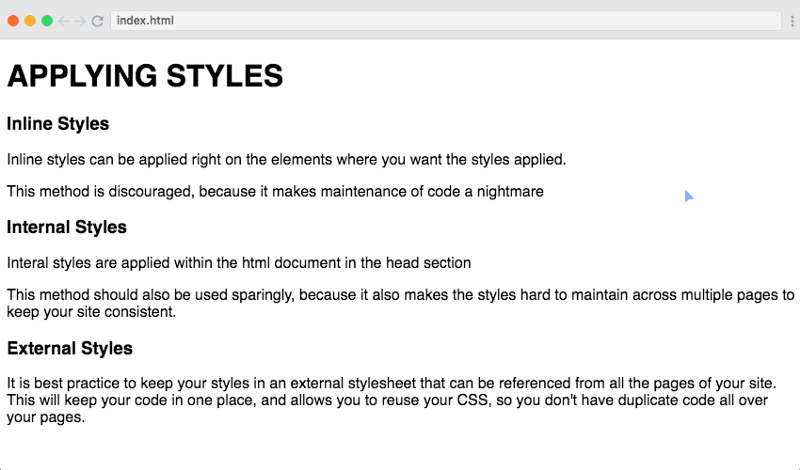
We then jump directly into the first formal lesson of the course. In this one, we will be looking into the ways we can include CSS in our HTML pages and how to start applying basic stylings on our elements.
Part #3: CSS Selectors, Properties, & Values
In the second lesson, Eric talks about some of the CSS vocabulary which sets you up to better understand concepts he goes through in later lectures. You’ll learn what HTML elements are, what CSS selectors are, and how you can apply properties and assign values to them.
CSS Vocabulary
So, for example, this is an h1 element. It has some default styling which appears when you render it in the browser. If we want to change some styling, we can use CSS:
h1 {
   color: 'red';
}
The selector for our h1 element is simply the name of the element itself, and then we assign it the property of color with the value of red. In the same way, we can select elements using Classes and IDs as well, which is discussed in later videos.
Part #4: Classes and IDs
This part of the course discusses how to use classes and IDs in CSS to select HTML elements and apply different styling on them. It also discusses in detail the difference between Class and ID, and how and when we assign them on HTML elements
Look at the following code for an example:
<h1 class='heading'>This is the heading tag</h1>

<p class='paragraph'>This is a paragraph tag</p>
The above snippet consists of an h1 (heading) and a p (paragraph) tag. We have given h1 element the class of heading and our p element the ID of paragraph.
In our CSS file, we select the heading class and give it the property of color. Later we select the paragraph ID and give it the properties of color and font size:
.heading {
   color: blue
}

#paragraph {
   color: green;
   font-size: 14px;
}
Part #5: Specificity
In part 5 of the course, you’ll learn about specificity, which means how a browser would know which styles and rules are most relevant for an element to apply.
<h1 class='heading'>This is the heading tag</h1>
For example, here we have an h1 tag with the class of heading applied to it.
h1 {
   color: blue;
}

.heading {
   color: green;
}
Using CSS, we assign the colour of blue to h1 tag which will change the colour of every h1 . We also then assign the colour of green to class heading, so that every element with this class will have its colour overridden to green. So the h1 tag we defined above will appear as green.
Part #6: Width & Height
In this lesson, you’ll learn how to apply width and height in order to control the formatting and flow of the page.
Above is a slide from the lesson, which will give you an idea of how we can create sections and boxes using width and height to make our web page look properly formatted.
Part #7: Length Units
In CSS, we can use different units to measure the different sizes we pass in as properties of our HTML elements. This lesson discusses in detail what those different units are and how they differ in usage.
There are two types of length units:
- Absolute Units
- Relative Units.
Absolute units are fixed length units, and a length which is expressed in any of them will appear as exactly that size. For example, cm, mm, in, 'px, and so on are absolute units.
On the other hand, relative length units specify a length relative to another length property. For example, em, ex, rem, and so on are absolute units.
Part #8: Colors
This lesson discusses in detail how we can use and apply colours to different HTML elements. It also discusses different ways we can declare the name of the colour in our CSS properties.
.heading1 {
   color: orange;
}

.heading2 {
   color: #ff6347;
}

.heading3 {
   color: RGB(255, 99, 71);
}
The example above has three classes declared with the same property of colour assigned to them. But the point to notice is how we have used different ways to assign the values of colours.
Class heading1 uses the name of the colour (orange) as its property. heading2 uses the hex value of the colour. And heading3 uses the RGB value of the colour.
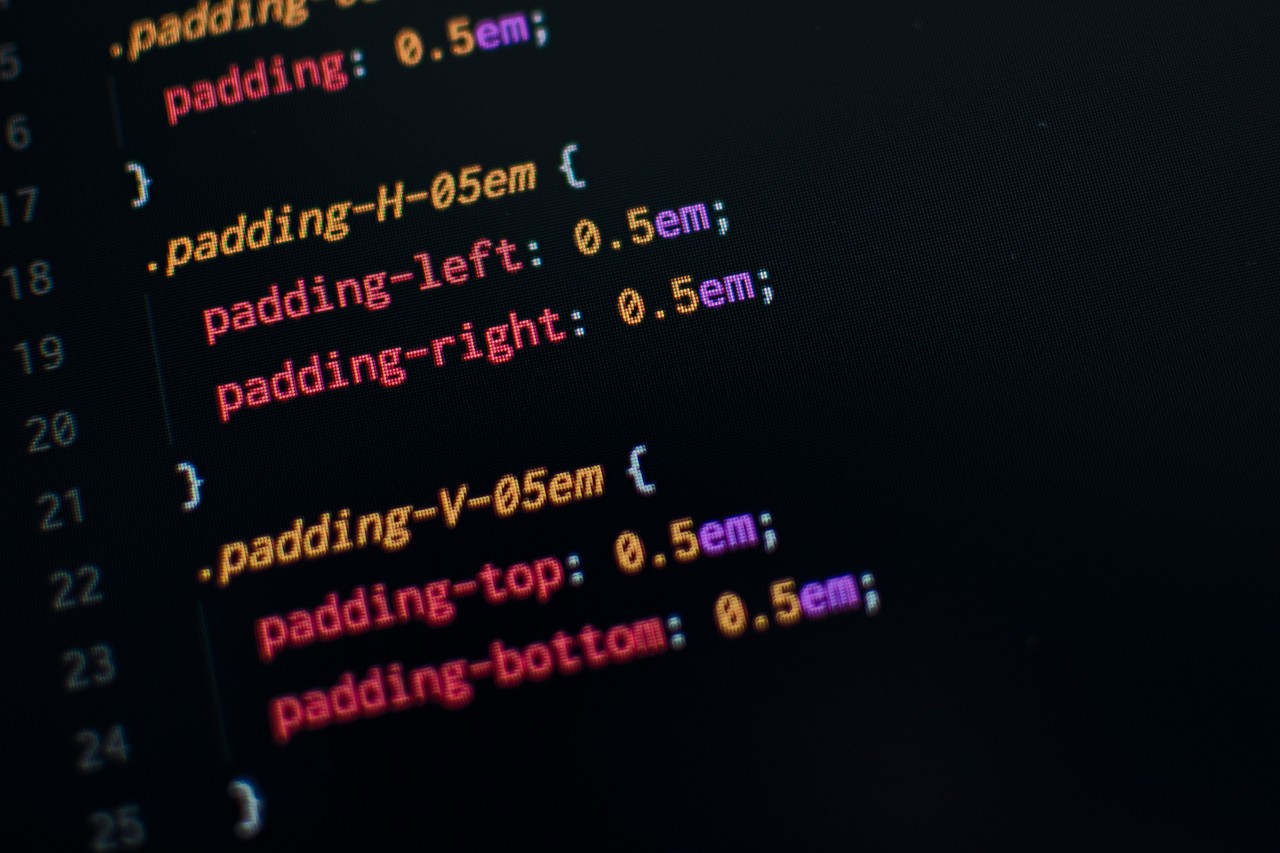
Part #9: Padding
In CSS, padding is used to create spaces around an element’s content inside any defined borders. In CSS, you have the control to apply padding to all or any side of the elements. Lesson 9 of this course talks about padding and teaches you how you can apply it in different ways.
.container {
   padding: 10px;
   /* padding-left: 10px; */
   /*  padding-right: 10px; */
   /*  padding-top: 5px; */
   /*  padding-bottom: 5px; */
}
Like in the example above, we can either just use the property of padding, which will apply the spacing to all the sides, or alternatively, you can give padding to individual directions.
Part #10: Borders
In this lesson, you will learn how you can apply borders around your content. You’ll also learn about the variations you can give to the borders using different styles and options available in CSS.
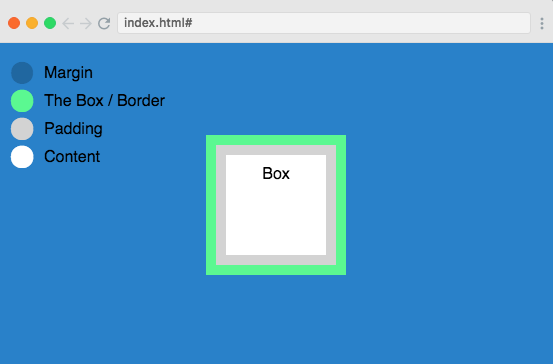
Take the example of the box in the above picture and notice the borders around it with different colours and width.
Part #11: Margins
Margins in CSS are like padding: they apply spacing around the element but they do it outside of any defined border. This lesson talks about using margins inside your CSS, and how you can apply the same margins in all directions or different margins in different directions.
.container {
   margin: 10px;
   /* margin-left: 10px;  */
   /* margin-right: 10px;  */
   /* margin-top: 5px;  */
   /* margin-bottom: 5px;  */
}
Part #11: The Box Model
The Box Model in CSS is a term we use when we describe design and layout. We can think of all the HTML elements as boxes where each box contains properties of margins, padding, borders, and so on.
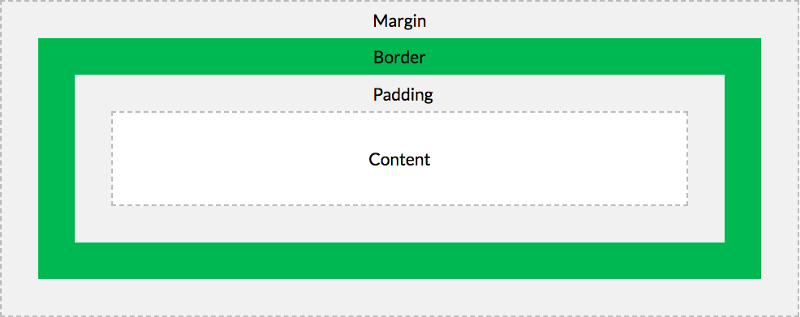
The above illustration explains the conceptual model of the box. In this lesson, Eric will explain how we can use this concept to better design and arrange our elements.
Part #13: Visibility
We can also update the visibility of any element in HTML using CSS. We can, for example, hide or display any element using the property of display. This lesson explains three different ways in which we can play with the visibility of elements.
.hidden {
   display: none:
}
One of the three ways to update visibility is using the display property. In the example above, we have set the display property to none so that any element which has the class of hidden won’t appear in the browser at all.
Part #14: Fonts
Fonts are one of the most important and useful features of CSS. We can play with different kinds of font styles and font families to make our text look good. Lesson 14 of this course is all about using fonts!
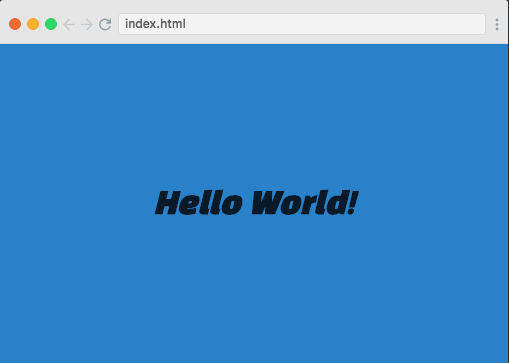
In the image above, the text Hello World has the font-family of Black Han Sans’, arial, sans-serif and the font-size of 30px. In the same way, we can apply different properties to make our text look more appealing and beautiful.
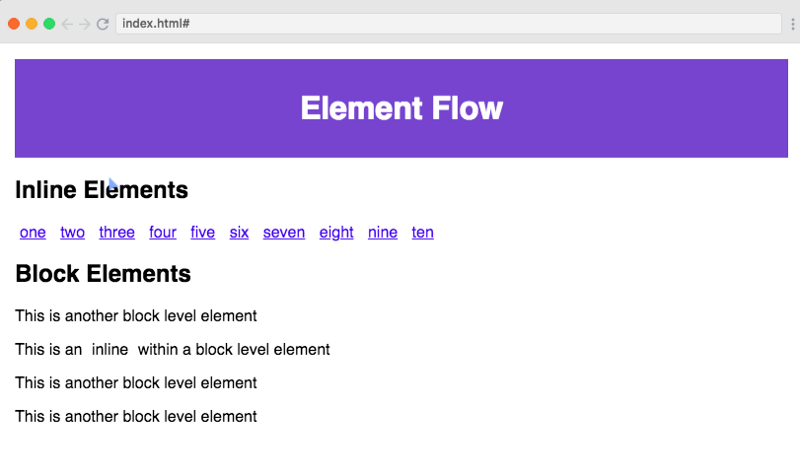
Part #15: Element Flow
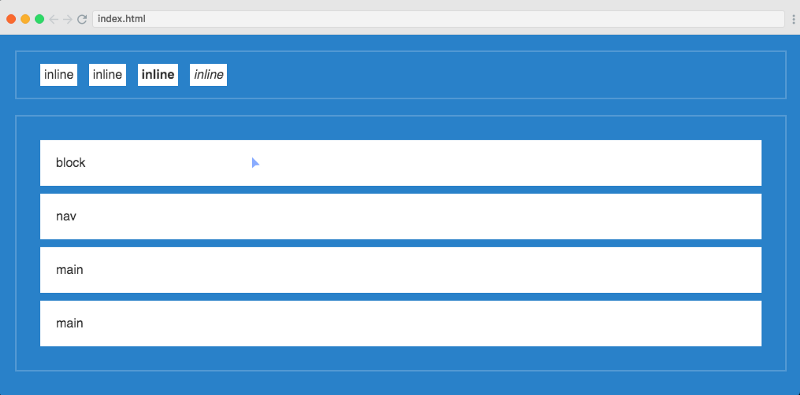
In this section of the course, you will be learning about the typical flow of elements on how they are rendered inside the browser. There are two types of HTML elements: Inline and Block elements
Inline elements can not take the width and height properties. They will always be as big as their content. However, on block elements, you can set both width and height as you like
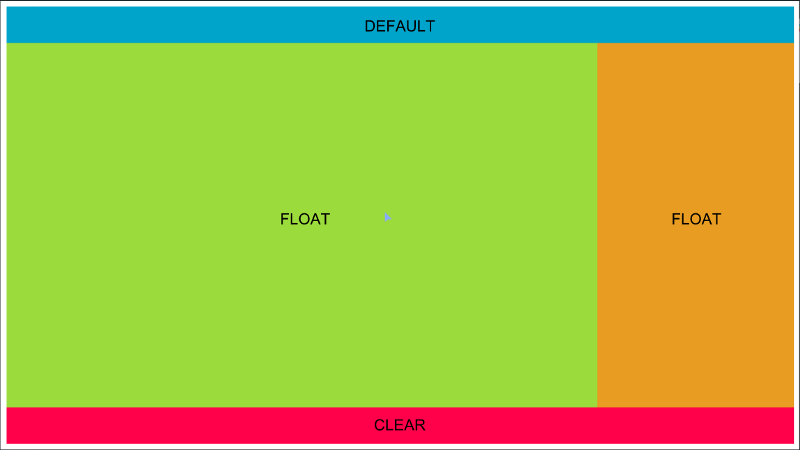
Part #16: Float & Clear
In the lesson, you’ll be learning about the float and clear properties. These are very useful if we want to control the position of HTML elements to float left or right of each other.
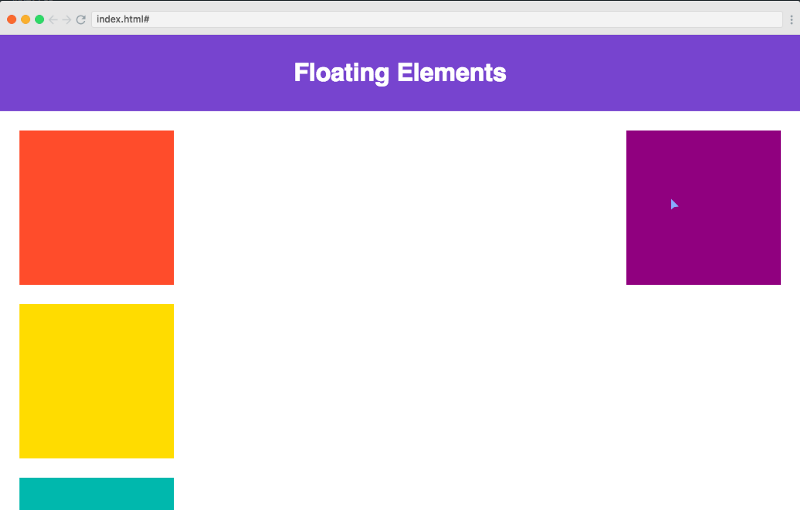
Part #17: Float Layout Challenge
Here comes the challenge of this course. In it, you’ll be encouraged to create the following layout using the float properties. Later in the screencast, Eric will teach you how to do it in case you faced any difficulties.
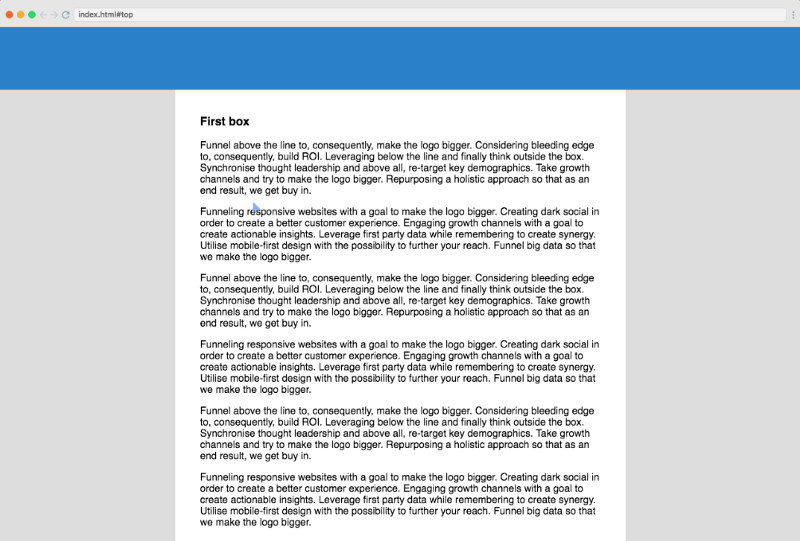
Part #18: Position Property
In this lesson, we’ll design a simple article page where we’re using the available positioning properties. We will be working with divs, text content, span, and footer.
At the end of this lesson, you’ll be able to create a layout like this:
Part #19: Pseudo Classes / Elements
In the final lesson, we will learn about pseudo classes and elements. We use pseudo-classes to make some advanced level selections of our HTML elements. This is a very useful technique when we are dealing with complex web pages that have multiple elements and conditional stylings
/* unvisited link */
a:link {
    color: aqua;
}

/* visited link */
a:visited {
    color: orange;
}
For example, in the above code snippet, we are applying different classes to the anchor tag using its state of whether it has been visited or not. There are thousands of use cases for using pseudo-classes, and this lesson will help you understand the basic concept of using them.
Part #20: What’s Next?
In this last screencast of the course, Eric wraps up what you have learned throughout the course and gives you tips on continuing your learning journey.
CSS is a vast topic, and they are many more features to learn apart from what was covered during this course!
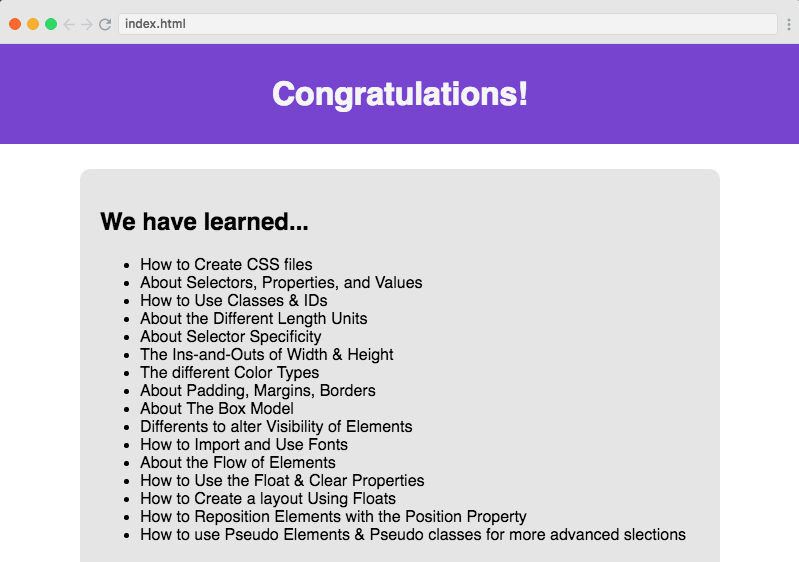
If you make it to the end, you can give yourself a pat on the back. You’ve taken a big step towards learning how to build and design websites, which is a hugely valuable skill.
So go ahead and take the free course today! Your future self will thank you for it :)
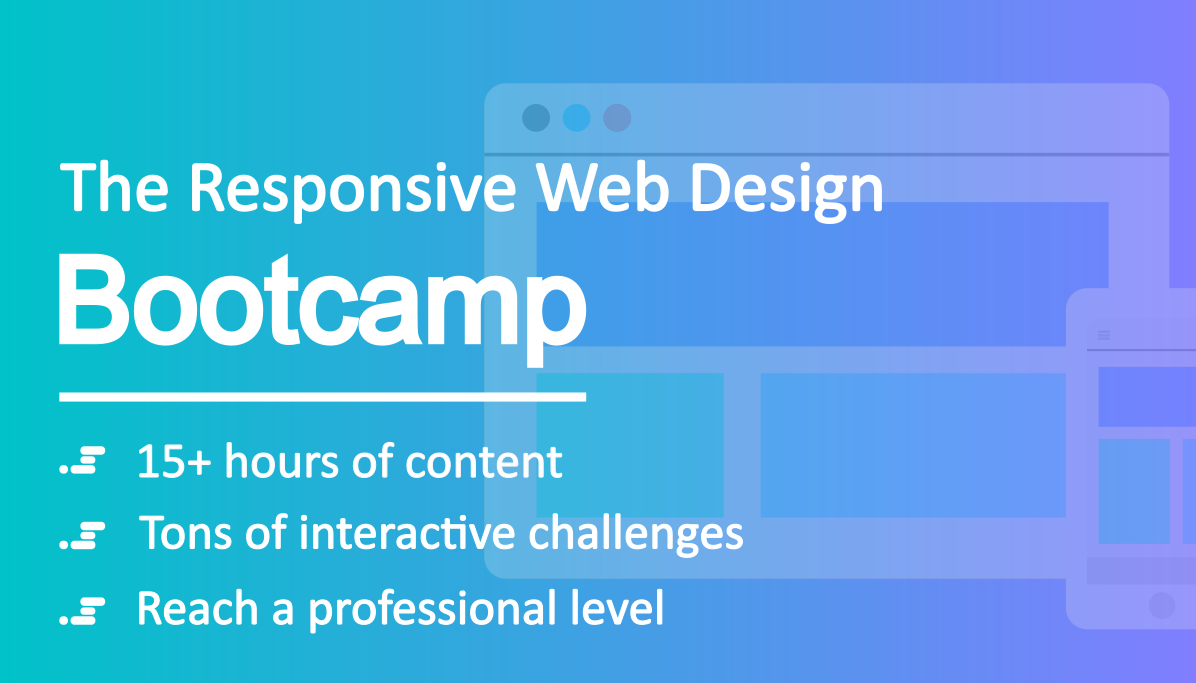
Thanks for reading! My name is Per Borgen, I'm the co-founder of Scrimba – the easiest way to learn to code. You should check out our responsive web design bootcamp if want to learn to build modern website on a professional level.
 _
_