
By Kelvin Mai
So I finally decided to come back to freeCodeCamp and try to finish out my Front End Development Certificate. I had already finished all the algorithms and tutorials earlier last year, and the only thing missing was the projects.
But now that I have more experience as a Full Stack Developer, most of the projects are a bit easy for my current level. So I had two choices. I could either go back to the basics and finish them all in a day, or I could kill two birds with one stone: have some fun and experiment with technology while working on these projects. I opted for the latter.
 So Close…
But let’s make that three birds — because I have been wanting to write a tutorial/guide thing for a while. Today, what we’re going to tackle is the Show The Local Weather project. But this time, it’s going to combine React and Typescript! You can take a look at the finished code in this GitHub repo, as well as a live demo here.
Background
So first thing’s first: why would I want to do this? Well here’s the thing: I have been jumping back and forth with Angular 5 and React for a while now. And I like React more as a framework. It’s small and concise, but has all the features you need to create a fully functional Single Page Application. As for Angular, it is far too large for me to enjoy for an app as small as this…but it uses Typescript!
TypeScript is a super set of JavaScript that adds a lot of features that are just missing from JavaScript, even with the enhancements from ES6/7. It’s mostly known for it’s static typing. So I wondered if I could get the best of both worlds. The answer was a resounding YES!… Redux not included. (I mean you can include Redux, but so far it’s been a pain to set up, so I won’t be doing it for this guide.)
 The User Stories
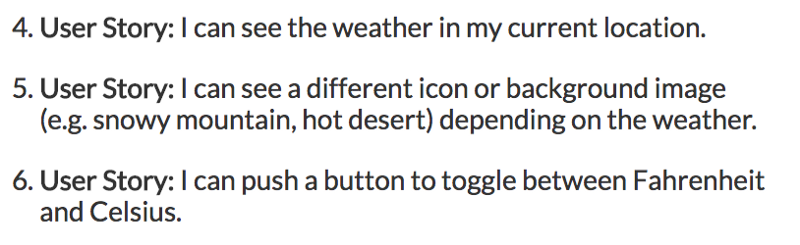
For this project, we’re going to focus on the bare minimum of the User Stories, because my focus is the technology rather than any extra features. As such, the API we’ll be using for this app is going to be Wunderround. It’s perfect for what we’re building, because they offer temperatures in both Fahrenheit and Celsius and also provide icons for the different weather conditions. This means less programmatic work on our end.
Step 0: Set Up
I’ll be using create-react-app for this project, with the custom React script for Typescript, so that we can keep the zero configuration and ease of use. A good article on setting up a React app with TypeScript was written by Trey Huffine and can be found here.
I definitely suggest looking at that post for some more in depth set up. But without further ado, we are going to run the following line in the terminal.
create-react-app weather --scripts-version=react-scripts-tsnpm install --save core-decorators
I’ll get to the decorators a little later. Just know that it’s a neat little feature that I was really excited to try out. But to be able to use it, we’ll have to edit our tsconfig.json file to include experimental decorators. To do this, just add the bold line of code.
{ "compilerOptions": {// ...code hidden... "noUnusedLocals": true, "experimentalDecorators": true } // ...more code hidden...}
And since I have Prettier installed on my development environment, I had to change my tslint.json file because the lint conflicted with the formatter. If you have a similar development set up, I suggest just deleting all the tslint rules so that you don’t have to get bogged down on configuration. The file should look like this after you’re done.
The folder structure that I will be using will look like the following. You can create, delete, and move files accordingly.
weather-app/├─ .gitignore├─ node_modules/├─ public/├─ src/ └─ assets/ | - - loader.svg | - - logo.svg └─ components/ | - - Weather.tsx | - - WeatherDisplay.tsx └─ styles/ | - - App.css | - - WeatherDisplay.css | — — index.tsx | — — registerServiceWorker.ts | — — App.tsx | — — index.css | - - config.ts | - - types.ts├─ package.json├─ tsconfig.json├─ tsconfig.test.json└─ tslint.json
Okay, the worst is over! We have finally set up our app. Let’s dive into the code.
Step 1: Styling
I want to get the styling out of the way first. I’m not much of a designer, so all I really did was re-skin the create-react-app default styles to have the freeCodeCamp green theme. Additionally I made the button more button-like and of course, more green. You are free to go wild with this if you happen to be a CSS master. You can also download image files here and place them in your assets/ folder.
Step 2: Okay, I lied… More Set Up
But don’t worry, it’s actual code this time. First let’s start with the easy part: adding your API and API keys. Nothing new here — it looks exactly like normal JavaScript so far.
Now for the TypeScript specific thing, we have to specify types. Well, we don’t have to, but we definitely should. The reason behind static typing is that it gives us security. Unlike normal JavaScript, our code won’t run if things are of the wrong type. Essentially this means that the compiler just flat out won’t let us write bad code.
As you can see, it’s not too scary. Just add the type after a colon. The primitive types (string, number, boolean) are supported out of the gate. With objects, it is a good idea to create a new type specific to that particular object as seen in WeatherData with DisplayLocation .
Now, I was a little lazy, because the shape of the data coming from our API is a lot larger, and I could have created the whole object. But I opted to just take what I needed and discard the rest, which is why this types.ts file is as small as it is.
Step 3: React — The Fun Part
I’m going to skip over the [index.tsx](https://github.com/kelvin-mai/tsx-weather/blob/master/src/index.tsx) and [App.tsx](https://github.com/kelvin-mai/tsx-weather/blob/master/src/components/App.tsx) files because there’s really nothing really new there. Just know that the imports are different because of how strict TypeScript is about modules. Instead, we’re going to go over the presentational component first.
I still prefer to destructure Component and Fragment from React, instead of calling React.Component , as it reduces redundancy. And for Fragments, if you’ve never played with them before, it’s basically a div that doesn’t show up in the HTML markup.
You will also notice that I have added interfaces at the top. An interface specifies what our props and state should look like. And if you haven’t noticed, TypeScript’s gimmick is adding types to everything, so that is what’s happening above within the angle brackets <Props, State>. If you are familiar with prop types, it does the same thing, but I feel like this is much cleaner.
The next thing is the weird @ symbol. Well, that’s a decorator! I originally wanted to hook up Redux and connect so that I can show a much more complicated version, but the autobind will do for now.
A decorator is basically a function that wraps around the class and applies necessary attributes. It also allows us to use export default at the top, which is just a personal preference of mine.
@decorateexport default Class {}
// is the same as
export default decorate(Class)
In this case autobind will, as the name entails, automatically bind this to everything so we don’t have to worry about binding issues. And coming from a more Object Oriented language, these class methods will look a lot cleaner than the JavaScript work-around with the arrow functions.
classMethod = () => { console.log('when you use arrows, you don't have to worry about the keyword "this"');}
classMethod () { console.log('because of javascript, you have to worry about the keyword "this" here');}
And now finally we move to the bulk of our logic, which is going to be living in the Weather.tsx component.
The first thing you’ll notice is the ? in the interface. I mentioned that we definitely should define types for our props, but what happens when you know for certain it won’t be defined until after the API call? Well we can define optional types with a question mark.
What is happening in the background is that the variable weatherData is only allowed to be a WeatherData type or undefined. Also, remember that our WeatherData type is only a subsection of what wunderground offers. Earlier I mentioned that we are only going to take the data that we needed from the API — well, that’s what that huge destructuring on line 55 is doing.
Did I mention you can specify expected return types of functions? That’s what is happening here with getCurrentPosition , because I wanted to make sure that it returns a promise.
The reasoning here is that I didn’t want to call getCurrentWeather until after we had the correct geolocation, which means we’re dealing with asynchronous events. Async always means Promises, so that’s what’s going to happen.
A word of warning: the native geolocation API does take a long time to get a result without passing in any options. I opted to not add options to it as it was giving me errors at the time.
And I believe that is all the new things happening in this app because of TypeScript. Everything else should be familiar if you know React. But hopefully you can see the benefits of this superset, as it adds both security to our code as well as some nice super powers.
Step 4: Complete!
 The Finished Product
You did it! You finished an app that shows the weather at your current position. And in doing so, you’ve covered a good chunk of TypeScript as well as incorporating it into React.
Of course, there can definitely be improvements on this, like an option to search and show other locations. And the UI can definitely be worked on. But if you haven’t already finished the weather app on freeCodeCamp, you have already gone above and beyond on this assignment.