By Sreehari
Let’s build a machine learning pipeline that can read the sign language alphabet just by looking at a raw image of a person’s hand.
This problem has two parts to it:
- Building a static-gesture recognizer, which is a multi-class classifier that predicts the static sign language gestures.
- Locating the hand in the raw image and feeding this section of the image to the static gesture recognizer (the multi-class classifier).
You can get my example code and dataset for this project here.
First, some background.
Gesture recognition is an open problem in the area of machine vision, a field of computer science that enables systems to emulate human vision. Gesture recognition has many applications in improving human-computer interaction, and one of them is in the field of Sign Language Translation, wherein a video sequence of symbolic hand gestures is translated into natural language.
A range of advanced methods for the same have been developed. Here, we’ll look at how to perform static-gesture recognition using the scikit learn and scikit image libraries.
Part 1: Building a static-gesture recognizer
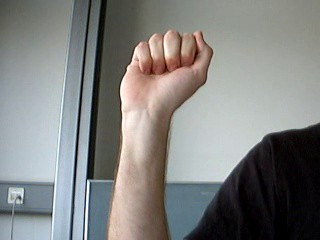
For this part, we use a data set comprising raw images and a corresponding csv file with coordinates indicating the bounding box for the hand in each image. (Use the Dataset.zip file to get the sample data set. Extract as per instructions in the readme file)
This data set is organized user-wise and the directory structure of the dataset is as follows. The image names indicate the alphabet represented by the image.
dataset
   |----user_1
          |---A0.jpg
          |---A1.jpg
          |---A2.jpg
          |---...
          |---Y9.jpg
   |----user_2
          |---A0.jpg
          |---A1.jpg
          |---A2.jpg
          |---...
          |---Y9.jpg
   |---- ...
   |---- ...
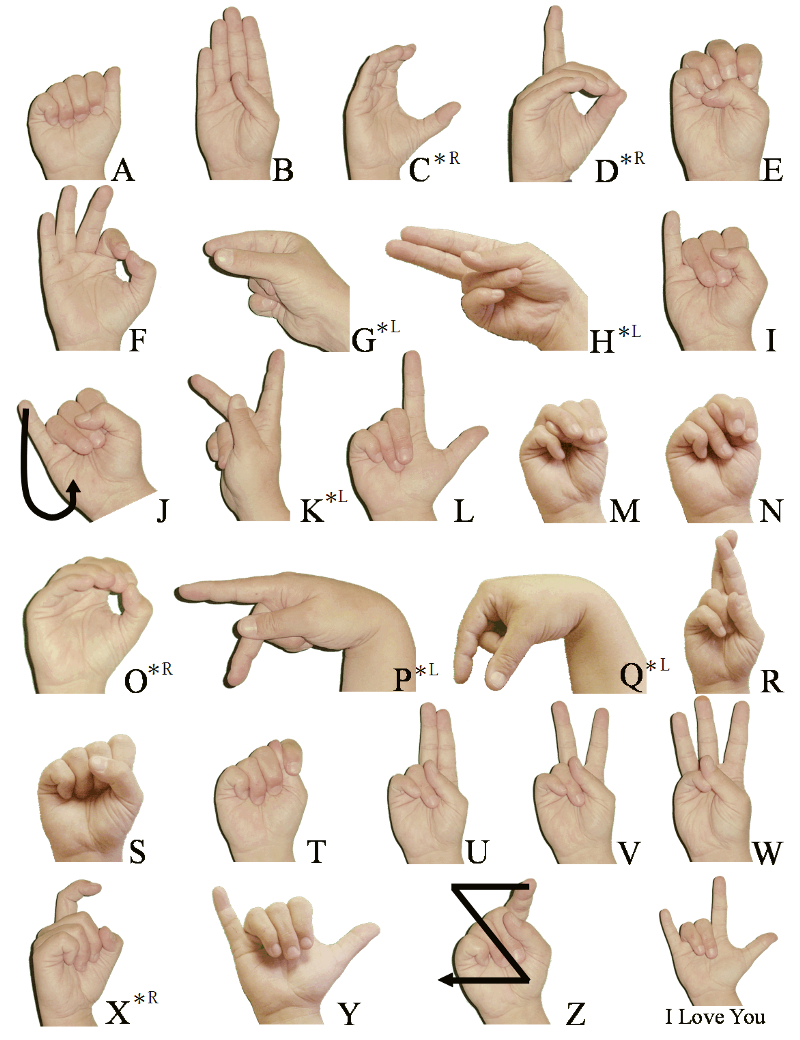
The static-gesture recognizer is essentially a multi-class classifier that is trained on input images representing the 24 static sign-language gestures (A-Y, excluding J).
Building a static-gesture recognizer using the raw images and the csv file is fairly simple.
To use the multi-class classifiers from the scikit learn library, we’ll need to first build the data set — that is, every image has to be converted into a feature vector (X) and every image will have a label corresponding to the sign language alphabet that it denotes (Y).
The key now is to use an appropriate strategy to vectorize the image and extract meaningful information to feed to the classifier. Simply using the raw pixel values will not work if we plan on using simple multi-class classifiers (as opposed to using Convolution Networks).
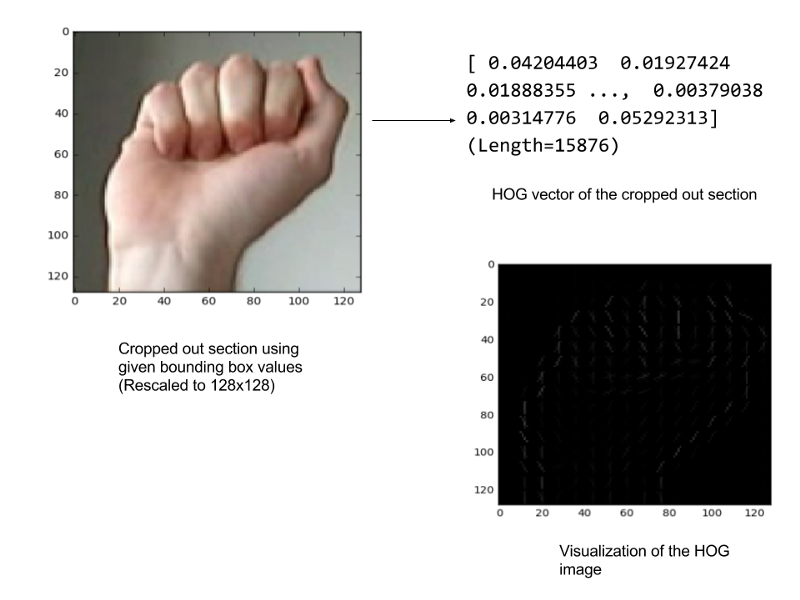
To vectorize our images, we use the Histogram of Oriented Gradients (HOG) approach, as it has been proven to yield good results on problems such as this one. Other feature extractors that can be used include Local Binary Patterns and Haar Filters.
Code:
We use pandas in the get_data() function to load the CSV file. Two functions-crop() and convertToGrayToHog() are used to get the required hog vector and append it to the list of vectors that we’re building, in order to train the multi-class classifier.
# returns hog vector of a particular image vector
def convertToGrayToHOG(imgVector):
rgbImage = rgb2gray(imgVector)
return hog(rgbImage)
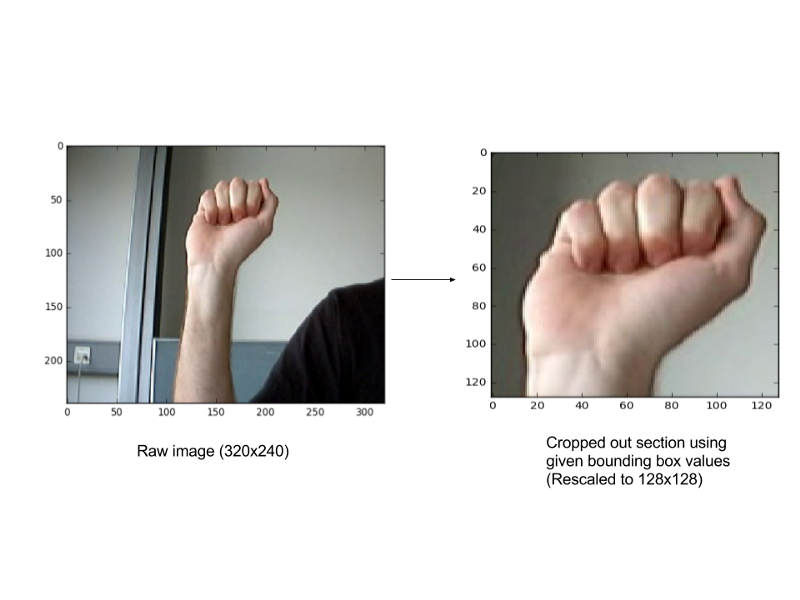
# returns cropped image
def crop(img, x1, x2, y1, y2, scale):
crp=img[y1:y2,x1:x2]
crp=resize(crp,((scale, scale)))
return crp
#loads data for multiclass classification
def get_data(user_list, img_dict, data_directory):
X = []
Y = []
for user in user_list:
user_images = glob.glob(data_directory+user+'/*.jpg')
boundingbox_df = pd.read_csv(data_directory + user + '/'
+ user + '_loc.csv')
for rows in boundingbox_df.iterrows():
cropped_img = crop( img_dict[rows[1]['image']],
rows[1]['top_left_x'],
rows[1]['bottom_right_x'],
rows[1]['top_left_y'],
rows[1]['bottom_right_y'],
128
)
hogvector = convertToGrayToHOG(cropped_img)
X.append(hogvector.tolist())
Y.append(rows[1]['image'].split('/')[1][0])
return X, Y
The next step is to encode the output labels (the Y-values) to numerical values. We do this using sklearn’s label encoder.
In our code, we have done this as follows:
Y_mul = self.label_encoder.fit_transform(Y_mul)
where, the label_encoder object is constructed as follows within the gesture-recognizer class constructor:
self.label_encoder = LabelEncoder().fit(['A', 'B', 'C', 'D', 'E', 'F', 'G', 'H', 'I', 'K', 'L', 'M', 'N', 'O', 'P', 'Q', 'R', 'S', 'T', 'U', 'V', 'W', 'X', 'Y'])
Once this is done, the model can be trained using any Multi-class classification algorithm of your choice from the scikit learn toolbox. We have trained ours using Support Vector Classification, with a linear kernel.
Training a model using sklearn does not involve more than two lines of code. Here’s how you do it:
svcmodel = SVC(kernel='linear', C=0.9, probability=True)
self.signDetector = svcmodel.fit(X_mul, Y_mul)
The hyperparameters (i.e., C=0.9 in this case) can be tuned using a Grid Search. Read more about this here.
In this case, we do not know a whole lot about the data as such (i.e., the hog vectors). So, it’d be a good idea to try and use algorithms like xgboost (Extreme Gradient Boosting) or Random Forest Classifiers and see how these algorithms perform.
Part 2: Building the Localizer
This part requires a slightly more effort as compared to the first.
Broadly, we’ll employ the following steps in completing this task.
- Build a data set comprising images of hands and parts that are not-hand, using the given data set and the bounding box values for each image.
- Train a binary classifier to detect hand/not-hand images using the above data set.
- (Optional) Use Hard Negative Mining to improve the classifier.
- Use a sliding window approach with various scales, on the query image to isolate the region of interest.
Here, we are not going to be using any image processing techniques like filtering, color segmentation, etc. The scikit image library is used to read, crop, scale, convert images to gray scale and extract hog vectors.
Building the hand/not hand dataset:
The data set could be built using any strategy you like. One way to do this, is to generate random coordinates and then check the ratio of area of intersection to area of union (i.e., the degree of overlap with the given bounding box) to determine if it is a non-hand section. (Another approach could be to use a sliding window to determine the coordinates. But this is horribly slow and unnecessary)
"""
This function randomly generates bounding boxes
Returns hog vector of those cropped bounding boxes along with label
Label : 1 if hand ,0 otherwise
"""
def buildhandnothand_lis(frame,imgset):
    poslis =[]
    neglis =[]

    for nameimg in frame.image:
        tupl = frame[frame['image']==nameimg].values[0]
        x_tl = tupl[1]
        y_tl = tupl[2]
        side = tupl[5]
        conf = 0

        dic = [0, 0]

        arg1 = [x_tl,y_tl,conf,side,side]

        poslis.append( convertToGrayToHOG(crop(imgset[nameimg],  x_tl,x_tl+side,y_tl,y_tl+side)))

        while dic[0] <= 1 or dic[1] < 1:
            x = random.randint(0,320-side)
            y = random.randint(0,240-side)
            crp = crop(imgset[nameimg],x,x+side,y,y+side)
            hogv = convertToGrayToHOG(crp)
            arg2 = [x,y, conf, side, side]

            z = overlapping_area(arg1,arg2)
            if dic[0] <= 1 and z <= 0.5:
                neglis.append(hogv)
                dic[0] += 1
            if dic[0]== 1:
                break
        label_1 = [1 for i in range(0,len(poslis)) ]
        label_0 = [0 for i in range(0,len(neglis))]
        label_1.extend(label_0)
        poslis.extend(neglis)

        return poslis,label_1
Training a binary classifier:
Once the data set is ready, training the classifier can be done exactly as seen before in part 1.
Usually, in this case, a technique called Hard Negative Mining is employed to reduce the number of false positive detections and improve the classifier. One or two iterations of hard negative mining using a Random Forest Classifier, is enough to ensure that your classifier reaches acceptable classification accuracies, which in this case is anything above 80%.
Take a look at the code here for a sample implementation of the same.
Detecting hands in test images:
Now, to actually use the above classifier, we scale the test image by various factors and then use a sliding window approach on all of them to pick the window which captures the region of interest perfectly. This is done by selecting the region corresponding to the max of the confidence scores allotted by the binary (hand/not-hand) classifier across all scales.
The test images need to be scaled because, we run a set sized window (in our case, it is 128x128) across all images to pick the region of interest and it is possible that the region of interest does not fit perfectly into this window size.
Sample implementation and overall detection across all scales.
Putting it all together
After both parts are complete, all that’s left to do is to call them in succession to get the final output when provided with a test image.
That is, given a test image, we first get the various detected regions across different scales of the image and pick the best one among them. This region is then cropped out, rescaled (to 128x128) and its corresponding hog vector is fed to the multi-class classifier (i.e., the gesture recognizer). The gesture recognizer then predicts the gesture denoted by the hand in the image.
Key points
To summarize, this project involves the following steps. The links refer to the relevant code in the github repository.
- Building the hand/not-hand dataset.
- Converting all the images i.e., cropped sections with the gestures and the hand, not-hand images, to its vectorized form.
- Building a binary classifier for detecting the section with the hand and building a multi-class classifier for identifying the gesture using these data sets.
- Using the above classifiers one after the other to perform the required task.
Suks and I worked on this project as part of the Machine Learning course that we took up in college. A big shout out to her for all her contributions!
Also, we wanted to mention Pyimagesearch, which is a wonderful blog that we used extensively while we were working on the project! Do check it out for content on image processing and opencv related content.
Cheers!