

A GitHub wiki is a great place for your project's documentation. You can use the wiki to create, manage, and host documentation for your repository so others can use and contribute to your project.
GitHub wikis are easy to start using without installing any other software. The best part is that the wiki is integrated with your GitHub repository.
You do not need any other tool – you just need to know how to use markdown, as you'll use it to write your wiki. (You can read all about that in my other article here.)
How to Start Using GitHub Wiki
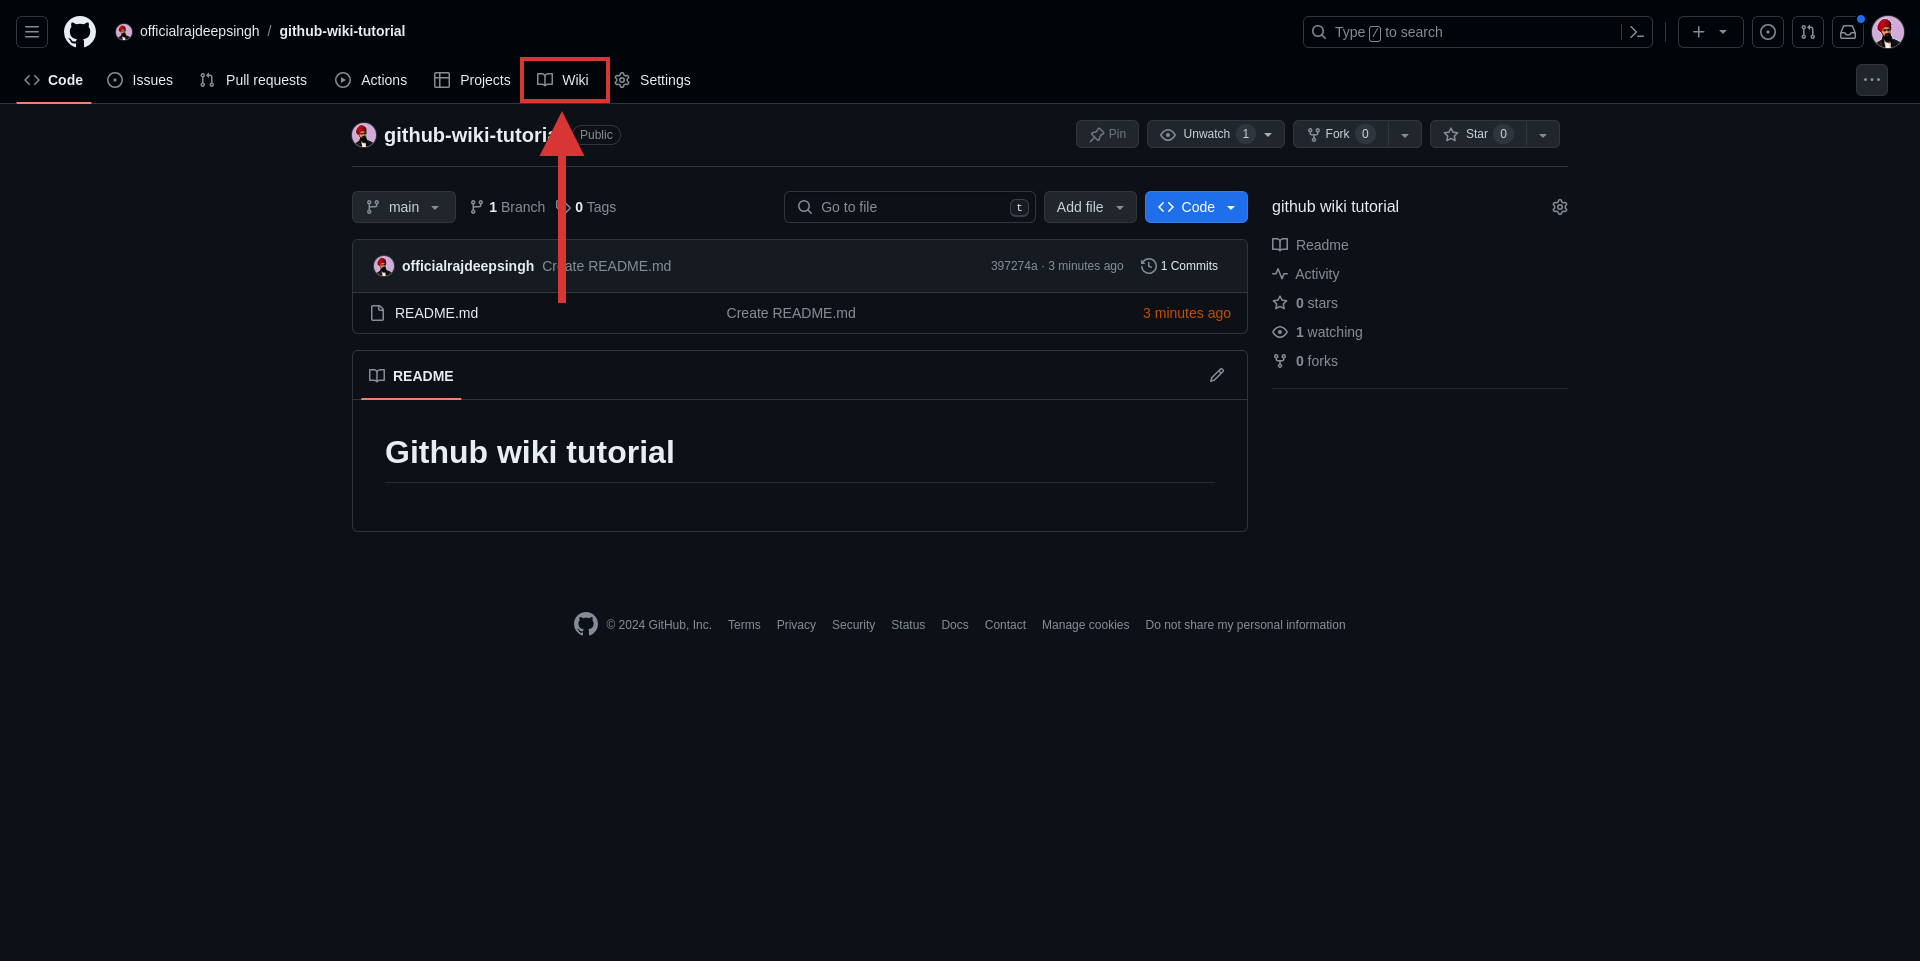
You can start your GitHub wiki with just one click. Every GitHub repository has a Wiki tab in the menu at the top of the page. To start, click on it.
 GitHub repository Page
The wiki tab is sometimes not shown by default in the GitHub repository nav bar. First, you'll need to enable wikis in your repository settings.
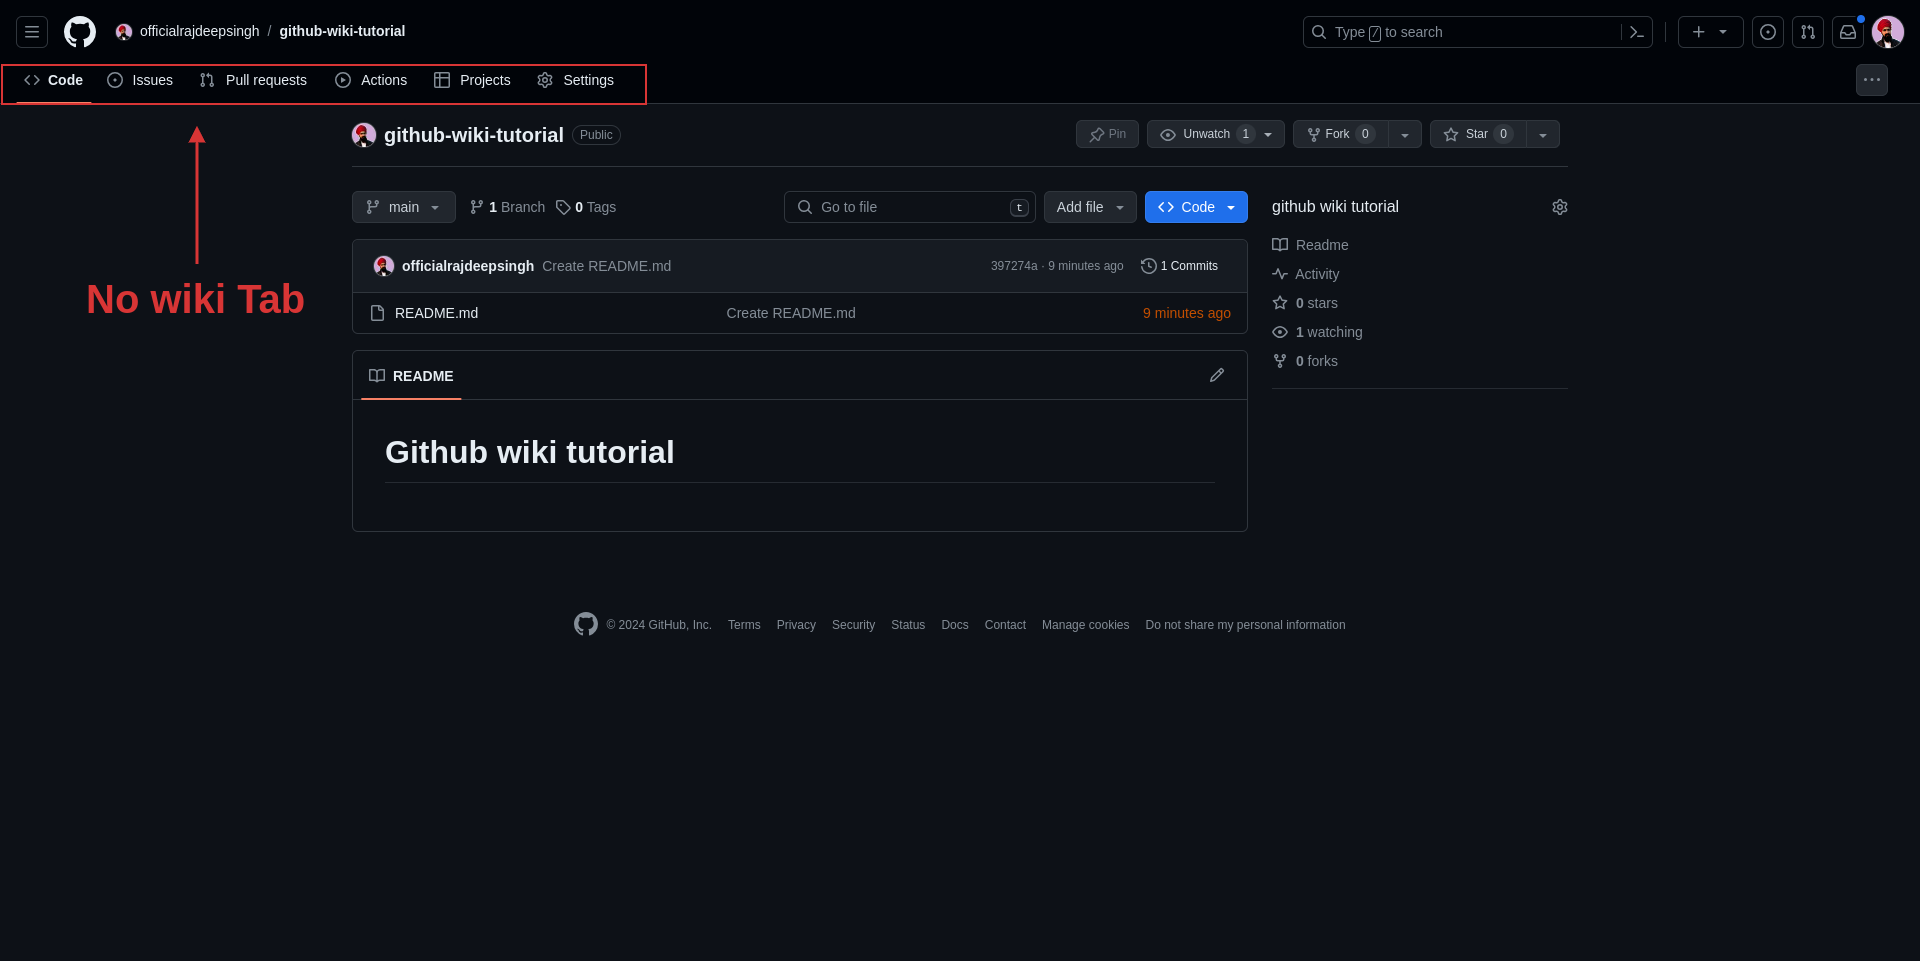 No wiki tab is shown.
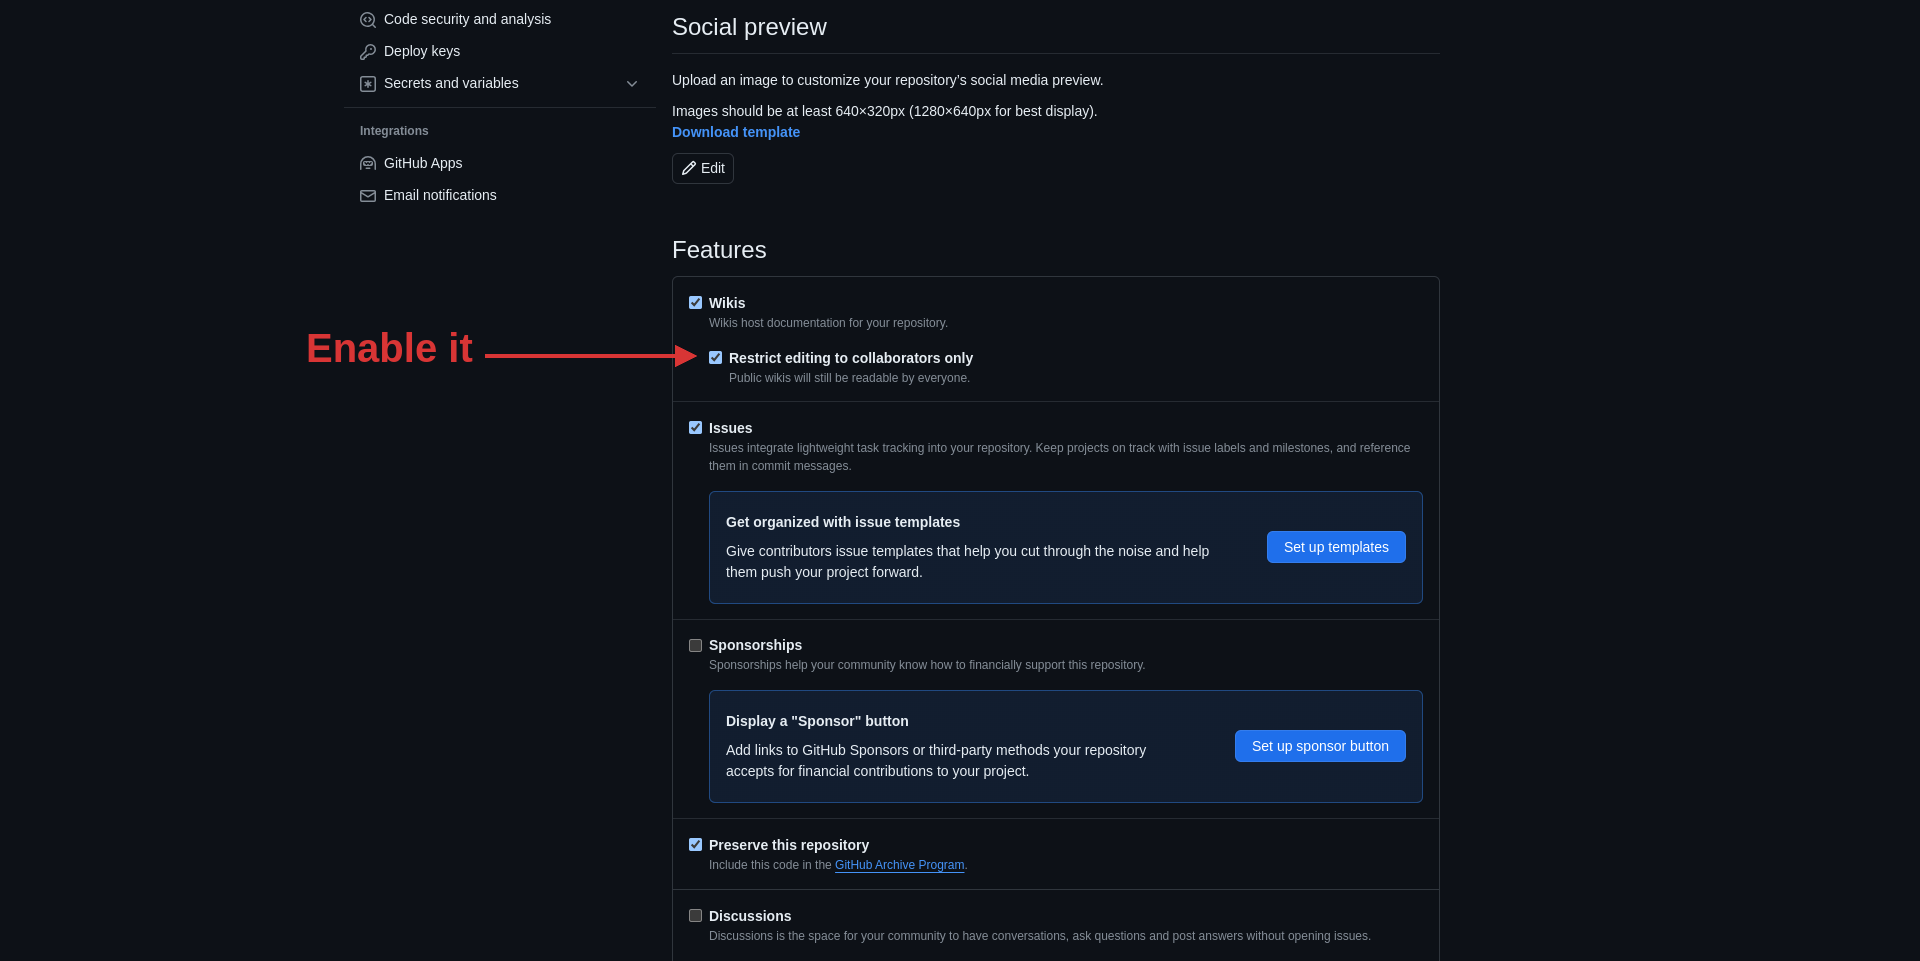
To do that, go to your repository settings page, scroll down, and find the features section. Then enable wikis by checking the "Wikis" box.
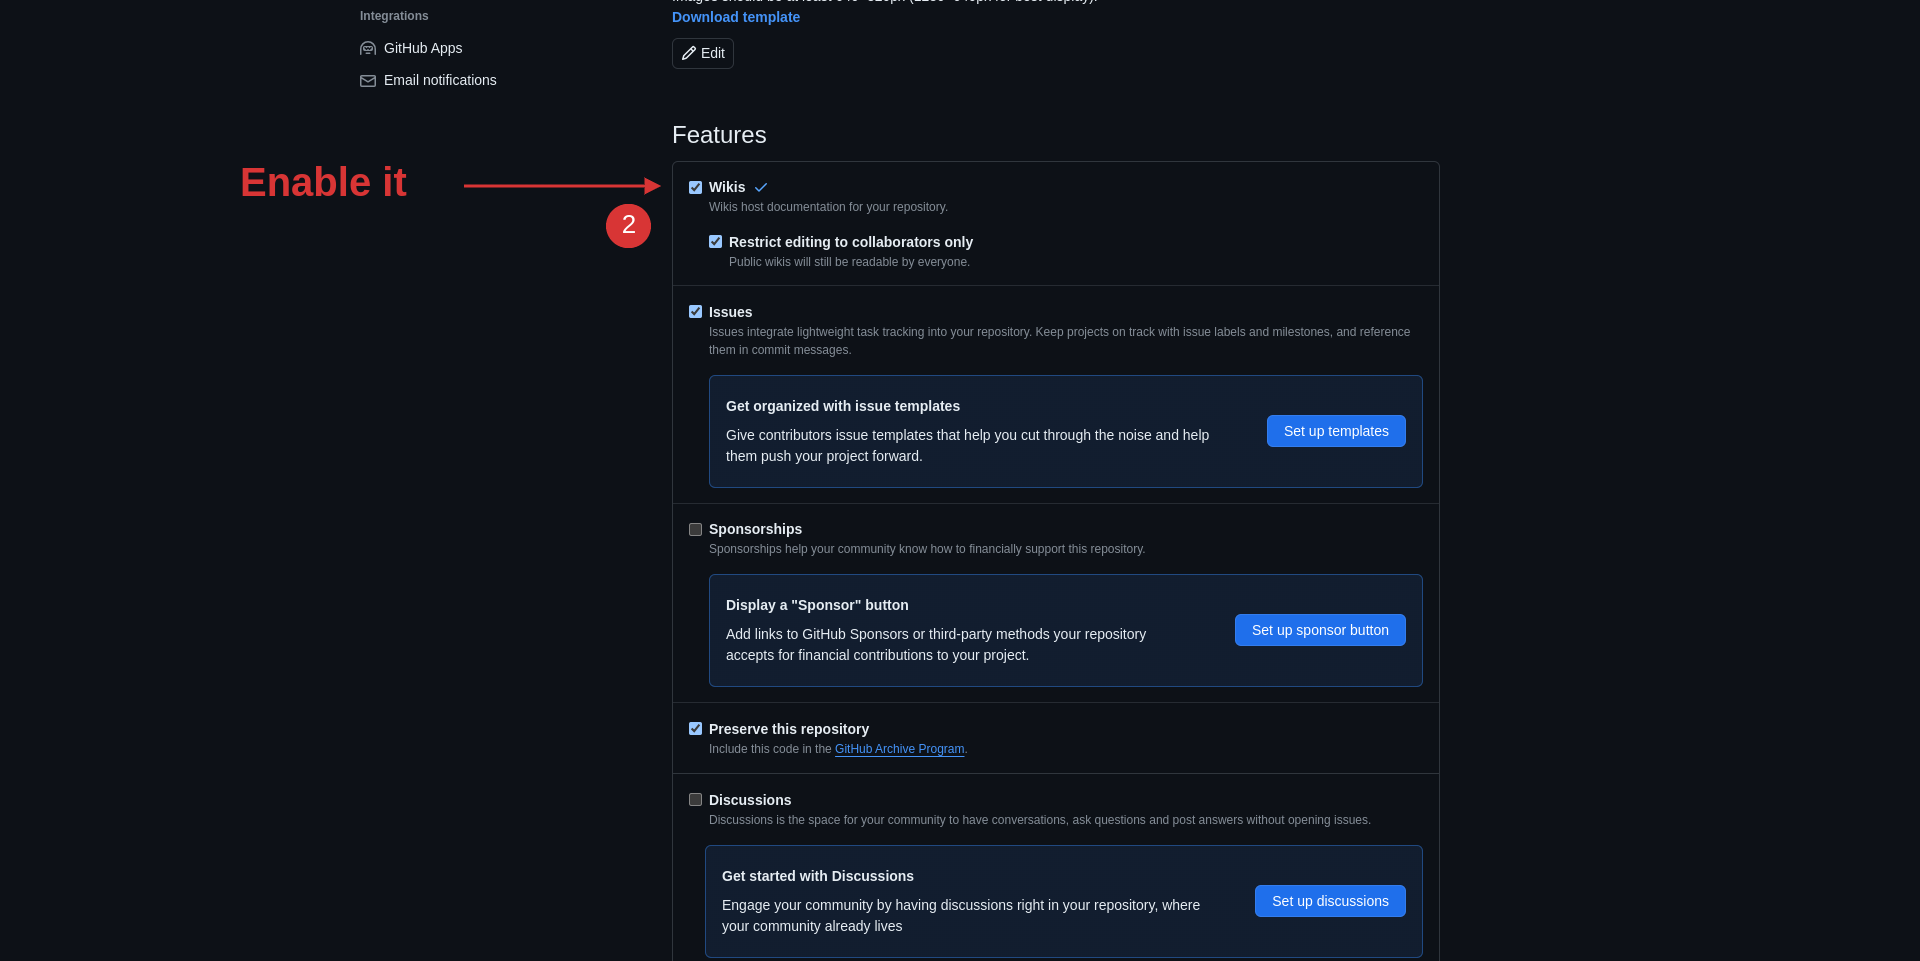 Enable wiki
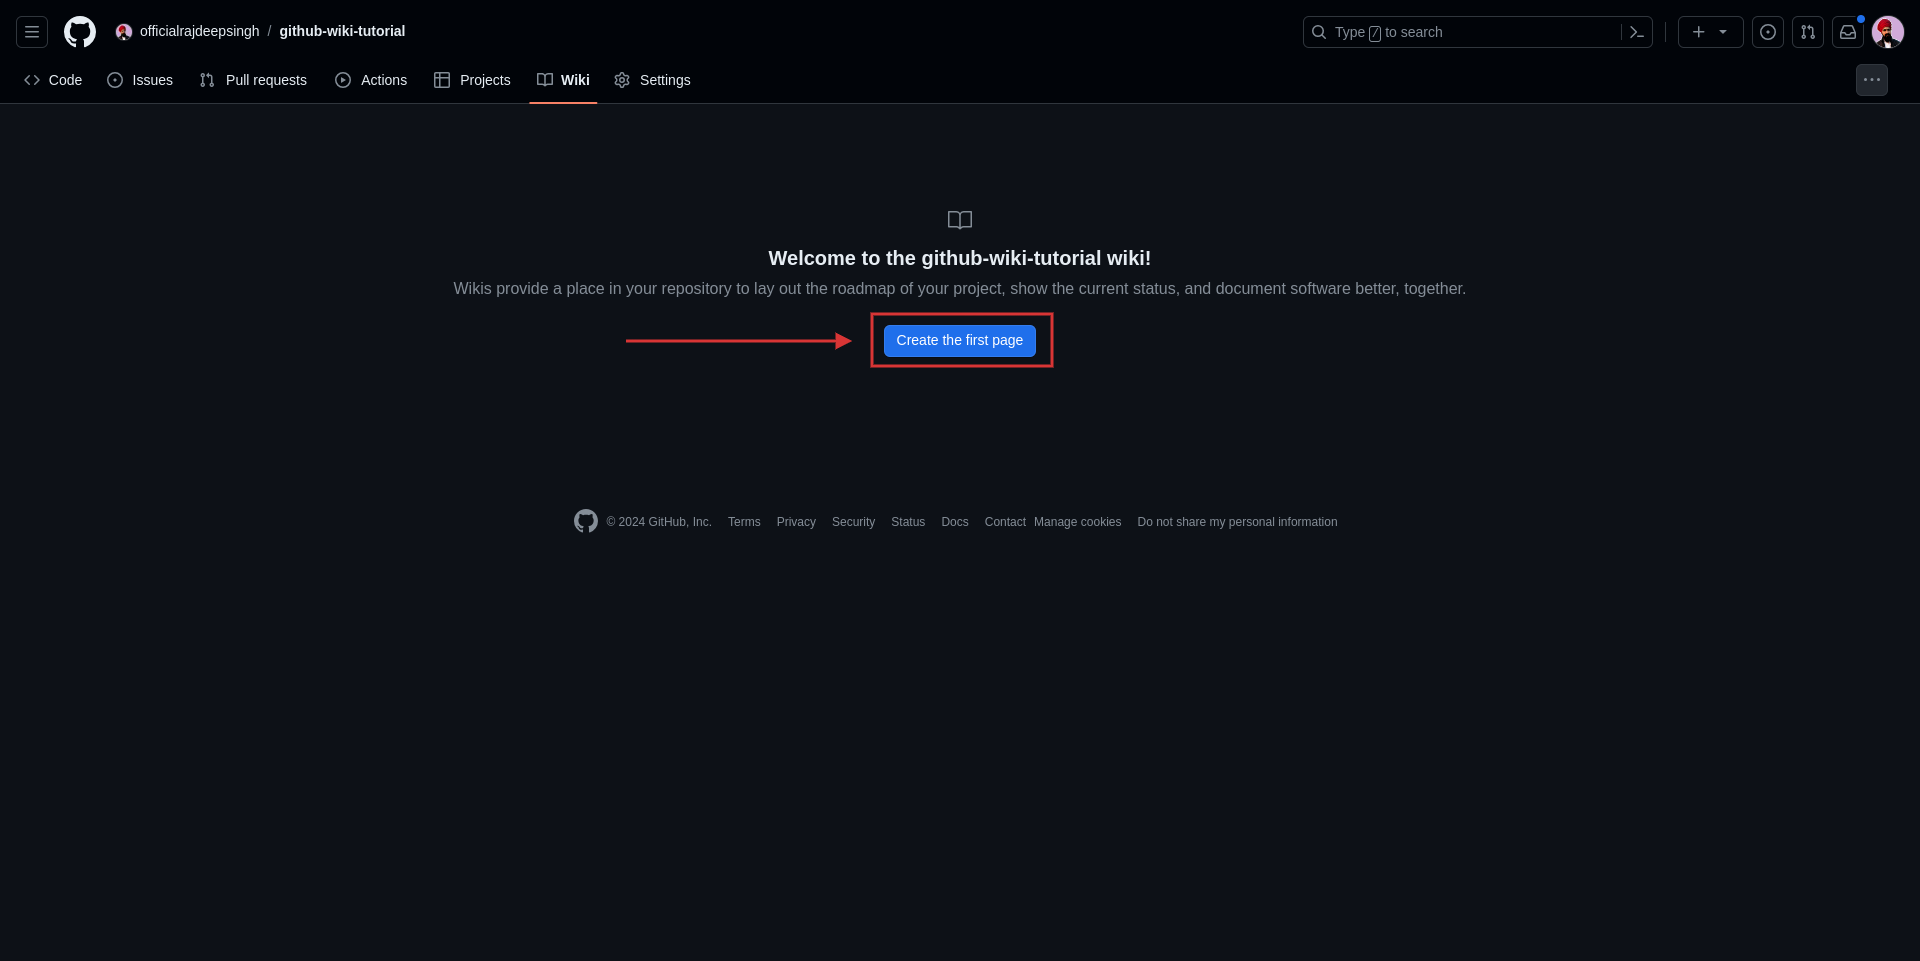
To initialize the wiki in your GitHub repository, create the home page in your wiki.
 Initialize the wiki in GitHub.
When you click the "Create the first page" button, you'll be redirected to the editor page where you can create a home page in the wiki.
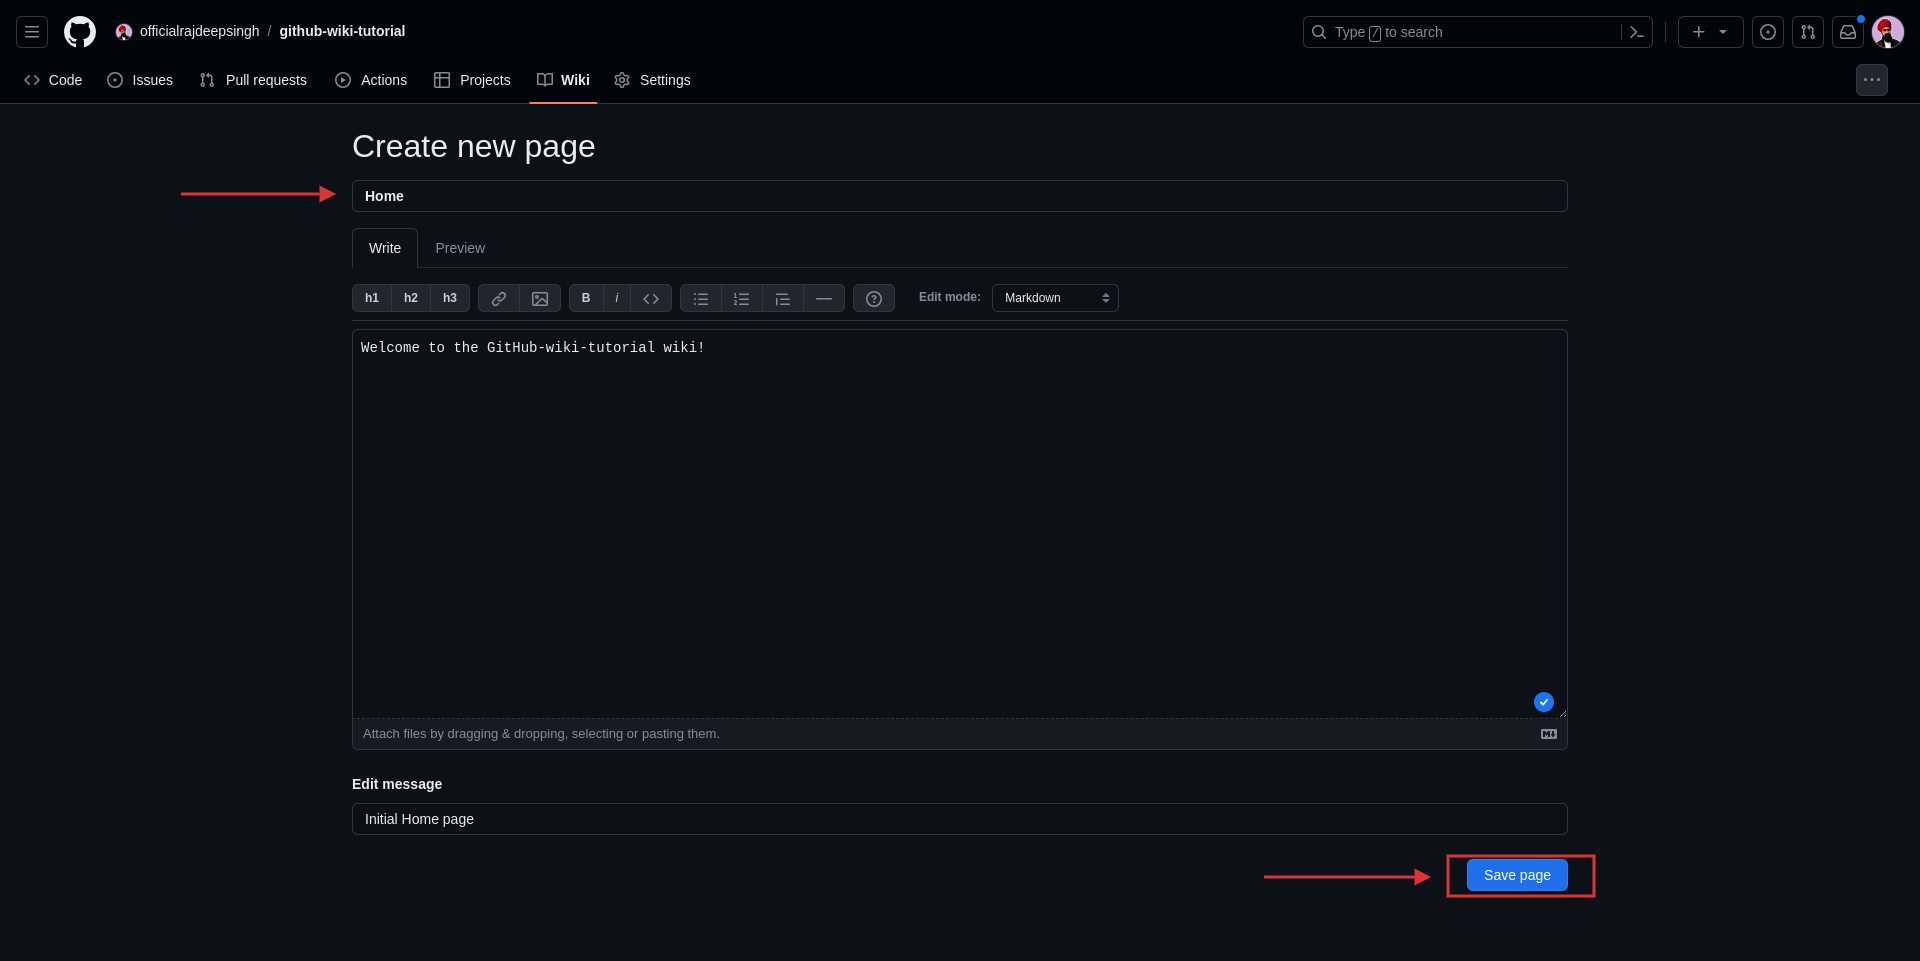 Create a home page and initialize the wiki.
Your wiki home page should now look like this:
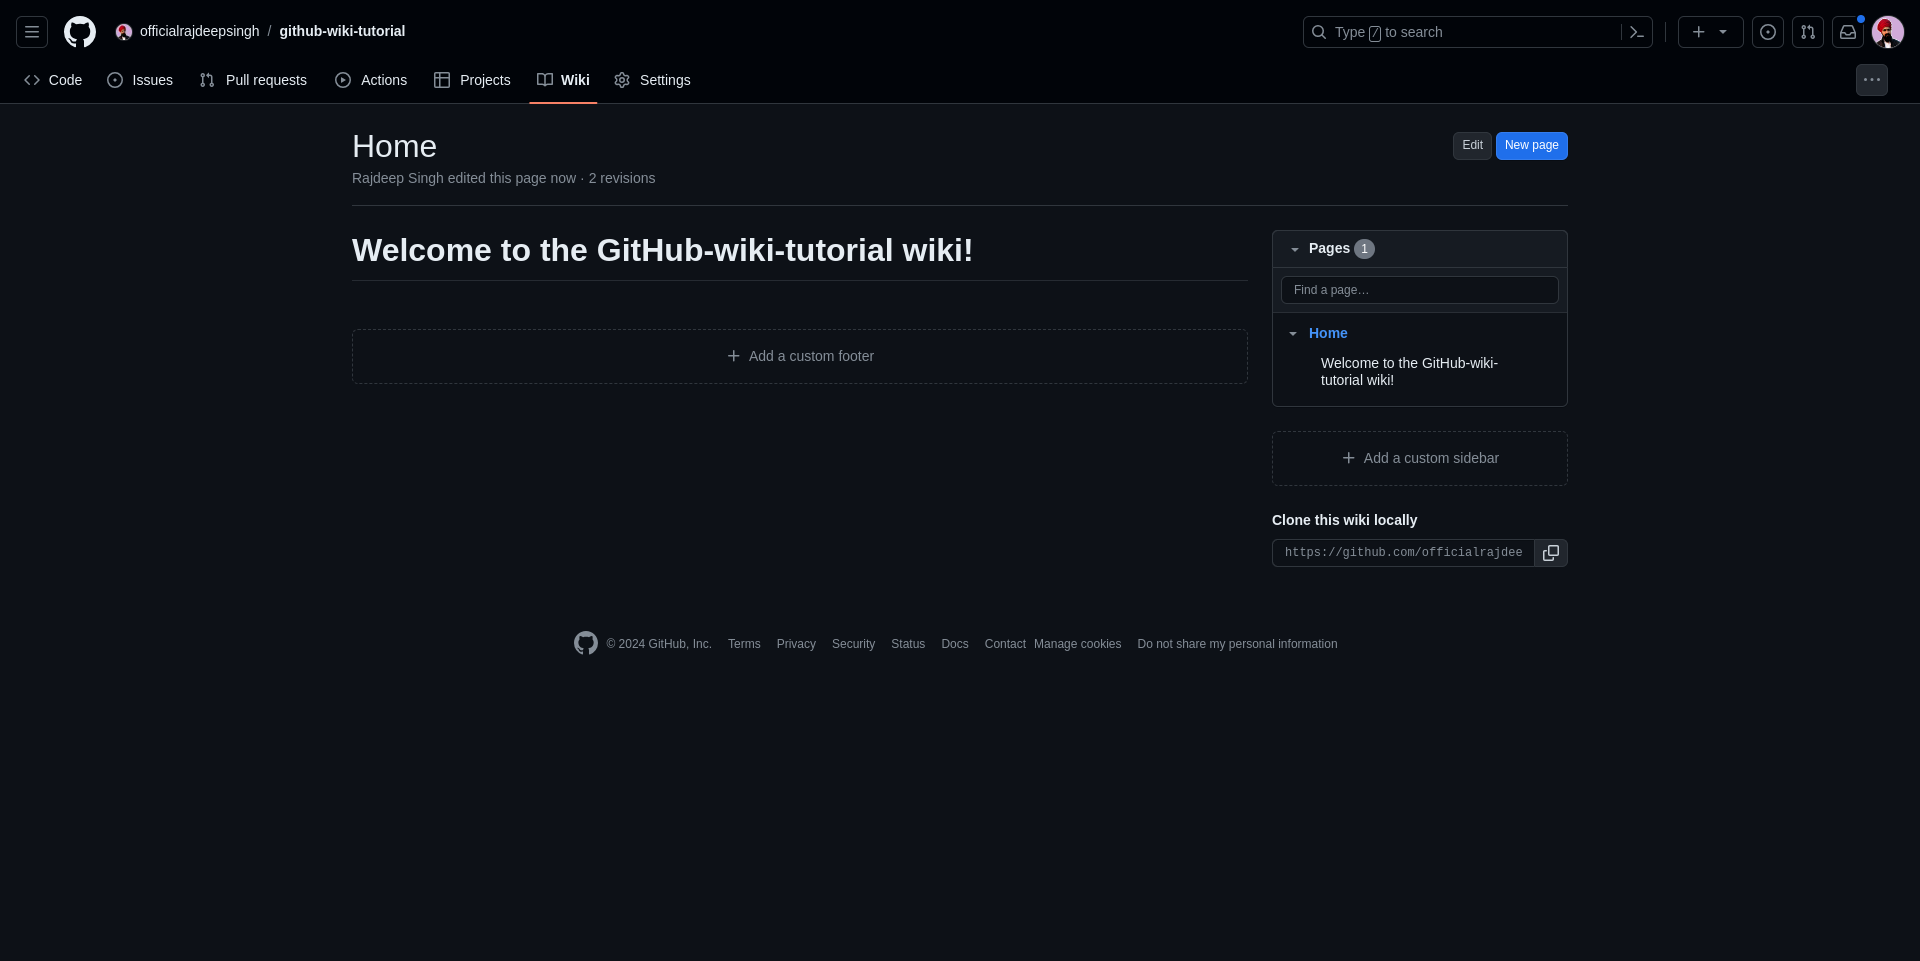 Wiki home page
How to Clone a GitHub Wiki Locally
Sometimes, new developers are confused about how to clone the wiki locally. To do this, just copy the link where it says “Clone this wiki locally”, as you can see in the image below:
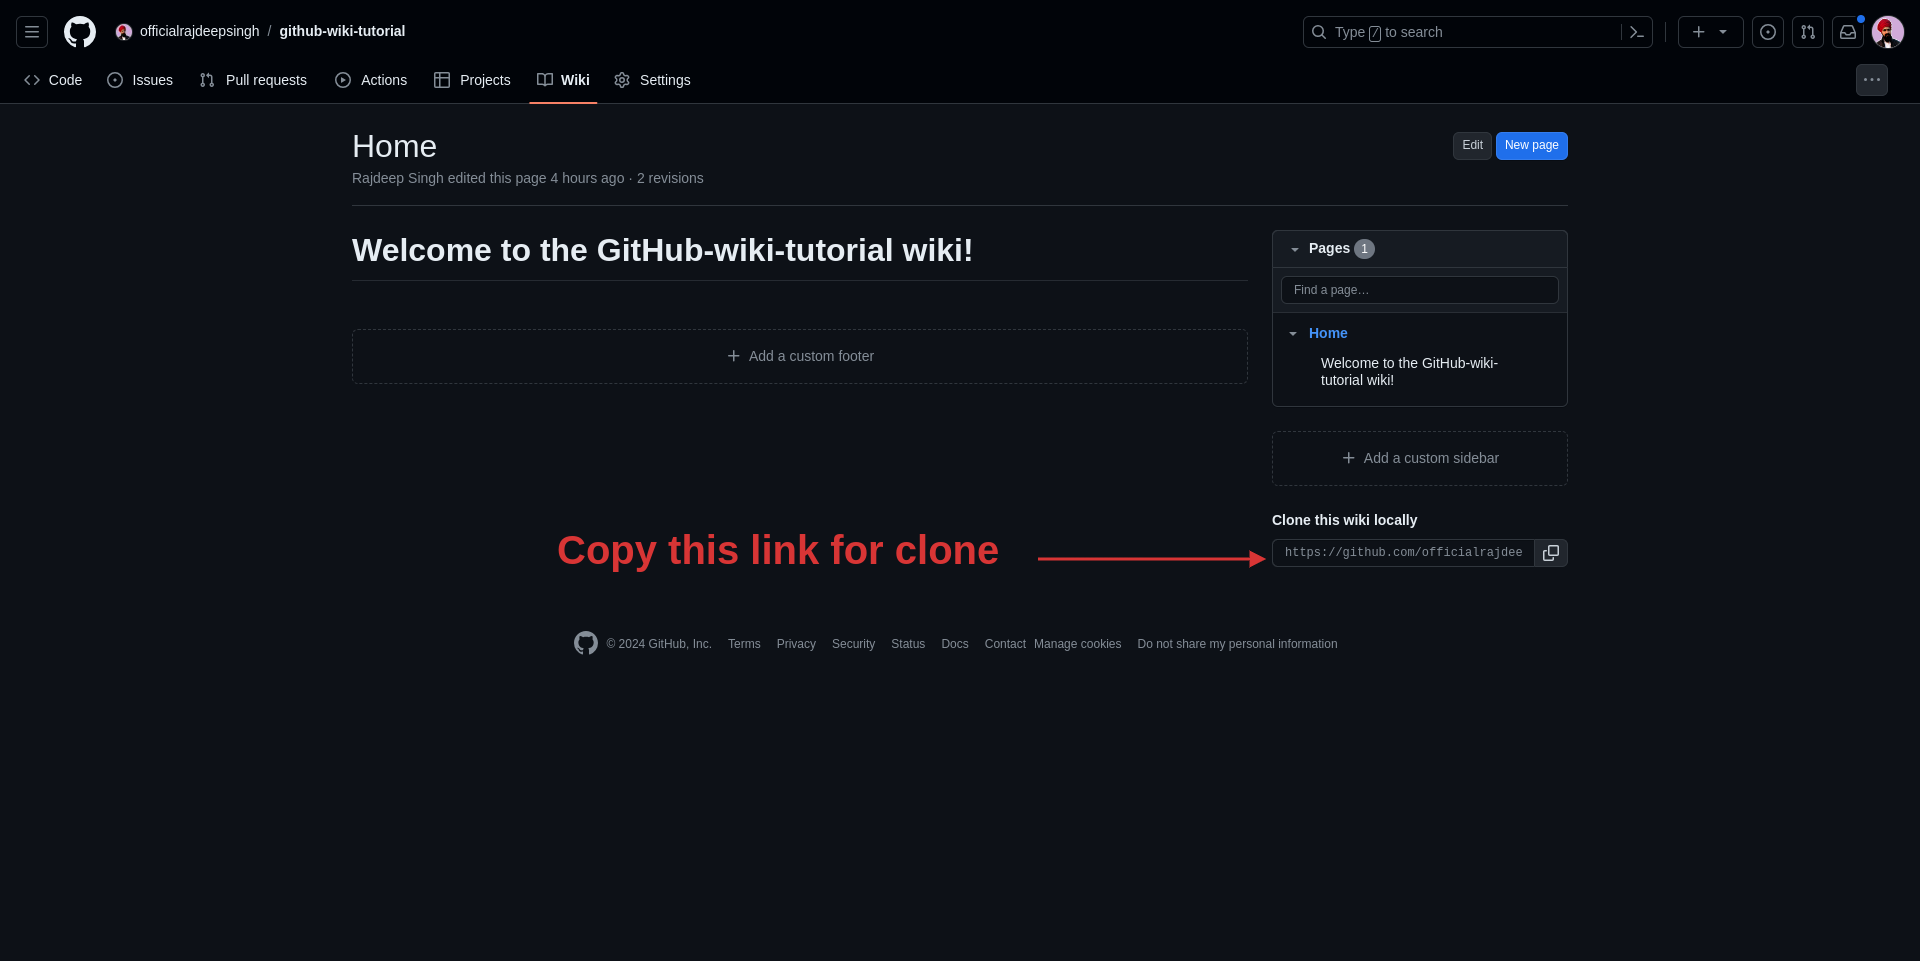 Copy the link to clone the GitHub wiki.
Copy that link and clone the GitHub wiki repository locally on your laptop or machine.
Now, you can make changes in the wiki, such as editing, updating, or changing documentation locally. After you finish any documentation changes, you can push your local wiki documentation to the GitHub wiki repository.
$ git clone https://github.com/officialrajdeepsingh/github-wiki-tutorial.wiki.git
Cloning into 'github-wiki-tutorial.wiki'...
remote: Enumerating objects: 6, done.
remote: Counting objects: 100% (6/6), done.
remote: Compressing objects: 100% (2/2), done.
remote: Total 6 (delta 1), reused 0 (delta 0), pack-reused 0
Receiving objects: 100% (6/6), done.
Resolving deltas: 100% (1/1), done.
How to Customize Your Wiki
Wikis have limited customization options for the sidebar, home page, and footer. But you can extend these options using HTML, CSS, and Markdown.
We have already discussed the home page, and now we'll discuss the footer and sidebar.
The footer and sidebar show or contain helpful links such as contact information, navigation links, social media links, and so on.
The footer is shown at the bottom of every page on your site, and the sidebar is typically a vertical column on the left or right side of a web page. Both are visible on all pages of the wiki.
How to create a custom sidebar
There are two ways to create a sidebar in the GitHub wiki.
- With the GitHub UI
- Locally in your IDE
We'll look at each method here so you can choose the one that works best for you.
With the GitHub UI
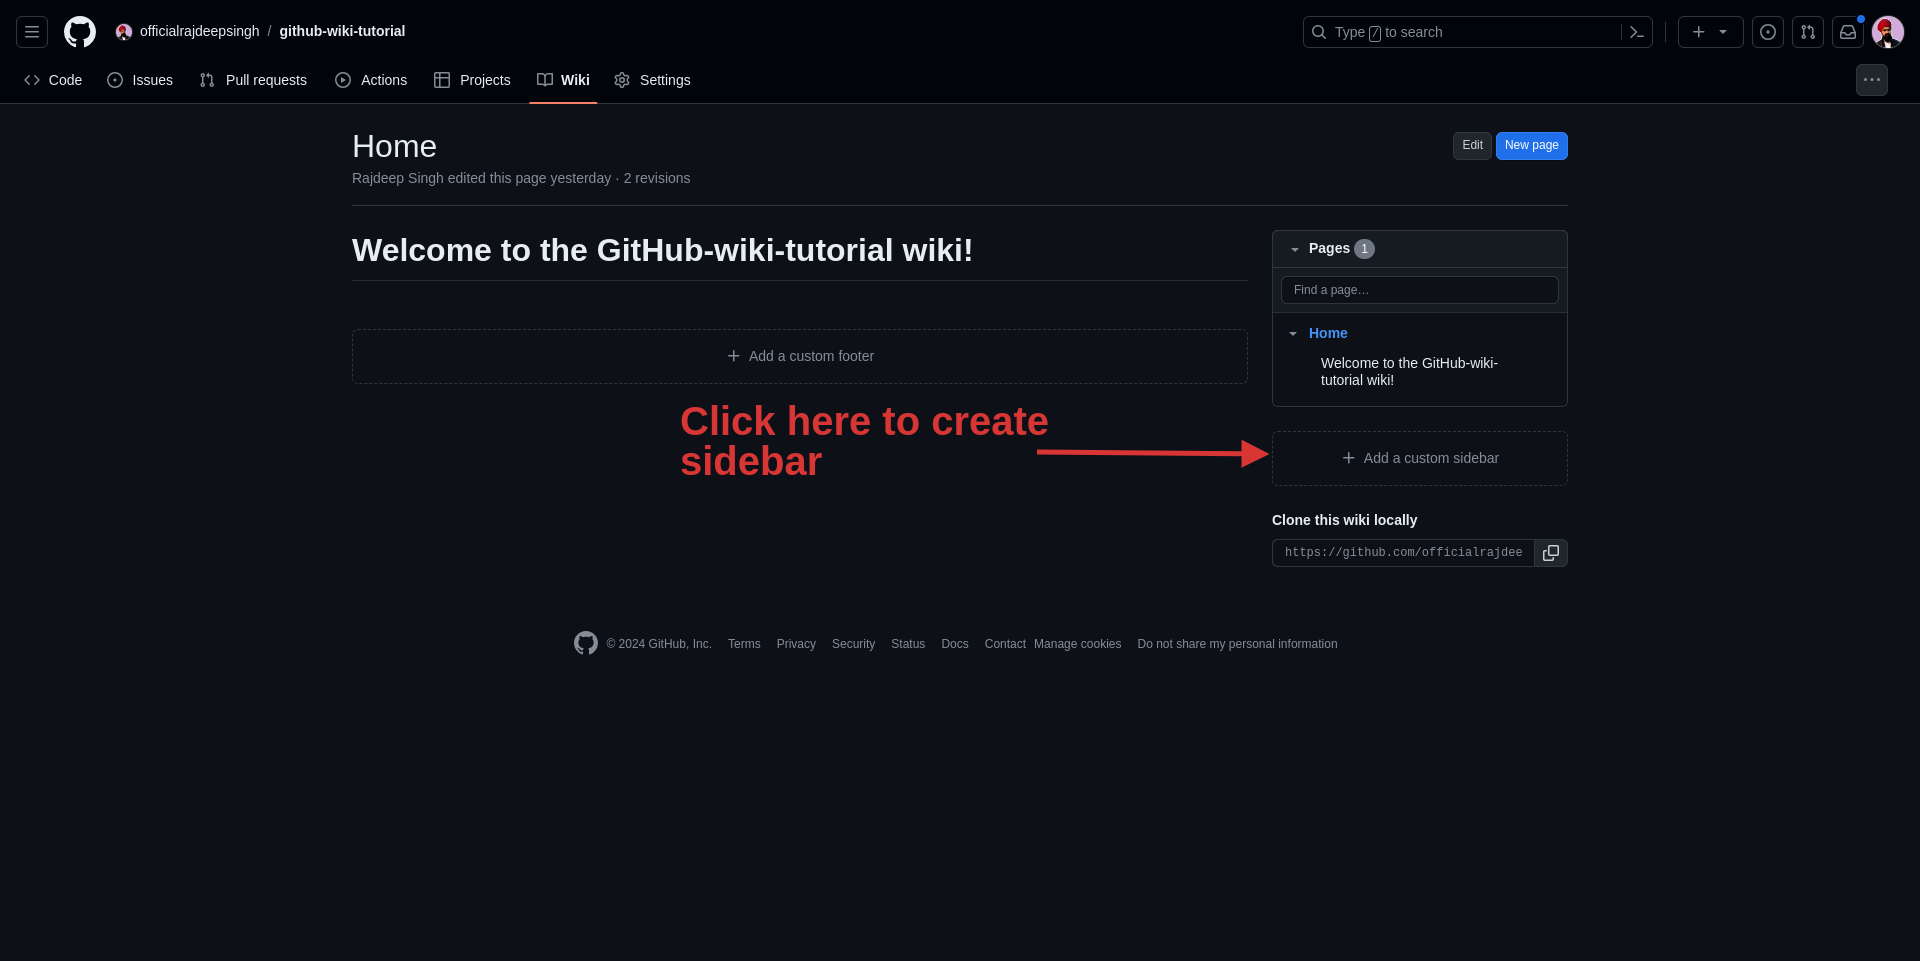 Create a sidebar
Go to the wiki home page and click on the “Add a custom sidebar” button to create a sidebar in your wiki.
Next, it will redirect you to the editor page to create a sidebar page. In the sidebar file, you can write markdown content such as navigation links, and so on. After that, click the save button.
 _Create
 _Sidebar.md file._
Locally in your IDE
The second way is to clone your wiki locally and then create a _Sidebar.md
file in your wiki at the root level using VS Code or any other IDE which you like.
How to create a custom footer
You'll follow basically the same steps as in the sidebar section to create your custom wiki footer.
With the GitHub UI
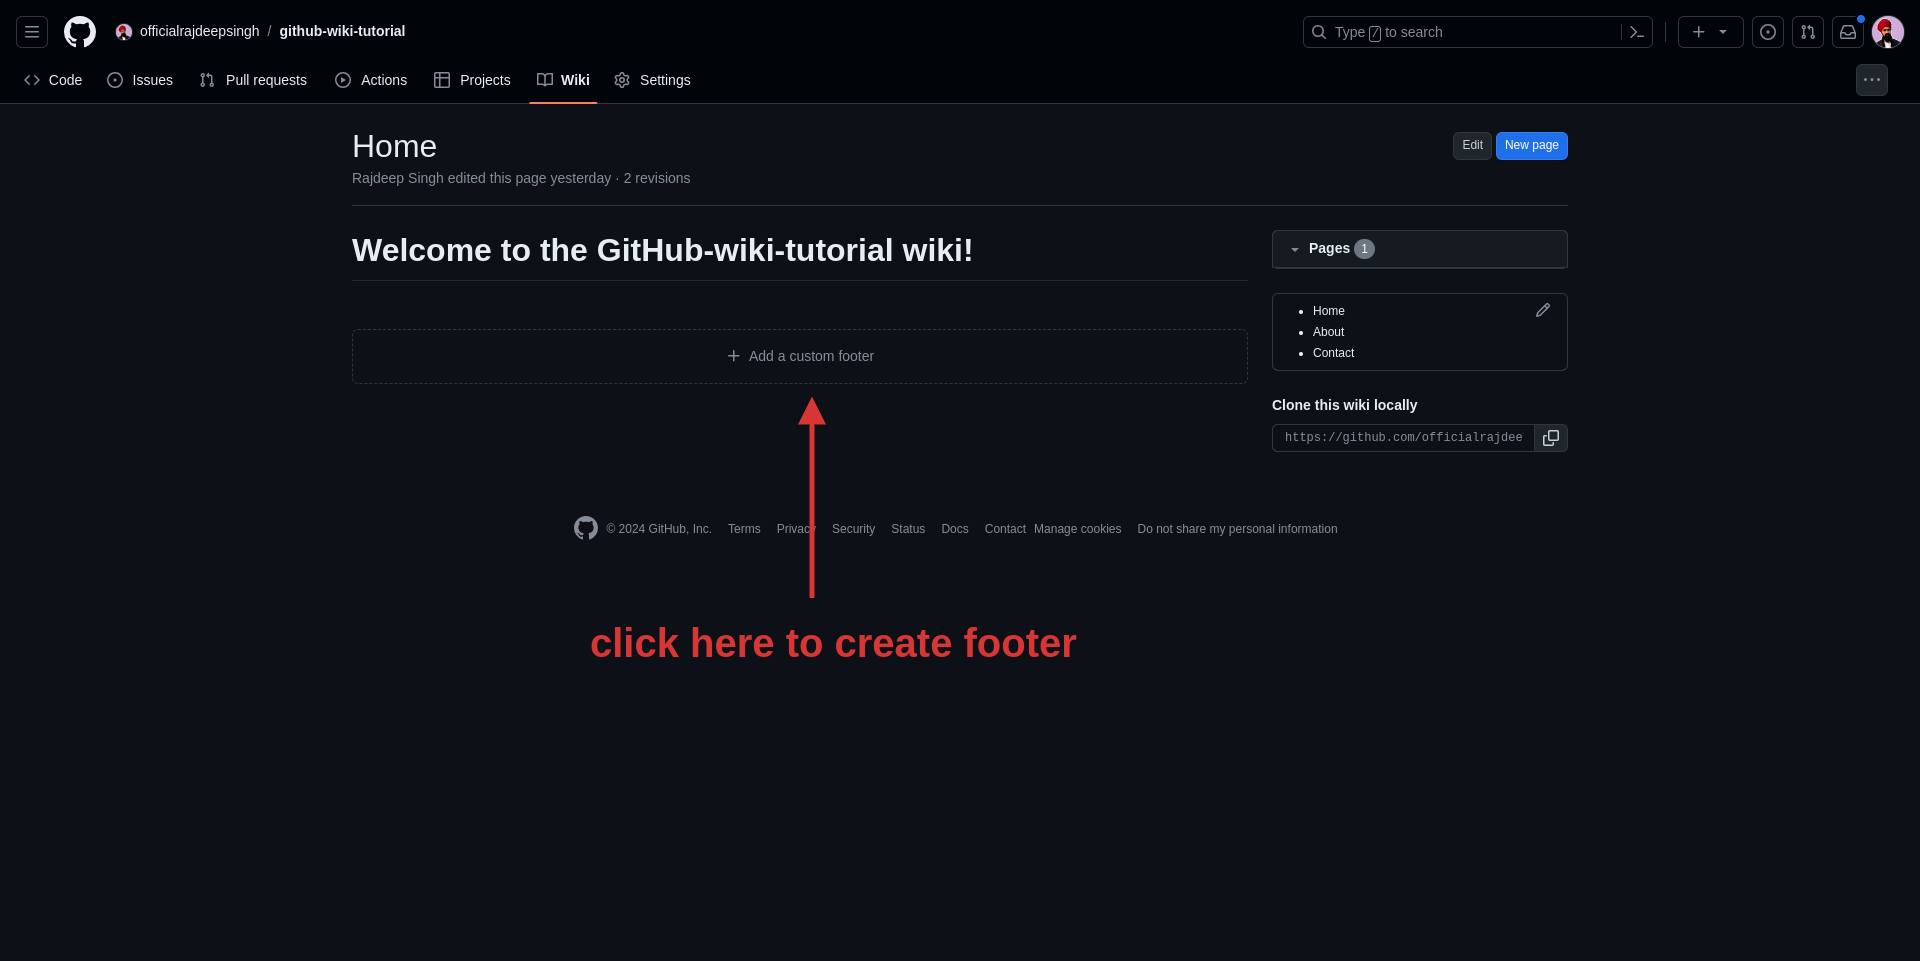
Go to your wiki page and click on the “Add a custom footer” button to create a footer in your wiki.
Next, it will redirect you to the editor page to create a footer. In the footer file, you can write markdown content such as navigation links, and so on. After that, click the save button.
 Create a footer
Locally in your IDE
The second way is to clone your wiki locally and then create a _Footer.md
file in your wiki at the root level using VS Code or any other IDE which you like.
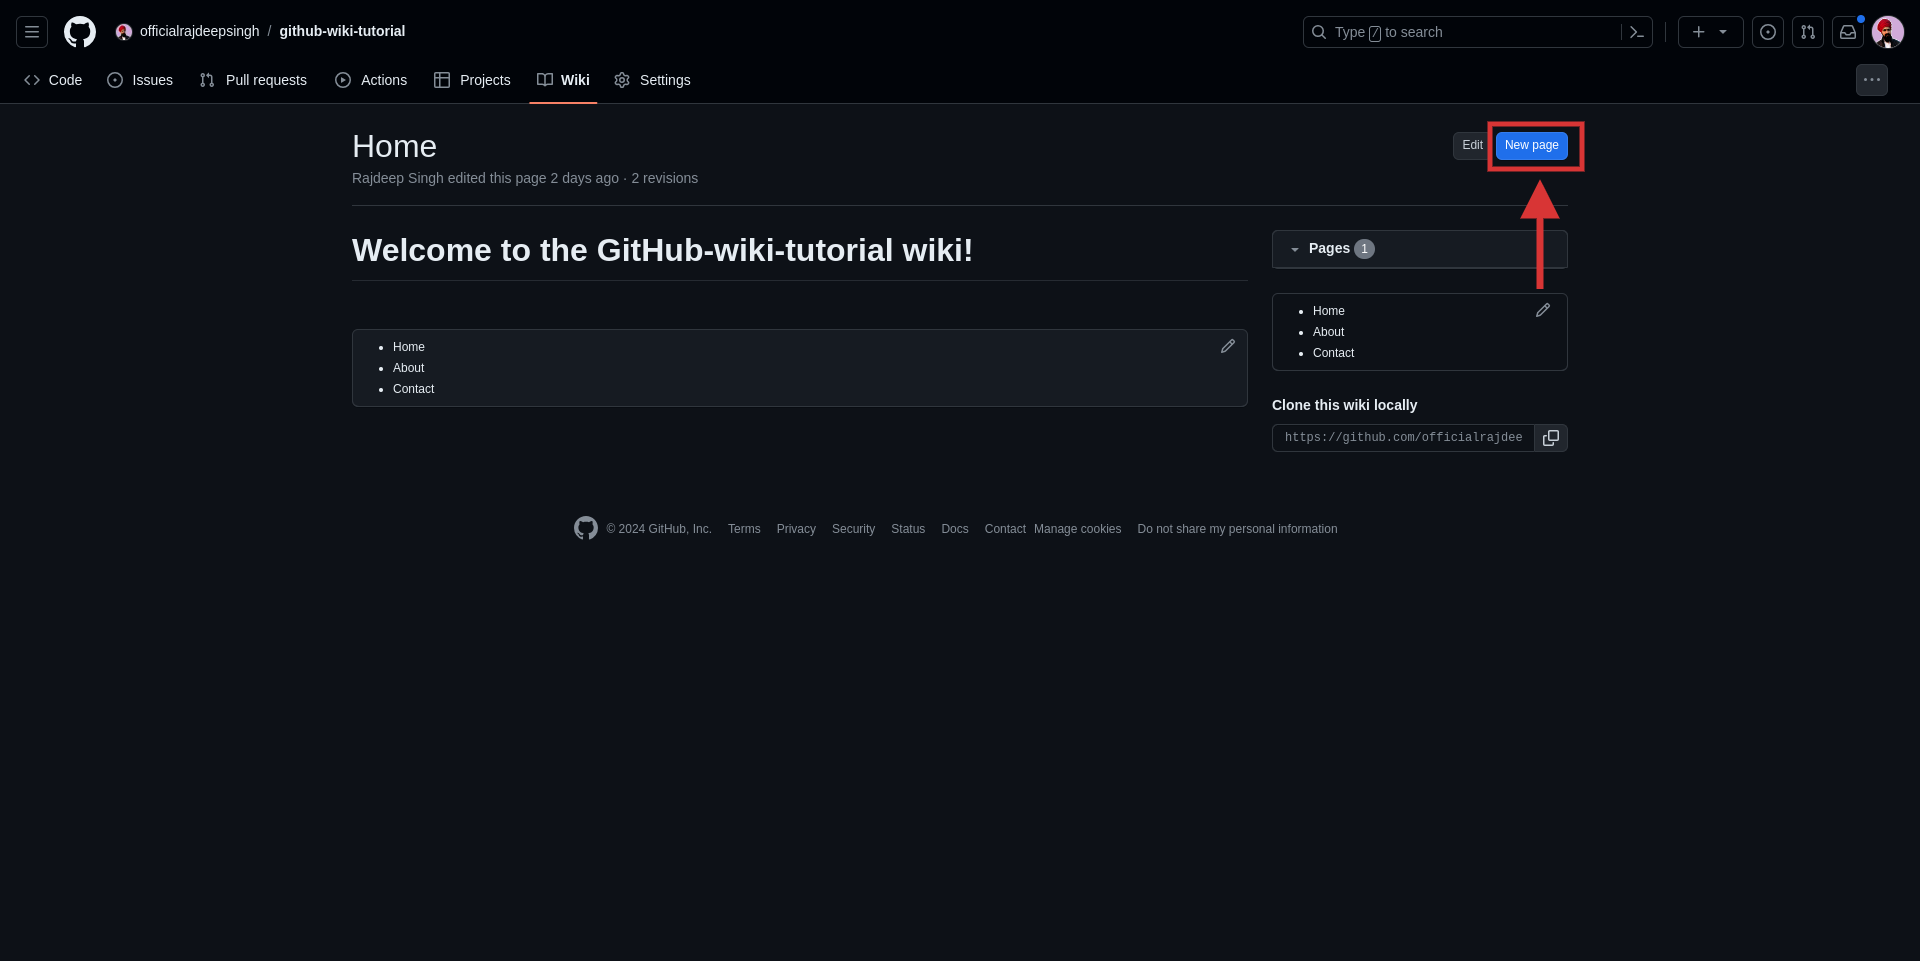
What is a Page? How Do You Create a New Page in the Wiki?
In a wiki, a page has functionality similar to other CMSs, giving you the power to manage your content and documentation.
With the wiki page, you can divide your content or docs into different sections such as installation, configuration, and so on.
To create a new page, click on the new page button.
 Create a new wiki page
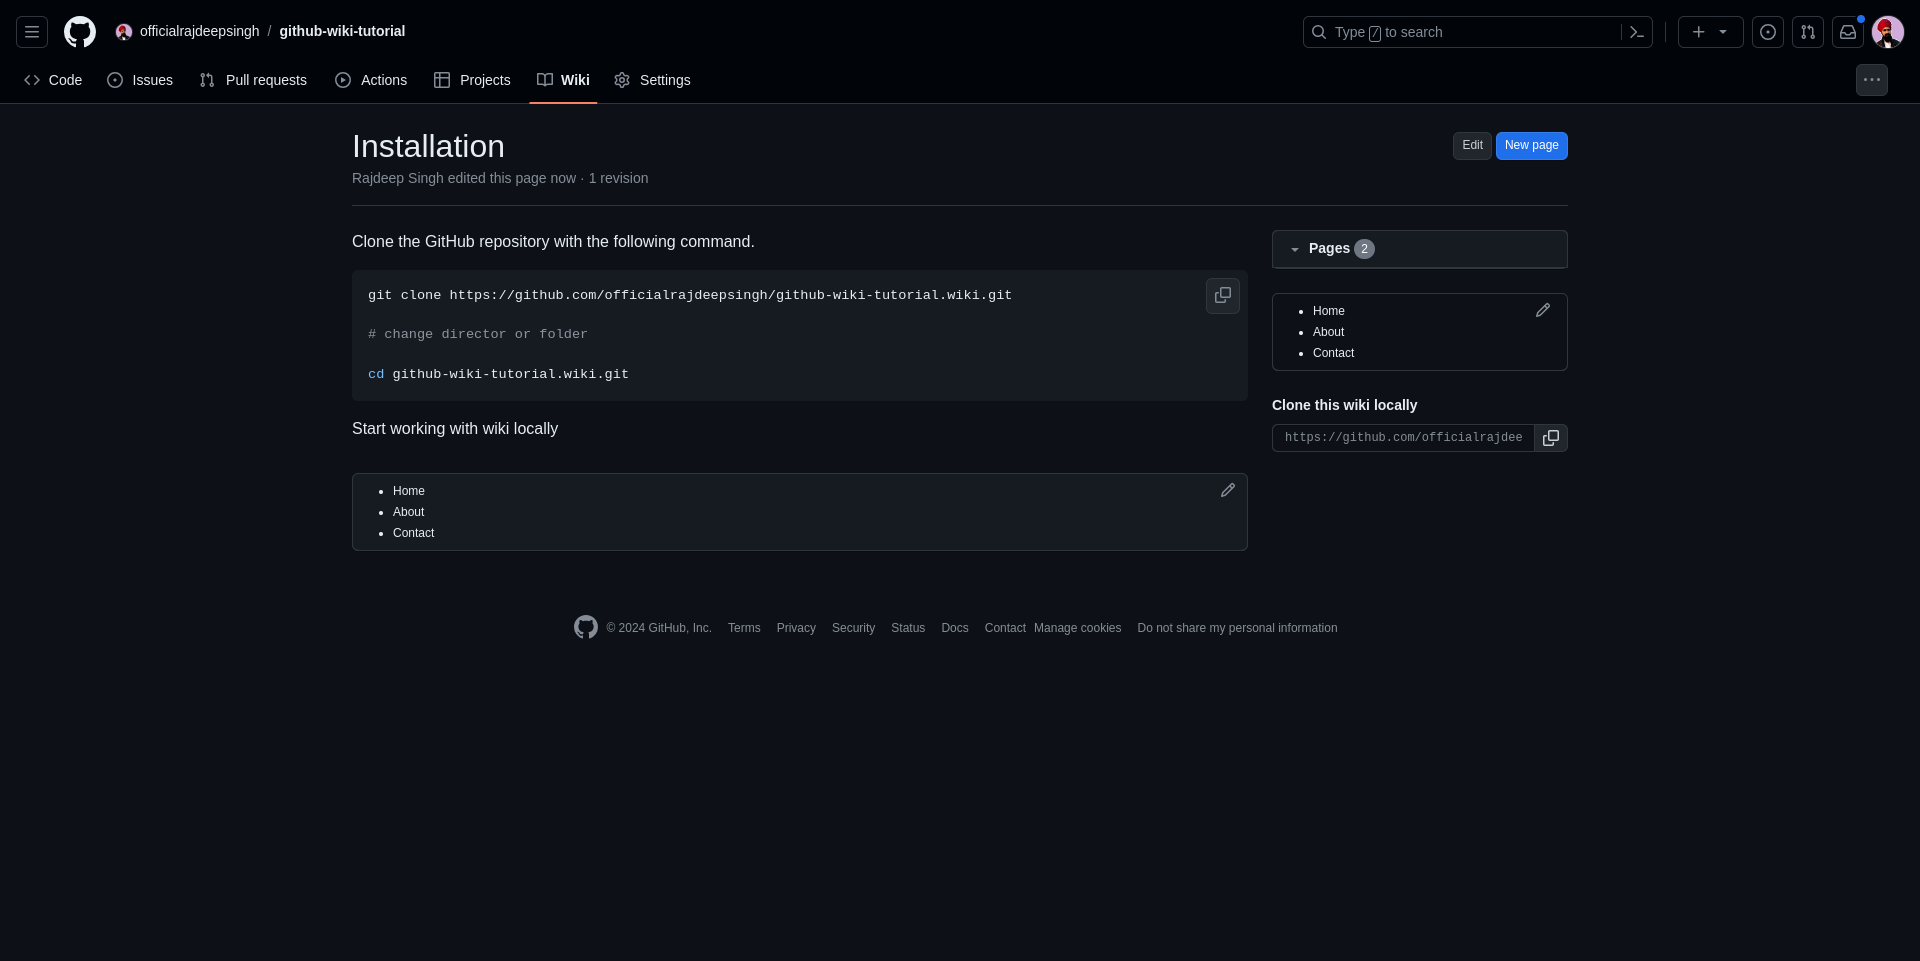
It redirects you to the editor page, where you can add a title and content. After your writing is finished, click on the save button.
 Create a wiki page
Your page looks like this in the wiki after it is published:
 The Wiki page looks like this in the browser after publishing.
Everybody can access your pages section. Every page you publish is shown in the pages section on your wiki.
 The page section shows the published page list.
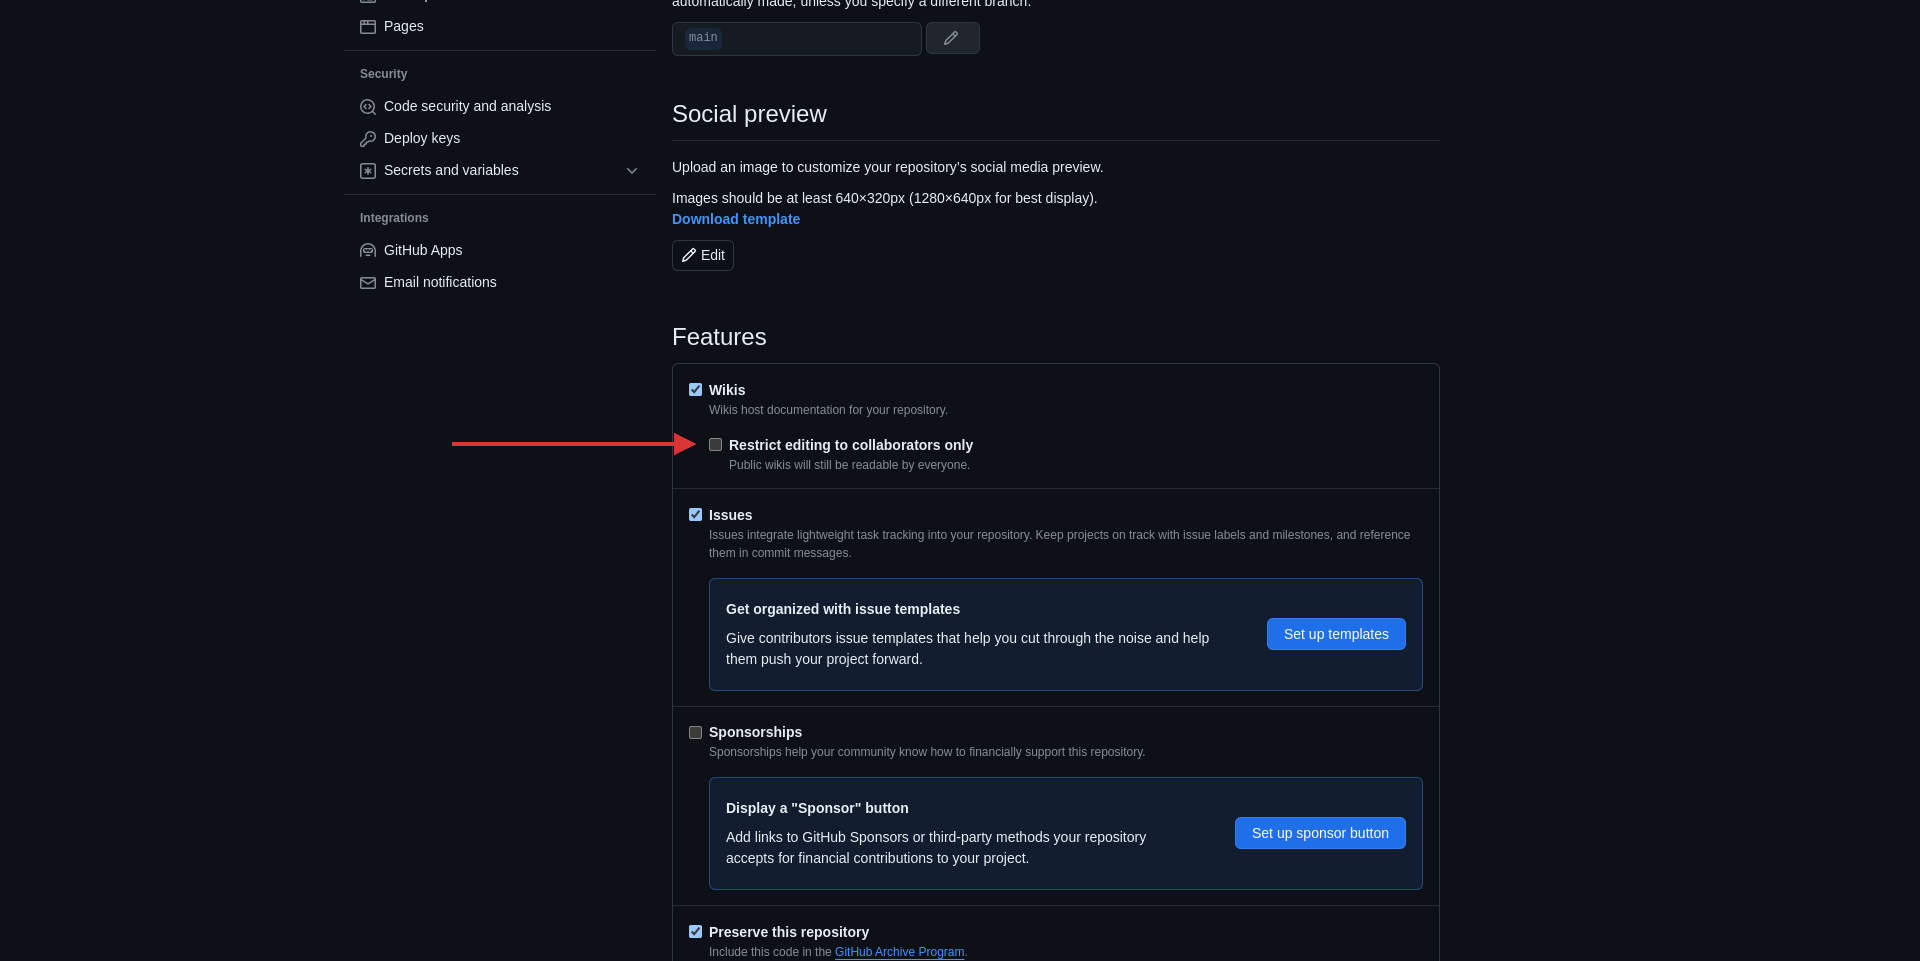
How to Enable and Disable Collaboration in the Wiki
To enable collaboration for everyone in the wiki, go to your GitHub repository settings page, scroll down, find the features, and unselect the "Restrict editing to collaborators only" checkbox.
 Enable Collaboration in the GitHub Wiki.
You can turn off collaboration for everyone, so that you and your team are the only ones responsible for updating, deleting, and editing the wiki.
To do this, you need to restrict editing for other users. Enabling the Restrict editing to collaborators only option quickly accomplishes this.
After there haven't been any edits, invite your team and give them access to it. Then just click the "Restrict editing to collaborators only" checkbox.
 Disable Collaboration in the GitHub Wiki.
Why is GitHub Wiki So Useful?
GitHub wikis can be useful for everyone. You can start your documentation with a wiki in less than one minute. You do not need anything to start writing your documentation except basic knowledge of Markdown syntax.
Using GitHub wikis, you can just focus on writing basic documentation and on the project itself. GitHub wiki handles the rest of your documentation such as hosting concerns, search, and so on. Most importantly, for public repository wikis, it's totally free.
Many famous open-source projects use Wiki nowadays, such as hhvm, neovim, guard, foundation db, and others.
Check out the list of projects used in Wiki.
Conclusion
There are many documentation frameworks on the market, such as Nextra, Lume, Starlight, and Docusaurus. But they take some time to learn, configure, and set up.
Also, if you're still working on your coding skills and you aren't comfortable with tools like React, MDX, and so on, you'll need to take some time to learn them before using these more advanced documentation frameworks.
With GitHub Wiki, you can start creating your documentation right away, and you do not need to worry about deploying and hosting anything managed by GitHub.
GitHub Wiki is a great choice for small and early-stage projects. You and your team can focus on the project while composing straightforward documentation.