
By Stanley Nguyen
This article should serve as an all-in-one essential guide for Node.js' favorite sidekick: npm.
Node.js has been taking the world by storm since 2009. Hundreds of thousands of systems have been built using Node.js, prompting the developer community to claim that "JavaScript is eating software".
One of the major factors of Node's success is npm - its popular package manager, which allows JavaScript developers to share useful packages like lodash and moment quickly and easily.
As of the moment I'm writing this post, npm has facilitated the publication of over 1.3 million packages with a weekly download rate of over 16 billion! These numbers are fantastic for any software tool. So now let's talk about what exactly npm is.
What is NPM?
NPM – or "Node Package Manager" – is the default package manager for JavaScript's runtime Node.js.
It's also known as "Ninja Pumpkin Mutants", "Nonprofit Pizza Makers", and a host of other random names that you can explore and probably contribute to over at npm-expansions.
NPM consists of two main parts:
- a CLI (command-line interface) tool for publishing and downloading packages, and
- an online repository that hosts JavaScript packages
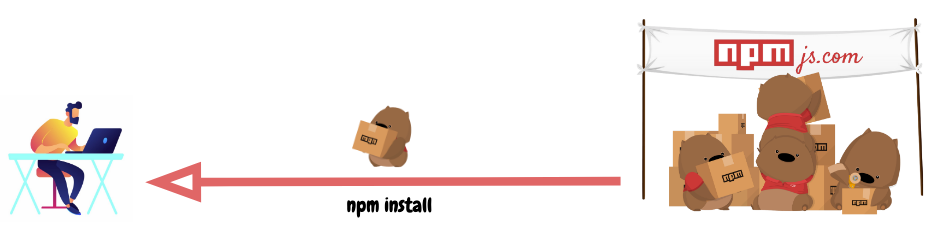
For a more visual explanation, we can think of the repository npmjs.com as a fulfillment center that receives packages of goods from sellers (npm package authors) and distributes these goods to buyers (npm package users).
To facilitate this process, the npmjs.com fulfillment center employs an army of hardworking wombats (npm CLI) who will be assigned as personal assistants to each individual npmjs.com customer. So dependencies are delivered to JavaScript developers like this:
and the process of publishing a package for your JS mates would be something like this:
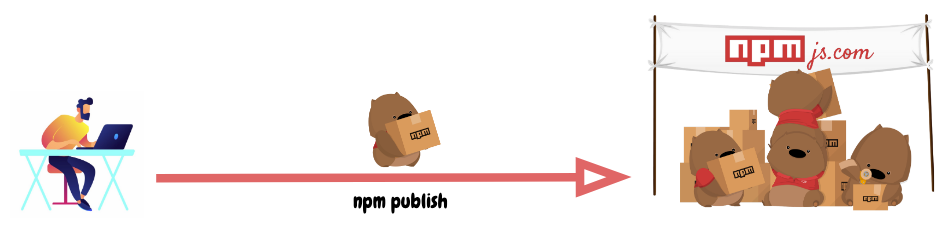
Let's look at how this army of wombats assist developers who want to use JavaScript packages in their projects. We'll also see how they help open-source wizards get their cool libraries out into the world.
package.json
Every project in JavaScript – whether it's Node.js or a browser application – can be scoped as an npm package with its own package information and its package.json job to describe the project.
We can think of package.json as stamped labels on those npm good boxes that our army of Wombats delivers around.
package.json will be generated when npm init is run to initialise a JavaScript/Node.js project, with these basic metadata provided by developers:
name: the name of your JavaScript library/projectversion: the version of your project. Often times, for application development, this field is often neglected as there's no apparent need for versioning opensource libraies. But still, it can come handy as a source of the deployment's version.description: the project's descriptionlicense: the project's license
npm scripts
package.json also supports a scripts property that can be defined to run command-line tools that are installed in the project's local context. For example, the scripts portion of an npm project can look something like this:
{
  "scripts": {
    "build": "tsc",
    "format": "prettier --write **/*.ts",
    "format-check": "prettier --check **/*.ts",
    "lint": "eslint src/**/*.ts",
    "pack": "ncc build",
    "test": "jest",
    "all": "npm run build && npm run format && npm run lint && npm run pack && npm test"
  }
}
with eslint, prettier, ncc, jest not necessarily installed as global executables but rather as local to your project inside node_modules/.bin/.
The recent introduction of npx allows us to run these node_modules project-scoped commands just like a globally installed program by prefixing npx ... (i.e. npx prettier --write **/*.ts).
dependencies vs devDependencies
These two come in form of key-value objects with npm libraries' names as the key and their semantic-formatted versions as the value. This is an example from Github's TypeScript Action template:
{
  "dependencies": {
    "@actions/core": "^1.2.3",
    "@actions/github": "^2.1.1"
  },
  "devDependencies": {
    "@types/jest": "^25.1.4",
    "@types/node": "^13.9.0",
    "@typescript-eslint/parser": "^2.22.0",
    "@zeit/ncc": "^0.21.1",
    "eslint": "^6.8.0",
    "eslint-plugin-github": "^3.4.1",
    "eslint-plugin-jest": "^23.8.2",
    "jest": "^25.1.0",
    "jest-circus": "^25.1.0",
    "js-yaml": "^3.13.1",
    "prettier": "^1.19.1",
    "ts-jest": "^25.2.1",
    "typescript": "^3.8.3"
  }
}
These dependencies are installed via the npm install command with --save and --save-dev flags. They're meant to be used for production and development/test environments respectively. We will drill deeper into the installation of these packages in the next section.
Meanwhile, it's important to understand the possible signs that come before the semantic versions (assuming you have read up on major.minor.patch model of semver):
^: latest minor release. For example, a^1.0.4specification might install version1.3.0if that's the latest minor version in the1major series.~: latest patch release. In the same way as^for minor releases,~1.0.4specification might install version1.0.7if that's the latest minor version in the1.0minor series.
All of these exact package versions will be documented in a generated package-lock.json file.
package-lock.json
This file describes the exact versions of the dependencies used in an npm JavaScript project. If package.json is a generic descriptive label, package-lock.json is an ingredient table.
And just like how we don't usually read the ingredient table of a product (unless you are too bored or need to know), package-lock.json is not meant to be read line-by-line by developers (unless we're desperate to resolve "works in my machine" issues).
package-lock.json is usually generated by the npm install command, and is also read by our NPM CLI tool to ensure reproduction of build environments for the project with npm ci.
How to effectively command NPM Wombats as a "buyer"
As inferred from the 1.3 million published packages vs 16 billion downloads mentioned earlier, the majority of npm users use npm in this direction. So it's good to know how to wield this powerful tool.
npm install
This is the most commonly used command as we develop JavaScript/Node.js applications nowadays.
By default, npm install <package-name> will install the latest version of a package with the ^ version sign. An npm install within the context of an npm project will download packages into the project's node_modules folder according to package.json specifications, upgrading the package version (and in turn regenerating package-lock.json) wherever it can based on ^ and ~ version matching.
You can specify a global flag -g if you want to install a package in the global context which you can use anywhere across your machine (this is common for command-line tooling packages like live-server).
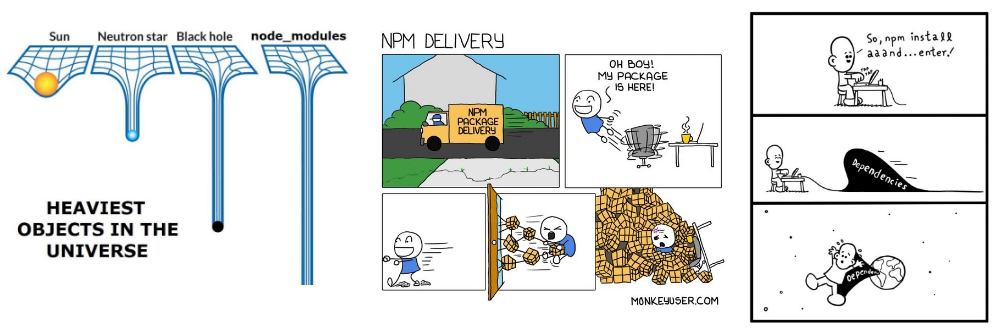
npm has made installing JavaScript packages so easy that this command is often used incorrectly. This results in npm being the butt of a lot of programmers' jokes like these:
This is where the --production flag comes to the rescue! In the previous section, we discussed dependencies and devDependencies meant for usage in production and development/test environment respectively. This --production flag is how the differences in node_modules are made.
By attaching this flag to the npm install command, we will only install packages from dependencies, thus drastically reducing the size of our node_modules to whatever is absolutely necessary for our applications to be up and running.
Just like how as boy and girl scouts we didn't bring lemon squeezers to our lemonade booth, we shouldn't bring devDependencies to production!
npm ci
So if npm install --production is optimal for a production environment, must there be a command that's optimal for my local development, testing setup?
The answer is npm ci.
Just like how if package-lock.json doesn't already exist in the project it's generated whenever npm install is called, npm ci consumes this file to download the exact version of each individual package that the project depends on.
This is how we can make sure that the our project's context stays exactly the same across different machines, whether it's our laptops used for development or CI (Continuous Integration) build environments like Github Actions.
npm audit
With the humongous number of packages that have been published and can easily be installed, npm packages are susceptible to bad authors with malicious intentions like these.
Realising that there was an issue in the ecosystem, the npm.js organisation came up with the idea of npm audit. They maintain a list of security loopholes that developers can audit their dependencies against using the npm audit command.
npm audit gives developers information about the vulnerabilities and whether there're versions with remediations to upgrade to. For example,
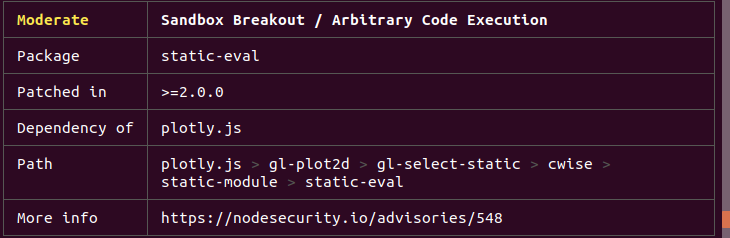
If the remediations are available in the next non-breaking version upgrades, npm audit fix can be used to upgrade the affected dependencies' versions automatically.
How to effectively command NPM wombats as "seller"
We have gone through how to wield the NPM CLI tool as a consumer, but what about effectively using it as an author (and potentially becoming a JavaScript open source wizard ?)?
npm publish
Sending a package to our npmjs.com fulfillment centre is super easy as we only need to run npm publish. The tricky part, which is not specific to npm package authors, is determining the version of the package.
The rule of thumb according to semver.org:
- MAJOR version when you make incompatible API changes,
- MINOR version when you add functionality in a backwards compatible manner, and
- PATCH version when you make backwards compatible bug fixes.
It's even more important to follow the above rule when publishing your packages to ensure that you're not breaking anyone's code as the default version matching in npm is ^ (aka the next minor version).
❤️ npm ❤️ JavaScript ❤️ Node.js ❤️
That's all we need to know to start wielding npm effectively and command our lovely army of wombats!
