There are many essential concepts and lessons that React developers need to know that simply aren't covered in most tutorials.
I have handpicked the topics I believe are some of the most important for you to know, but that few articles have dedicated the time to cover in detail.
Let's take a look at five key React lessons worth knowing which you might not find elsewhere.
1. How React state is actually updated
As a React developer, you know that state can be created and updated with the useState and useReducer hooks.
But what happens exactly when you update a component's state with either of these hooks? Is the state updated immediately or is it done at some later time?
Let's look at the following code, which is a very simple counter application. As you would expect, you can click on the button and our counter increases by 1.
import React from 'react';

export default function App() {
  const [count, setCount] = React.useState(0)

  function addOne() {
    setCount(count + 1);
  }

  return (
    <div>
      <h1>Count: {count}</h1> {/* 1 (as we expect) */}

      <button onClick={addOne}>+ 1</button>
    </div>
  );
}
But what if we attempt to add an additional line, which also updates our count by one – what do you think will happen?
When you click on the button, will our displayed count increase by one or two?
import React from 'react';

export default function App() {
  const [count, setCount] = React.useState(0)

  function addOne() {
    setCount(count + 1);
    setCount(count + 1);
  }

  return (
    <div>
      <h1>Count: {count}</h1> {/* 1?! */}

      <button onClick={addOne}>+ 1</button>
    </div>
  );
}
If we run this code we see it's incremented only by one! Despite attempting to increment the count by one twice, with two separate state updates.
Why does our counter display 1, despite clearly incrementing state by 1 two times?
The reason for this is that React schedules a state update to be performed when we update state the first time. Because it is just scheduled and is not performed immediately (it is asynchronous and not synchronous), our count variable is not updated before we attempt to update it a second time.
In other words, because the state update is scheduled, not performed immediately, the second time we called setCount, count is still just 0, not 1.
The way that we can fix this to update state reliably, despite state updates being asynchronous, is to use the inner function that's available within the useState setter function.
This allows us to get the previous state and return the value that we want it to be in the body of the inner function. When we use this pattern, we see that it's incremented by two like we originally wanted:
import React from 'react';

export default function App() {
  const [count, setCount] = React.useState(0)

  function addOne() {
    setCount(prevCount => prevCount + 1); // 1
    setCount(prevCount => prevCount + 1); // 2
  }

  return (
    <div>
      <h1>Count: {count}</h1>
      <button onClick={addOne}>+ 1</button>
    </div>
  );
}
2. It's better to use multiple effects instead of one
When performing a side effect, most React developers will useEffect just once and attempt to perform multiple side effects within the same effect function.
What does that look like? Below you can see where we are fetching both post and comment data in one useEffect hook to be put in their respective state variables:
import React from "react";

export default function App() {
  const [posts, setPosts] = React.useState([]);
  const [comments, setComments] = React.useState([]);

  React.useEffect(() => {
    // fetching post data
    fetch("https://jsonplaceholder.typicode.com/posts")
      .then((res) => res.json())
      .then((data) => setPosts(data));

    // fetching comments data
    fetch("https://jsonplaceholder.typicode.com/comments")
      .then((res) => res.json())
      .then((data) => setComments(data));
  }, []);

  return (
    <div>
      <PostsList posts={posts} />
      <CommentsList comments={comments} />
    </div>
  );
}
Instead of attempting to cram all of your side effects into a single effect hook, just as you can use the state hook more than once, you can use several effects.
Doing so allows us to separate our different actions into different effects for a better separation of concerns.
A better separation of concerns is a major benefit that React hooks provide as compared to using lifecycle methods within class components.
In methods like componentDidMount, for example, it was necessary to include any action that we want to be performed after our component mounted. You could not break up your side effects into multiple methods – each lifecycle method in classes can be used once and only once.
The major benefit of React hooks is that we are able to break up our code based upon what it's doing. Not only can we separate actions that we are performing after rendering into multiple effects, but we can also co-locate our state:
import React from "react";

export default function App() {
  const [posts, setPosts] = React.useState([]);
  React.useEffect(() => {
    fetch("https://jsonplaceholder.typicode.com/posts")
      .then((res) => res.json())
      .then((data) => setPosts(data));
  }, []);

  const [comments, setComments] = React.useState([]);
  React.useEffect(() => {
    fetch("https://jsonplaceholder.typicode.com/comments")
      .then((res) => res.json())
      .then((data) => setComments(data));
  }, []);

  return (
    <div>
      <PostsList posts={posts} />
      <CommentsList comments={comments} />
    </div>
  );
}
This means we can put the state hook with the effect hook that it is related to. This helps to organize our code much better and better understand what it's doing at a glance.
3. Don't optimize functions that update state (useState, useReducer)
A common task whenever we pass down a callback function from a parent component to a child component is to prevent it from being recreated, unless its arguments have changed.
We can perform this optimization with the help of the useCallback hook.
useCallback was created specifically for callback functions that are passed to child components to make sure that they are not recreated needlessly, which incurs a performance hit on our components whenever there is a re-render.
This is because whenever our parent component re-renders, it will cause all child components to re-render as well. This is what causes our callback functions to be recreated on every re-render.
However, if we are using a setter function to update state that we've created with the useState or useReducer hooks, we do not need to wrap that with useCallback.
In other words, there is no need to do this:
import React from "react";

export default function App() {
  const [text, setText] = React.useState("")

  // Don't wrap setText in useCallback (it won't change as is)
  const handleSetText = React.useCallback((event) => {
    setText(event.target.value);
  }, [])

  return (
    <form>
      <Input text={text} handleSetText={handleSetText} />
      <button type="submit">Submit</button>
    </form>
  );
}

function Input({ text, handleSetText }) {
  return(
    <input type="text" value={text} onChange={handleSetText}  />
  )
}
The reason comes directly from the React documentation:
React guarantees that setState function identity is stable and won't change on re-renders. This is why it's safe to omit from the useEffect or useCallback dependency list.
Therefore, not only do we not need to optimize it unnecessarily with useCallback, but we also do not need to include it as a dependency within useEffect because it will not change.
This is important to note because in many cases, it can cut down the code that we need to use. And most importantly, it is an unproductive attempt to optimize your code as it can incur performance problems of its own.
4. The useRef hook can preserve state across renders
As React developers, it's very helpful sometimes to be able to reference a given React element with the help of a ref. We create refs in React with the help of the useRef hook.
It's important to note, however, that useRef isn't just helpful for referencing to a certain DOM element. The React documentation says so itself:
The ref object that's created by useRef is a generic container with a current property that's mutable and can hold any value.
There are certain benefits to be able to store and update values with useRef. It allows us to store a value that will not be in memory that will not be erased across re-renders.
If we wanted to keep track of a value across renders with the help of a simple variable, it would be reinitialized each time the component renders. However, if you use a ref, the value stored in it will remain constant across renders of your component.
What is a use case for leveraging useRef in this way?
This could be helpful in the event that we wanted to perform a given side effect on the initial render only, for example:
import React from "react";

export default function App() {
  const [count, setCount] = React.useState(0);
  const ref = React.useRef({ hasRendered: false });

  React.useEffect(() => {
    if (!ref.current.hasRendered) {
      ref.current.hasRendered = true;
      console.log("perform action only once!");
    }
  }, []);

  return (
    <div>
      <button onClick={() => setCount(count + 1)}>Count: {count}</button>
    </div>
  );
}
Try running this code yourself.
As you will see, no matter how many times the button is clicked, state is updated, and a re-render takes place, the action we want to perform (see console.log) is only performed once.
5. How to prevent your React app from crashing
One of the most important lessons for React developers to know, especially if they haven't pushed a React application to the web, is what to do with uncaught errors.
In the example below, we are attempting to display a Header component in our app, but are performing an action that results in an error. Namely, attempting to get a property from a null value:
import React from "react";

export default function App() {
  return (
    <>
      <Header />
    </>
  );
}

function Header() {
  const user = null;

  return <h1>Hello {user.name}</h1>; // error!
}
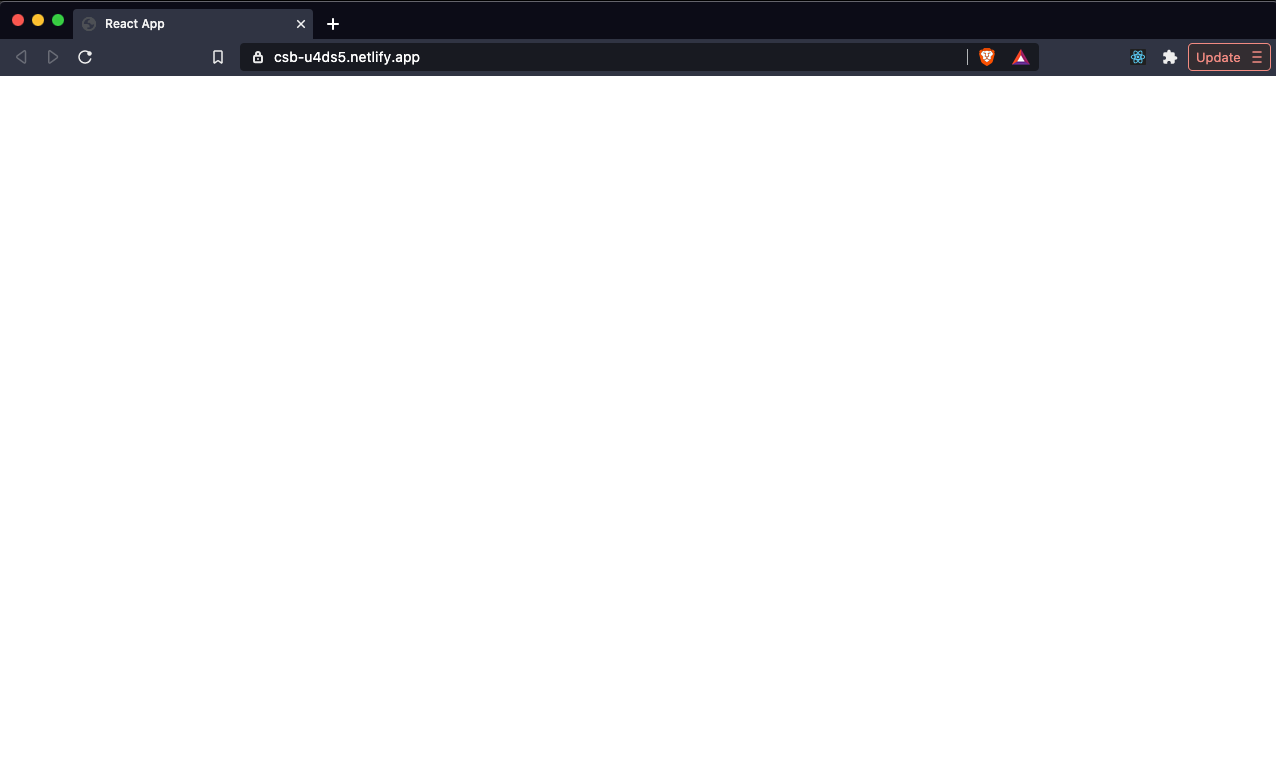
If we push this code to production, we will see a blank screen exactly like this:

Why do we see nothing?
Again, we can find the answer for this within the React documentation:
As of React 16, errors that were not caught by any error boundary will result in unmounting of the whole React component tree.
While in development, you see a big red error message with a stack trace that tells you where the error can be found. When your application is live, however, you're just going to see a blank screen.
This is not the desired behavior that you want for your application.
But there is a way to fix it, or at least show your users something that tells them that an error took place if the application accidentally crashes. You can wrap your component tree in what's called an error boundary.
Error boundaries are components that allow us to catch errors and show users a fallback message that tells them that something wrong occurred. That might include instructions on how to dismiss the error (like reloading the page).
We can use an error boundary with the help of the package react-error-boundary. We can wrap it around the component we believe is error-prone. It can also be wrapped around our entire app component tree:
import React from "react";
import { ErrorBoundary } from "react-error-boundary";

export default function App() {
  return (
    <ErrorBoundary FallbackComponent={ErrorFallback}>
      <Header />
    </ErrorBoundary>
  );
}

function Header() {
  const user = null;

  return <h1>Hello {user.name}</h1>;
}

function ErrorFallback({ error }) {
  return (
    <div role="alert">
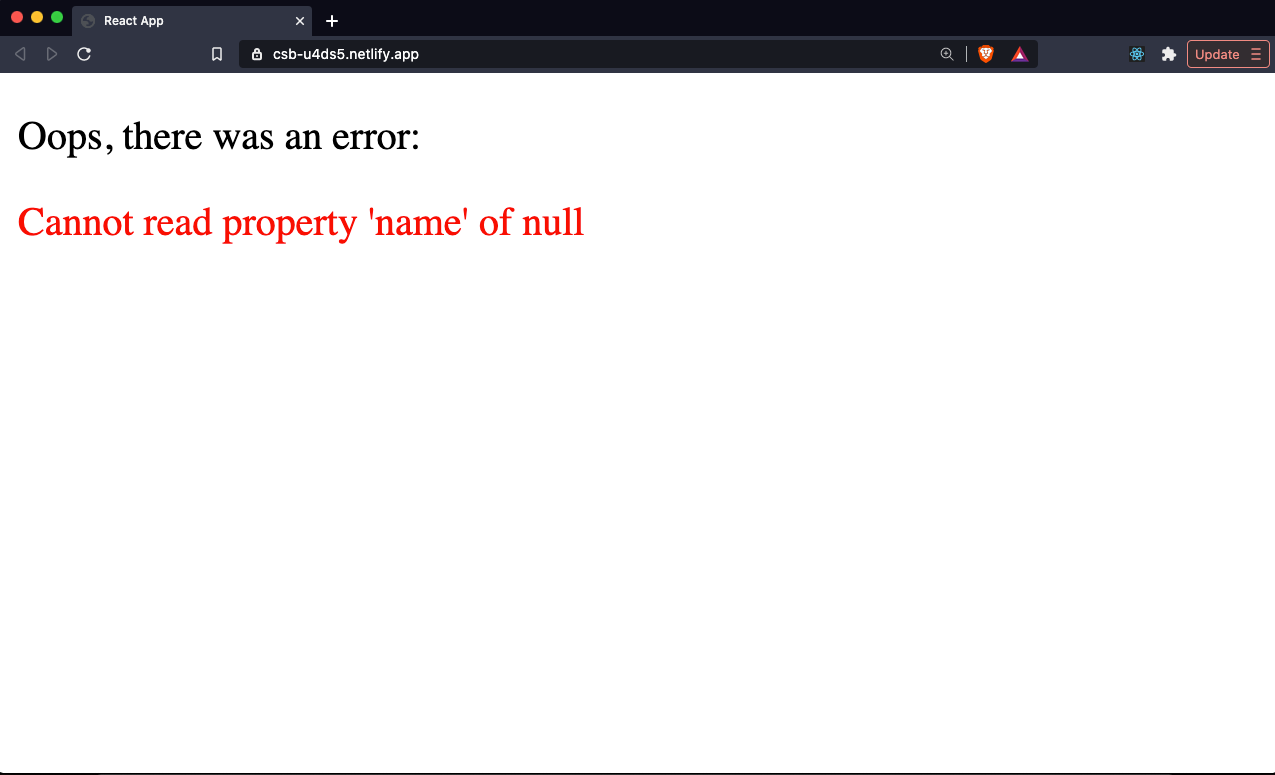
      <p>Oops, there was an error:</p>
      <p style={{ color: "red" }}>{error.message}</p>
    </div>
  );
}
You can also display the error message however you like and style it just like you would any normal component.
The result that we get when an error does occur is much better:

Become a Professional React Developer
React is hard. You shouldn't have to figure it out yourself.
I've put everything I know about React into a single course, to help you reach your goals in record time:
Introducing: The React Bootcamp
It’s the one course I wish I had when I started learning React.
Click below to try the React Bootcamp for yourself:

