Hi, fellow coders! You may have heard of the Vim code editor before, or even used it a bit.
There are plenty of resources out there that cover the basics of Vim and I don't want to just do another rewrite of those here. Instead, I want to share some quick tips that I've learned from others while using Vim full time at work.
These are tiny things that you can learn quickly that will make a big difference in your day-to-day work in Vim. They'd definitely made my life easier.
Remember: Vim comes pre-installed on Mac and Linux. You just need to open up your terminal and type "vim" in the command prompt, and you'll open Vim. If you have a Windows computer, follow these instructions to install Vim on your PC.
Before we begin
If you're interested in Vim but haven't started yet, these are the resources I'd like to recommend:
- OpenVim - Interactive Vim Tutorial
- vimtutor - this is an interactive command line tutorial that's available and installed on Macs and some Linux distros. Just type
vimtutorin your terminal - VimAdventures - First couple of levels are free, and if you like the format, and the full license is $25
If you like Vim but it's too much to run it on its own, install a Vim extension for your favourite editor, like VS Code or Sublime or any other. That way you get to use the quick actions and shortcuts of Vim and a friendlier interface you're more used to.
One important realization I had about learning and working with Vim: you don't need to master everything (which is practically impossible anyway) to start using it.
Once you figure out the basics, every time you have a question or a block throughout your workday, write it down, and then go through that list and search the Internet for how to do that in Vim.
This way, you will incrementally fill any gaps you might have and will become better with each new little thing you add to your repertoire (these micro-improvements will be similar to the tips in this article below).
Now let's proceed to the fun stuff – the tips and tricks. You don't have to have any Vim plugins installed to take advantage of these.
1. How to start writing on a line at correct indentation
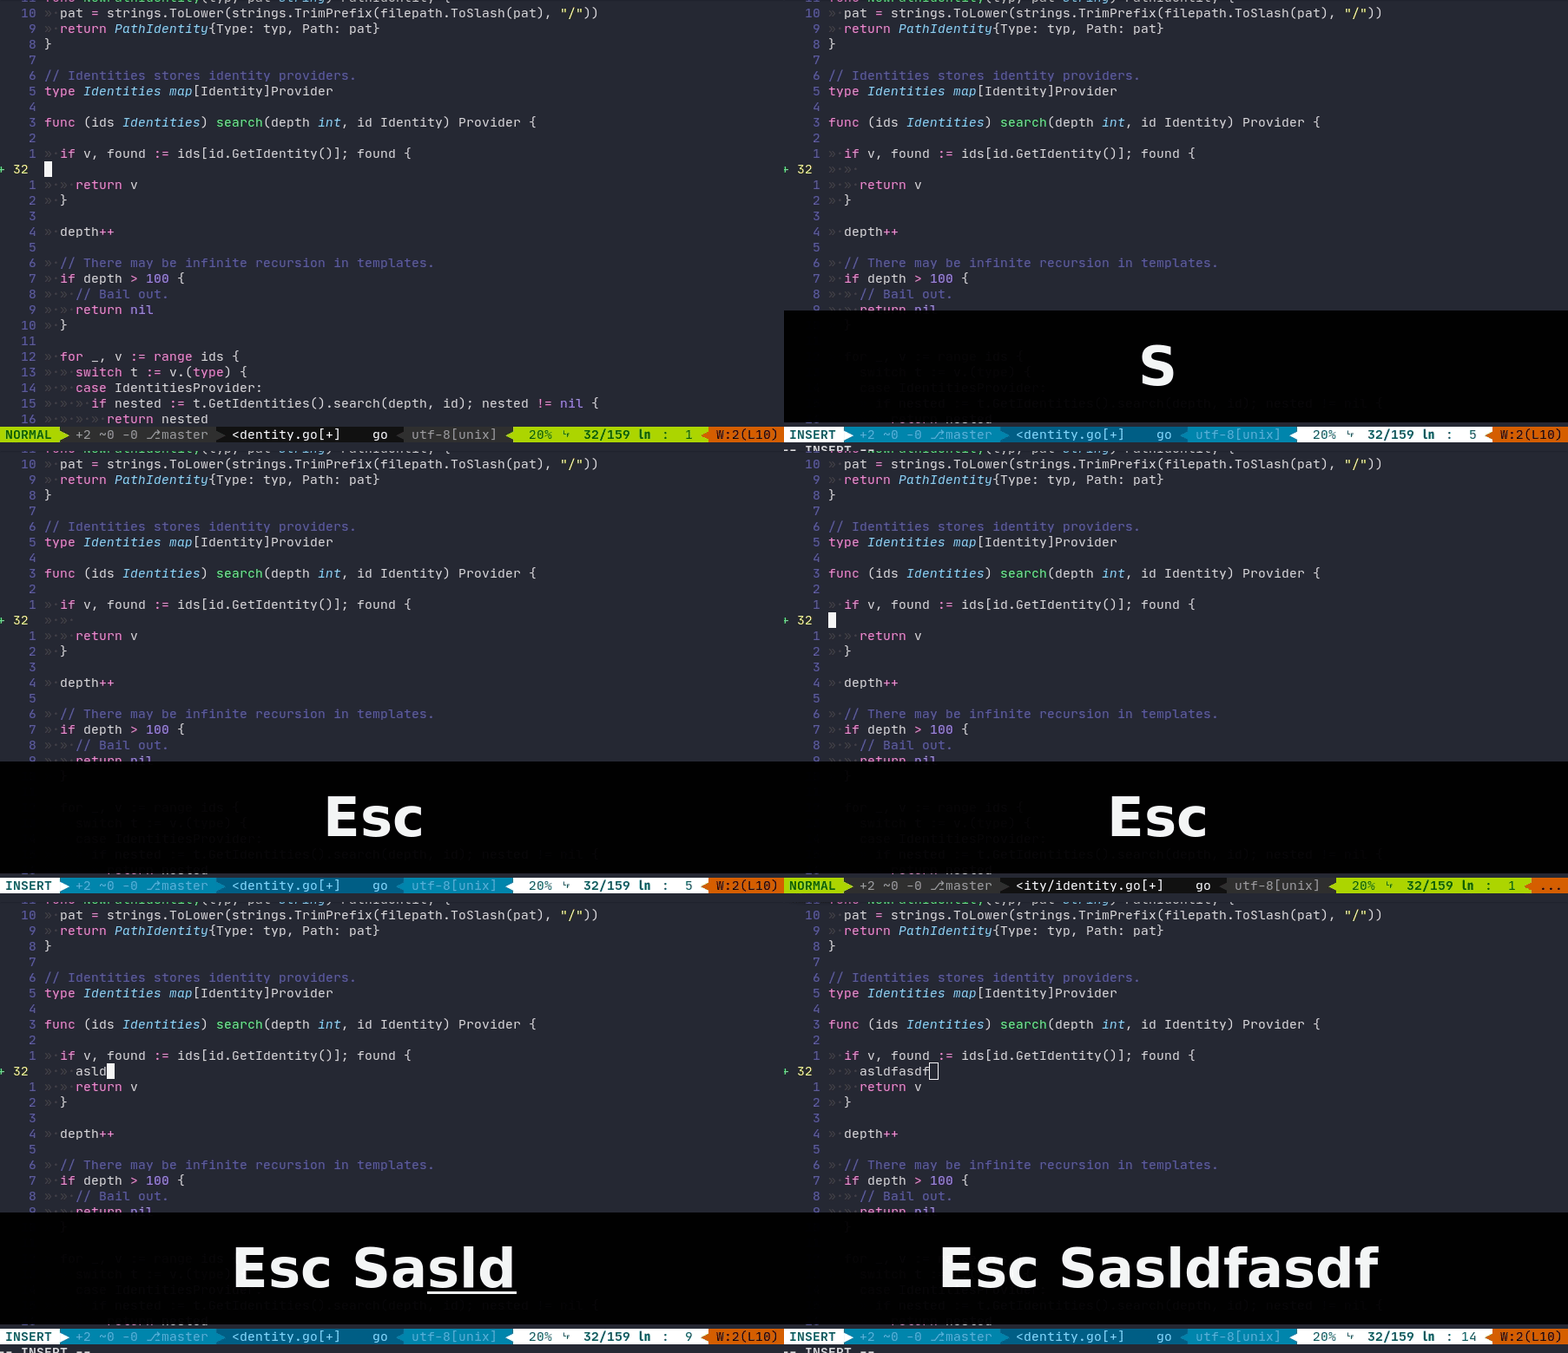
Before I learned this, I used to jump on a new line and go to insert mode, TAB to the right indentation and start typing code. With this little trick, you won't have to do do all the extra tabbing, it will just place you in insert mode at the right indentation.
RECIPE: S (SHIFT+s)
DEMO:
2. Resize windows automatically
Very often we do something with windows inside Vim that causes them to be resized incorrectly, sometimes one being way too wide and the other way too narrow.
The easiest way to see that effect is to open 3 windows in one Vim tab and resize the terminal window in which you opened Vim.
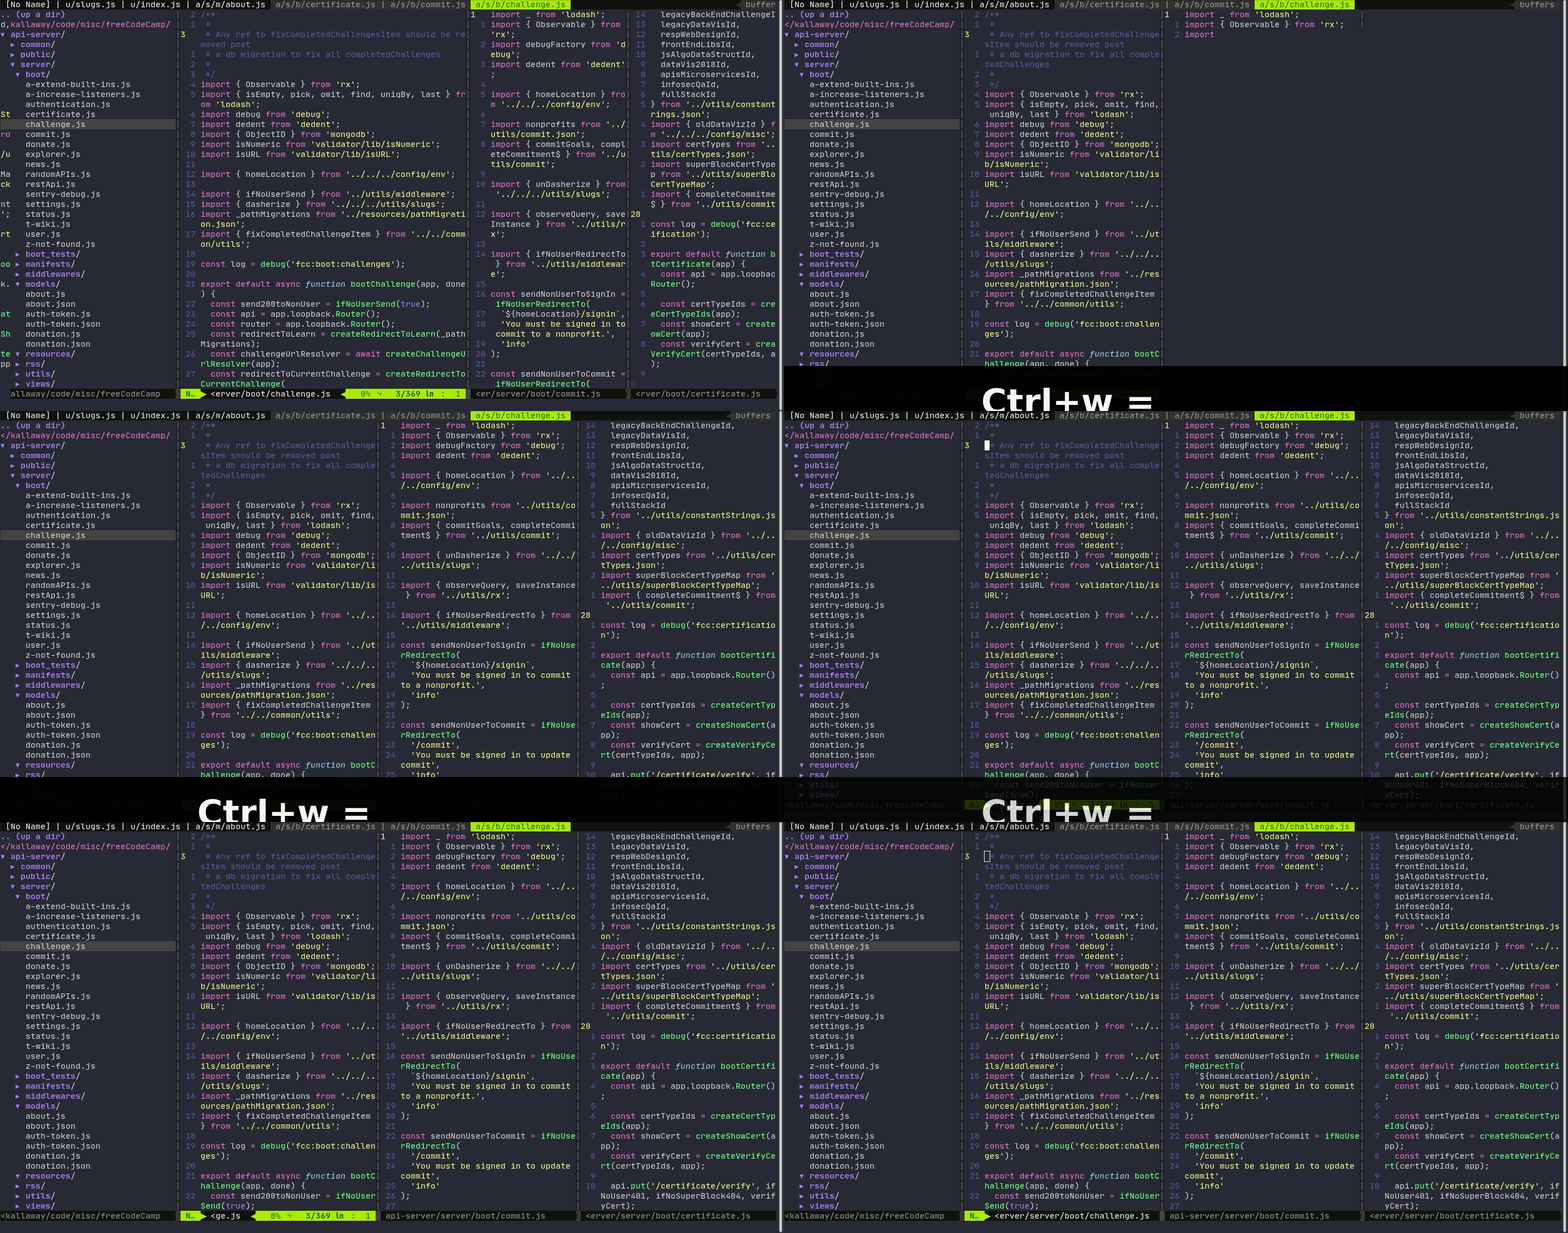
You want to resize the windows to all be the same size, with available space evenly distributed. Good news is, you don't have to do it manually.
RECIPE: CTRL+w =
The combination of CTRL+w, followed by pressing the equals sign key will equalize the windows.
DEMO:
3. Jump to the matching bracket/brace
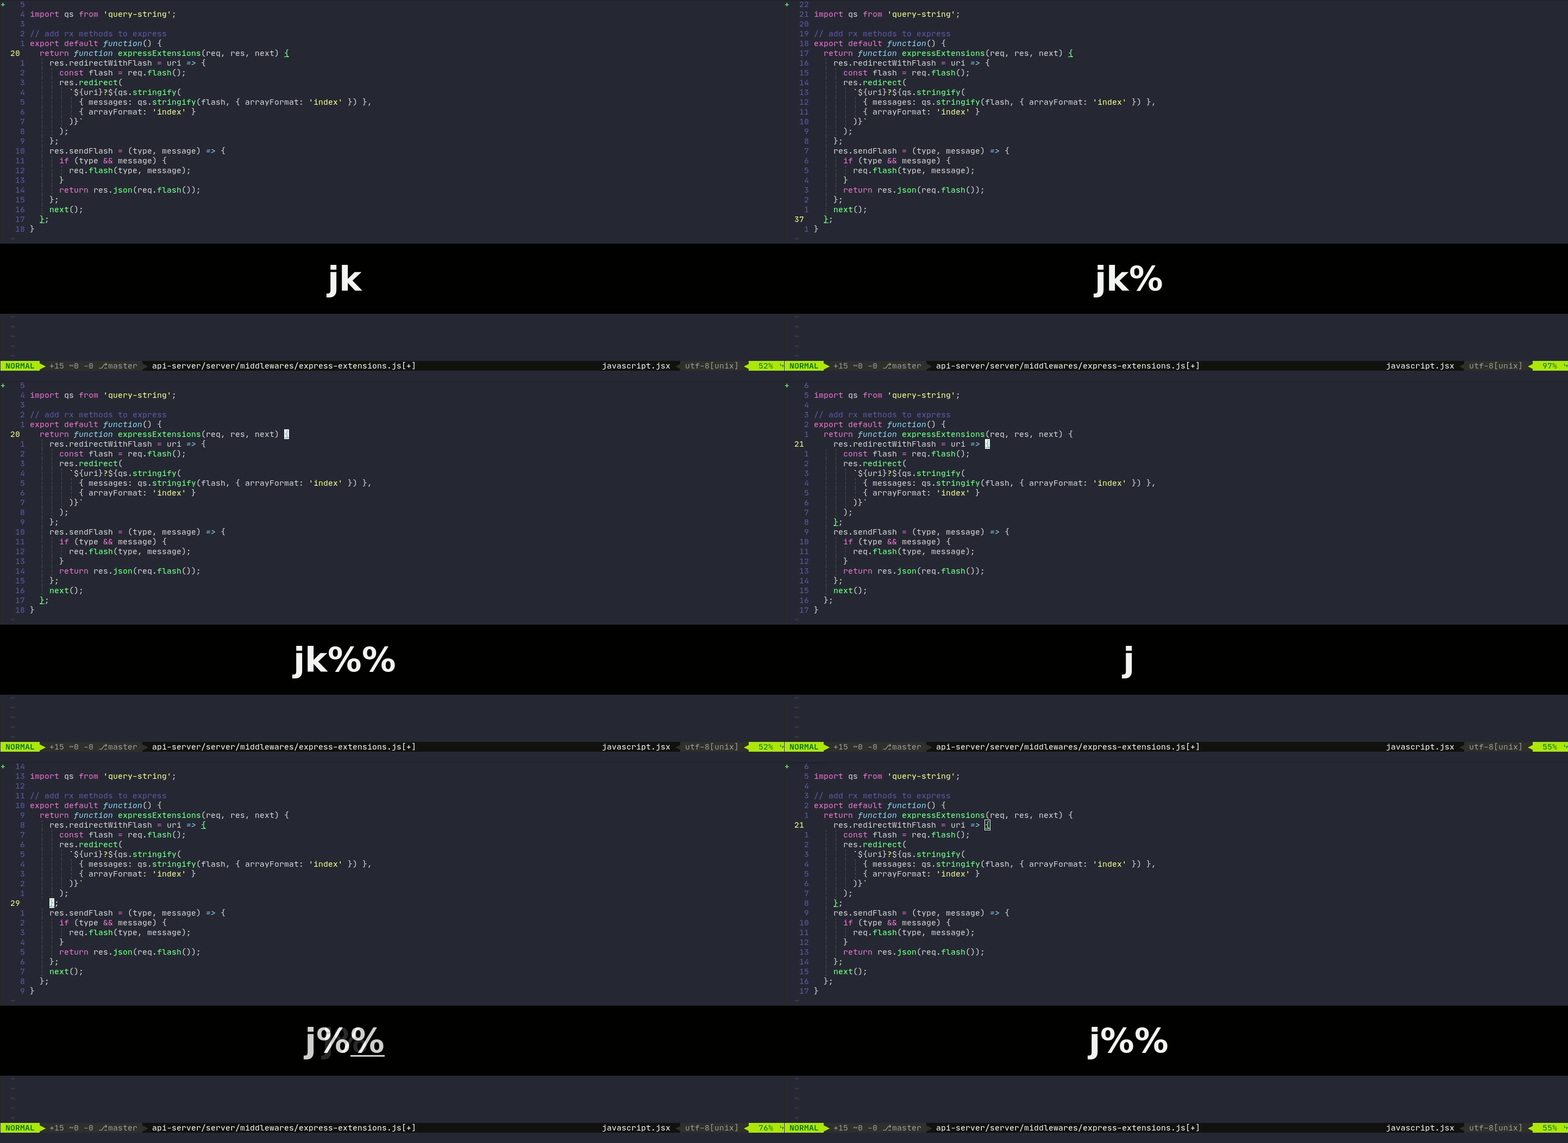
With your cursor on a square [ or round ( bracket or a curly brace {, press % (SHIFT+5) to jump to its matching symbol. Press it again to jump back (toggle between them).
if (condition) {
  // code
}
// If your cursor was on {, and you pressed %, you'd jump to }
RECIPE: % with your cursor on the character you want to find a match to.
DEMO:
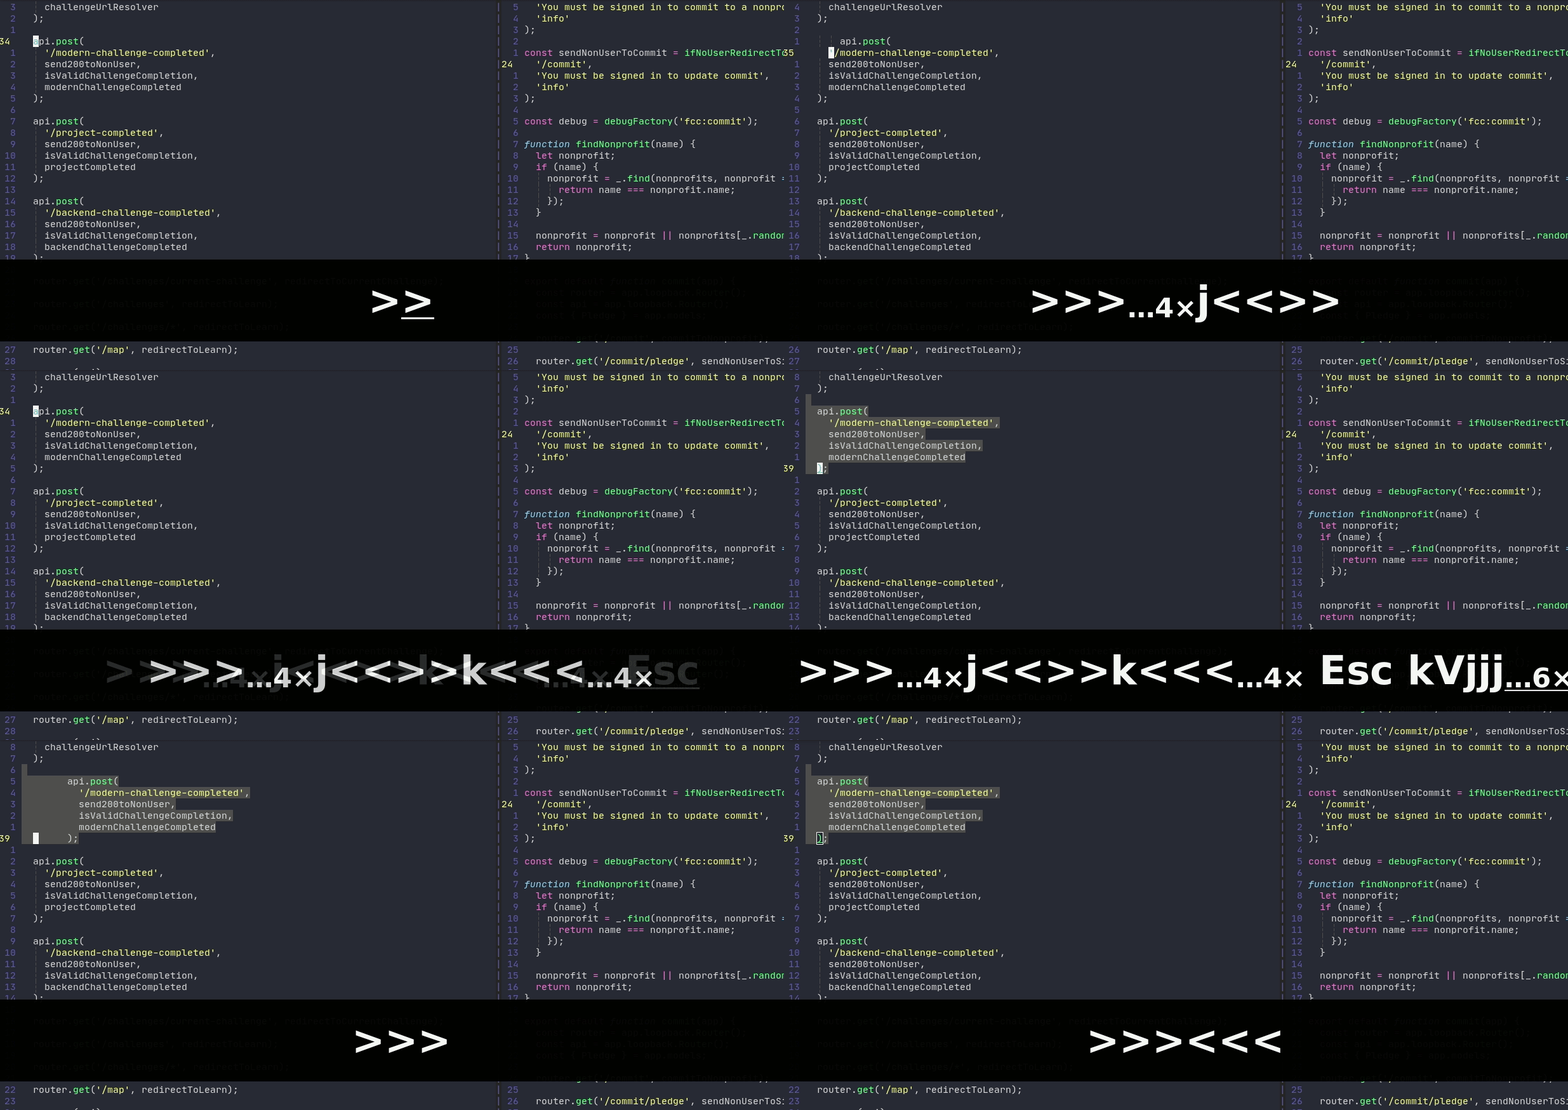
4. Indent/Unindent a line or multiple lines
>> – indents a line
<< – unindents a line
When you have multiple lines selected (in VISUAL LINE mode), you only need to press > or < once to indent or unindent the lines (as shown in demo below)
It doesn't matter where your cursor is positioned in the line when indenting - it will still work. After indent is done, cursor is auto-positioned on first non-empty character in the line.
RECIPE: One line: >>, <<. Multiple lines: >, <.
DEMO:
5. Fix indentation in the whole file
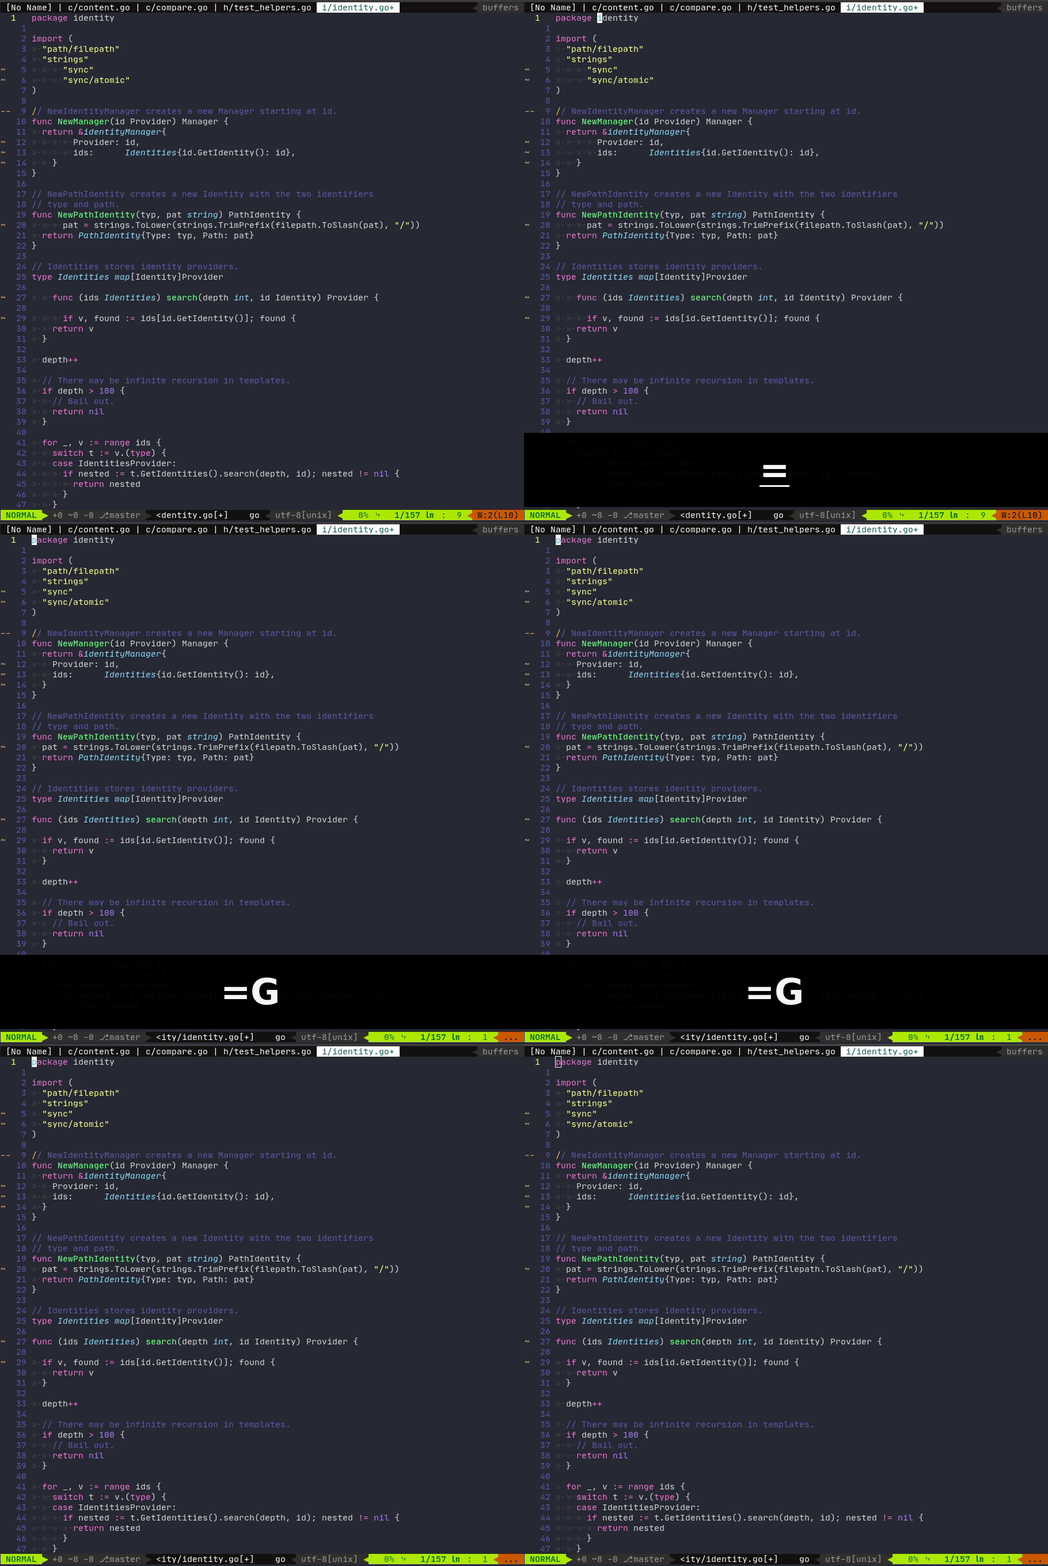
Start in the top of a file (to get there, press gg anywhere in the file.). Then press =G, and Vim will fix the indentation in the whole file. If you don't start in the beginning of the file, it will fix indentation from current line to the bottom of file.
RECIPE: =G
Press the equals sign, followed by SHIFT+G
DEMO:
6. Basics of working with tabs
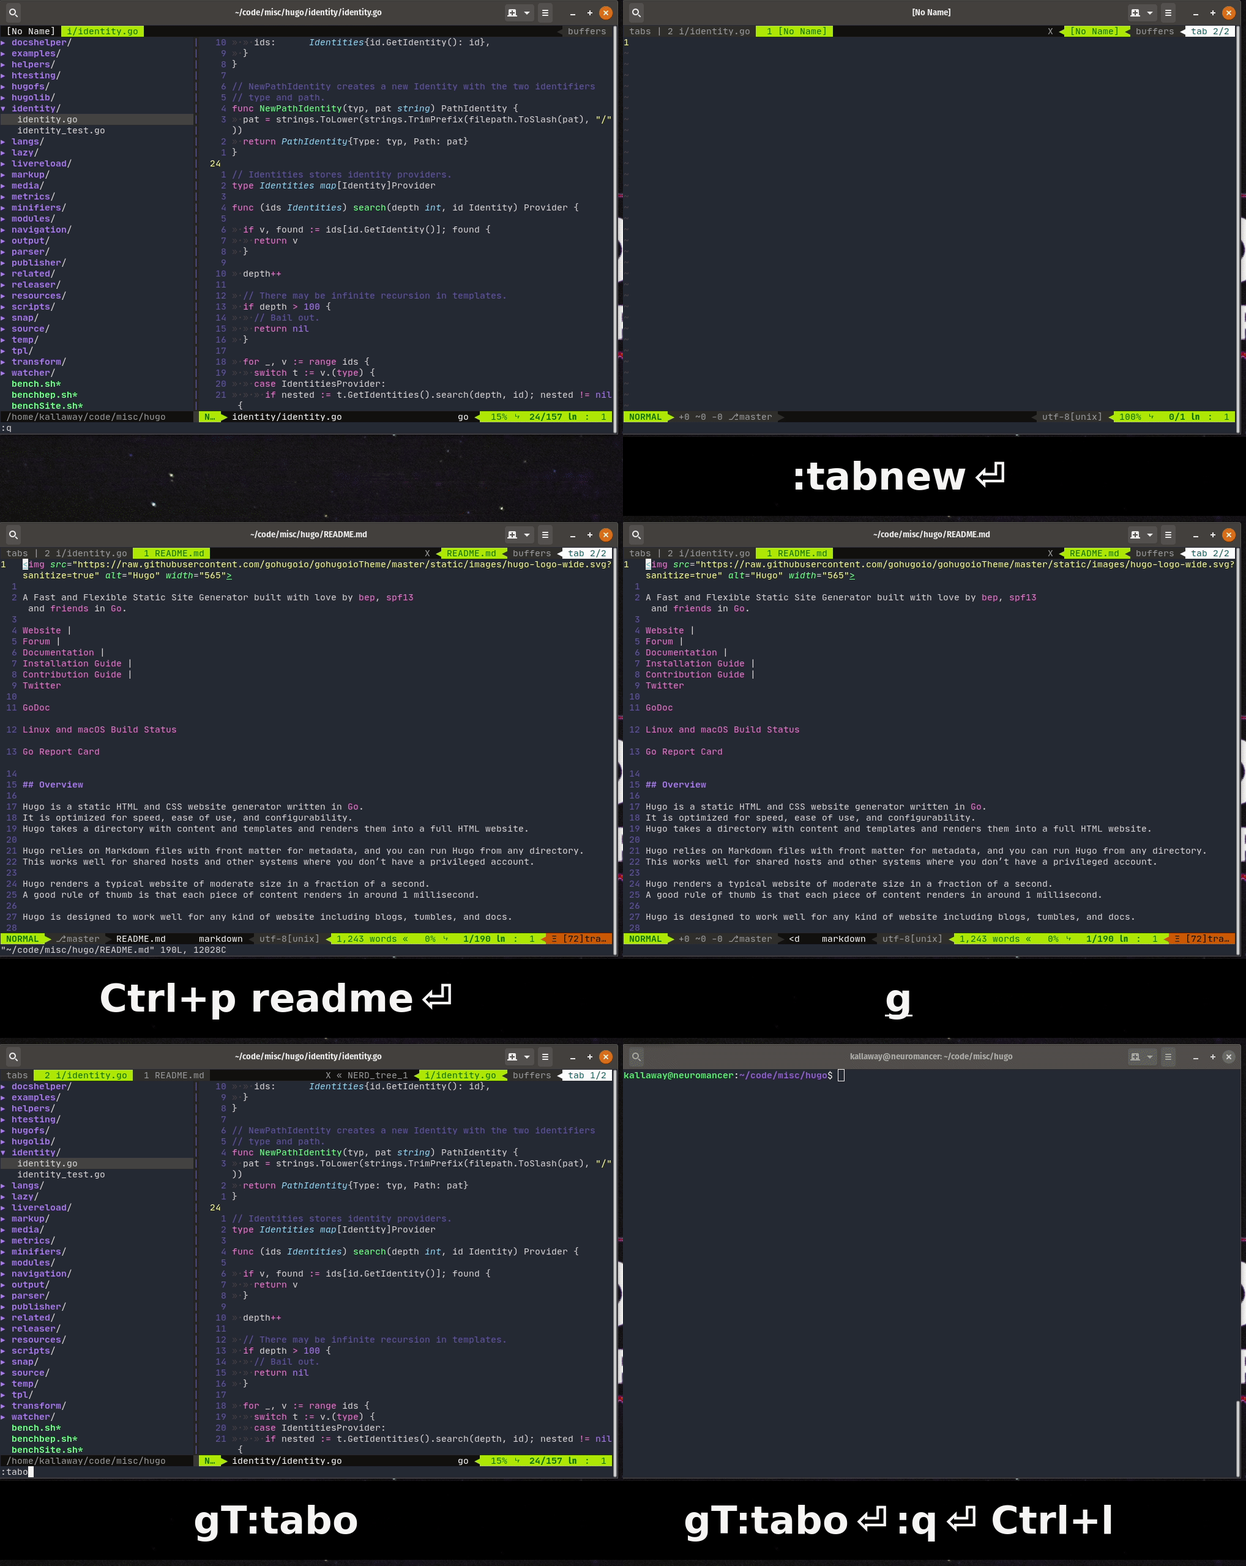
Often you want to be looking at multiple files or contexts at the same time. Vim tabs are very handy but underutilized feature for this. I don't know of any other editor that supports this (but I'm sure there is a way to do it elsewhere).
For example, I like to keep my code related files in my main tab, and in another tab: README with a TODO list and a place I can jot down further ideas.
To write the commands to work with tabs, you will need to be in command mode. To start writing the command, press : and type. The command will show up in the left bottom corner of the editor as you are typing. Press enter to execute.
RECIPE: :tabnew creates a new tabgt - go to next tabgT - go to previous tab:tabo - close all other tabs besides the active one
DEMO:
7. How to quickly go back to a previous file
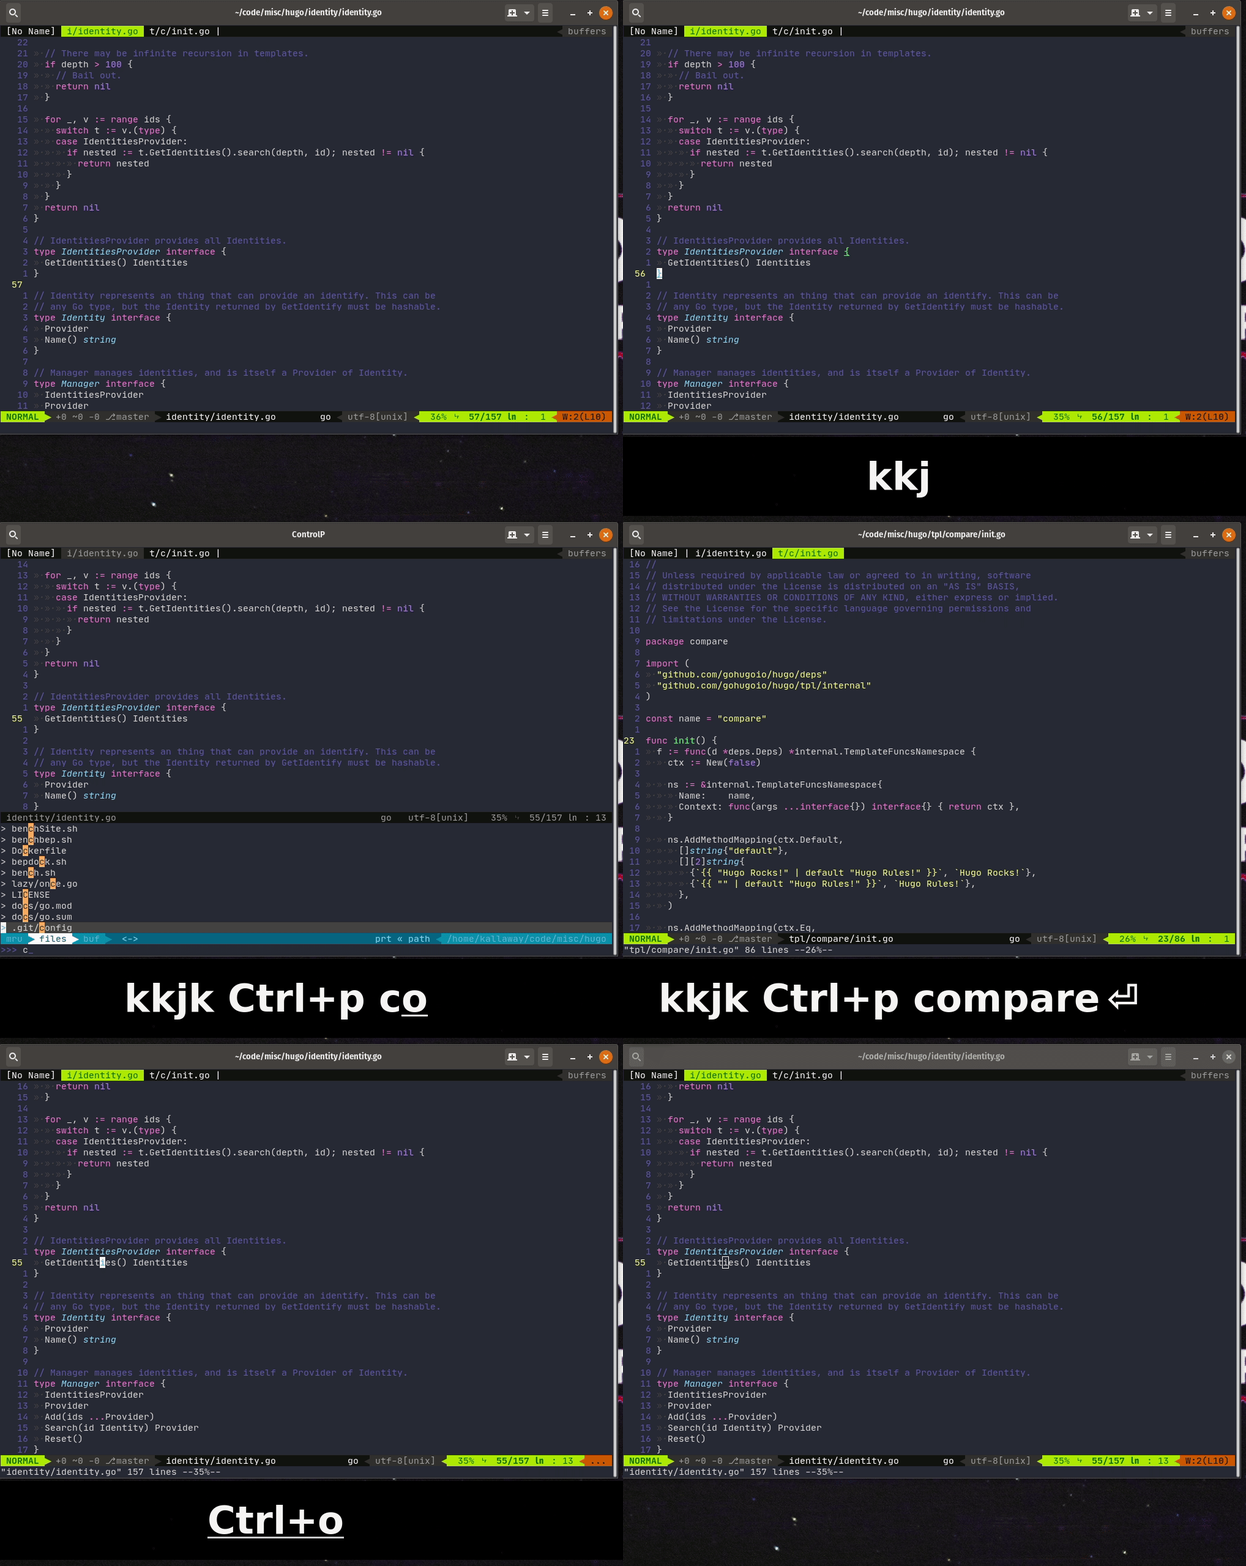
Often, when you edit a file with code, you open another one in the same window. Then it's not so easy to come back to the one you just worked on. You could list buffers and navigate to the previous one but you need to remember its name for that and spend your precious time. Vim users don't like to spend too much time on actions. :) So you can use CTRL+o for this.
All it does is that it finds a previous position of your cursor - and if it happened to be in a different file (the one you just lost by opening a new one), it jumps us right back there.
Thank you for reading and I hope these tips serve you well!
? If you want to follow my adventures, here's my Twitter :)
? I write a weekly newsletter that covers topics like learning to code, changing habits, personal finance, book recommendations & key takeaways, minimalism, starting a business, psychology and more. For those of you who are interested: join 1K+ like-minded people passionate about self-improvement and learning.
Subscribe here
? These days I am working on my side project - an app called "Zerno". Sign up to get early access very soon!
ZERNO app

