Say you are a developer, and you use Git for one of your projects. You want to share the changes you made with your users, but you don’t know how. Well, then this article is for you.
In the last part of this series, I shared with you how to write a good commit message.
I gave you an overview of the benefits of writing a good commit, and I mentioned the possibility of generating a changelog.
In this article, you will learn what a changelog is along with two ways to generate it – a simple one and a sophisticated one.
What is a changelog?
A changelog is a file that shares a chronologically ordered list of the changes you've made on your project. It’s often organized by the version with the date followed by a list of added, improved, and removed features.
Globally, there are two ways to write a changelog:
- the usual way: create a text file and start to enumerate all your changes with a specific date
- the developer choice (alias the lazy option): auto-generate your changelog from your commit messages. I have good news for you – this is what you’re going to learn in this article!
“A changelog is a log or record of all notable changes made to a project. The project is often a website or software project, and the changelog usually includes records of changes such as bug fixes, new features, etc.” – Wikipedia
Why is it essential?
I think, even now, you are asking yourself why it is essential and why you should take the time to create it.
A changelog is a kind of summary of all your changes. It should be easy to understand both by the users using your project and the developers working on it.
In a world where everything is evolving quickly, a user needs to know if the website/software they are using is changing. You might be surprised, but people love to read blog posts or an update page on your website.
For a developer, for example, if the project is big, it can be interesting to know how the software they're working on is evolving.
Or if you are working on an open-source project, you can find a "CHANGELOG.md" file in the GitHub repository. This file aims to inform contributors of the latest updates on the project.

Where do we find them?
Changelogs are everywhere! Okay, they often have different styles and locations, but they're literally on every project.
I created a short list with a few places where you can find a changelog.
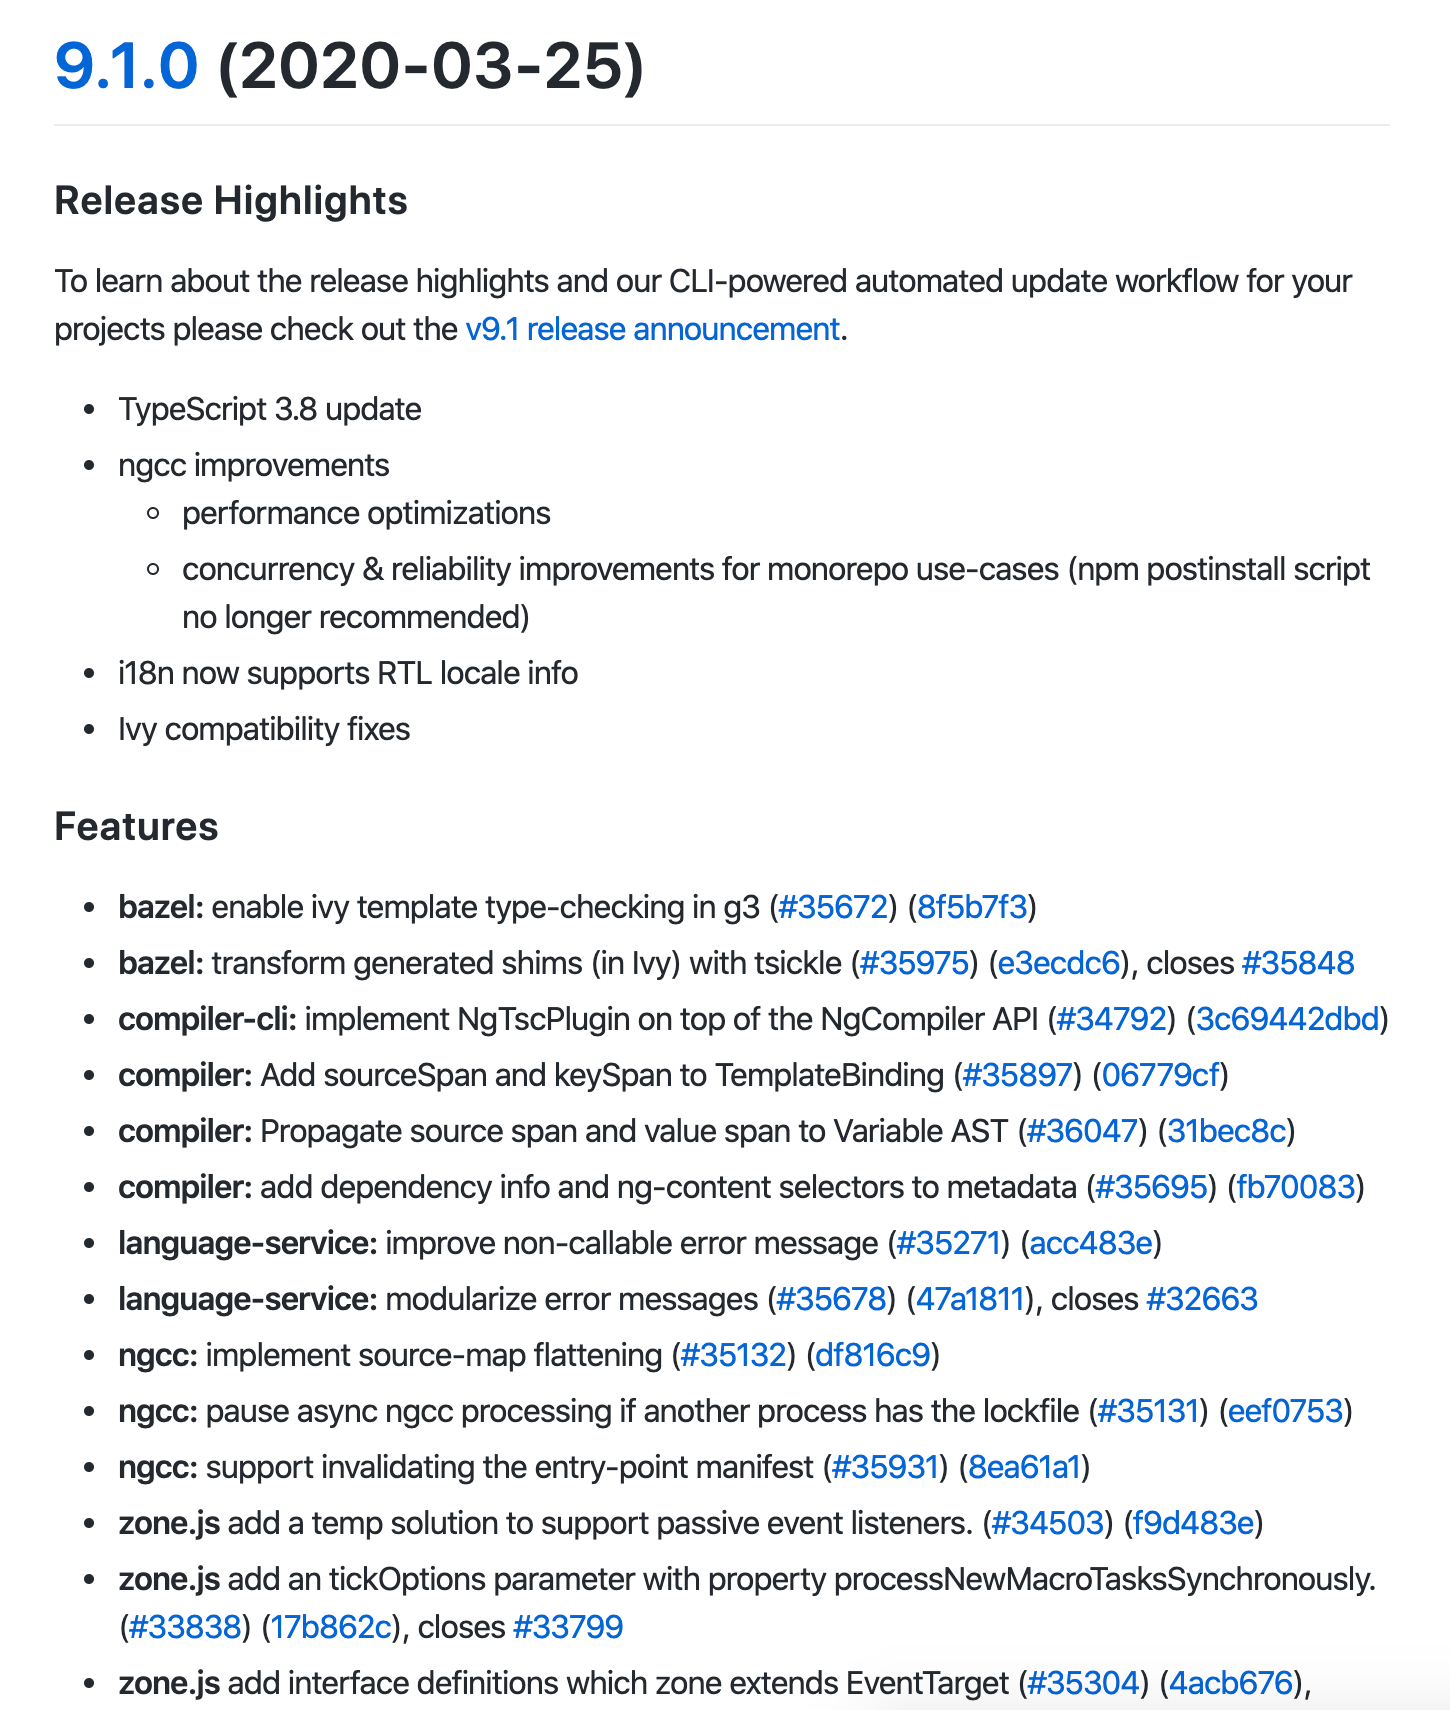
- A blog post. A changelog can be delivered under an article sharing the last features point by point.
- A "CHANGELOG.md" file in a GitHub repository.
- A Changelog section on your favourite website/software. Here's one example with the task management tool TickTick.
- In "What's new" on the Android and the IOS store.


Changelog auto-generation
In this part, we're going to generate our first changelog together.
By doing this task, you will understand why it can be useful to commit by following some rules.
An excellent and explicit commit doesn't need to be modified and can be directly added to the changelog.
If you are interested in generating a necessary file without any personalisation or beautification, I recommend the first way; otherwise, the second one is better.
Note: Some websites such as Keep A Changelog explain that you shouldn't make a changelog only by copying and pasting your git commits (refer to the simple way). Indeed, I recommend trying to avoid this way if you are working on a professional product.
However, nowadays, there are some advanced generators that allow you to change your git logs into changelogs (refer to the sophisticated way).
How to generate a changelog (the simple way)
By using this first way, you don't need any prerequisites. All you need is to type a few commands inside your Git repository.
As a simple reminder, when you type "git log", a list of all your commits is displayed.
$ git log

// Output
commit f6986f8e52c1f889c8649ec75c5abac003102999 (HEAD -> master, origin/master, origin/HEAD)
Author: Sam Katakouzinos <sam.katakouzinos@gmail.com>
Date:   Tue Mar 10 11:41:18 2020 +1100

    docs(developers): commit message format typo

    Any line of the commit message cannot be longer *than* 100 characters!

    Closes #17006

commit ff963de73ab8913bce27a1e75ac01f53e8ece1d9
Author: Chives <chivesrs@gmail.com>
Date:   Thu Feb 6 19:05:57 2020 -0500

    docs($aria): get the docs working for the service

    Closes #16945

commit 2b28c540ad7ebf4a9c3a6f108a9cb5b673d3712d
Author: comet <hjung524@gmail.com>
Date:   Mon Jan 27 19:49:55 2020 -0600

    docs(*): fix spelling errors

    Closes #16942
This command can take a few parameters. We are going to use them to change the output and get an improved one to generate our changelog.
By typing the following command, you will have an output with one commit per line.
$ git log --oneline --decorate

// Output
f6986f8e5 (HEAD -> master, origin/master, origin/HEAD) docs(developers): commit message format typo
ff963de73 docs($aria): get the docs working for the service
2b28c540a docs(*): fix spelling errors
68701efb9 chore(*): fix serving of URI-encoded files on code.angularjs.org
c8a6e8450 chore(package): fix scripts for latest Node 10.x on Windows
0cd592f49 docs(angular.errorHandlingConfig): fix typo (wether --> whether)
a4daf1f76 docs(angular.copy): fix `getter`/`setter` formatting
be6a6d80e chore(*): update copyright year to 2020
36f17c926 docs: add mention to changelog
ff5f782b2 docs: add mention to changelog
27460db1d docs: release notes for 1.7.9
add78e620 fix(angular.merge): do not merge __proto__ property
It’s better, but let’s see what we can do with the following one.
$ git log --pretty=”%s”

// Output
docs(developers): commit message format typo
docs($aria): get the docs working for the service
docs(*): fix spelling errors
chore(*): fix serving of URI-encoded files on code.angularjs.org
chore(package): fix scripts for latest Node 10.x on Windows
docs(angular.errorHandlingConfig): fix typo (wether --> whether)
docs(angular.copy): fix `getter`/`setter` formatting
chore(*): update copyright year to 2020
docs: add mention to changelog
docs: add mention to changelog
docs: release notes for 1.7.9
fix(angular.merge): do not merge __proto__ property
With this one, you can print the list of commits with the style you want.
The “%s” corresponds to the commit title itself. You can modify the string to style your commit as you like.
In our case, we want to create a list.
$ git log --pretty="- %s"

// Output
- docs(developers): commit message format typo
- docs($aria): get the docs working for the service
- docs(*): fix spelling errors
- chore(*): fix serving of URI-encoded files on code.angularjs.org
- chore(package): fix scripts for latest Node 10.x on Windows
- docs(angular.errorHandlingConfig): fix typo (wether --> whether)
- docs(angular.copy): fix `getter`/`setter` formatting
- chore(*): update copyright year to 2020
- docs: add mention to changelog
- docs: add mention to changelog
- docs: release notes for 1.7.9
- fix(angular.merge): do not merge __proto__ property
You did it! You created a simple changelog.
Note: If you want to go further, and save your changelog faster: instead of copying and pasting the result into a file, redirect it to your terminal by typing “git log --pretty="- %s" > CHANGELOG.md”
How to generate a changelog (the sophisticated way)
Prerequisites
We are now going to explore a sophisticated way to generate a changelog. The idea behind the process stays the same, but this time we’re going to use other tools to help us.
Do you remember when in the last part of this series I wrote about the Git guidelines?
Note: Git guidelines are a set of rules to write your commits better. These guidelines help you add some structure to your commits.
When you are using a guideline for your project, you can use tools to generate a changelog. Most of the time, these tools are better because they allow you to create a markdown formatted changelog.
In this example, we’re going to use a simple generator which works with most of the guidelines. Its name is “generate-changelog”, and it’s available on NPM (the Node Package Manager).
This tool is going to create a stylised changelog, but it’s not the one with the most features. I decided to use it because it’s an excellent example for a beginner. If you want to go further, please refer to the list of changelog tools below:
Here are a few tools you can use:
Note: Before installing the tool, you need to have NPM installed on your computer. If you don't have it, I invite you to follow the official website (it will help you to install Node and NPM).
To install the package on your computer, type the following command in your terminal.
$ npm install generate-changelog -g Once you do that, it’s installed!
How to use it
To make this package work, you need to follow the guidelines for using this pattern – “type(category): description [flags]”. In this example, I will use the Angular.js GitHub repository.
Now you can type the generate command in your terminal inside your GitHub repository.
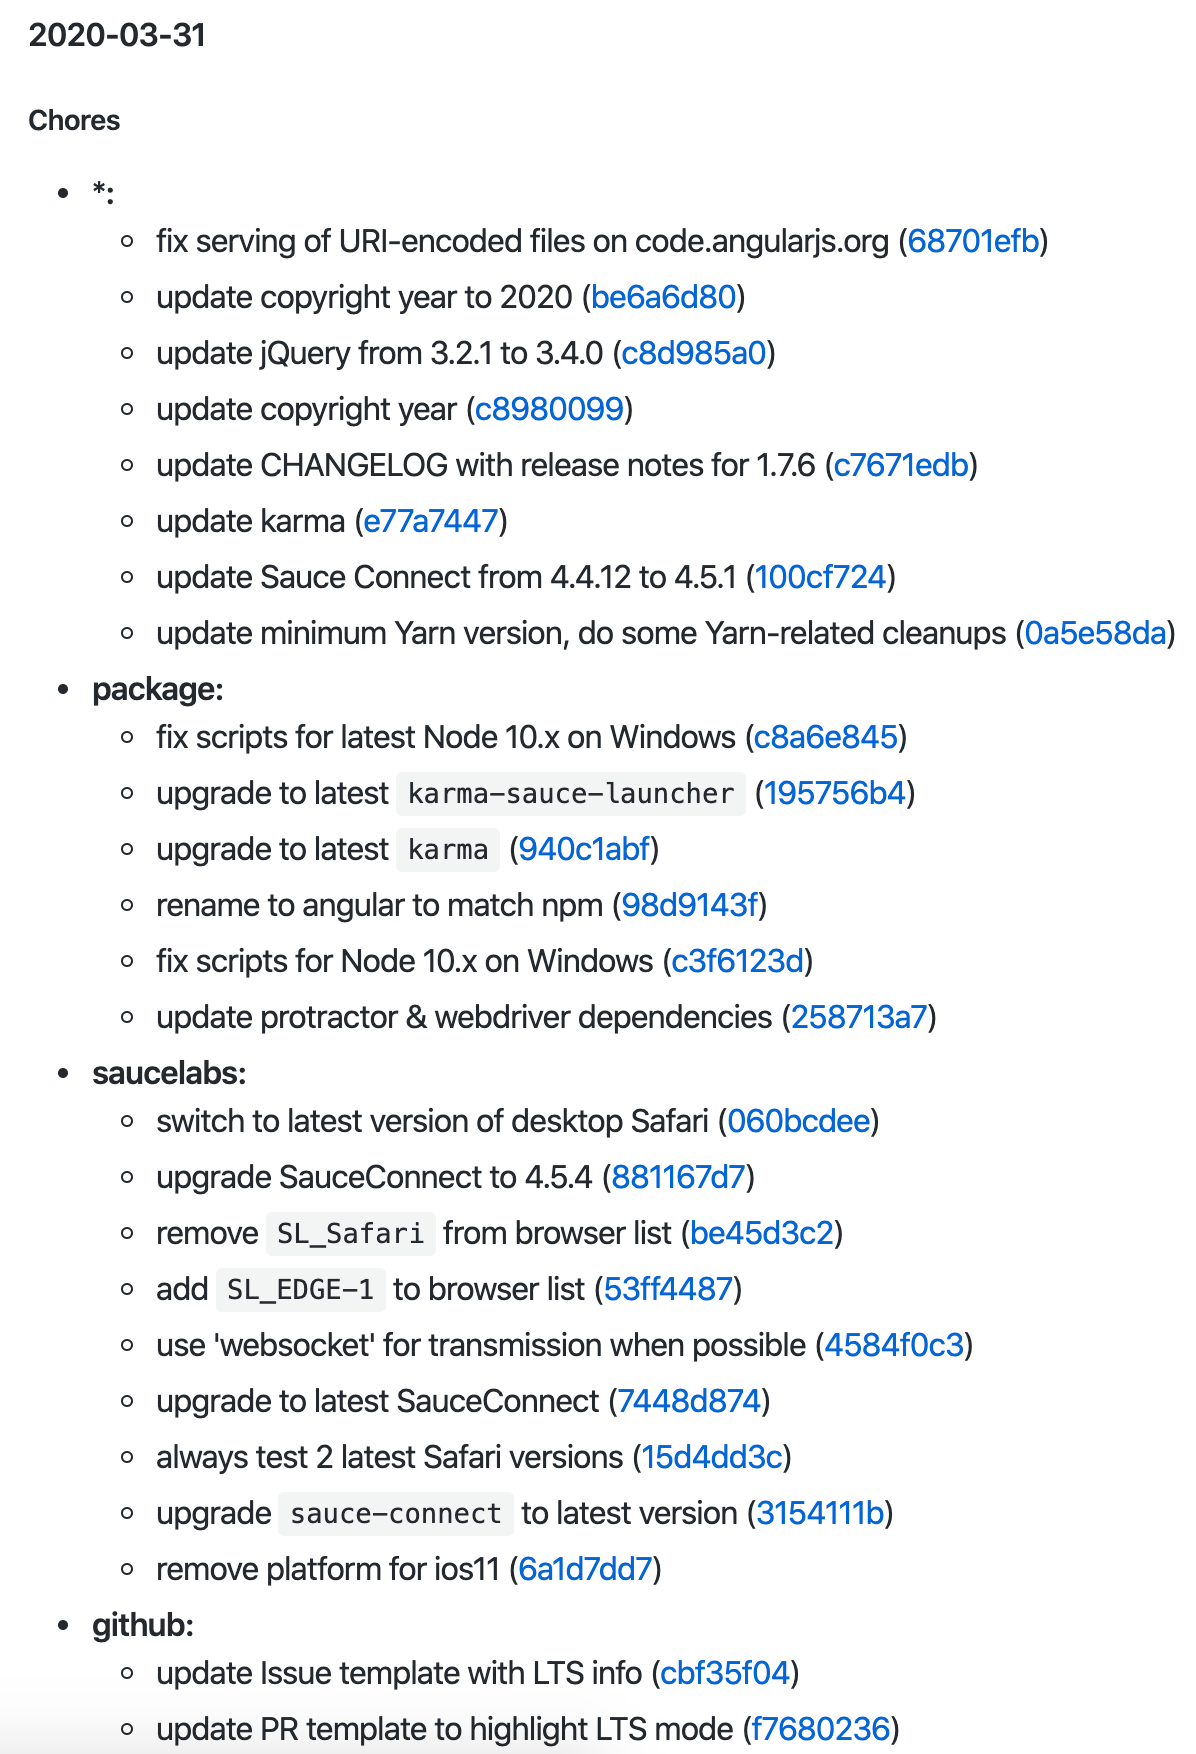
$ changelog generateA “CHANGELOG.md” file will be automatically created and filled with your logs in a markdown format.
You can find an example of the output (with a markdown reader such as GitHub) below.

Conclusion
I hope you liked this guide and now understand how to create a changelog for your project. I think it’s a good way to demonstrate why you should write good commit messages.
Feel free to try other changelog generators and send me the result!
If you have any questions or feedback, please let me know.
If you want more content like this, you can follow me on Twitter, where I tweet about web development, self-improvement, and my journey as a full stack developer!

