By Abhinav Pandey
No frameworks, no NPM, no Package.json, no frills
In this post, we will dive deep inside Node.js fundamentals by creating a Node.js web app without any external packages. We will cover core concepts like streams, events, exceptions, HTTP etc.
 A Look Inside Node.js Fundamentals
Currently, whenever we say we are going to implement a service in Node.js, most of the time we are going to use Express or other 3rd party libraries to implement our functionality. And I am not going to say there is any harm in doing that. These libraries provide necessary abstraction over redundant concepts which make us efficient.
But with greater abstraction, the low-level logic of your program is hidden from you. As a result, we’re not able to develop a clear picture of how our business logic interacts with Node.js.
But as Ryan Dahl, the creator of Node.js said:
You can never understand everything. But, you should push yourself to understand the system.
We will push ourselves to form this clear picture in entirety.
So, let’s build a raw HTTP Node.js application with no Framework, no NPM, and no Package.json.
We will build an app that will:
- Import necessary modules
- Create a Server instance
- Attach listeners to the
**request**event of the server object - Parse request body and headers
- Sending Response to the client.
- Handle error events at request and response streams.
But, here is the catch ;)
We will do all of it from scratch with just
- a terminal, and
- an editor.
Yes!! We will use nobody else’s framework, nobody else’s libraries just raw JavaScript and core Node.js runtime.
Let’s Begin!
Before creating an HTTP server, let’s clear up the necessary concept of an HTTP module in Node.js.
What is HTTP?
http in Node.js is an inbuilt module that allows client-server communication via HTTP protocol. This module provides an interface to create either an HTTP client or HTTP server that can communicate with other HTTP servers or clients.
And to make this communication space efficient, an http module provides streaming of data using stream interface. And since stream passes data in chunks, that means Node.js never buffers the entire request or response at once in the memory. We will come to streams soon.
So for our app, we will use this http interface to create an HTTP server that will listen to a particular port and give data back to the user.
Importing the HTTP module
To use either the http server or client you must require http module.
var http = require(“http”);
Now let us see how the above line actually works:
For loading an instance of a particular module in our runtime, Node.js provides us a require variable which is globally accessible. We use that globally defined require variable and tell Node to load the http module (by passing 'http' as the only param to the require function call).
There is a list of other globally available Node.js objects that you can check out in node REPL( by pressing twice).
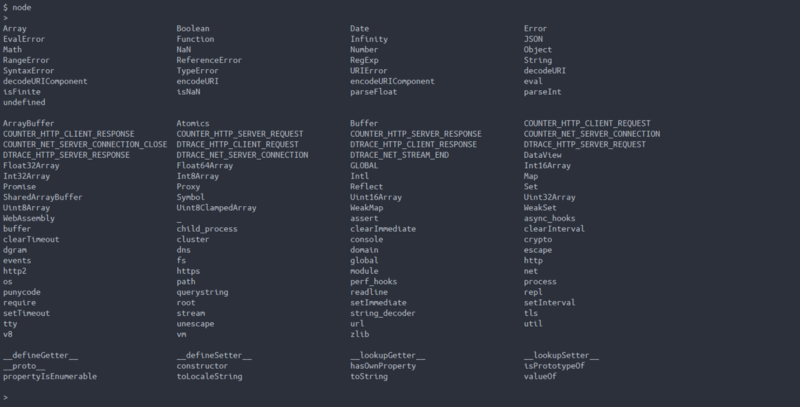 Globally defined Node.js and JavaScript variables
But the 2 most important for our use are:
- The require module
- The module (in-depth explanation in the next article)
(We do not need to require(‘require’) or require (‘module’) as they are global ).
How does require work?
At runtime when Node.js invokes a require call (require(‘./path/to/fileName’), it searches for a file with a name the same as what’s provided in the only parameter to the require function call.
And once the file name matches, Node.js checks for 3 types of extensions:
.js— Node.js looks for “fileName.js” at the specified path to load as js script..json— If Node.js finds “filename.json” file at the specified path it loads a file with the name corresponding to the value of the ‘main’ key in the JSON file..node— Node.js loads binary addons with name fileName.node at the specified path.
 The extension are loaded in order of .js > .json > .node.
Create a Server instance
Now that we have included the http module, we need to create an HTTP web server object. This can be done by using the createServer method on the http module.
To createServer method, we pass a callback function which is called every time a request is received on the server.
This createServer method returns a server object that we store in the variable app. This server object is an event emitter.
Okay wait, what is an event emitter?
Let’s look a bit into the named event and emitter objects.
Much of the Node.js core APIs are built around an event-driven architecture. Certain kinds of objects (called “emitters”) can cause some Function (“listeners”) to be called by emitting any “named” events.
Let us see an example to get the hang of it.

Output : Called namedEvent in myEventObject’s attached listner
Explanation
In the above example, we saw the namedEvent has a listener (a function) attached to it. By attached, we mean the listener is called after it hears the named event. So the listener prints the output on the console screen when the emitters object emits namedEvent.
Apart from attaching the listeners, the eventEmitter object provides many other properties and functions such as
- you can get the count of the total number of listeners attached to a named event, or
- you can also remove a Listener attached to the events.
You can refer to the Node.js official docs for more detailed information about events in Node.js.
Moving back to our example…
Our web server object is also like all other emitter objects implementing event emitter interfaces. It also emits different kinds of named events.
Some of them are the following:
connect— raised for all the ‘connect’ request by the HTTP client.connection— Emitted when a new TCP stream is established. Provide access to the socket established.request— Emitted for Each request from the client (We would listen here).upgrade— emitted each time a client requests an upgrade of the protocol (can be HTTP version).
You can get the complete list of events emitted by our web server from the official Node.js docs.
Listening to the request event
Now since our server needs to listen to the incoming request, we will listen to the request event of our HTTP server.
Code Sample:
In the 3rd line, a listener function is attached to listen to all the **request** events on our server object.
The request event provides the listener function with 2 parameters which are:
- request — an instance of http.incomingMessage object and
- response — an instance of http.ServerResponse object.
These request and response objects have properties and methods that they inherit from the http.incomingMessage and http.ServerResponse classes, respectively.
Parse request body and headers
Now that we have access to request and response object…
The first few things that you might want to know about incoming requests are the URL, method, and Headers. Node.js makes it very easy by attaching them as properties to the request object (passed as the first parameter for the listener of request event).
You can de-structure the request object to get them out like this:
const {headers, url, method } = request;
headers passed in request are present as an independent object inside the request object (secret : they are all in lower-case).
After looking at the http method, in case of a PUT or POST request, we are interested in looking at the data sent in the request body.
But to take the data out of the request body we need to know a few key points about the request object.
Request Object — a readable stream
The request object that’s passed into the handler also implements the readable stream interface. This means that our request object is a stream that can be listened to or piped elsewhere to grab the data that is flowing into it. We will also grab the data right out of the request stream by listening to the stream’s data and end events.
Different kinds of data may be passed to our server, but to keep it simple we will be passing only the string in the body.
To use that data we need to parse it, so we will be using the data and end event of the readable stream which is implemented by our request object as mentioned earlier.
On each data event, the readable stream passes data as a buffer chunk. We will be appending all the chunks in an empty array. And at the end event we will concat and stringify the array to get the cumulative body.
So here is the code up until now:
Sending the Response to the client.
After collecting data from the HTTP request we need to give an appropriate response to the client. But since the request object implements a readable stream only, we need a writable stream where we can write out our response.
Response Object — a writable stream
For doing so, Node.js provide us with a 2nd parameter that is the response object to the request event listener.
By using the response object, we can set HTTP status code, set headers, and write content in the write stream of the response object.
Although if you do not set the response code explicitly, then Node.js itself sets it to 200. But as complexity increases you will want to set the desired statusCode of the HTTP response.
Implicit headers setting
You can set, get and remove headers to the response using setHeader(name, value), getHeader(name), and removeHeader(name) API.
Code Sample:
When using the above setHeader() method for setting headers, we are depending on Node.js to implicitly set the response headers before sending the response body.
To set headers and status code explicitly, we have a response.writeHead() method.
Code Sample:
While explicitly setting headers we should keep in mind that headers come before the body in the HTTP response. That is, we should prefer using the writeHead() method before writing anything to the response body.
Now let us see how we can write data to a response.
Since the response object is a writable stream object, we just need to use write stream methods to write data chunks into the HTTP response object.
Code Sample:
After writing to the response stream, we need to close the stream so that Node.js gets to know that it’s time to send the response back to the client.
.end() method allows us to close the HTTP connection that was set up at the time of the request hitting our server. The end() method also accepts a last string to be written before closing the connection.
If we do not use the end method, Node.js will write data to the write stream and wait…
…until the default timeout in the server object expires. That is, for any request, Node.js only waits for a fixed time (which is specified in the server object) before closing the connection. And once the connection is closed (either manually using end() or the timeout expires), Node frees up all the allocated resources immediately.
You can set or change the timeout using server.setTimeout([msecs][, callback]).
To disable the timeout, you can set the timeout value to 0. But as the timeout is assigned at the time of forming a new connection, the timeout will only be updated for upcoming new connections.
Now that we have written our response, our server should work fine.
But, what will happen when our server encounters an exception?
We need to hear the error events of request and response streams. An error event is raised every time an exception occurs. You can try to avoid it but they do come and we have to catch and handle them properly.
But how?
We will handle them by attaching error handlers to the error events of request and response streams.
Explanation
Here we are catching all the error events of request and response streams and just logging them into the console. You can also use util instead of the console in the production environment (although in production it’s advised to inspect errors properly).
Now let us have a look at the code sample we have up til now.
Okay so our server is capable of the following things at this point:
- Import necessary modules
- create a Server instance
- Attach listeners to the
**request**event of server object - Parse request body and headers
- Write the response to response Stream
- Handle error events at request and response streams.
By now we have made our server object capable of taking head on to new connections but we have not told it where to listen for new connections. That is, this server object also needs to be bound to a particular port so that our server can have access to all the incoming requests at that port.
To do so we will use the .listen method of our HTTP server object, .listen(PORT , CB).
@params PORT is the port number where we want our server to listen.
@params Callback is called once the server starts listening.
Code Sample:
By now our server is ready to receive requests.
Let us run our Node.js app:
node app.js
And hit our server with the following curl on a terminal:
curl -d “Hello World” -H “Content-Type: text” -X POST http://localhost:8008
WooHoo!! Congratulations, You have created a Node.js app without any external packages.
It is wonderfully applaudable that you stayed this long.
If you are willing to learn more about the Node.js core like this, then let me know by bursting the claps counts to 50.
In the next articles, we will continue building over this basic app and add other critical features of routing, middleware, error handling etc. Get notified by following me here on Medium.
I have tried to make this article as complete as possible. If you have any ideas that could make it better, please mention in your valuable comments.
You can connect me via gmail or tweet me here.
Thank you so much for your love! Pardon my mistakes, you have been a wonderful audience.
 Congratulations!