By Chris Lam
I am a big fan of science toys. I have been looking for one that combines the elegance of math and programming for a while. However, there was not much success in the search. So, I decided to make one myself.
Here is a demo. The flashing LEDs are used to illustrate a mathematical identity visually.
Math
The mathematical identity is the following. The left side of the equation is an arithmetic sum from 1 to n-1 and the right side of the equation is “n choose 2”, the number of unique ways to choose 2 items from n items.
 Mathematical identity
It is not the identity itself that is elegant, but the visual proof itself. Let’s look at the diagram below. There are n=4 green dots in the illustration.
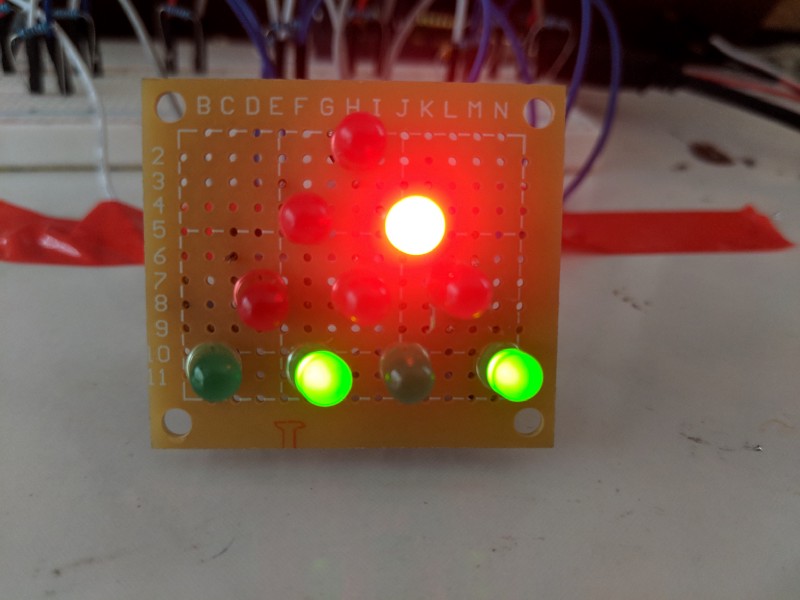 LED illustration
For every two green dots on the bottom row, there is always a unique red dot in the triangle above that corresponds to them. That red dot is the tip of an equilateral triangle with the base specified by the green dots.
Therefore, the number of ways to choose 2 green dots out of n green dots is equal to the sum of the red dots, 1 +2 + 3 + … + (n-1).
In this case, it is 1 + 2 + (4 –1) = 6.
This observation was originally made by Loren C. Larson in this article.
Programming
While it is easy to trace the red dot from the green dots visually, it is more fun and challenging to specify the relationship in code.
Let us assume that we know the indices of the green dots (say, i and j). The programming challenge is to specify the corresponding index of the red dot that forms the equilateral triangle with the green dots.
It looks difficult at first glance.
But the problem can be simplified a lot when we tweak the way that we label the red dots. We can label the red dots from bottom-up instead of top-down.
With that indexing scheme, we can then specify the index of the red dots by the following formula.
 An illustration of how to index the red dots using the indices of the green dots.
Here is the complete code used to flash the LEDs using Arduino.
Electronics
I solder the LEDs on a board and connect the LEDs to Arduino output pins through 1k resistors. It is very important to use the resistors because they protect the LEDs.
The connection is as follows.
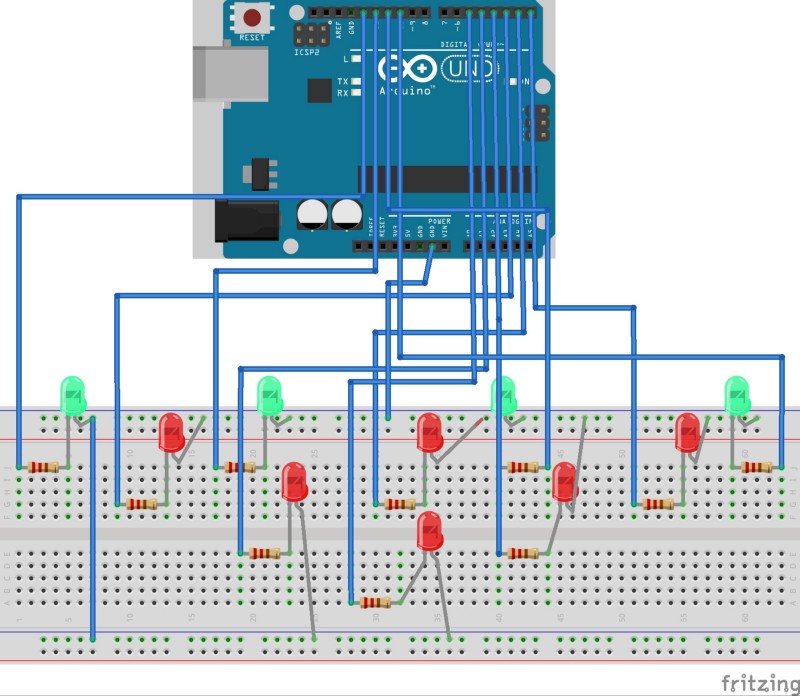 Schematics
And when you put them together and load the software to Arduino, it will start flashing like below.
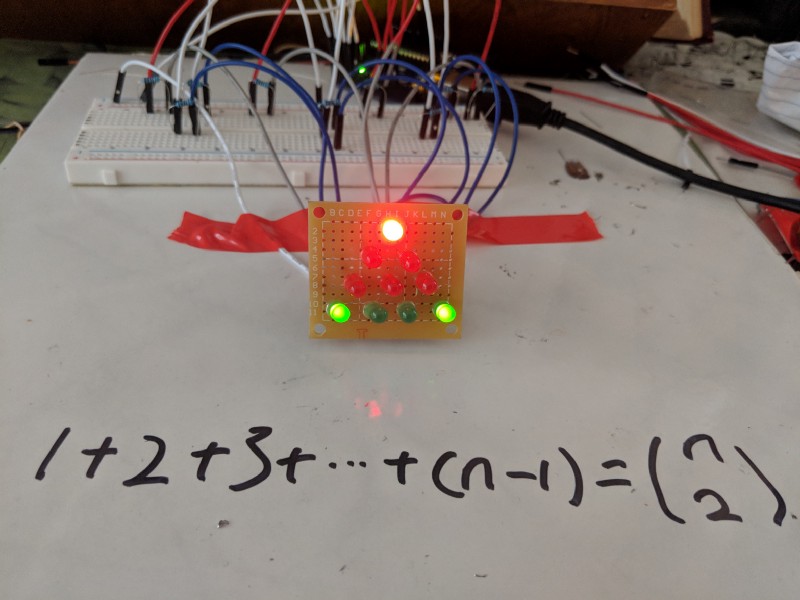 Final result
Hope you enjoy this gadget!