By Mohak Puri
For the past few weeks, I have been digging a lot into Chef. Although the documentation is good, there have been a lot of times when I was stuck with no clue whatsoever. So I will be giving an in-depth introduction to Chef. If you haven’t heard about Chef at all (like me a few months back) don’t worry I will explain all of it.

What is Chef and why?
Chef is a powerful automation platform that transforms infrastructure into code. Chef automates how infrastructure is configured, deployed, and managed across your network, no matter its size.
But what does infrastructure as code mean? So let’s say you have a Java application that needs to be deployed on a single machine. You don’t need automation for that — you can do it manually.
But what happens when a single machine cannot handle the load and you need to deploy your application on 10 or 50 or 100 more machines? This is where Chef comes in. Rather than manually deploying your application on every single machine, you can write code that does it for you.

Terminology
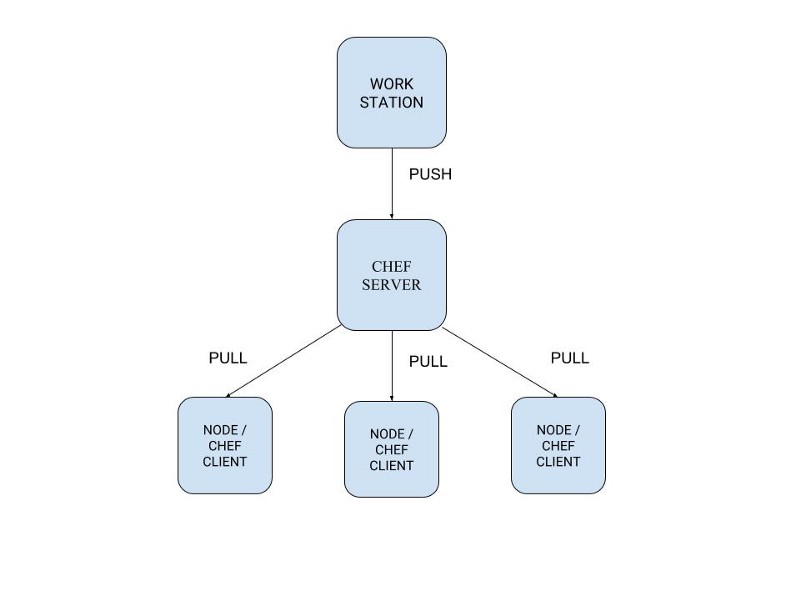
- Workstation — your local machine aka your laptop. This is where you write your code which is then pushed to your chef server.
- Chef Server — This is where all your code resides. It also contains all the information about nodes.
- Nodes aka Chef Client — The machines where your code needs to run. You can use something like vagrant for learning purposes and aws/gcp in production. Your nodes pull the latest code from your chef server.
Getting started with chef
To get started, first we need to install ChefDK on our workstation. ChefDK is the Chef development kit that contains all the tools that are required to start using chef. You can install ChefDK from here.
Once you have installed ChefDK, run the following command:
chef generate cookbook testingCheftree testingChef
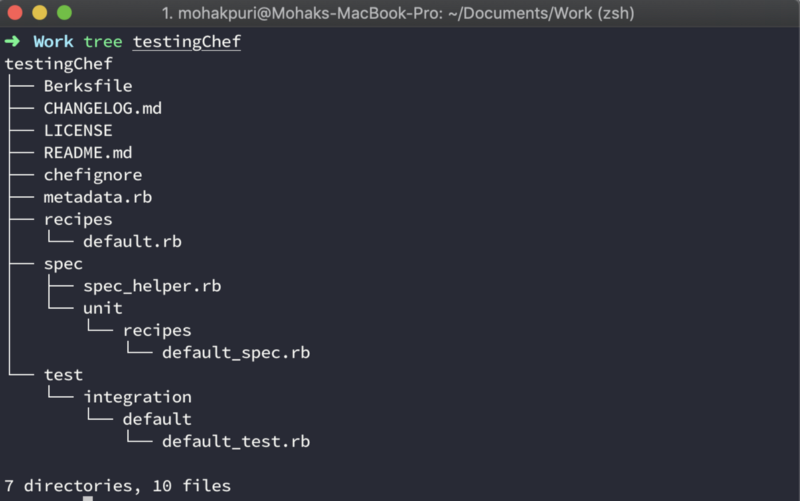
This is the structure that is generated by chef generate cookbook command. Let’s go over each file to see what they do.
Cookbooks
A cookbook is the fundamental unit of configuration which aims to achieve some desired state with the help of other components like recipes, templates, files etc. By default, when you generate a cookbook, you only get a recipes folder. However you can create folders for templates and other components also if you plan to use them (we will talk about them later).
Let’s say you want to run a java application on a machine. There are two things that are required for that:
- Your machine must have java installed.
- It must have the application to run.
Then you can run the application.
So you create a cookbook which, when run on a node, installs java on that node, fetches the application that you have to run, and runs that application.
Chef resources
A resource is a Ruby block with four components: a type, a name, one (or more) properties (with values), and one (or more) actions. The syntax for a resource is like this:
type 'name' do attribute 'value' action :type_of_actionend
Let say you want to install OpenJDK 7 on your node. To do so you can use the package resource available in chef.
package 'java-1.7.0-openjdk' do action :installend
The action :install is the default action for package resource, so you can skip that if you want.
package 'java-1.7.0-openjdk'
To run a cronJob on your node, you can use the cron resource.
cron 'reporting' do action :create minute '0' hour '0' weekday '1' command "/srv/app/scripts/daily_report" # Path of script to runend
Depending on what you want to achieve, there are a lot of in-built chef resources that you can use. You can read more about them here.
Recipes
A recipe is a collection of resources that tends to bring your node one step closer to the desired state. Recipes are written in ruby.
To run a recipe, we use the following command:
chef-client -z pathToRecipe
The -z flag implies that the chef-client should run in local mode since we are not connected to any chef server. In case your nodes are connected to the server you don’t have to use the -z flag.
************************** default.rb ****************************
/* This is an example recipe to install install httpd (Apache HyperText Transfer Protocol (HTTP) server program), creates a file on the node at /var/www/html/index.html (default path for serving web pages on apache server) and starts the service on a centOS based machine */
package 'httpd'
file '/var/www/html/index.html' do content '<html>This is a placeholder for the home page.<;/html>'end
service 'httpd' do action [:enable, :start]end
Metadata and Berksfile
When working on a cookbook, you don’t have to begin from the very first step as there is a good chance that someone has already built something similar and you can just extend their work.
This is where the Chef Supermarket comes in. It contains community cookbooks which you can use as dependencies in your own cookbook. These dependencies are listed in the metadata.rb file or even in your Berksfile. But then the question arises: how are they different?
************************* Berksfile ********************************source 'https://supermarket.chef.io' # Fetch dependencies from here
metadata
When you upload your cookbook on the chef server, you must also upload your cookbook’s dependencies. This is where Berks help. You just have to run two simple commands:
berks install berks upload
which download all the dependencies of your cookbooks and upload all of them to the chef server. The dependency cookbooks are present at
~/.berkshelf/cookbooks/
In case you updated your cookbook and want to re-upload them on the chef server, then you must update the version in the metadata file. Otherwise when you use the berks upload command, the new recipe won’t be uploaded unless you force an upload.
**************************** metadata.rb ***************************name 'testingChef'maintainer 'The Authors'maintainer_email 'you@example.com'license 'All Rights Reserved'description 'Installs/Configures testingChef'long_description 'Installs/Configures testingChef'version '0.1.0' # Update after changes are made to the cookbookchef_version '>= 12.14' if respond_to?(:chef_version)
depends 'haproxy', '~> 6.2.6'
Chefignore
Put files/directories that should be ignored in this file when uploading
or sharing cookbooks to the community site.
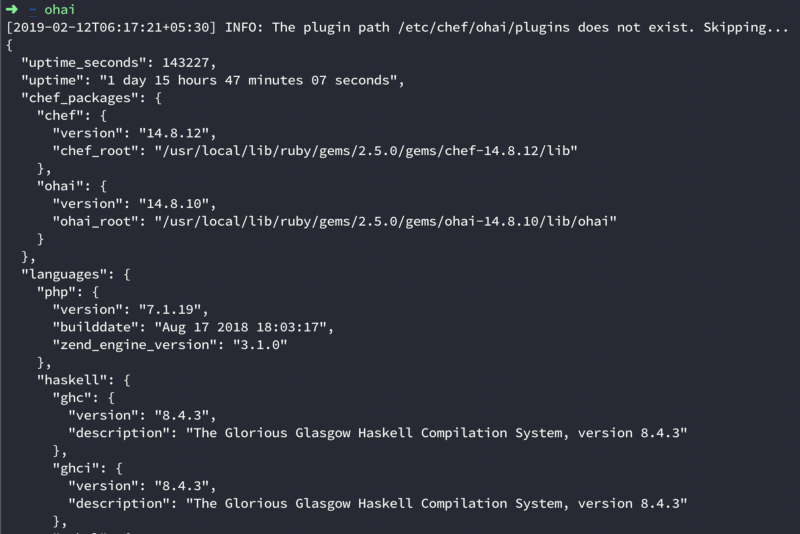
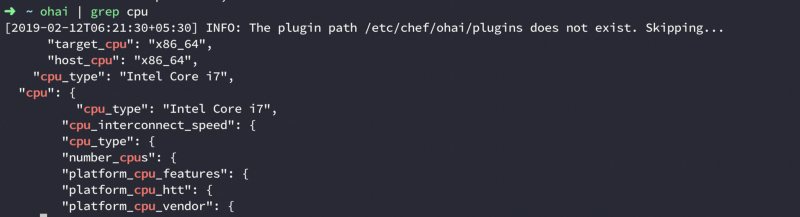
Ohai
When we install CheckDK, we also get ohai with it. Every time you run chef-client on your node, chef runs ohai before that. Ohai collects a lot of system information. The types of attributes Ohai collects include, but are not limited to:
- Operating System
- Network
- Memory
- Disk
- CPU
When running ohai you get a lot of output, so be mindful of what you want and write your commands accordingly.
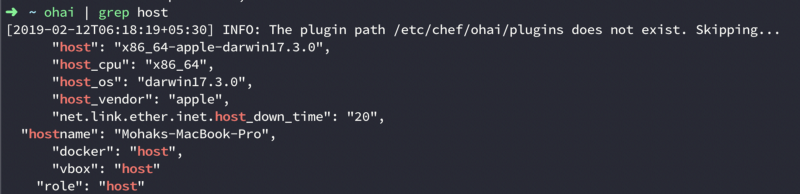
Now if want, we can use all this information in our recipes. All we have to do is refer to a particular property of the node.
if node['hostname'] == "Some hostname" do // do something only if the nodes hostname matchesend
Knife
Knife is a tool which you use to communicate with the chef server. If you want to know anything about your nodes or want to update anything like their recipes, knife is the way to go. There are more than a dozen knife commands. Here are some of them
- knife bootstrap — This command is used to create a new node and attach that to your chef server. When bootstrapping a node, chef installs everything like ohai, chef-client on the node and it also runs chef-client automatically. For any subsequent changes made to that node, you need to run chef-client manually to update your node.
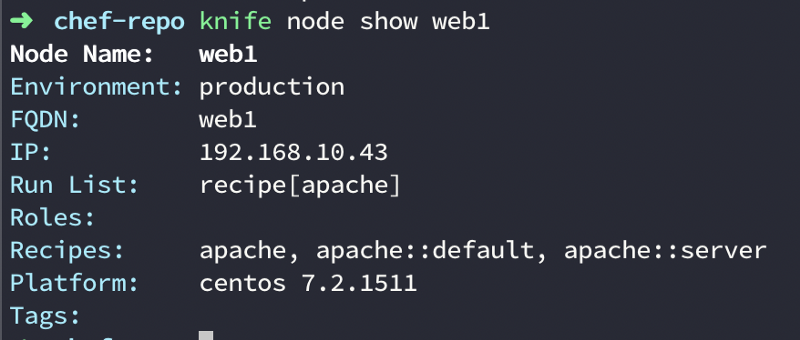
- knife node show ${nodeName} — This command is used to get information about your node which includes recipes, environment, platform etc.
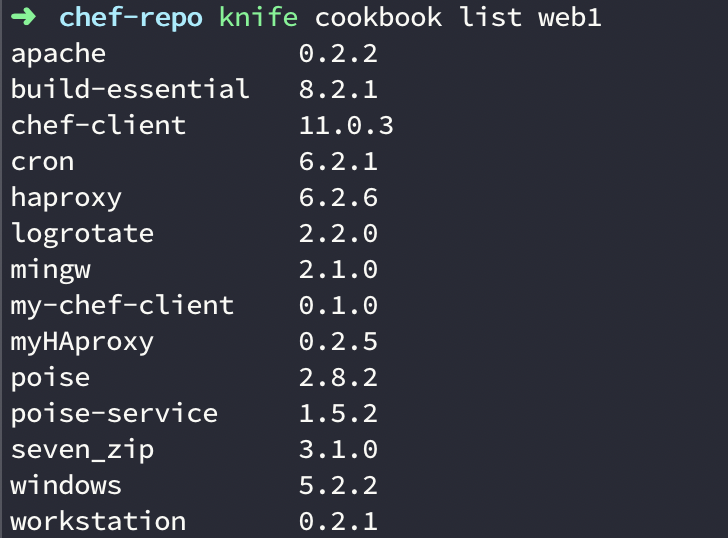
- knife cookbook list ${nodeName} — This command is used to get all the cookbooks associated with your node
That’s about it ! Thank you for reading, and I hope you enjoyed the article.