By Honey Thakuria
There is ever-increasing interest in and demand for Decentralized application (DApp) development. Therefore, I have decided to come up with a tutorial to help you get started with developing & architecting a modular DApp. We’ll use one of the most popular and widely adopted languages of the 21st century: JavaScript.
We will be working with the following technologies in this tutorial:
- Nebulas: a BlockChain Platform which allows us to write Smart Contracts in JavaScript. Signup here to get the referral benefit.
- Nuxt.JS: a framework built on the top of Vue.JS.
- NebPay: Nebulas Payment JavaScript API. Both for PC and Mobile.
- WebExtensionWallet: Used to interact with the Smart Contract for payment purposes.
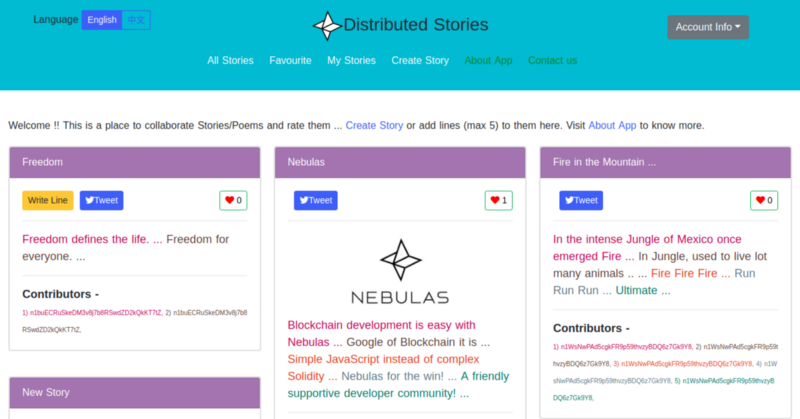
I will be explaining the DApp creation process with the help of an existing DApp, Distributed Stories. It qualified for the new DApp reward on season 1 of the incentive program on the Nebulas Platform.
You can find the source code for the frontend of the DAapp here. The Smart Contract code can be found in the PayloadData here.
It’s not always enough to know about creating a simple to-do app. Sometimes we must also understand how to architect big modular applications.
Focusing on such an app, I will give you a high level overview of structuring a big modular DApp using Nuxt.js and Nebulas. You can get more in-depth by exploring and debugging the code shared above.
What are we going to build?
We are going to create a short story/poem collaboration platform, Distributed Stories. It will allow a user to create a new story by adding a line to an existing story and sharing the story on Twitter. Here’s a demo link.
I will be explaining the Smart Contract and Frontend Architecture in the upcoming lines.
The Smart Contract Code
The DApp Frontend communicates with the SmartContract in order to fetch and write the data. It is then the BlockChain Platform which syncs this smart contract data across multiple nodes in order to meet the decentralization and security needs. This syncing process needs a little time, and that’s why the write process costs time and money in the form of NAS.
Story Initialization
In the below section, I will explain to you the part of the smart contract which defines the Story Object:
"use strict";
/*
Story Constructor which will create the story by providing the necessary field fetched from the frontend using nebpay API explained at the end of this blog:
*/

var Story = function(text, image_url) {
    this.title = text;
    this.address = Blockchain.transaction.from;
    this.hash = Blockchain.transaction.hash;
    this.image_url = image_url;
    this.lines = [];
    this.votes = [];
};
/*
Init function is used once while deploying the smart contract to
initialize the parameters if required:
*/
Story.prototype = {
    init: function() {

    }
};
As mentioned above, every story will have the following fields, out of which text and image_url need to be provided as an argument from the user. For the Address field, the hash can be obtained using the BlockChain APIs explained in depth here.
Data Structure and Storage used in the DApp
The storage module enables the data storage on Nebulas. It enables the permanent storage of data variables on Nebulas when a payment is made. You can read in depth about it here.
/*
With the help of the Storage Module, we are defining following maps and index property, which will help us to keep track of multidimensional data obtained from users. Nebulas recommend the capturing of multiple data points, which may help in improving Nebulas Rank and Search Feature.
*/
var Data = function() {
    LocalContractStorage.defineMapProperty(this, "favourite_stories");
    LocalContractStorage.defineMapProperty(this, "my_stories");
    LocalContractStorage.defineProperty(this, "s_index");
    LocalContractStorage.defineMapProperty(this, "stories_data");
};
Saving and Retrieving Story
Now we’ll look at two of the most important functions used for writing and getting the story on the Platform with the help of Story Constructor and Storage declared in the Data constructor above.
/*
stories_data hash map will contain every story stored against its unique index on the Platform storage module.
Every story index added by a particular user will be stored in a hash map my_stories, in the form of an array.
*/

Data.prototype = {

/*
Initializing the index on Smart Contract. As soon as people will keep on adding a new story, s_index will keep on increasing.
*/

init: function () {
        this.s_index = new BigNumber(1);
      },
save_story: function (name, image_url) {
var id = this.s_index;
if (name.length > 25) {
          throw new Error("Story Length error");
        }
if (name == "") {
          throw new Error("empty story title");
        }
var story = new Story(name, image_url);
this.stories_data.put(new BigNumber(id).toNumber(), JSON.stringify(story));
var my_stories_local = this.my_stories.get(Blockchain.transaction.from) || [];
my_stories_local.push(this.s_index);
this.my_stories.put(Blockchain.transaction.from, my_stories_local);
this.s_index = new BigNumber(id).plus(1);
},

/*
get_stories method will be used to retrieve all the stories stored on the platform.
*/
get_stories: function () {

        var stories = [];
        var total = new BigNumber(this.s_index).toNumber();
        for (let i = 1; i < total; i++) {
          stories.push(JSON.parse(this.stories_data.get(i)));
        }
        return stories;
},

/*
Remaining Functions can be found out in the Smart Contract Code here.
*/
};
module.exports = Data;
This completes the major parts of the Smart Contract. In the next section, I will be explaining the structure of the Frontend Code in Nuxt.js.
Frontend Architecture Design
As the project grows, and more functionalities get added, a proper architecture set up from the beginning can help us achieve our goal by making debugging easier.
The below approach is a good way to go about it:
/*
Go to the root directory in the source code here and find out the below-mentioned files. This Architecture helps in creating a big modular App/Dapp.
*/
pages/

 about / index.vue  : Static About us PAge

 contact / index.vue : Static Contact us Page

 create / index.vue : Page to Create the Story.

 favourite / index.vue : Stories Liked by you will be here.

 mystory / index.vue : My Stories Page.

 index.vue / index.vue : All Stories Page

store/
 index.js : Vuex code used to make API calls to Smart Contract

 neb_init.js : Importing nebpay and initializing Smart Contract
               Address here, which gets used throughout the app.
layouts/
 default.vue: Every page follows an architecture where Header and
              Footer are same. So setting up the default
              architecture here.
components/

 Header.vue: Header component which is getting used in default.vue
 Footer.cue: Footer component which is getting used in default.vue
 ....
Making API calls to the Smart Contract
I will be explaining one of the API call using nebpay to interact with the Smart Contract and get all the stories’ data for the landing page.
Initialize Nebpay, to be used across the app in store/neb_init.js:
import * as NebPay from 'nebpay.js';
/*
Contract Address can be obtained after deploying the code on Nebulas Platform using their Web Wallet.
It needs to be the Mainnet Address.
*/
var contractAddress = "n1pQHv...................Pm1";
var nebPay = new NebPay();
export { contractAddress, nebPay, result,NebPay };
The below API call code can be found in the store/index.js file:
/*
nebPay API's can be used to interact with the Smart Contract and Chrome extension to perform read and write operations. More details about nebpay API's can be found out here.
*/
call: (store) => {
// args needs to be sent in below format.
var args = "[]";
nebPay.simulateCall(contractAddress, 0, "get_stories", args, {
 listener: function (data) {
  if (data.result != null) {
    store.commit("all_data", JSON.parse(data.result));
  }
 }
});
}
The above code is getting called from component/Allstories.vue.
/*
As soon as the Allstories component gets mounted, it dispatches the call action mentioned in the above lines, which then fills the Vuex Store all_data array and gets rendered in the All Stories Component.
*/
mounted() {
  this.$store.dispatch("call");
}
Like this, you can go around every section in the source code and understand the complete architecture of the DApp.
I hope this tutorial helped you in getting started with DApp development. For any queries, feel free to reach out to me.