
By Ankit Sharma
Introduction
Sometimes, we want our users to log in using their existing credentials from third-party applications such as Facebook, Twitter, Google and so on. In this article, we are going to look into authentication of an ASP.NET Core app using Twitter.
Prerequisites
- Install .NET Core 2.0.0 or above SDK from here.
- Install the latest version of Visual Studio 2017 Community Edition from here.
Create MVC Web Application
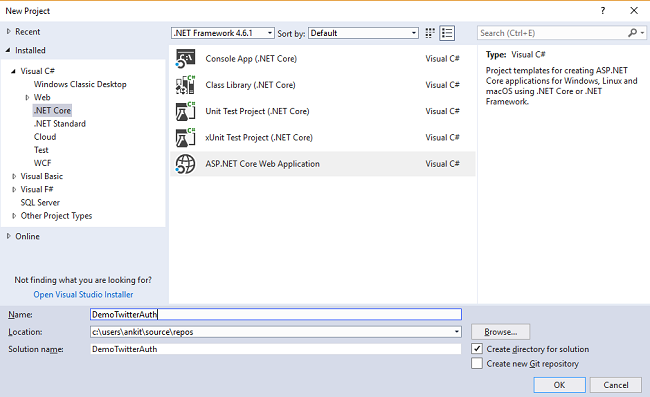
Open Visual Studio and select File >> New >> Project. After selecting the project, a “New Project” dialog will open. Select .NET Core inside Visual C# menu from the left panel. Then, select “ASP.NET Core Web Application” from available project types. Put the name of the project as Dem_o_TwitterAuth and press OK.
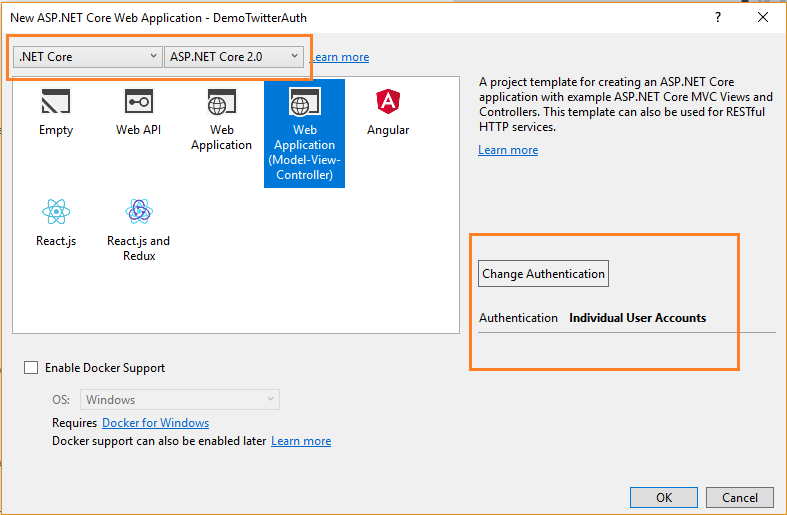
After clicking on OK, a new dialog will open asking to select the project template. You can observe two drop-down menus at the top left of the template window. Select “.NET Core” and “ASP.NET Core 2.0” from these dropdowns. Then, select the “Web application(Model-View-Controller)” template. Click on the “Change Authentication” button, and a Change Authentication dialog box will open. Select “Individual User Account” and click OK. Now, click OK again to create your web app.
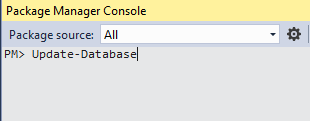
Before running the application, we need to apply migrations to our app. Navigate to Tools >> NuGet Package Manager >> Package Manager Console.
It will open the Package Manager Console. Put in the Update-Database command and hit enter. This will update the database using Entity Framework Code First Migrations.
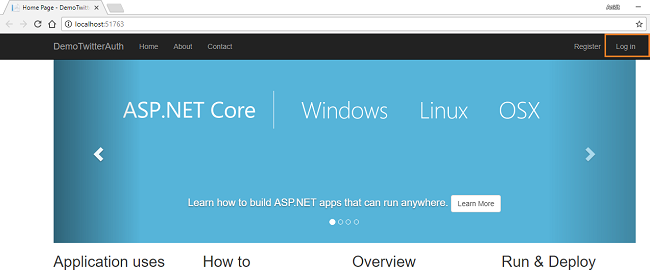
Press F5 to run the application. You can see a home page as shown below.
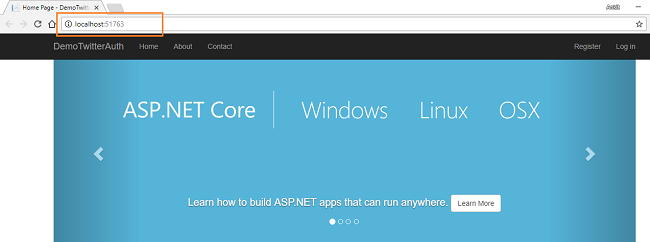
Note the URL from the browser address bar. In this case, the URL is http://localhost:51763/. We need this URL to configure our Twitter App, which we will be doing in the next section.
Create the Twitter App
Before we start building our ASP.NET Core 2.0 application, we need to create and configure the Twitter app so that we can use it to authenticate our application.
Navigate to https://apps.twitter.com/ and sign in using your existing Twitter account. If you do not have a Twitter account, you need to create one. You cannot proceed without a Twitter account. Once you have logged in, you will be redirected to an Application Management page similar to the one shown below.
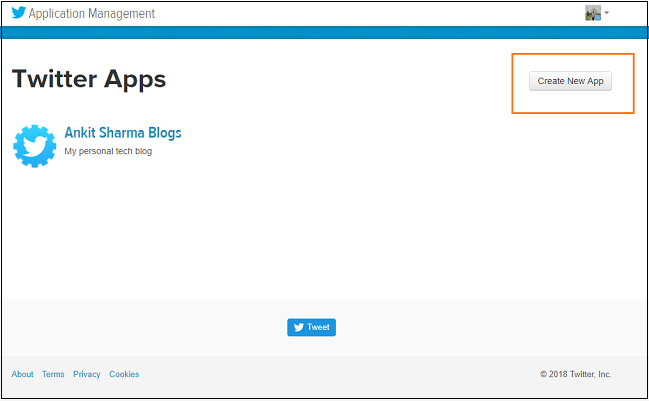
It will show all your Twitter Apps configured. Since I have already configured a Twitter App, it is being displayed. If you are creating one for the first time, it will not show anything. Click on the “Create New App” button in the top right corner. It will open a form and ask to fill out the details to create a new app.
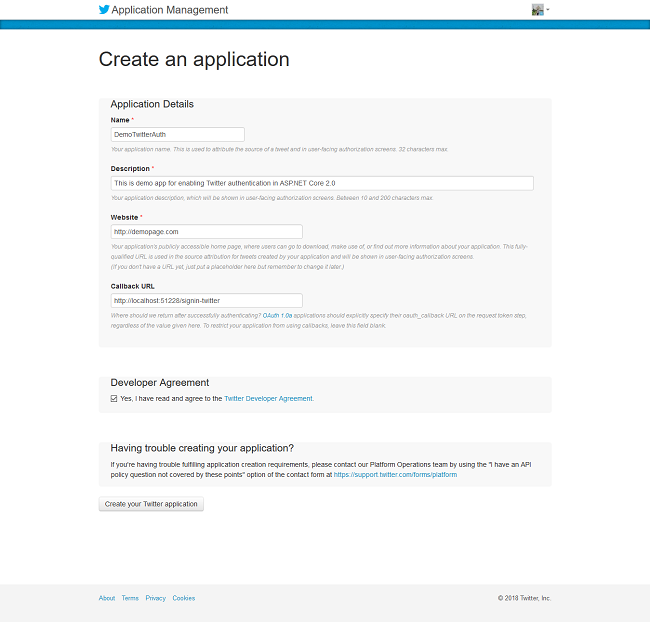
You can fill the form with the details as mentioned below.
- Name
Give any name of your choice. But it should be universally unique. This means no one should have used this name earlier for creating a Twitter app. This works the same as Email id. Two people cannot have the same Email id. I am using the name “DemoTwitterAuth” for this tutorial. If you use an already existing name then you will get an error “_The client application failed validation: is already taken fo_r Name.” - Description
Give an appropriate description. - Website
Give your public website URL. But for this demo purpose, we will use a dummy URL http://demopage.com.
If you use the URL format as www.demopage.com, you will get an error “The client application failed validation: Not a valid URL format.” Always use URL format as http://demopage.com
- Callback URL
Give the base URL of your application with /signin-twitter appended to it. For this tutorial, the URL will be http://localhost:51763/signin-twitter.
Accept the Developer agreement by clicking the checkbox and click on the “Create your Twitter application” button. You will be redirected to your newly created Twitter app page, and you will also see a success message as shown in the image below.
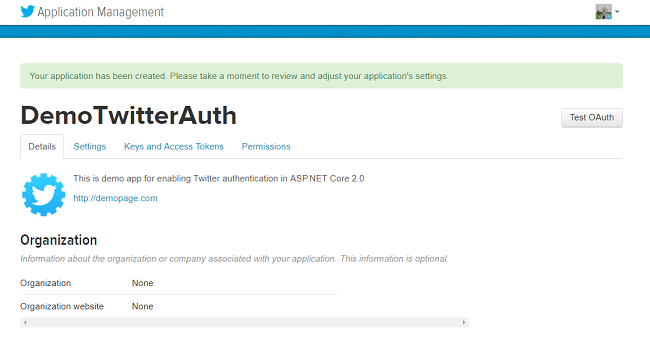
Navigate to the “Keys and Access Tokens” tab and make a note of the Consumer Key (API Key) and Consumer Secret (API Secret) field values. We will be using these values in the ASP.NET Core app.
The fields are masked in this image for security purposes.

Our Twitter app has been created successfully.
Configure the Web App to use Twitter authentication
We need to store the Consumer Key (API Key) and Consumer Secret (API Secret) field values in our application. We will use the Secret Manager tool for this purpose.
The Secret Manager tool is a project tool that can be used to store secrets such as password, API Key, and so on for a .NET Core project during the development process. With the Secret Manager tool, we can associate app secrets with a specific project and can share them across multiple projects.
Open your web application once again and Right-click the project in Solution Explorer. Select “Manage User Secrets” from the context menu.

A secrets.json file will open. Put the following code in it.
{
    "Authentication:Twitter:ConsumerKey": "Your Consumer Key here",
    "Authentication:Twitter:ConsumerSecret": "Your Consumer Secret here"
}
Now open the Startup.cs file and put the following code into the ConfigureServices method.
services.AddAuthentication().AddTwitter(twitterOptions => {
    twitterOptions.ConsumerKey = Configuration["Authentication:Twitter:ConsumerKey"];
    twitterOptions.ConsumerSecret = Configuration["Authentication:Twitter:ConsumerSecret"];
});
In this code section, we are reading ConsumerKey and ConsumerSecret for the authentication purpose. So finally, Startup.cs will look like this.
using System;
using System.Collections.Generic;
using System.Linq;
using System.Threading.Tasks;
using Microsoft.AspNetCore.Builder;
using Microsoft.AspNetCore.Identity;
using Microsoft.EntityFrameworkCore;
using Microsoft.AspNetCore.Hosting;
using Microsoft.Extensions.Configuration;
using Microsoft.Extensions.DependencyInjection;
using DemoTwitterAuth.Data;
using DemoTwitterAuth.Models;
using DemoTwitterAuth.Services;
namespace DemoTwitterAuth {
    public class Startup {
        public Startup(IConfiguration configuration) {
            Configuration = configuration;
        }
        public IConfiguration Configuration {
            get;
        }
        // This method gets called by the runtime. Use this method to add services to the container.
        public void ConfigureServices(IServiceCollection services) {
            services.AddDbContext < ApplicationDbContext > (options => options.UseSqlServer(Configuration.GetConnectionString("DefaultConnection")));
            services.AddIdentity < ApplicationUser, IdentityRole > ().AddEntityFrameworkStores < ApplicationDbContext > ().AddDefaultTokenProviders();
            services.AddAuthentication().AddTwitter(twitterOptions => {
                twitterOptions.ConsumerKey = Configuration["Authentication:Twitter:ConsumerKey"];
                twitterOptions.ConsumerSecret = Configuration["Authentication:Twitter:ConsumerSecret"];
            });
            // Add application services.
            services.AddTransient < IEmailSender, EmailSender > ();
            services.AddMvc();
        }
        // This method gets called by the runtime. Use this method to configure the HTTP request pipeline.
        public void Configure(IApplicationBuilder app, IHostingEnvironment env) {
            if (env.IsDevelopment()) {
                app.UseBrowserLink();
                app.UseDeveloperExceptionPage();
                app.UseDatabaseErrorPage();
            } else {
                app.UseExceptionHandler("/Home/Error");
            }
            app.UseStaticFiles();
            app.UseAuthentication();
            app.UseMvc(routes => {
                routes.MapRoute(name: "default", template: "{controller=Home}/{action=Index}/{id?}");
            });
        }
    }
}
And with this, our application is ready.
Execution Demo
Launch the application and click “Login” in the top right corner of the homepage.
You will be redirected to the http://localhost:51763/Account/Login page, where you can see the option to login using Twitter on the right side of the page.
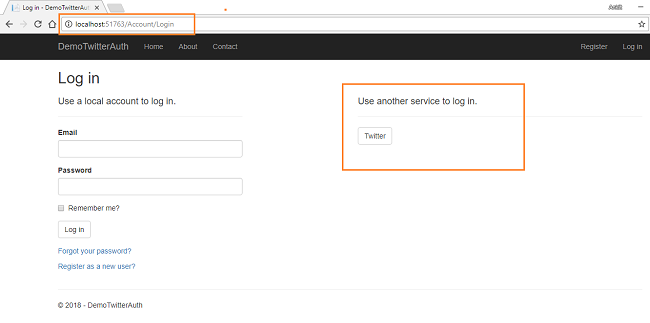
Clicking on the Twitter button will take you to the Twitter authorization page. There, you will be asked to fill in your Twitter credentials and authorize the Twitter app to use your Twitter account.

Once you click on Authorize app, the application will take a few moments to authenticate your Twitter account. Upon successful authentication, you will be redirected to a registration page inside your application where you need to fill in an email id to tag with your account.
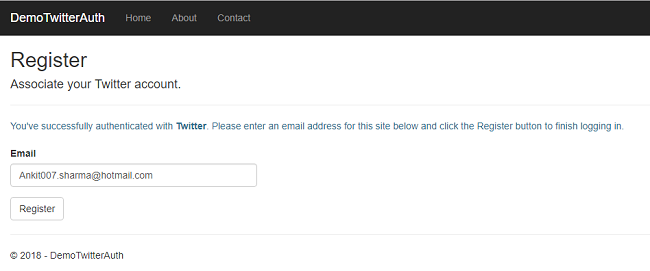
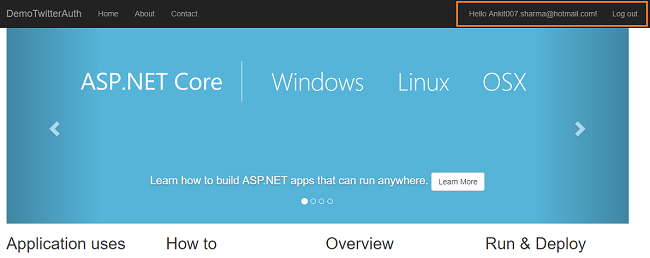
Give an email id and click “Register”. You will be redirected to the homepage again but this time, you can also see your registered email is in the top right corner.
Conclusion
We have successfully created a Twitter app and used it to authenticate our ASP.NET Core application.
You can get the source code from GitHub.
Please note that in the source code, the secrets.json file contains dummy values. So you’ll need to replace the values with the keys of your Twitter app before executing it.
You can also find this article at C# Corner.
You can check my other articles on ASP .NET Core here
See Also
- Authentication Using Facebook In ASP.NET Core 2.0
- Authentication Using Google In ASP.NET Core 2.0
- Authentication Using LinkedIn In ASP.NET Core 2.0
- Cookie Authentication With ASP.NET Core 2.0
- ASP.NET Core — Two Factor Authentication Using Google Authenticator
Originally published at ankitsharmablogs.com