
By Sander Vreeken
I use VBA, or Visual Basic for Applications, to automate my repetitive tasks. This saves me quite a lot of time in my day-to-day life.
Based on the fact that you're reading this tutorial, I assume that you would like to be able to do the same.
So I will take you through the basics of VBA, such as how to use variables, loops, if-else statements, arrays, and dictionaries.
Intro to VBA and Overview of the Project
Although VBA was declared legacy in 2008, this implementation of Visual Basic can help you automate the repetitive tasks in your daily life.
The language is object oriented, it's written in C++, and it includes all the features you would expect in a coding language these days.
In this tutorial we will be writing a macro that prepares a template to note the temperatures in several European cities – Amsterdam, Barcelona, Berlin, Brussels, London, and Rome.
The template will be automatically created by a macro we build together based on the cities and date that we use as parameters.
Finally, we will also learn how to import the data from another file in our template.
In order to follow along with this tutorial, I expect you to have a basic understanding of Excel. But you don't need any experience with VBA (although it might help you understand the different concepts I'll introduce).
I have downloaded several Excel files of data which are free to use. You can also find them on my GitHub together with the final result.
Let's Define Our Parameters
First we will define the different cities that we will be using for this tutorial. If we were to do this manually, increasing the number of cities would consequently mean more work.
But in our case, since the macro will do the work for us, we can add as many cities as we like. Then we'll just run the macro and go do something else.
In order to define the cities, we can do one of two things. Either we can include the cities in an array in the code, or we can define them in a separate worksheet in our template.
For this tutorial, we'll be doing the latter, which makes it easier for other people to add cities later on without any knowledge of VBA.
How to Set Up the Excel Workbook
Open a new Excel file, save it as Excel Macro-Enabled Workbook (extension .xlsm), and name it whatever you like.
Rename the first worksheet to Cities and add the six cities by typing their names in the first column with a city on every row, as shown here:
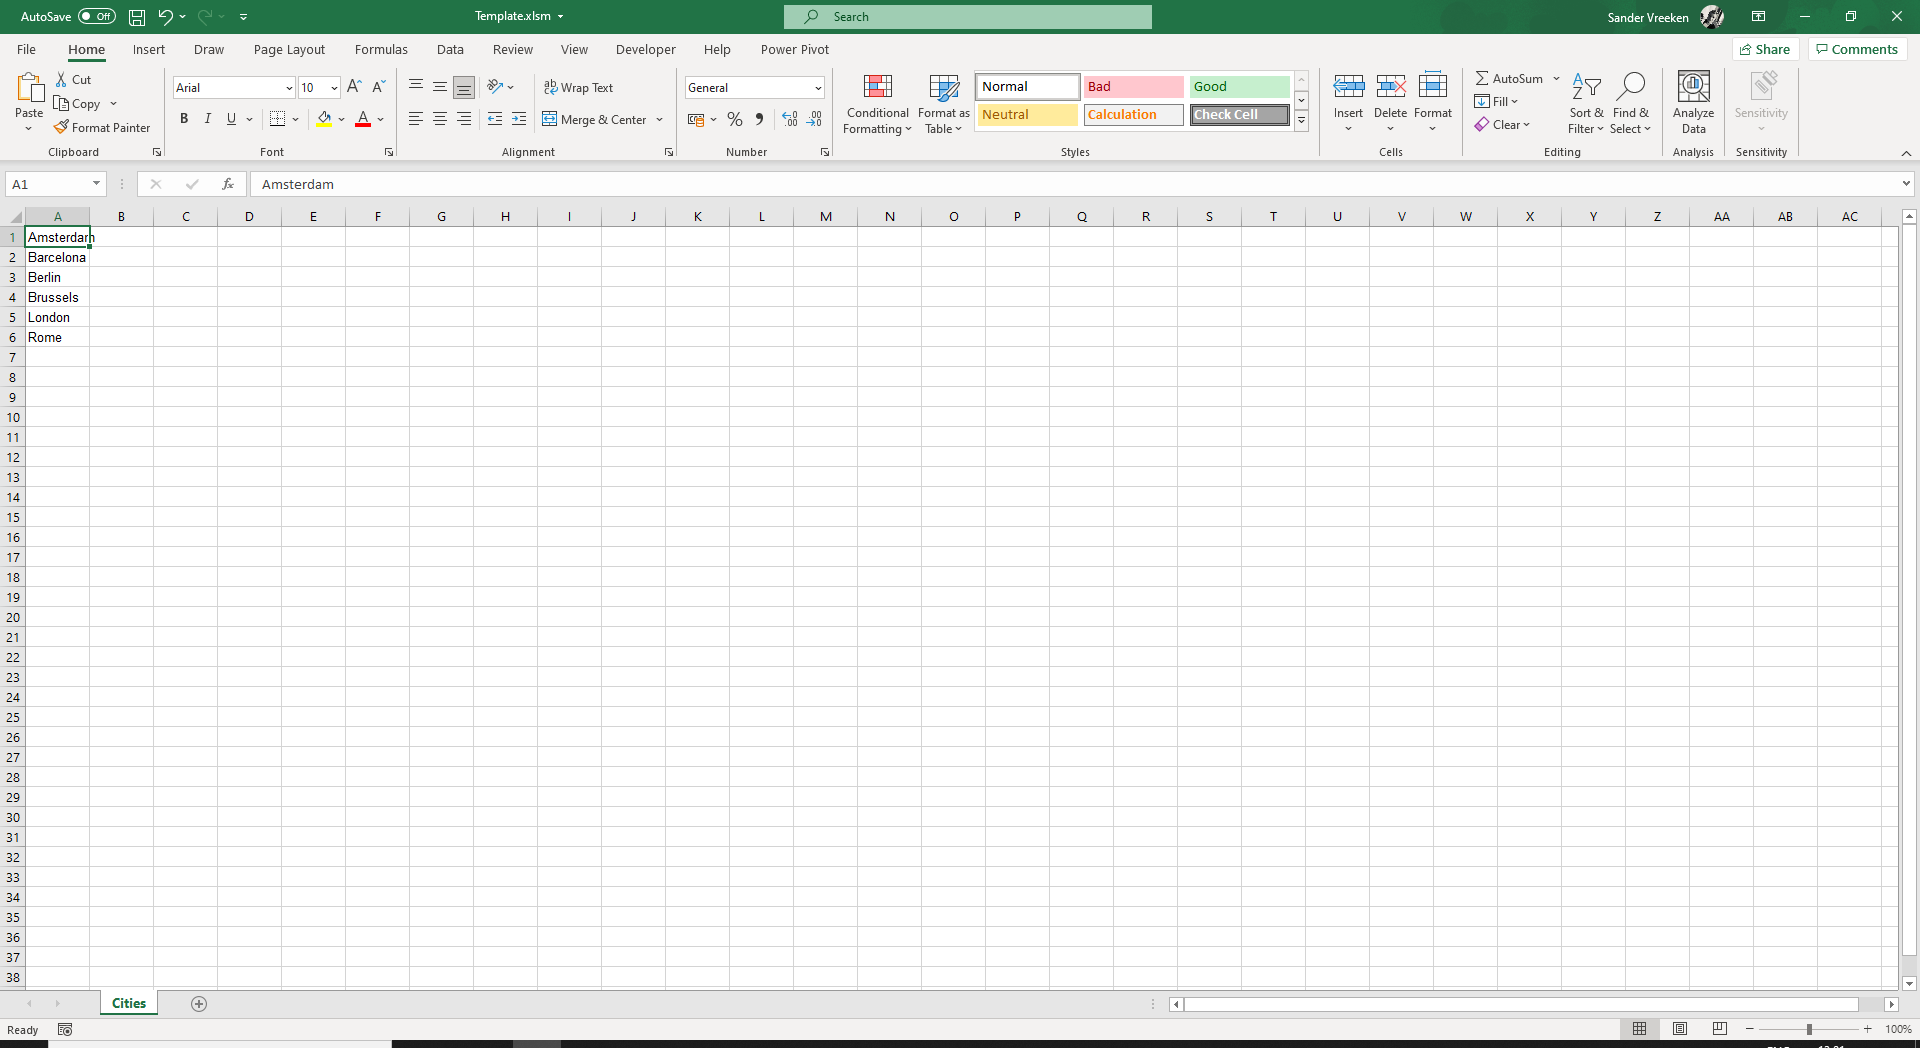 Figure 01: Cities Worksheet
To define the date, we will create another worksheet called Date where the user can define the month they want the template to be created for.
Since not every year and month are the same (for example different number of days, different number of weekdays), the template for your data needs to be adjusted every single month in order to correctly show these differences.
I have also added data validation to make sure we can only enter a date and to make sure it's a date not beyond today's date (but this is completely optional). As long as you have a cell with a date, preferably cell B1, that is enough.
For this tutorial, we'll only need the month and year, so I have chosen a different date format as shown below:
 Figure 02: Date Worksheet
How to Build a Macro with Visual Basic for Applications
Now that we have set the parameters, we can move on with actually building the macro.
If this is the first time you are using VBA, you might need to customize your ribbon to get the necessary functions available.
In order to do so, make sure that the Developer box is ticked (as shown in Figure 3 below) and that the Developer options are available in your ribbon after you have saved your changes.
 Figure 03: Settings Excel
You should now be able to open Visual Basic from the Developer tab in Excel, which should look something like this:
 Figure 04: Visual Basic
This is the editor provided by Excel where you will be able to create, adjust, and remove your functions and macros. I will not go into too much detail for now, but I'll just explain some of the elements as we go.
Now, let's got our hands dirty and write our first macro.
You could choose to write macros for a single worksheet only, or choose to have them available in the entire workbook.
As the two worksheets we created earlier only maintain the parameters, I chose to write the macros for the entire workbook by double-clicking the "ThisWorkbook" option in the sidebar for our project.
Don't worry about the PERSONAL.xlsb in my screenshot for now – this is a file containing functions that I can use in all my files and will be handled in a future tutorial.
How to Create Our First Macro
After you've selected the workbook, you are ready to start your first program.
Macros in VBA start with the keyword Sub, short for subroutine, followed by their name and two parentheses. Although the editor is nothing compared to an IDE like Visual Studio Code, it will complete the code with End Sub when you hit enter after the two parentheses.
For now, I have created an empty macro called CreateTemplate which looks like this:
Sub CreateTemplate()

End Sub
It is a bit sad that the function does not do anything for now, so let's add the following code and find out what it does:
Sub CreateTemplate()

    'Adding a new worksheet called NewSheet to the workbook, next to the worksheet we currently have selected.
    Sheets.Add.Name = "NewSheet"

End Sub
If we were to run this code right now, the function would create a new worksheet in our Excel workbook called NewSheet.
Note that I have included a comment in the code by starting the line with an apostrophe. This will not be executed, but is only there to help you and myself understand the code.
We can run this code by placing our cursor somewhere in the function and pressing the green 'play' icon on top of the editor, which says Run Sub when you hover over it.
After you have pressed this button, you will see that new worksheet called NewSheet has been created in our workbook and has also been added in the sidebar, next to the sheets we already had.
Personally, I do not like the fact that the sheet is created next to the sheet we had (maybe on purpose, maybe not) selected. Therefore, I will add a parameter to the add method to define its location:
Sub CreateTemplate()

    'Adding a new worksheet called NewSheet to the workbook, next to the worksheet Date.
    Sheets.Add(After:=Sheets("Date")).Name = "NewSheet"

End Sub
Delete the newly created sheet, as we will now create the worksheets for every city we defined earlier. As the number of cities entered might differ, we want to know how many rows are actually being used in our Cities worksheet.
Sub CreateTemplate()

    Debug.Print Worksheets("Cities").UsedRange.Rows.Count

End Sub
To test whether we are able to extract the date from the file, we use Debug.Print (similar to print in Python or console.log in JavaScript) to print the numbers of rows, which Excel will calculate for us based on the code we provided.
Make sure to open your Immediate Window (in Visual Basic, by selecting View > Immediate Window) and run the macro above. It will print six, just like we expect, after we have defined the same number of cities in our Cities worksheet earlier in this tutorial.
How to Store Values as Variables in VBA
Rather than printing this value, I want to store it as a variable instead. To do so, add the following code:
Sub CreateTemplate()
    'Variable that will contain the number of cities.
    Dim NumberOfCities As Integer

    NumberOfCities = Worksheets("Cities").UsedRange.Rows.Count
    Debug.Print NumberOfCities

End Sub
We use the Dim keyword in VBA to declare a variable, which should always include the type (for example String, Integer, Double).
After we've declared our variable, we can assign the number of rows used, as printed before, to this variable and print the number to test that we get the same result. You can see this in the image below:
 Figure 05: Printing to Immediate Window
We can now use this number to define a loop that will create a sheet for every city.
Sub CreateTemplate()
    'Variable that will contain the cityname that is used to name a sheet.
    Dim CityName As String
    'Variable that will contain the number of cities.
    Dim NumberOfCities As Integer
    'Variable that will be used to track the index of the loop to create worksheets.
    Dim SheetIndex As Integer

    NumberOfCities = Worksheets("Cities").UsedRange.Rows.Count

    For SheetIndex = 1 To NumberOfCities
        'Setting the cityname variable based on the index.
        CityName = Worksheets("Cities").Cells(SheetIndex, 1)
        'Adding a new worksheet called NewSheet to the workbook as last to ensure the alphabetical order.
        Sheets.Add(After:=Sheets(Sheets.Count)).Name = CityName
    Next SheetIndex

End Sub
How to Work with Loops in VBA
Let me explain how this all works. In the example above, I have declared two more variables, namely CityName and SheetIndex, which will hold the name of the city (which we'll use for the sheet title) and maintain the index of the loop.
The loop itself starts with the keyword For. Thereafter, we define the start of the index (one in this case) and loop through it until the number of cities has been reached.
For every iteration, the city has been stored in the variable CityName, which we then use to create a new worksheet. Run the function and you will see the worksheets being created with the title as defined in our Cities worksheet. It's magic, I know!
Now that the worksheets are there, we can add the single dates for the month. Earlier, we already defined the month we want to use in the Date worksheet. This can now help us create another loop so that all single days in the months are represented.
How to Use Functions in VBA
But first we need to get the number of days of the month the user has entered in the tab Date. We can do this by using a function in VBA. Rather than the subroutines that we have used before, we can also use a function which returns something.
The function we are now using looks quite similar to the function you might use in Excel yourself when defining the number of days in a month (but you would use Date instead of DateSerial):
Function DaysInMonth(DateInput As Date)
    DaysInMonth = Day(DateSerial(Year(DateInput), Month(DateInput) + 1, 1) - 1)
End Function
You can enter this function either above or below the subroutine we defined before, as VBA is a compiled language rather than an interpreted one.
Note – although I will not paste the function again, it will be there for the remainder of this tutorial.
We can now use this function in our subroutine. This makes our lives a lot easier, as we can now use those superpowers without polluting our subroutine.
Sub CreateTemplate()
    'Variable that will contain the cityname that is used to name a sheet.
    Dim CityName As String
    Dim MonthNum As Integer
    'Variable that will contain the number of cities.
    Dim NumberOfCities As Integer
    'Variable that will contain the date entered in the Date worksheet.
    Dim ReportDate As Date
    'Variable that will be used to track the index of the loop to create worksheets.
    Dim SheetIndex As Integer

    NumberOfCities = Worksheets("Cities").UsedRange.Rows.Count

    For SheetIndex = 1 To NumberOfCities
        'Setting the cityname variable based on the index.
        CityName = Worksheets("Cities").Cells(SheetIndex, 1)
        'Adding a new worksheet called NewSheet to the workbook as last to ensure the alphabetical order.
        Sheets.Add(After:=Sheets(Sheets.Count)).Name = CityName
    Next SheetIndex

    ReportDate = Worksheets("Date").Cells(1, 2)
    Debug.Print DaysInMonth(ReportDate)

End Sub
For now, delete the worksheets with the city names if you had created them and run the macro (again) to make sure you got the correct number of days printed in the Immediate Window for the month you defined earlier in the Date worksheet.
We can then store the number of days as an integer in another variable (called NumberOfDays) for another loop.
Sub CreateTemplate()
    'Variable that will contain the cityname that is used to name a sheet.
    Dim CityName As String
    'Variable that will be used to track the index of the loop to add the single dates for the month.
    Dim DateIndex As Integer
    'Variable that will contain the number of cities.
    Dim NumberOfCities As Integer
    'Variable that will contain the number of days in the chosen month
    Dim NumberOfDays As Integer
    'Variable that will contain the date entered in the Date worksheet.
    Dim ReportDate As Date
    'Variable that will be used to track the index of the loop to create worksheets.
    Dim SheetIndex As Integer

    NumberOfCities = Worksheets("Cities").UsedRange.Rows.Count

    For SheetIndex = 1 To NumberOfCities
        'Setting the cityname variable based on the index.
        CityName = Worksheets("Cities").Cells(SheetIndex, 1)
        'Adding a new worksheet called NewSheet to the workbook as last to ensure the alphabetical order.
        Sheets.Add(After:=Sheets(Sheets.Count)).Name = CityName
    Next SheetIndex

    ReportDate = Worksheets("Date").Cells(1, 2)
    NumberOfDays = DaysInMonth(ReportDate)

    For SheetIndex = 1 To NumberOfCities
        'Setting the cityname variable based on the index.
        CityName = Worksheets("Cities").Cells(SheetIndex, 1)

        For DateIndex = 1 To NumberOfDays
            Worksheets(CityName).Cells(DateIndex + 1, 1) = DateSerial(Year(ReportDate), Month(ReportDate), DateIndex)
        Next DateIndex
    Next SheetIndex

End Sub
This will be a loop within a loop to spice it up a little! 🔥
I will tell you what we are doing here. Again, we are looping through the cities. But instead of then creating another worksheet, we will now be doing something else with the Cityname variable.
In the loop inside the loop (you still get where I am now?) we are printing the date to the sheet, where, just like earlier in this tutorial, we used the DateSerial function.
Make sure to remove the sheets with a city name from your workbook, run the macro again, and you should see the worksheets including the dates for the month.
Note that the dates will be printed from the second row onwards, as I included +1 for my cell column in my code earlier. Why, you might ask yourself? Well, because I want to add certain titles on the first row instead, which we will add to the same loop right now.
Rather than defining the cells by using the Cells property followed by the row and column number as an integer, we can use Range followed by a cell's (or multiple cells') location to target its value and other properties.
    For SheetIndex = 1 To NumberOfCities
        'Setting the cityname variable based on the index.
        CityName = Worksheets("Cities").Cells(SheetIndex, 1)

        For DateIndex = 1 To NumberOfDays
            Worksheets(CityName).Cells(DateIndex + 1, 1) = DateSerial(Year(ReportDate), Month(ReportDate), DateIndex)
        Next DateIndex

        Worksheets(CityName).Range("B1") = "Minimum"
        Worksheets(CityName).Range("C1") = "Mean"
        Worksheets(CityName).Range("D1") = "Maximum"
    Next SheetIndex
In the example above I have added the headers for our table, which will now be printed to every single worksheet because of our loop.
How to Use Arrays in VBA
Every heard of DRY? Don't Repeat Yourself! Unfortunately, that is exactly what we are doing here.
An alternative could be to store the three headers in an array instead and loop over them to get to the same result. Is that really necessary for three items? Its debatable to be honest. But below you will find my code example as described:
Sub CreateTemplate()
    'Variable that will contain the cityname that is used to name a sheet.
    Dim CityName As String
    'Variable that will be used to track the index of the loop to add the single dates for the month.
    Dim DateIndex As Integer
    'Variable that will be used to track the index of the loop to insert the headers.
    Dim HeaderIndex As Integer
    'Variant that will store the headers as used in every single worksheet.
    Dim Headers(2) As Variant
    'Variable that will contain the number of cities.
    Dim NumberOfCities As Integer
    'Variable that will contain the number of days in the chosen month
    Dim NumberOfDays As Integer
    'Variable that will contain the date entered in the Date worksheet.
    Dim ReportDate As Date
    'Variable that will be used to track the index of the loop to create worksheets.
    Dim SheetIndex As Integer

    Headers(0) = "Minimum"
    Headers(1) = "Mean"
    Headers(2) = "Maximum"

    NumberOfCities = Worksheets("Cities").UsedRange.Rows.Count

    For SheetIndex = 1 To NumberOfCities
        'Setting the cityname variable based on the index.
        CityName = Worksheets("Cities").Cells(SheetIndex, 1)
        'Adding a new worksheet called NewSheet to the workbook as last to ensure the alphabetical order.
        Sheets.Add(After:=Sheets(Sheets.Count)).Name = CityName
    Next SheetIndex

    ReportDate = Worksheets("Date").Cells(1, 2)
    NumberOfDays = DaysInMonth(ReportDate)

    For SheetIndex = 1 To NumberOfCities
        'Setting the cityname variable based on the index.
        CityName = Worksheets("Cities").Cells(SheetIndex, 1)

        For DateIndex = 1 To NumberOfDays
            Worksheets(CityName).Cells(DateIndex + 1, 1) = DateSerial(Year(ReportDate), Month(ReportDate), DateIndex)
        Next DateIndex

        For HeaderIndex = 0 To UBound(Headers) - LBound(Headers)
            Worksheets(CityName).Cells(1, HeaderIndex + 2) = Headers(HeaderIndex)
        Next HeaderIndex

    Next SheetIndex

End Sub
The variant is used as an array, which is declared where you would expect and the titles are inserted later per index direclty after the variable declaration.
Instead of providing the individual cell locations, I have used a loop which runs from zero to the number of items (minus one, as arrays in VBA start at zero too). The title is then printed to the sheet, just like in the previous situation.
You might need to add another header later on, in which case the latest solution is easier. But if you are a hundred percent sure you'll stick with three only, choose what is most convenient for you. It's best to know both ways after all.
It does not matter which of the two options you choose for the remainder of this tutorial, as long as you got the headers printed.
How to Import Data Using VBA
At this point we've created the actual template, so we can enter cities and a date in the workbook. Then the macro will do the rest for us.
I would like to go one step further in this tutorial and show you how to trigger an explorer window where you can choose a file and import the data from that file.
Make sure you have completed the steps above and have gotten the worksheets for all the cities. Let's start a new subroutine and define the following variables at the top:
Sub ImportData()
    Dim FileLocation As String
    Dim WorksheetTitle As String

    WorksheetTitle = ActiveSheet.Name
End Sub
We need the first variable to store the location of the file where we are going to import the data on your device. We use the second one to store the title of the sheet that is currently selected by the user.
Add the following code to the macro, right below the line where we set the WorksheetTitle equal to the sheet name (but still before End Sub):
FileLocation = Application.GetOpenFilename
If FileLocation = "False" Then
    Beep
    Exit Sub
End If

Application.ScreenUpdating = False
Set ImportWorkbook = Workbooks.Open(Filename:=FileLocation)

Debug.Print ImportWorkbook.Worksheets(1).Range("B1")

ImportWorkbook.Close
Application.ScreenUpdating = True
This might seem a little cryptic at first, but should not be to difficult to understand. The Application.GetOpenFilename function is what triggers a file explorer window and returns a location, which is then stored in the earlier defined variable.
If you decide not to select a file, meaning if the FileLocation = "False", you will hear the iconic beep sound (yes, Excel comes with awesome sounds too!😍) and the macro will end here.
If it's true, we'll continue with the macro, which first ends the screen updates of Excel. This helps make sure that everything will run smoothly.
For this macro you might not notice the difference without this line, but with more complex calculations you will. Believe me.
How to Work with Objects in VBA
After that, the data included in the file that's located where the FileLocation variable is gets stored into the constant ImportWorkbook.
Note that we are using the Set keyword which is mainly used for objects, such as an import of a workbook.
To test whether we are able to extract the date from the file, we again use Debug.Print to print the city, which is located in cell B1 of the files available per the link mentioned in the beginning of this tutorial.
If you import the file Data_Amsterdam, you should see Amsterdam printed in your Immediate Window. After the file is closed, Excel will behave normally again. We can easily paste the (just printed) city name in the in our own template by replacing the Debug.Print with the following:
ThisWorkbook.Worksheets(WorksheetTitle).Range("A1") = ImportWorkbook.Worksheets(1).Range("B1")

'Equal to the following.
ThisWorkbook.Worksheets(WorksheetTitle).Cells(1, 1) = ImportWorkbook.Worksheets(1).Range(1, 2)
Note that we can now use our ImportWorkbook variable to get the data from the imported workbook. But we can also use ThisWorkbook (protected keyword name by VBA) to get to properties of our own template instead.
If we now run this macro and import Data_Amsterdam, the city should now be printed in the left-upper corner of your Amsterdam worksheet.
How to Use Dictionaries in VBA
As promised, now it's time to get the actual temperatures. You can use a loop and insert the numbers like demonstrated above, but I am feeling fancy today and would like to show you how we can do this using a dictionary.
Again, just like the array earlier in this tutorial, this approach might be a bit redundant for this situation. But if you need to work with larger amounts of data this will come in handy.
First thing we need to do is define several new variables here:
Dim DataIndex As Integer
Dim DaysIndex As Integer
Dim FileLocation As String
Dim Headers(2) As Variant
Dim WorksheetTitle As String
Set TemperaturesDict = CreateObject("Scripting.Dictionary")

Headers(0) = "Maximum"
Headers(1) = "Minimum"
Headers(2) = "Mean"
Both the indexes on top will track the index of the loops we will be using later. I copied the headers declaration and variables from our macro earlier.
Yes, we could have defined them as a global variable, but that is another topic for another day.
Note that I have changed the order, as this is how they are displayed in the imported file.
A dictionary is also an object, which we will therefore declare using the Set keyword directly below our variables.
But before you can actually use a dictionary this way, make sure that you have Microsoft Scripting Runtime (as you can see in Figure 6 above) ticked, which you can find under Tools and then References in your editor.
 Figure 06: Visual Basic References
Before, I showed you how to copy a value from a single cell from one workbook to a second one. Now, rather than copying single values, I want to store them all together in a dictionary before moving on and pasting them.
    For DaysIndex = 11 To ImportWorkbook.Worksheets(1).UsedRange.Rows.Count
        Set DataDict = CreateObject("Scripting.Dictionary")
        For DataIndex = 0 To 2
            DataDict.Add Headers(DataIndex), ImportWorkbook.Worksheets(1).Cells(DaysIndex, DataIndex + 2)
        Next DataIndex
        TemperaturesDict.Add DaysIndex, DataDict
    Next DaysIndex
This might be the most difficult part of the tutorial, which I will try to explain as clearly as possible.
We start with a loop like we've used many times before in this tutorial – so far so good. The loop starts at eleven and ends when the number of rows being used in the imported workbook is being reached.
Then, I am defining a new dictionary. Why? In most other languages it is possible to add new key value pairs using dot notation – but not in VBA. In order to so-called nest (add a dictionary in a dictionary), you will have to create a new (inner) dictionary and then add it to your other (outer) dictionary.
This dictionary in the loop will therefore first be populated with the different temperatures available, namely minimum, mean, and maximum.
To do this, I'll use the headers array as discussed above and I'll loop over these values. You add a key value pair by using the name of the dictionary followed by calling the .Add method, the key you want to use, a comma, and then its value:
DictName.Add Key, Value
This is what will be entered after the first iteration when you import the Data_Amsterdam file:
Maximum: 22.105547
Minimum: 14.385546
Mean: 18.25388
This dictionary then gets added to the 'main' dictionary called TemperaturesDict – meaning we'll now have something like this:
10:
    Maximum: 22.105547
    Minimum: 14.385546
    Mean: 18.25388
We do the same for all the other days and temperature types, until the file is completely scraped and we are ready to insert this information into our template. But then what?
    Headers(0) = "Minimum"
    Headers(1) = "Mean"
    Headers(2) = "Maximum"

    For DaysIndex = 2 To ThisWorkbook.Worksheets(WorksheetTitle).UsedRange.Rows.Count
        If TemperaturesDict.Exists(DaysIndex - 1) Then
            For DataIndex = 0 To 2
                ThisWorkbook.Worksheets(WorksheetTitle).Cells(DaysIndex, DataIndex + 2) = TemperaturesDict(DaysIndex - 1)(Headers(DataIndex))
            Next DataIndex
        End If
    Next DaysIndex
As discussed above, the imported file has another order. But since we are using a dictionary, we can now easily reorder to headers array and have it displayed as we originally thought through in our template, as it will search for the key (#winning).
We are then using an old-fashioned loop to get over all the days we have in our template. The loop starts at two, as we defined our headers on the first row. Now starting at index one will override those, which we do not want. The loop ends after we have had all rows (that is to say, all days).
Since only a limited number of days are included in the imported file, we have to check whether the day equal to the index actually exists in our dictionary.
We do this with an if statement, which you might recognize from other coding languages. There is a minus one since our loop starts at two, though days of the month always start at one. The same counts for the minus one used later on in this block of code.
If the data actually exists in our array, we will insert it in our template. Then the row is defined by the index of the loop and the column comes from the DataIndex.
Eventually, we end up with the following code for our second macro:
Sub ImportData()
    Dim DataIndex As Integer
    Dim DaysIndex As Integer
    Dim FileLocation As String
    'Variant that will store the headers as used in every single worksheet.
    Dim Headers(2) As Variant
    Dim WorksheetTitle As String
    Set TemperaturesDict = CreateObject("Scripting.Dictionary")

    Headers(0) = "Maximum"
    Headers(1) = "Minimum"
    Headers(2) = "Mean"

    WorksheetTitle = ActiveSheet.Name

    FileLocation = Application.GetOpenFilename
    If FileLocation = "False" Then
        Beep
        Exit Sub
    End If

    Application.ScreenUpdating = False
    Set ImportWorkbook = Workbooks.Open(Filename:=FileLocation)

    For DaysIndex = 11 To ImportWorkbook.Worksheets(1).UsedRange.Rows.Count
        Set DataDict = CreateObject("Scripting.Dictionary")
        For DataIndex = 0 To 2
            DataDict.Add Headers(DataIndex), ImportWorkbook.Worksheets(1).Cells(DaysIndex, DataIndex + 2)
        Next DataIndex
        TemperaturesDict.Add DaysIndex, DataDict
    Next DaysIndex

    Headers(0) = "Minimum"
    Headers(1) = "Mean"
    Headers(2) = "Maximum"

    For DaysIndex = 2 To ThisWorkbook.Worksheets(WorksheetTitle).UsedRange.Rows.Count
        If TemperaturesDict.Exists(DaysIndex - 1) Then
            For DataIndex = 0 To 2
                ThisWorkbook.Worksheets(WorksheetTitle).Cells(DaysIndex, DataIndex + 2) = TemperaturesDict(DaysIndex - 1)(Headers(DataIndex))
            Next DataIndex
        End If
    Next DaysIndex

    ImportWorkbook.Close
    Application.ScreenUpdating = True

End Sub
When you now run this code, you should see the the temperatures being imported from the data file to the template.
Note that we have also changed the order in which they originally come – now starting with minimum and ending with maximum.
Conclusion
Congratulations! You have now made yourself a template which you can easily populate with data, all using macros.
Thank you for reading :) If you have any questions about this tutorial or other VBA implementation, please don't hesitate to send me a direct message on Twitter so I can help you out.