

The React Context API provides a way to pass data through multiple nested levels of components without having to manually pass that data to each level.
React context is one sure way of globally managing your data in your app, and it's a good way to avoid prop drilling.
In this tutorial, we will learn how to use the React context API (useContext hook) to avoid prop drilling.
What is Prop Drilling?
In a traditional React application, data is often shared between components using props. Manually sharing this data can be hectic, especially when shared between multiple nested components. Also, sharing data between two child components can be cumbersome. Hence the need for global state management.
Prop drilling is a situation where data is passed from one component through multiple interdependent components until you get to the component where the data is needed. Here's an illustration of prop drilling to help you understand:
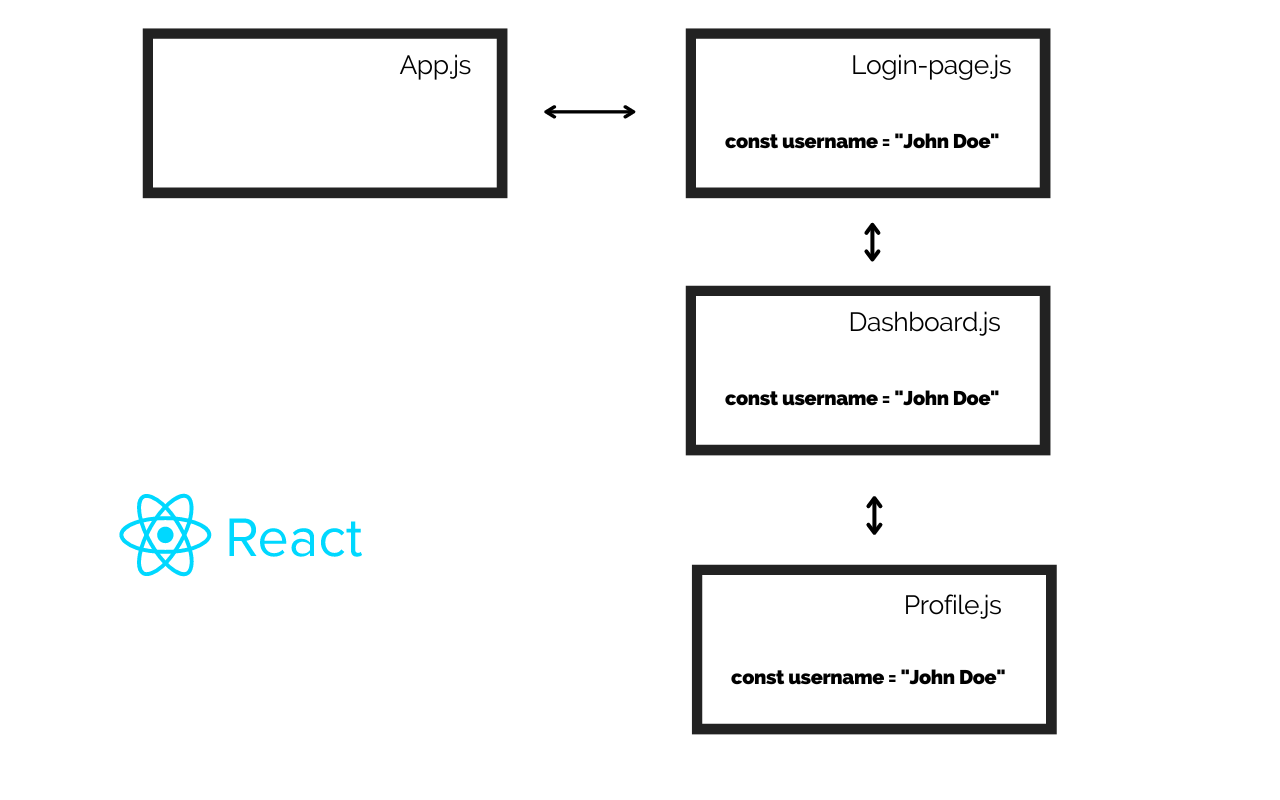
Passing data through multiple components is not a good way of writing clean, reusable, and DRY code.
The React context API is a fast way of avoiding prop drilling and ensuring your data is managed globally without using a huge third-party state management app like Redux and MobX.
What is the React Context API?
React context is a built-in API that uses the useContext hook to share data across components.
Imagine passing the data of an authenticated user from a parent component to a deep nested child component. This will be cumbersome if you need to pass the data through a lot of intermediate components.
A better approach to doing this is using React context to handle the data.
How to Use the React Context API
How to create context
useContext is a built-in hook in React. You can start using the context API by importing the createContext function from React like this:
Import {createContext} from ‘react’;
const AuthContext = createContext();
Here, we initialized our context and named it AuthContext. The next step is to provide the context.
How to provide the context to the components that need it
The context API uses a provider to pass data to its child components. You will have to wrap all components with a provider component.
<AuthContext.Provider value={...}>
    <ParentComponent/>
<AuthContext.Provider>
The Provider component has a value prop as seen above. The value of the context can either be updated or set using the value prop. In our case, we will be setting the value prop to the name of our authenticated user.
import React from ‘react’;

function App() {

    const username = “John Doe”

    return(
        <AuthContext.Provider value={username}>
            <Dashboard/>
        <AuthContext.Provider>
    )
}

export default App;
Hooray! All components inside this App component will have access to the username data. Next, let's see how to use the context.
How to consume the context
We can consume the context by using the useContext hook. Without passing data through nested components, you can access your context in any component you want. Here’s how.
import { useContext } from ‘react’;

const Profile = () => {

    const value = useContext(AuthContext);

    return (
        <div>
            {value}
        </div>
    )
}

export default Profile
Conclusion
Apart from solving the problem of prop drilling, you can also use React context for theme configuration, global state management and more.
Note that the React context API is not a replacement for a global state management tool like Redux and MobX. You can read more about React Context here.
I hope you enjoyed this tutorial.
Happy coding!