By Satyam Tripathi
To create an application like WhatsApp or Facebook, you'd need many servers (30-40), operating system licenses, routers, cables, switches, gateways, air conditioning units, and employees for maintenance.
All this can be expensive and time-consuming, and there is no guarantee that the application will be successful in the market.
But by using cloud services like AWS, you can avoid the upfront costs and complexity of building and managing your own data center infrastructure.
Instead, you can pay for the infrastructure on a pay-as-you-go basis, which means you only pay for the resources you use. This makes things more flexible and affordable.
In this article, you will learn how to create a server (instance) on AWS. We will also take a look at how to connect to your AWS instance using Putty.
First, we will set up the AWS account. Then we will create an instance. And finally, we will set up Putty and Puttygen to run the Linux machine.
Putty and Puttygen are free and open source software tools you can use to access and manage remote computers.
Putty is an open source SSH client or terminal emulator that allows you to establish a secure connection to a remote computer. It is available for Windows, Linux, and macOS.
Puttygen is a key generator used to create SSH keys. Puttygen allows you to generate new key pairs, import existing keys, and convert keys between different formats.
Benefits of Using Cloud Services
Cloud services like AWS offer a number of benefits that can make it easier and more cost-effective to create applications.
- Reduced upfront costs: Cloud services like AWS allow you to avoid the upfront costs of purchasing and maintaining your own data center infrastructure.
- Increased flexibility: Cloud services can be scaled up or down as needed, which gives you more flexibility to meet changing demand.
- Improved reliability: Cloud services are typically more reliable than traditional on-premises infrastructure, as they are backed up by multiple data centers.
- Enhanced security: Cloud services offer a number of security features that can help protect applications from unauthorized access.
Now let's dive into the task at hand.
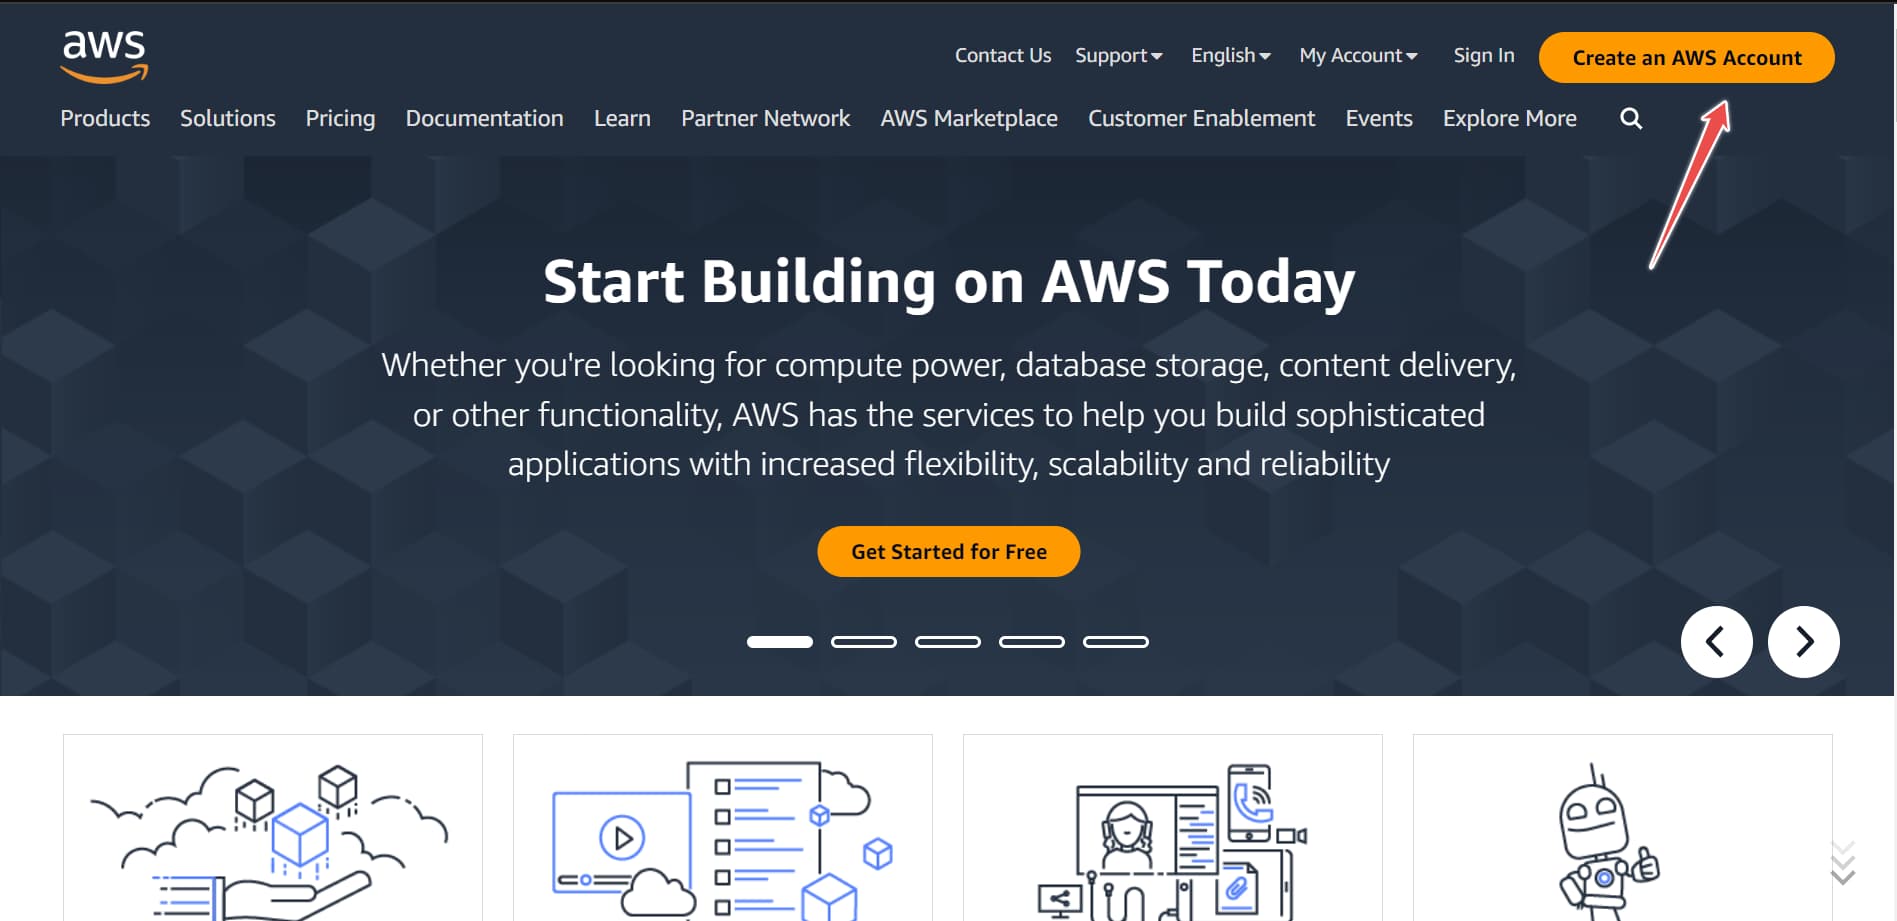
Create Account on AWS
Click on the Create an AWS Account button.
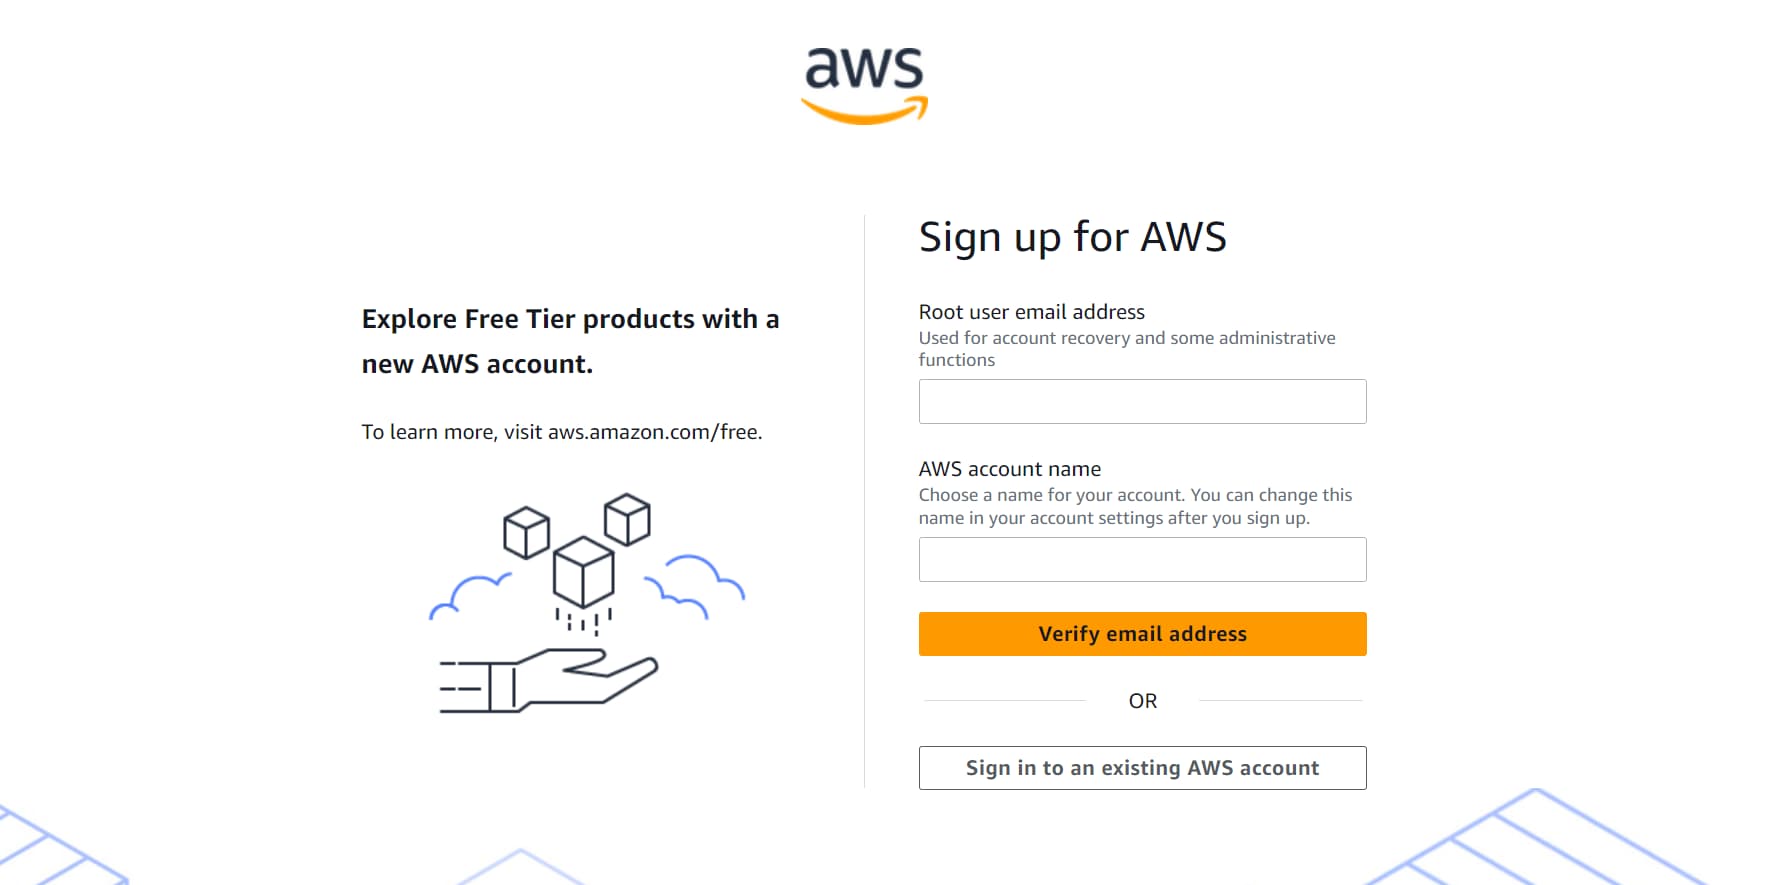
Sign up with your email address. You will receive an email verification code at your email address.
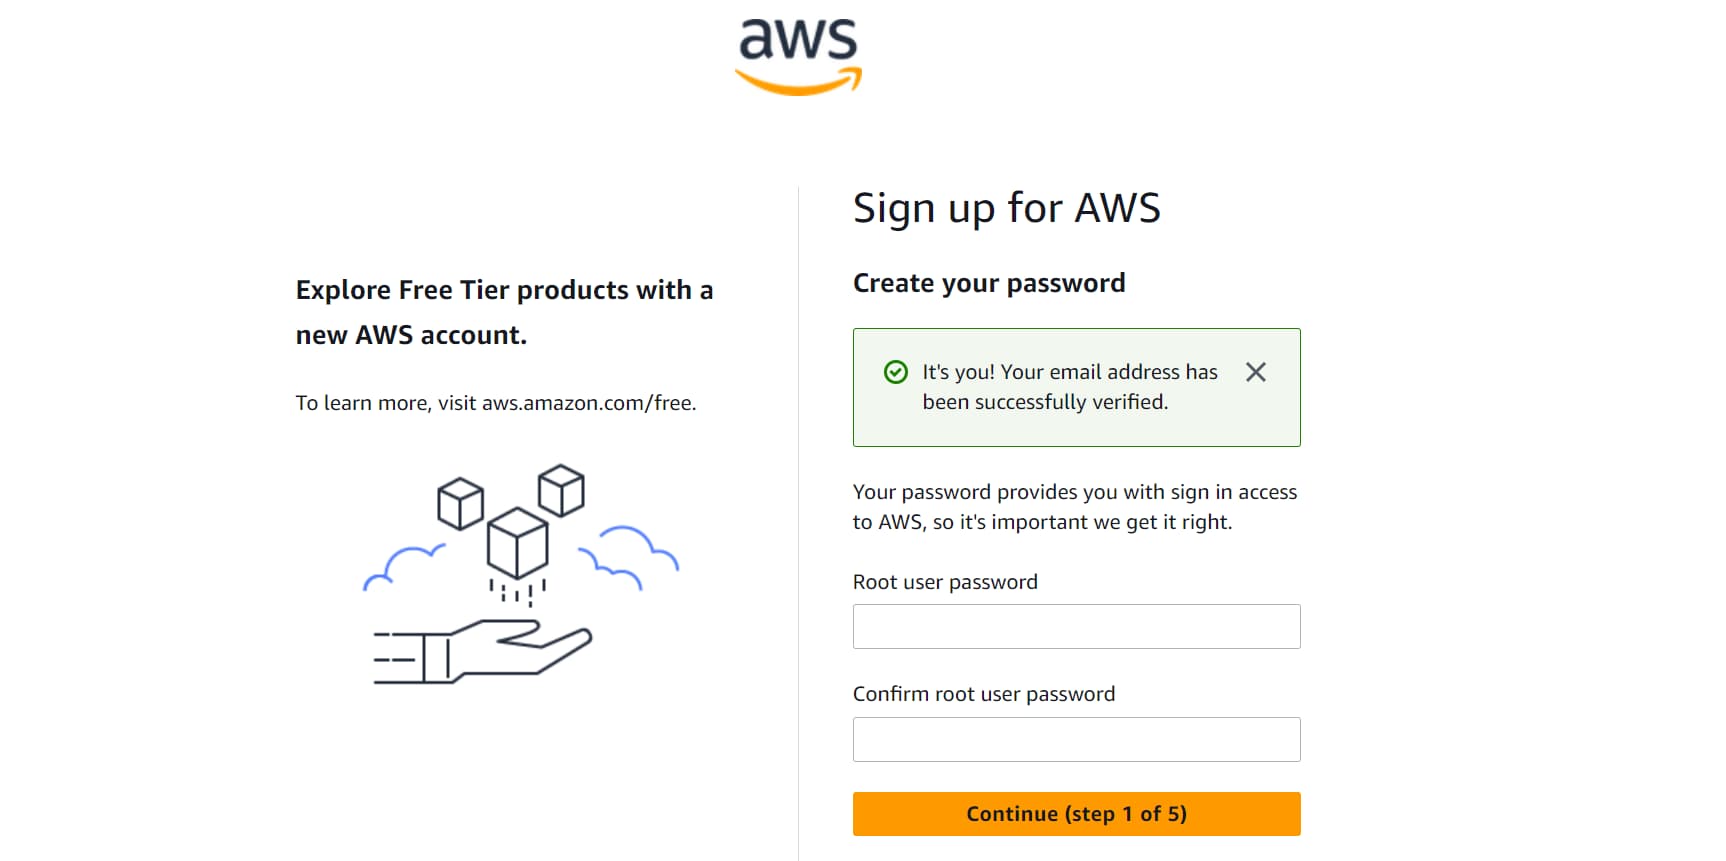
Once your email address is verified, create a password.
Now you can enter your personal details and choose the Personal - for your own projects option.
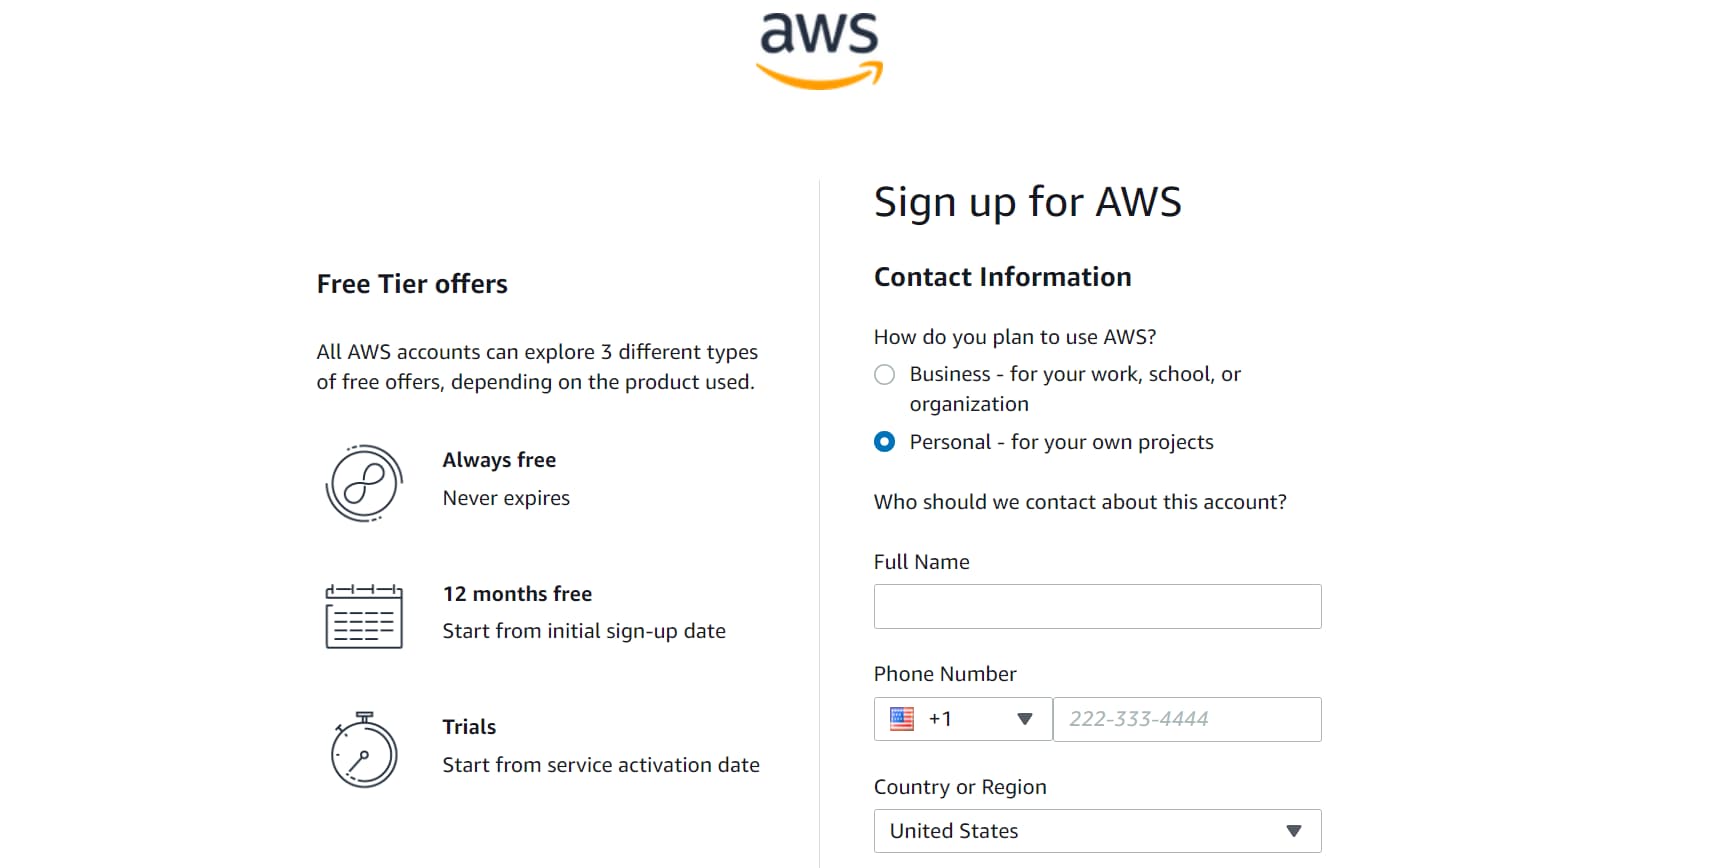
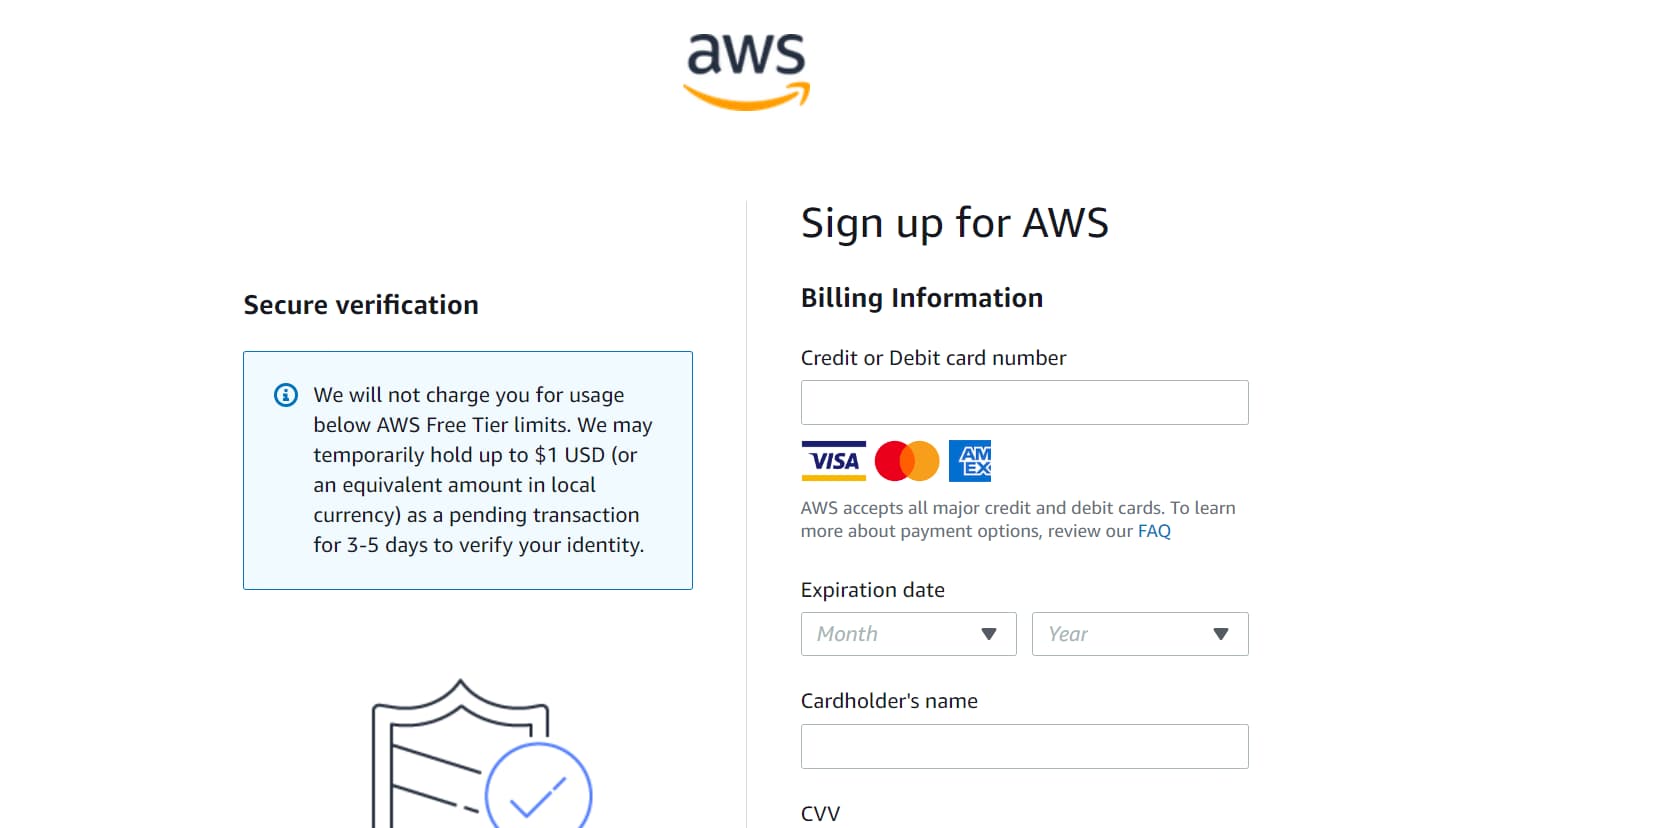
Now, the last step is to enter your credit card information. Don't worry, you will not be charged anything.
Note: As part of the AWS Free Tier, you can get started with Amazon EC2 for free. This includes 750 hours of Linux and Windows t2.micro instances each month for one year.
Later, we will discuss how to terminate your instances so that you will not be charged any money. Although you have 750 hours to use in one month, you should terminate your created instance when it is not in use.
Congratulations! You've created your AWS account. Now log back in – make sure to select the Root user.

Welcome to the AWS!
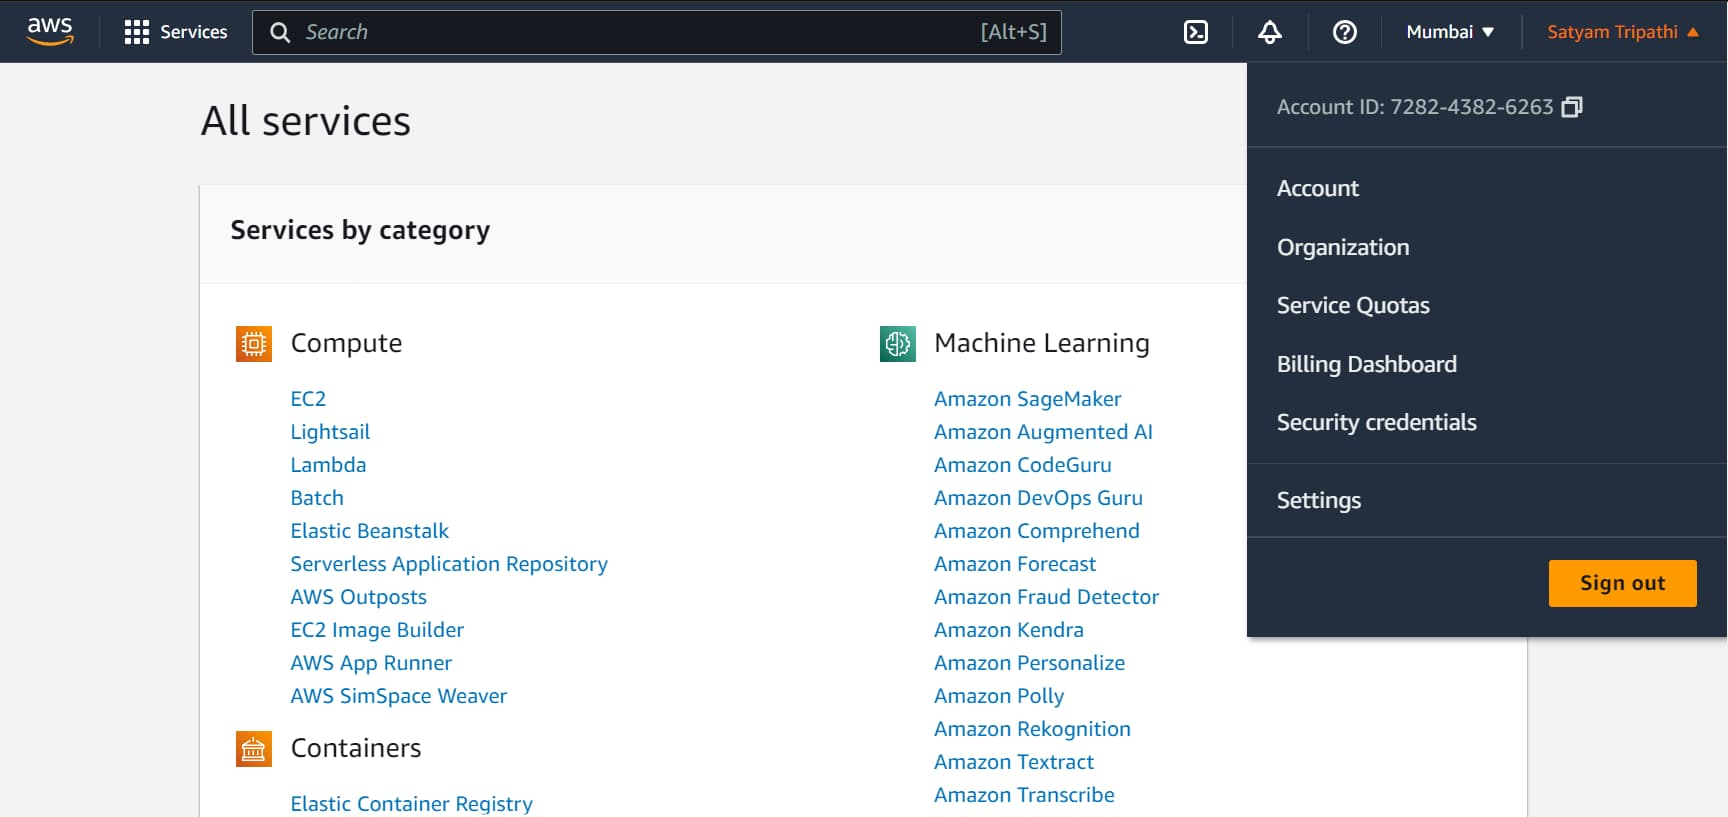
Every time you log in, you can check your bill by visiting the Billing dashboard.

Note: Mumbai is the nearest region to me where I will be creating my server. So choose the nearest region to you accordingly.
To view your billing dashboard:
- Click on your name at the top right of the page.
- Select Billing Dashboard from the menu.
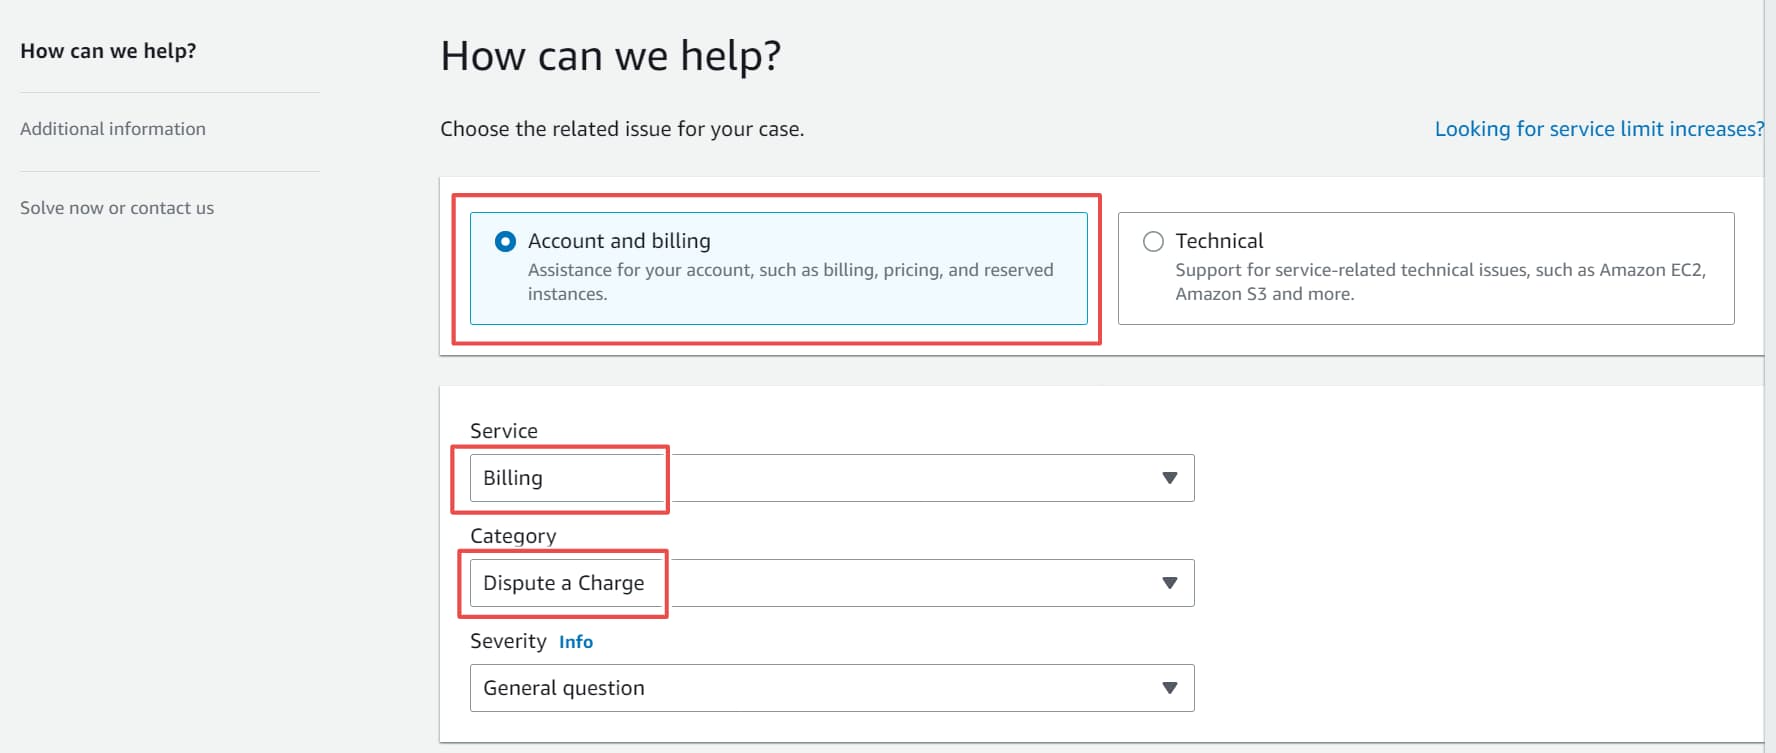
If you see any charges on your billing dashboard, you can create a case. To do this, navigate to the AWS Support Center and create a case.

Choose Account and Billing, then under Service, choose Billing, and under Category, choose Dispute a charge.
Note that you should always work in the same region. When you work in the same region, your data does not need to travel as far, which can reduce latency and improve performance.
How to Launch the Instance
To help you learn and practice DevOps, we will create a Linux machine in AWS. Linux is the operating system of choice for many DevOps practitioners and is widely used in production environments.
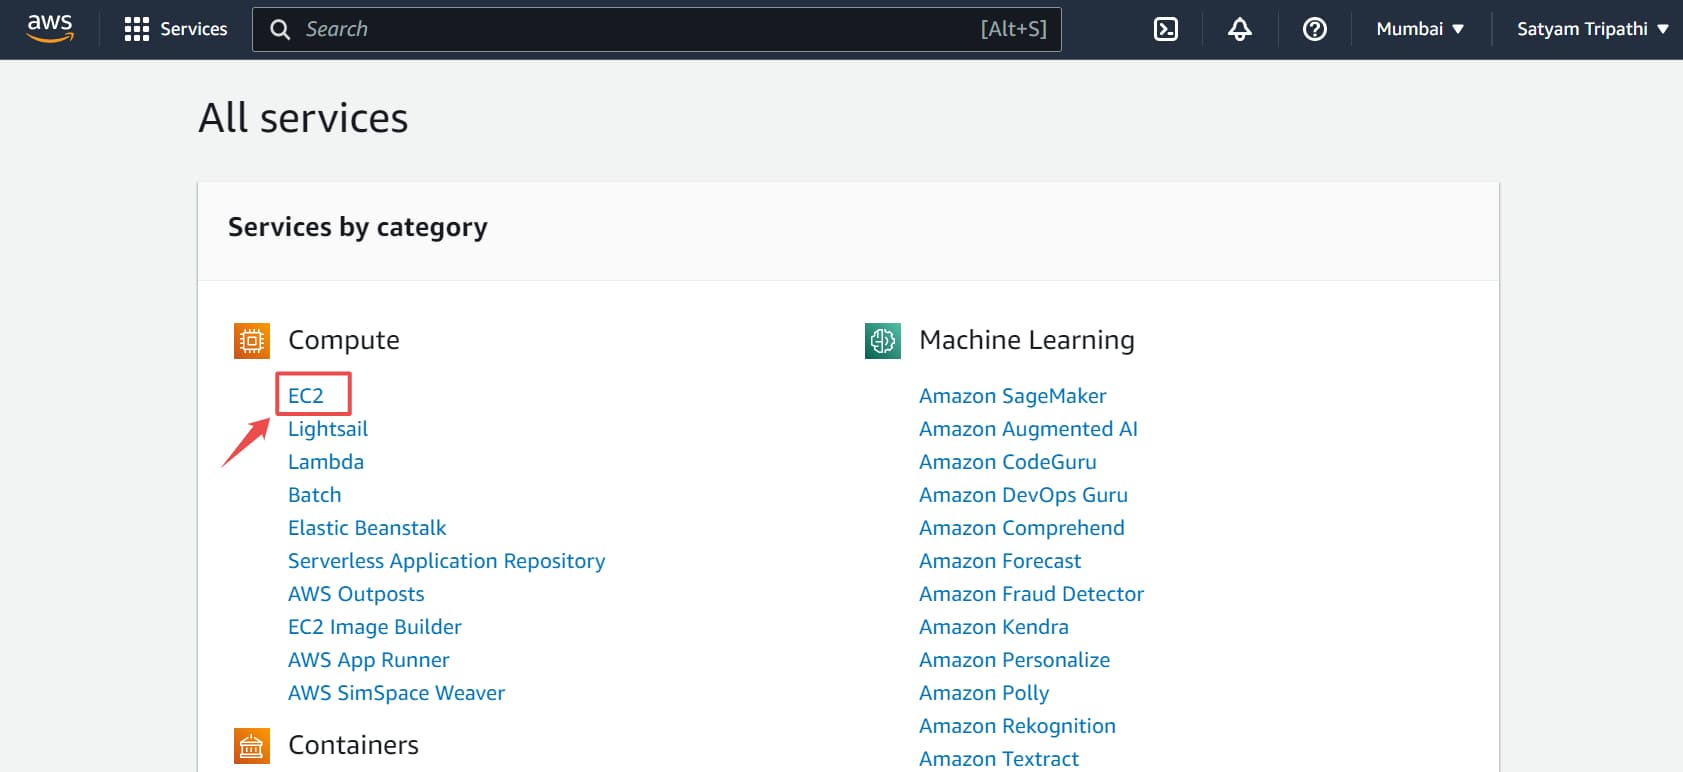
To create a Linux machine from scratch, click on the EC2 service in the AWS Management Console.
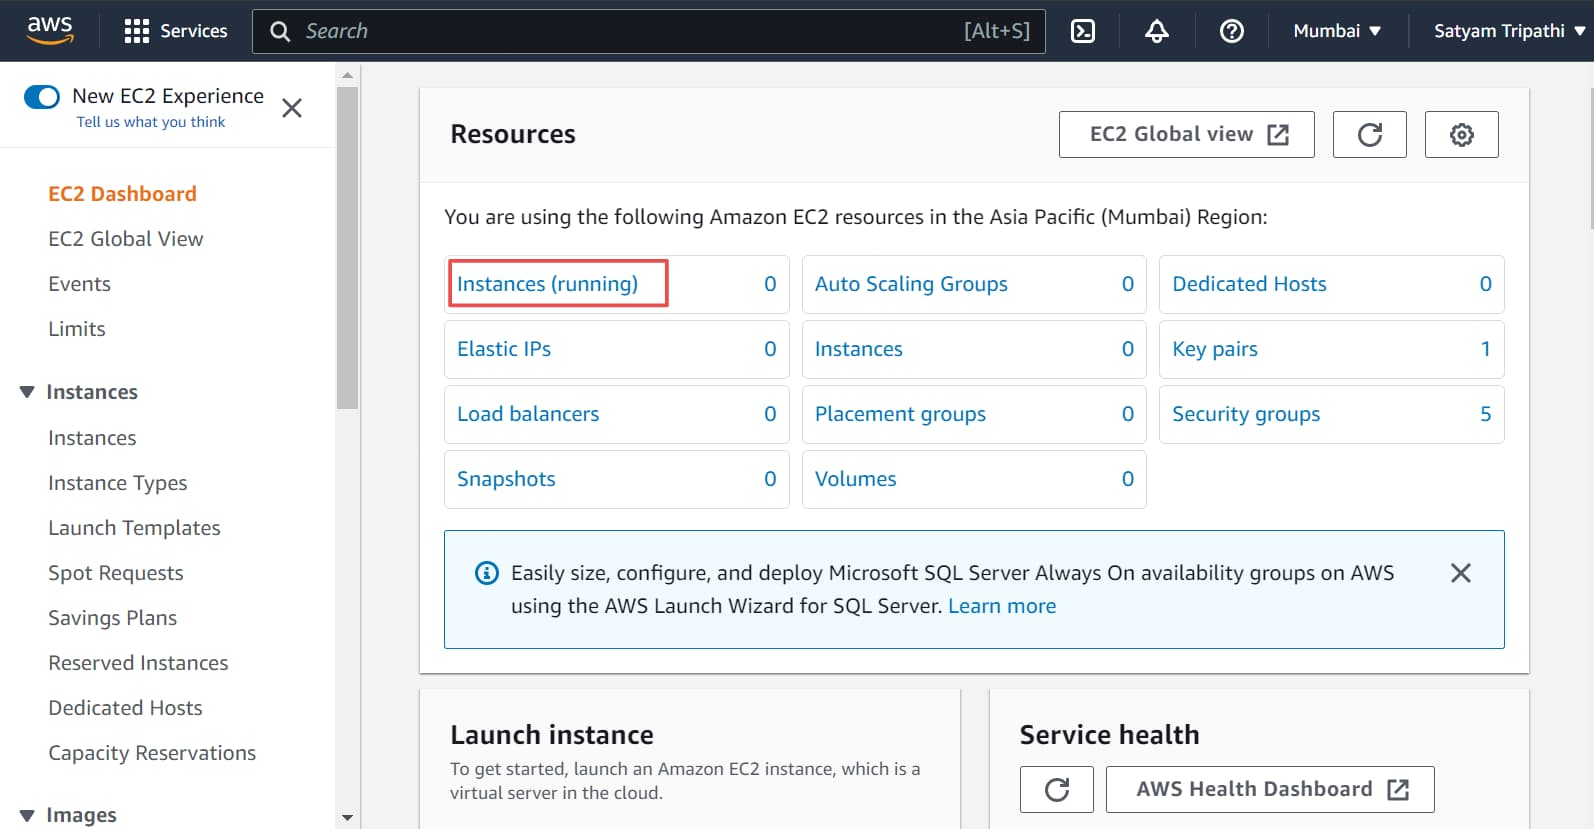
Click on the Instances tab. Currently, there are 0 running instances, which means that we do not have any instances running at this time.
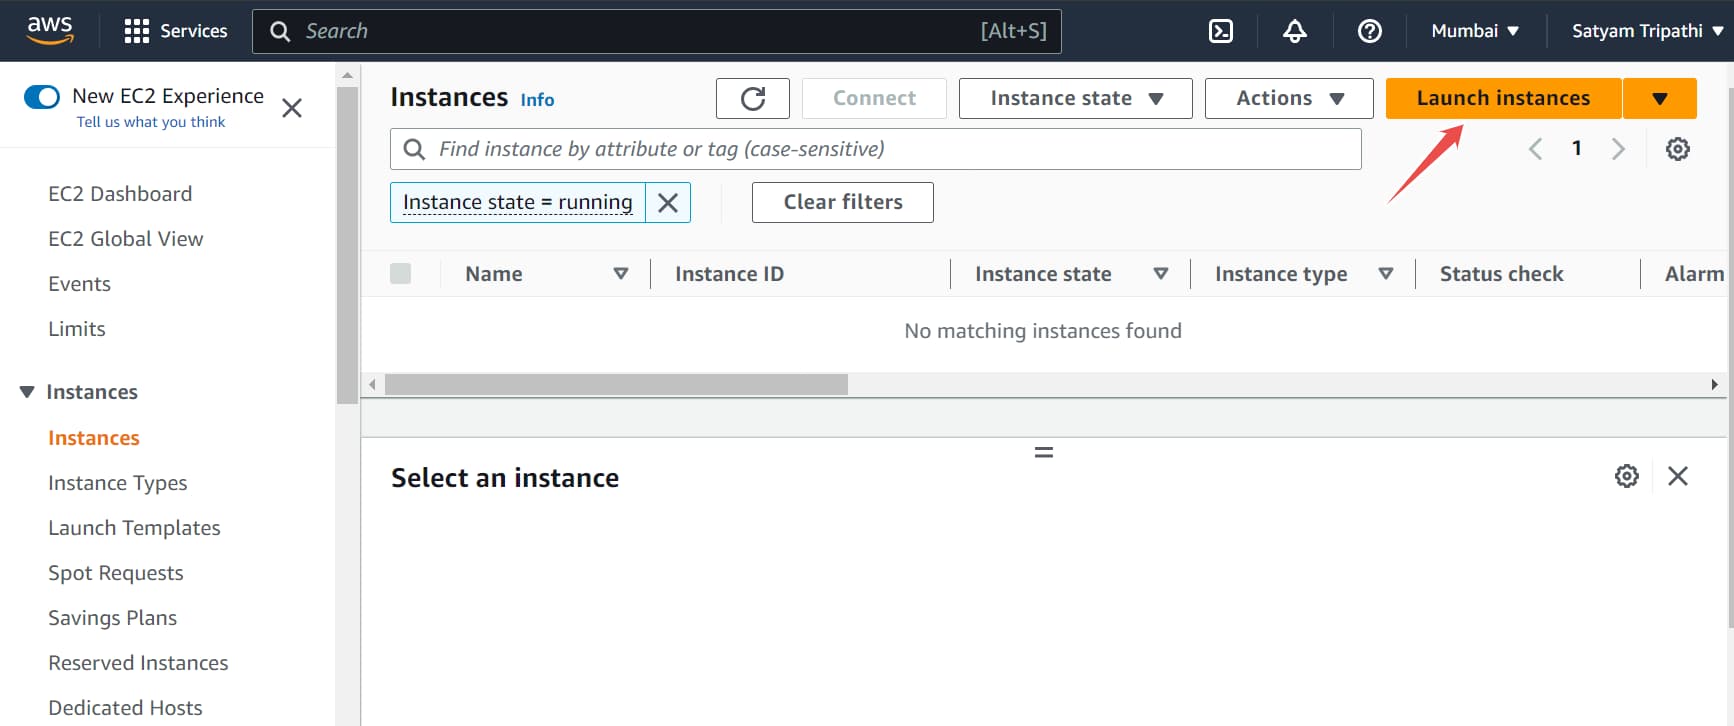
Click on the Launch Instances button to start an EC2 instance.
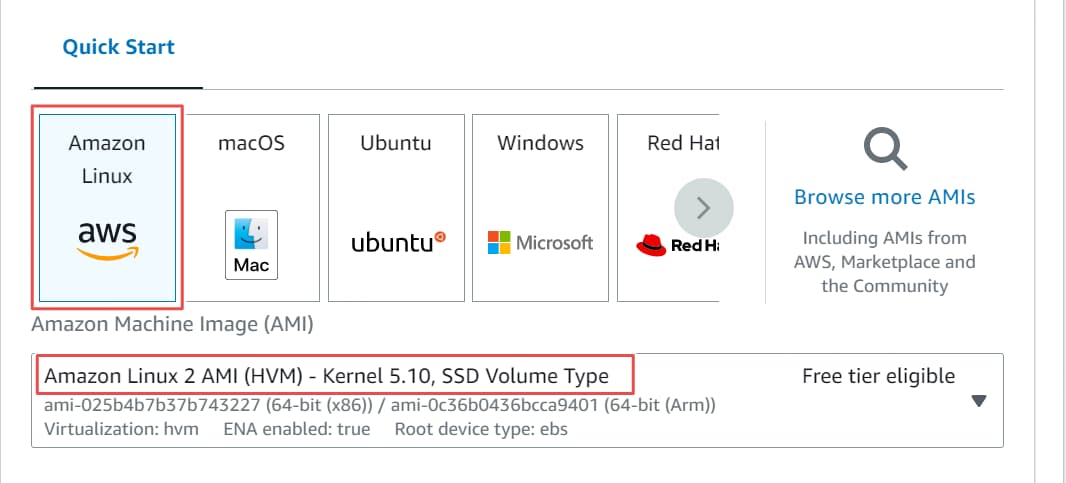
You can choose the machine below because it is free tier eligible.
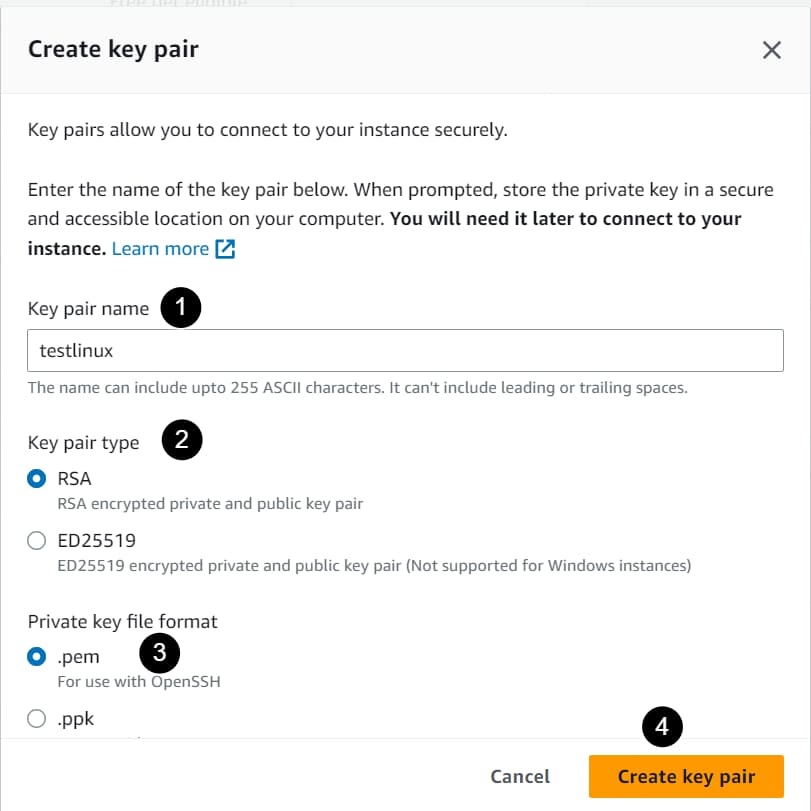
Now, you have to create a new key pair. This key pair will be used when we run the Linux machine using PuTTY. Here we will be using PuTTY to connect to a remote Linux machine.
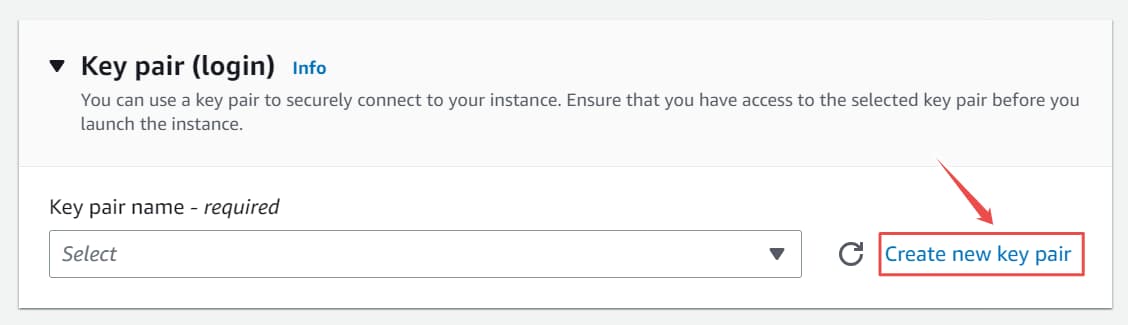
To create a new key pair, first give the key pair a name. The key pair type should be RSA, and the private key file format should be .pem. Later, you can use Puttygen to convert the PEM format to PPK format. Then, you can use PuTTY to open the .ppk file to run a Linux machine.
PPK (Putty Private Key) and PEM (Privacy Enhanced Mail) are two file formats used for storing private keys used in SSH authentication.
Note that Putty only supports PPK format, and we are going to use Putty. Therefore, you will need to convert your SSH key to PPK format first.
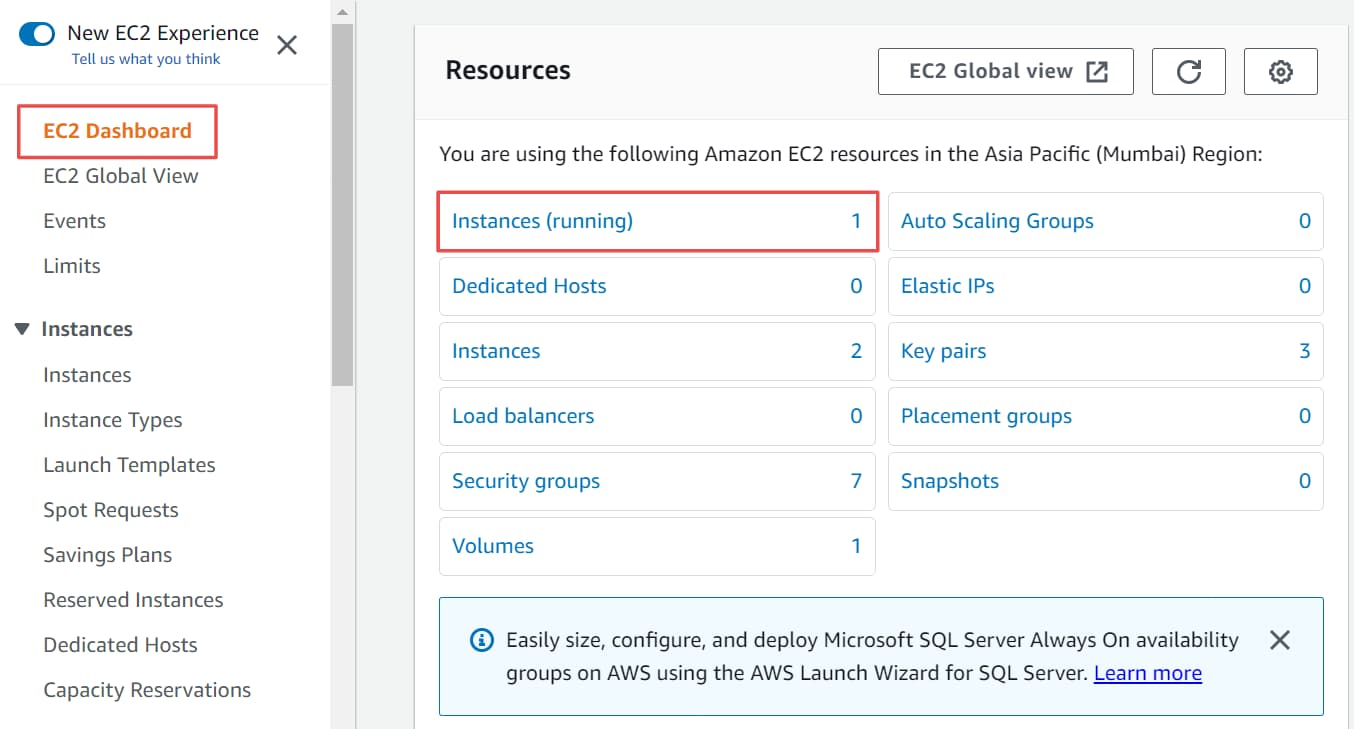
If you go back to the EC2 Dashboard, you will see that there is 1 instance running. If you click on this instance, you will see all the information, such as the public IPv4 address and instance ID.
See, 2/2 checks passed means that the instance has been launched successfully and is running. You can copy the public IPv4 address, because you'll use it when creating the Linux machine using PuTTY.
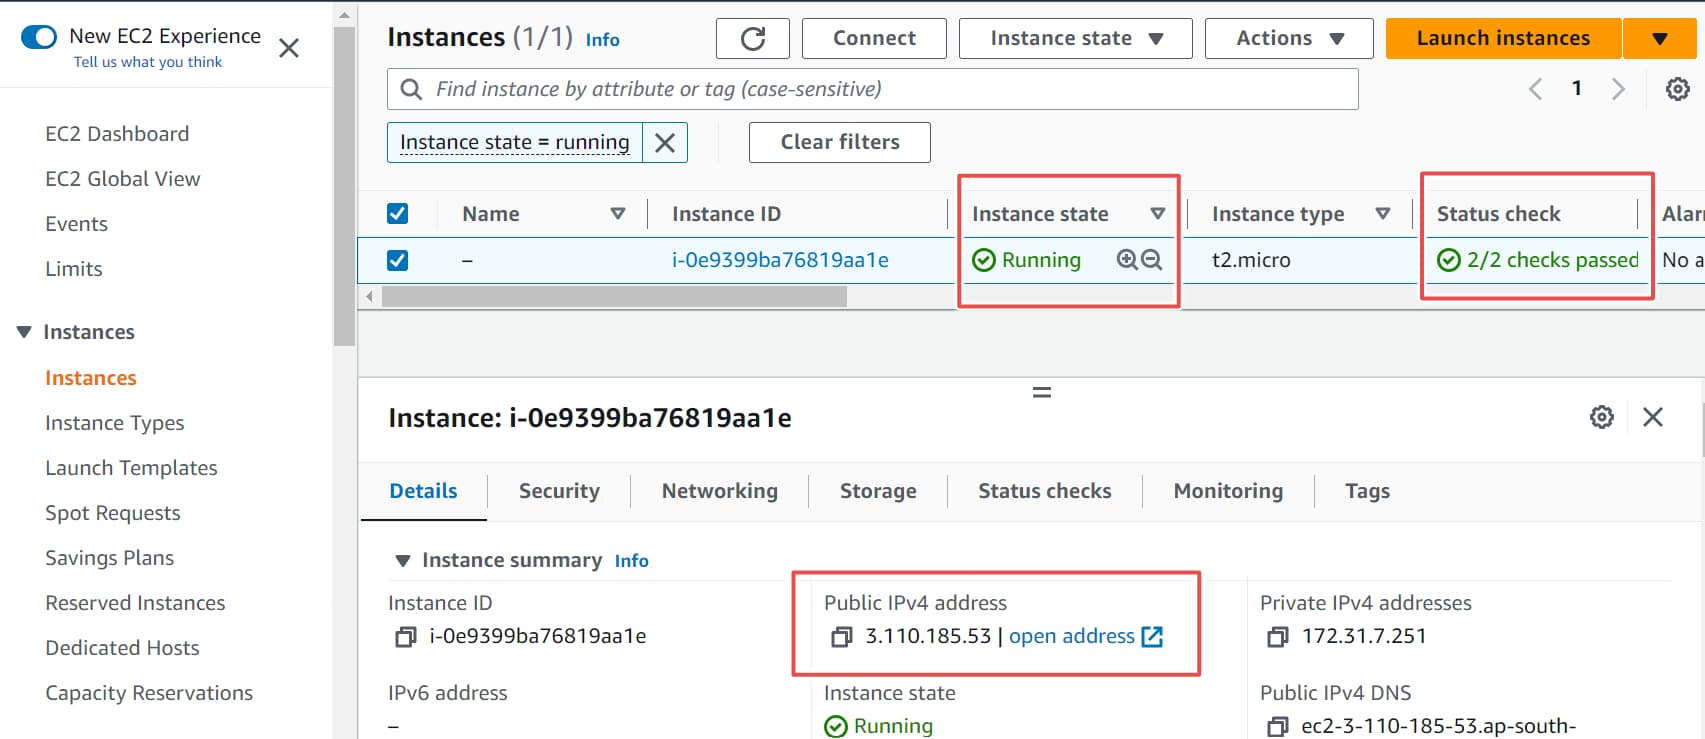
Yay! The instance has been launched successfully.
How to Create the Linux Machine
We have successfully launched the instance in the AWS console. Now, we will download PuTTY and PuTTYgen to run the Linux machine.
Here's the download link: https://www.puttygen.com/
Download Putty and Puttygen
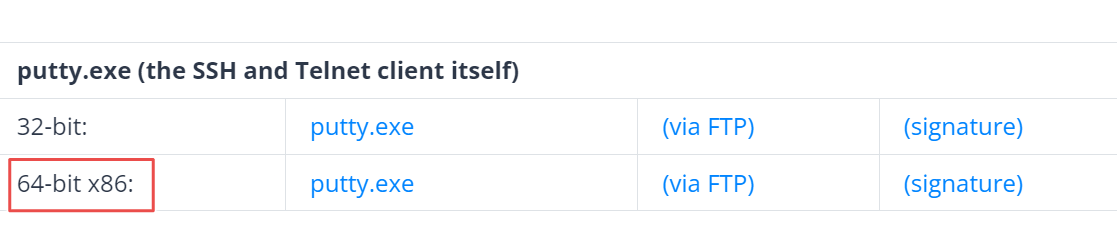
First, download PuTTY and PuTTYgen. For Windows, you can download the following versions from the following link:
Download Link: https://www.puttygen.com/download-putty

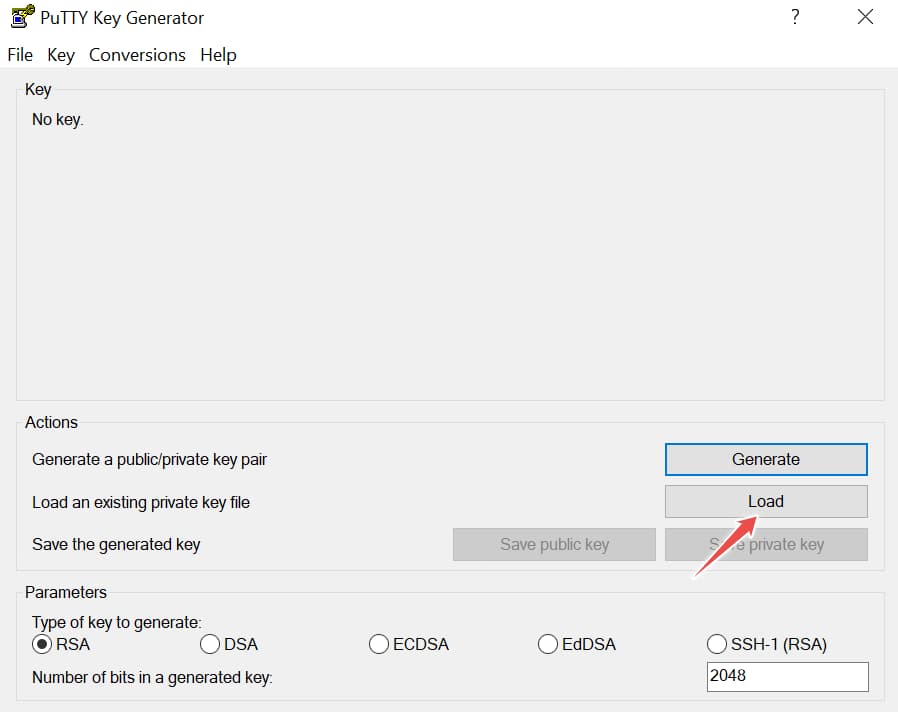
How to set up Puttygen
Open PuTTYgen and click the Load button.
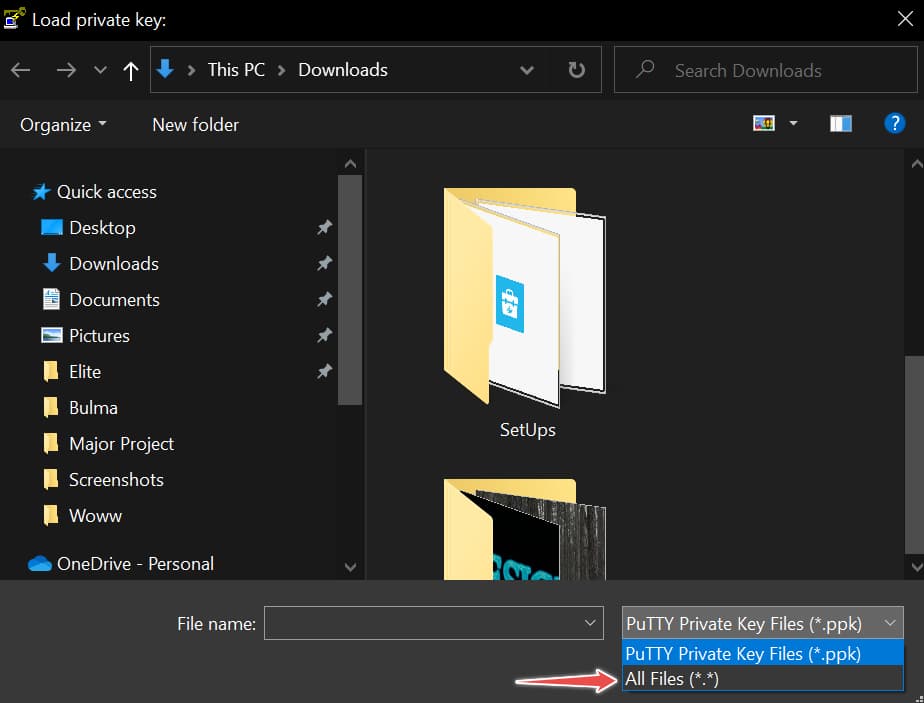
Now, select the "All files" option so that you can see the .pem file in your system.
Now, save the private key.
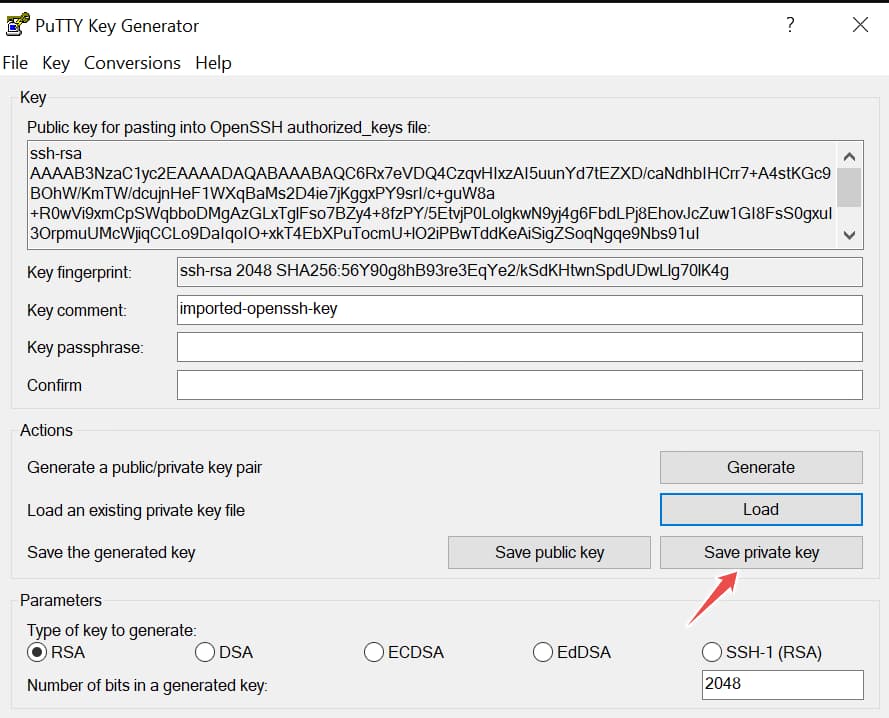
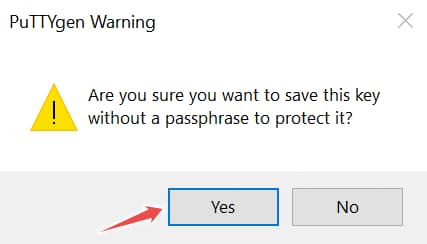
When you click the Save private key button, you will see a pop-up window. Click the Yes button.
Now, give your private key a name and save it in the .ppk format. Note that you'll use this file when we set up PuTTY.

How to set up Putty
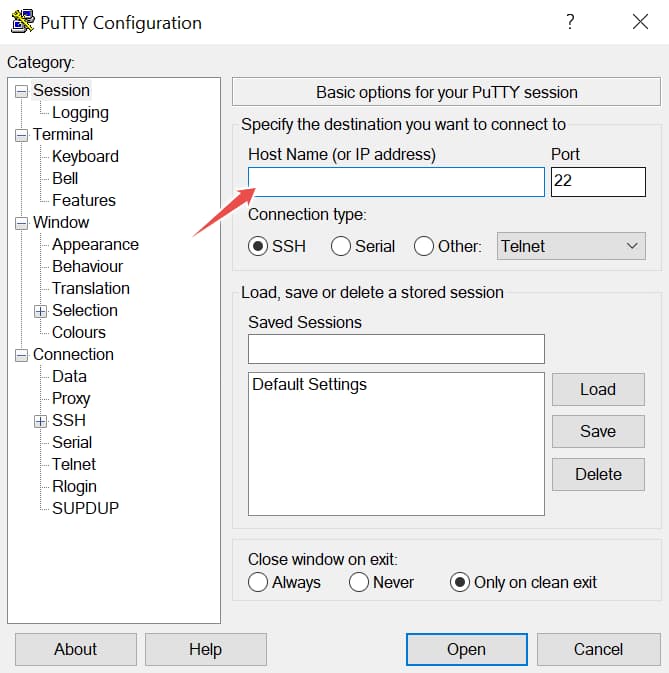
Copy the public IPv4 address from AWS and paste it in the hostname field in the PuTTY configuration.
Click the + button in the SSH section, then click the + button in the Auth section.
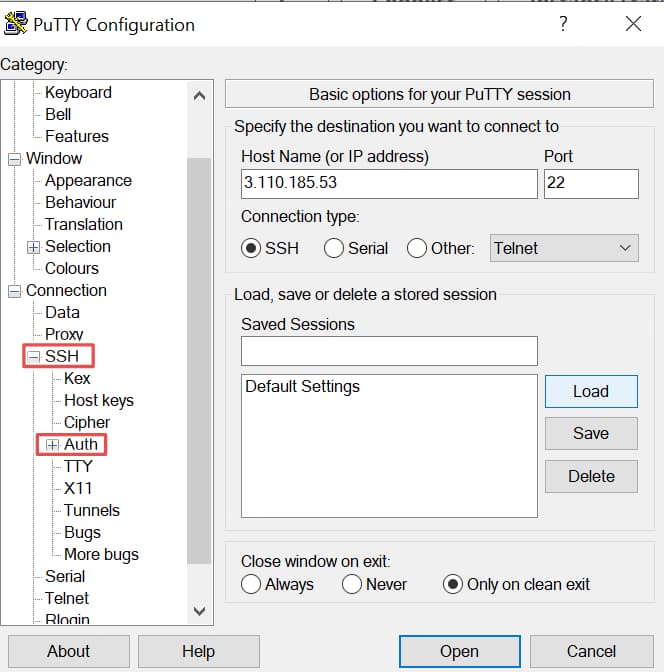
In the Auth section, click on Credentials.

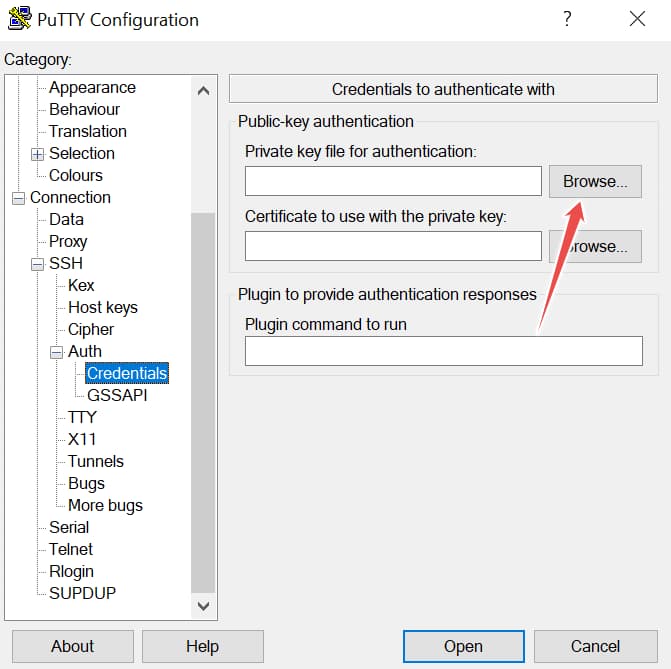
When you click on Credentials, you will see the Browse option. Click on it and browse to the .ppk file that you saved earlier.
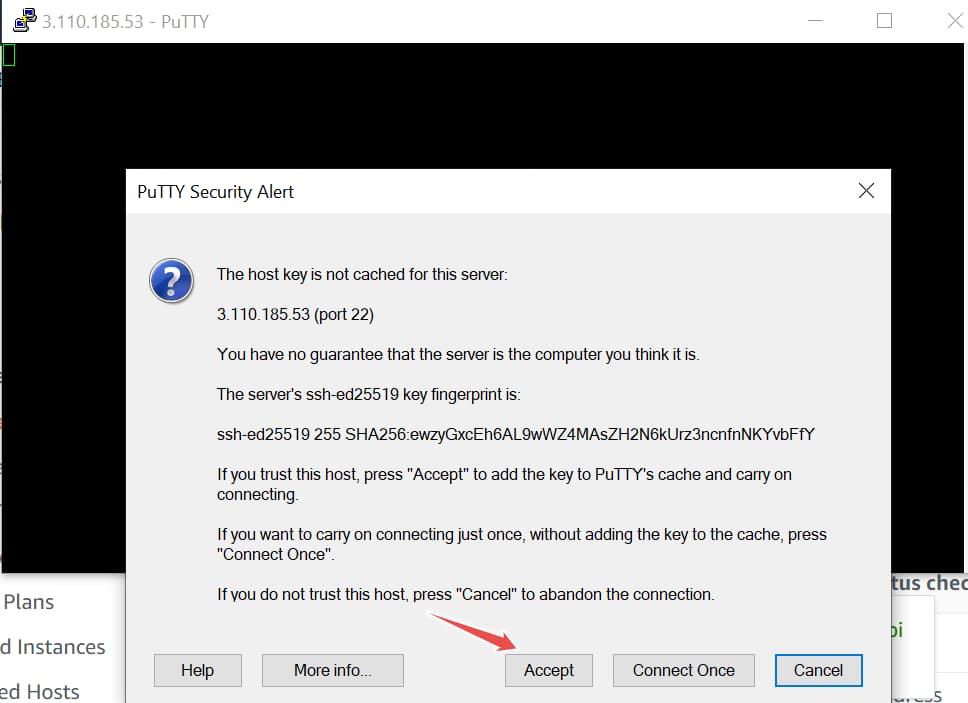
When you hit Accept, you will see a new black window open on your system. This is where you can run all of your Linux commands.
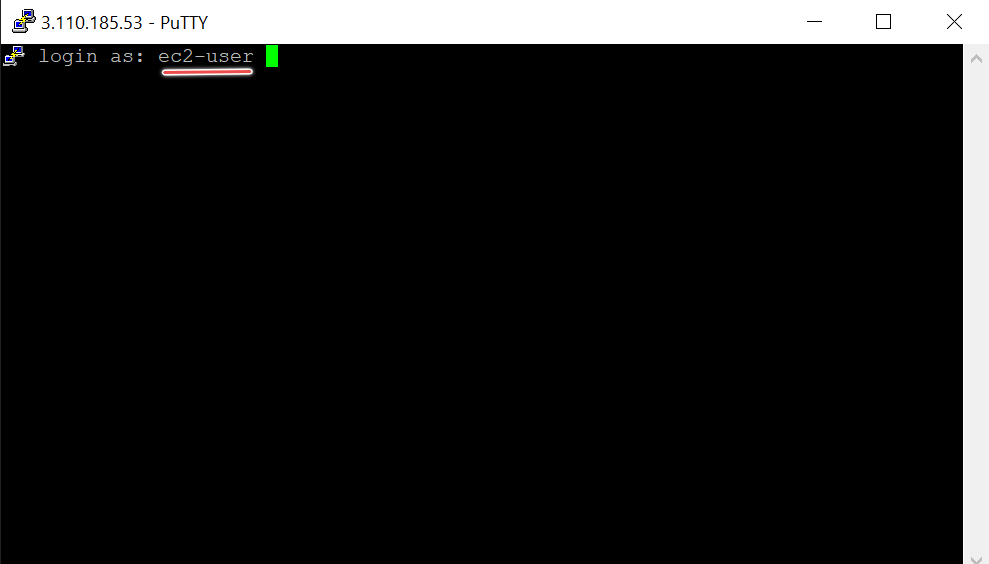
Now you need to log in as ec2-user. For Amazon Linux 2 or the Amazon Linux AMI, the username is ec2-user.
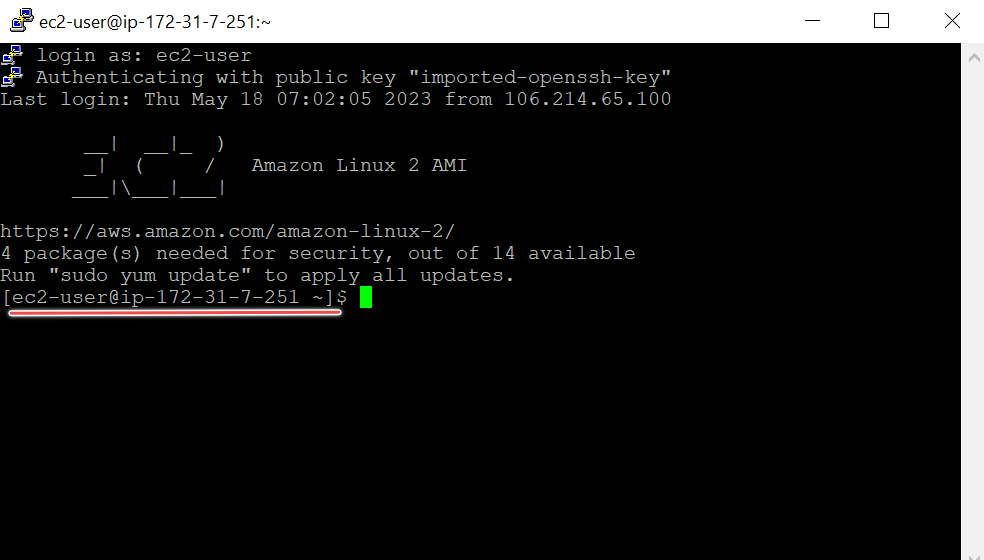
See, you have logged in as the ec2-user.
To run commands as the root user, you can switch users by using the sudo su command. The root user has full permissions on the system. It is important to use this command with caution, because any changes made as root user can have a significant impact on the system.
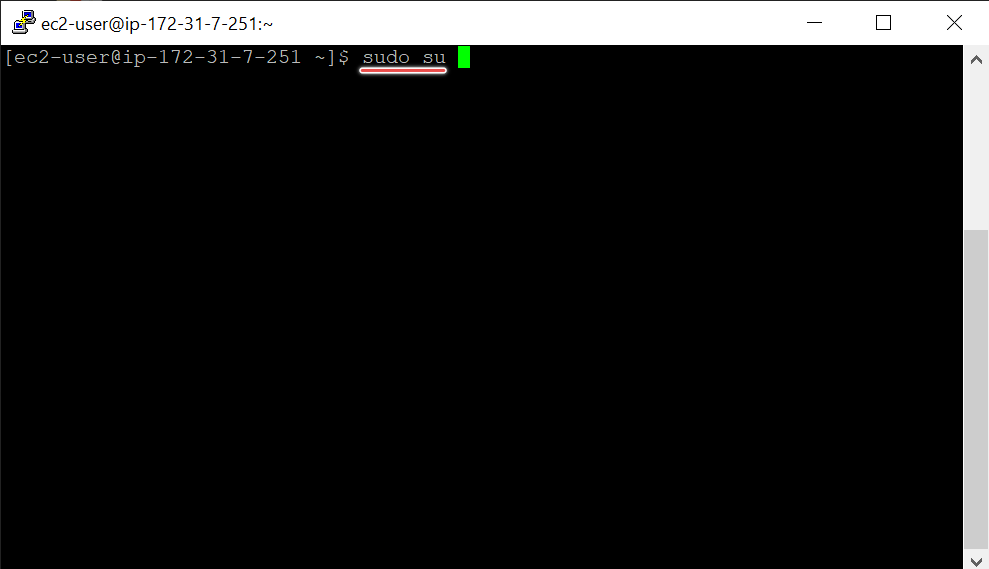
The prompt has changed from $ to #. This shows that you are now a root user and you can run any command without any additional privileges.
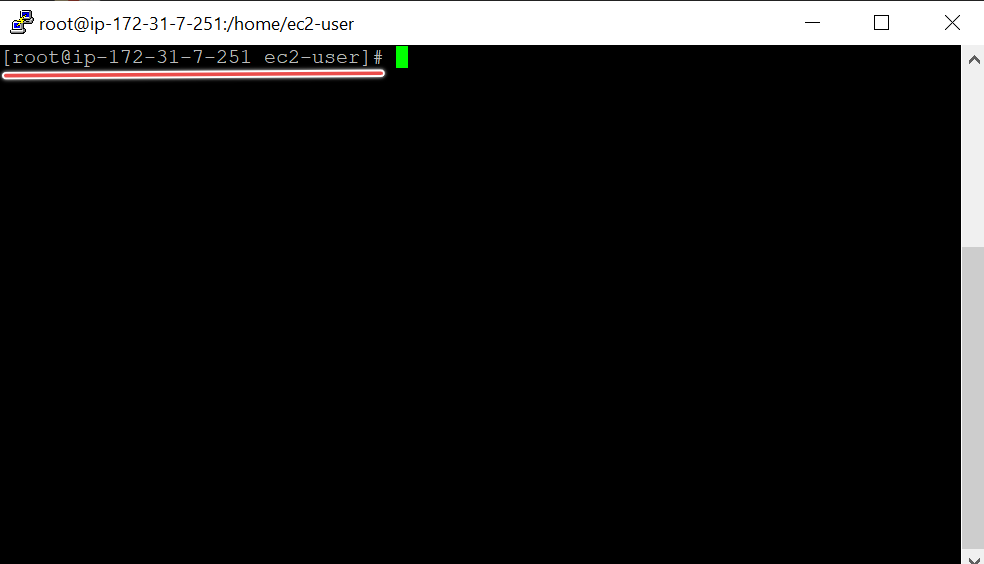
Congratulations! Your Linux machine is now ready to use.
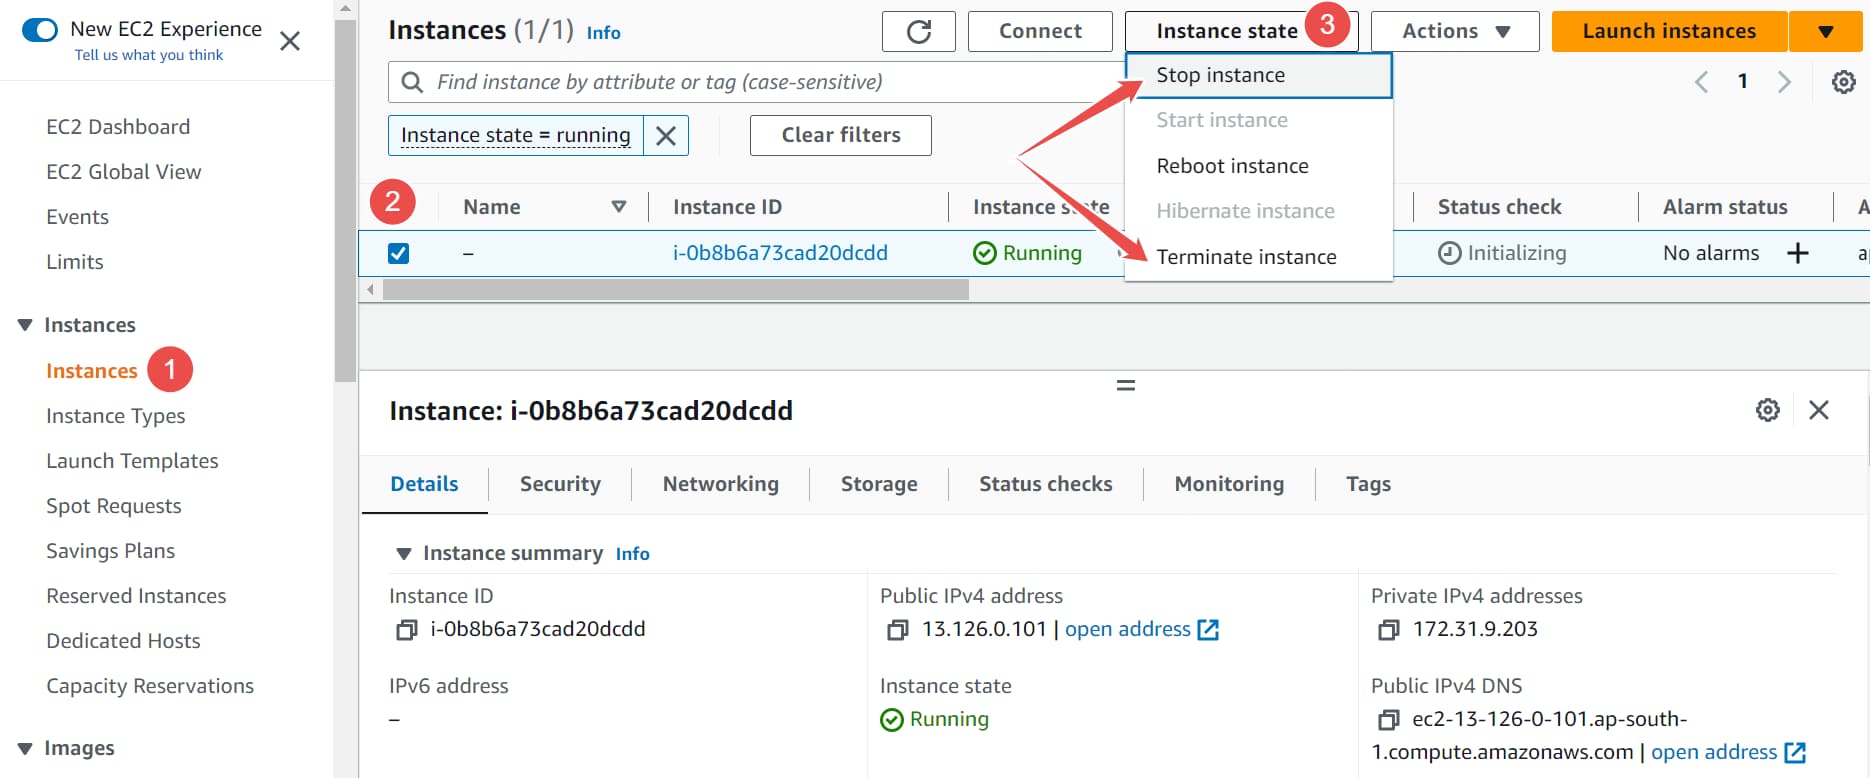
How to Terminate or Stop an Instance
Terminating an instance means deleting the instance and all of its associated data. You cannot recover a terminated instance.
Stopping an instance means moving the instance to the stopped state, where it can be restarted later.
To terminate or stop an instance on AWS:
- Go to the Amazon EC2 console.
- In the navigation pane, choose Instances.
- Select the instance that you want to terminate.
- Choose Instance State, then Terminate or Stop Instance.
- In the confirmation dialog box, choose Terminate or Stop.
Wrapping Up
In this article, we looked at how create an AWS instance and use PuTTY and PuTTYgen to launch a remote Linux machine. In future articles, I will talk more about Linux commands in more detail.
You can follow me on Twitter: @triposat.