

In Linux, process automation relies heavily on shell scripting. This involves creating a file containing a series of commands that can be executed together.
In this article, we'll start with the basics of bash scripting which includes variables, commands, inputs/ outputs, and debugging. We'll also see examples of each along the way.
Let's get started. 🚀
Table of Contents
- Pre-requisites
- Introduction
- Definition of Bash scripting
- Advantages of Bash scripting
- Overview of Bash shell and command line interface
- How to Get Started with Bash Scripting
- How to Run Bash Commands from the Command Line
- How to Create and Execute Bash Scripts
- Variables and data types in Bash
- Input and output in Bash scripts
- Basic Bash commands (echo, read, etc.)
- While loop
- For loop
- Case statements
- How to Schedule Scripts using cron
- How to Debug and Troubleshoot Bash Scripts
- Conclusion
- Resources for learning more about Bash scripting
Pre-requisites
To follow along with this tutorial, you should have the following accesses:
- A running version of Linux with access to the command line.
If you do not have Linux installed or you are just starting out, you can easily access the Linux command line through Replit. Replit is a browser-based IDE where you can access the bash shell in a few minutes.
You can also install Linux on top of your Windows system using WSL (Windows Subsystem for Linux). Here is a tutorial for that.
Introduction
Definition of Bash scripting
A bash script is a file containing a sequence of commands that are executed by the bash program line by line. It allows you to perform a series of actions, such as navigating to a specific directory, creating a folder, and launching a process using the command line.
By saving these commands in a script, you can repeat the same sequence of steps multiple times and execute them by running the script.
Advantages of Bash scripting
Bash scripting is a powerful and versatile tool for automating system administration tasks, managing system resources, and performing other routine tasks in Unix/Linux systems. Some advantages of shell scripting are:
- Automation: Shell scripts allow you to automate repetitive tasks and processes, saving time and reducing the risk of errors that can occur with manual execution.
- Portability: Shell scripts can be run on various platforms and operating systems, including Unix, Linux, macOS, and even Windows through the use of emulators or virtual machines.
- Flexibility: Shell scripts are highly customizable and can be easily modified to suit specific requirements. They can also be combined with other programming languages or utilities to create more powerful scripts.
- Accessibility: Shell scripts are easy to write and don't require any special tools or software. They can be edited using any text editor, and most operating systems have a built-in shell interpreter.
- Integration: Shell scripts can be integrated with other tools and applications, such as databases, web servers, and cloud services, allowing for more complex automation and system management tasks.
- Debugging: Shell scripts are easy to debug, and most shells have built-in debugging and error-reporting tools that can help identify and fix issues quickly.
Overview of Bash shell and command line interface
The terms "shell" and "bash" are used interchangeably. But there is a subtle difference between the two.
The term "shell" refers to a program that provides a command-line interface for interacting with an operating system. Bash (Bourne-Again SHell) is one of the most commonly used Unix/Linux shells and is the default shell in many Linux distributions.
A shell or command-line interface looks like this:
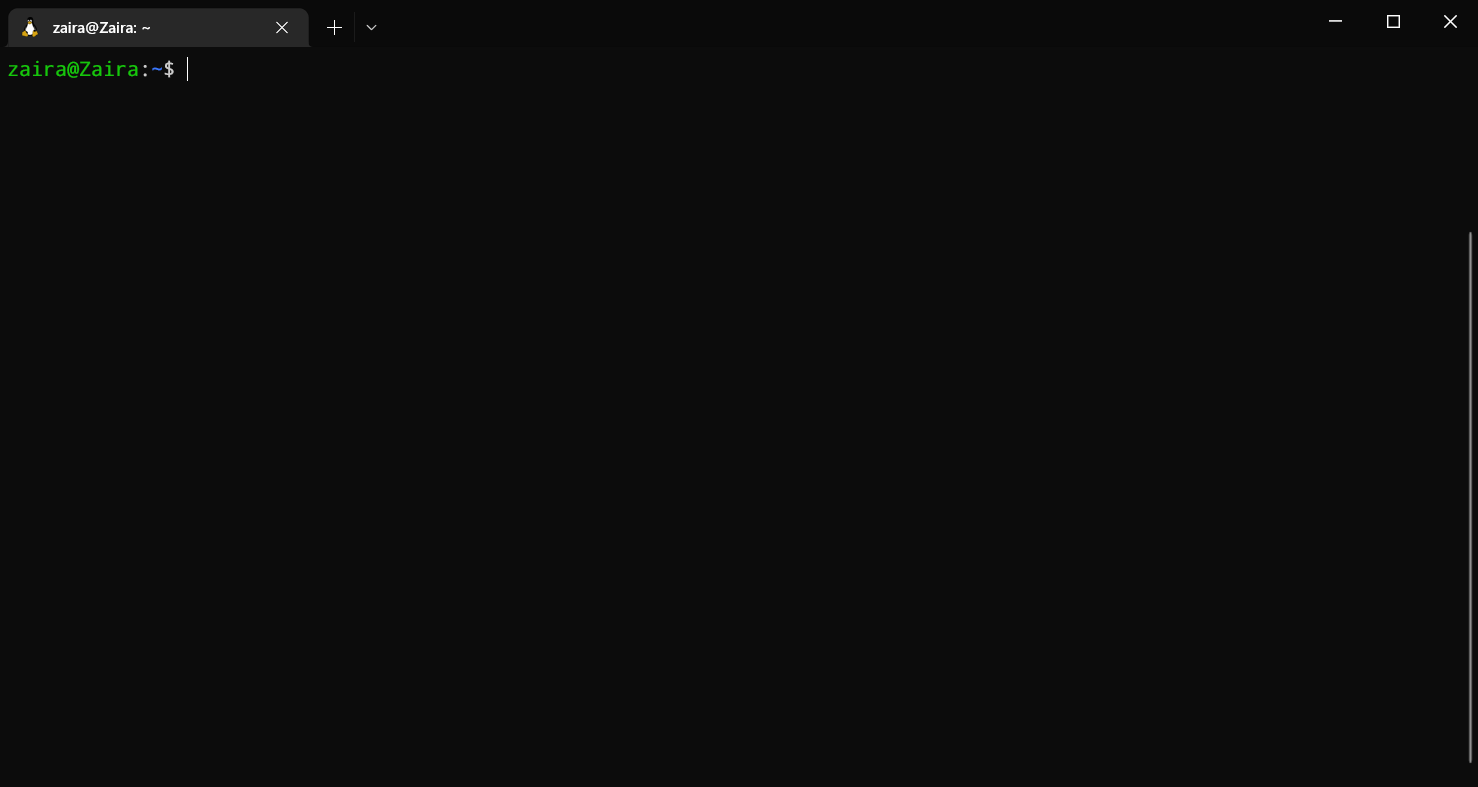 The shell accepts commands from the user and displays the output
In the above output, zaira@Zaira is the shell prompt. When a shell is used interactively, it displays a $ when it is waiting for a command from the user.
If the shell is running as root (a user with administrative rights), the prompt is changed to #. The superuser shell prompt looks like this:
[root@host ~]#
Although Bash is a type of shell, there are other shells available as well, such as Korn shell (ksh), C shell (csh), and Z shell (zsh). Each shell has its own syntax and set of features, but they all share the common purpose of providing a command-line interface for interacting with the operating system.
You can determine your shell type using the ps command:
ps
Here is the output for me:
 Checking the shell type. I'm using bash shell
In summary, while "shell" is a broad term that refers to any program that provides a command-line interface, "Bash" is a specific type of shell that is widely used in Unix/Linux systems.
Note: In this tutorial, we will be using the "bash" shell.
How to Get Started with Bash Scripting
Running Bash commands from the command line
As mentioned earlier, the shell prompt looks something like this:
[username@host ~]$
You can enter any command after the $ sign and see the output on the terminal.
Generally, commands follow this syntax:
command [OPTIONS] arguments
Let's discuss a few basic bash commands and see their outputs. Make sure to follow along :)
date: Displays the current date
zaira@Zaira:~/shell-tutorial$ date
Tue Mar 14 13:08:57 PKT 2023
pwd: Displays the present working directory.
zaira@Zaira:~/shell-tutorial$ pwd
/home/zaira/shell-tutorial
ls: Lists the contents of the current directory.
zaira@Zaira:~/shell-tutorial$ ls
check_plaindrome.sh  count_odd.sh  env  log  temp
echo: Prints a string of text, or value of a variable to the terminal.
zaira@Zaira:~/shell-tutorial$ echo "Hello bash"
Hello bash
You can always refer to a commands manual with the man command.
For example, the manual for ls looks something like this:
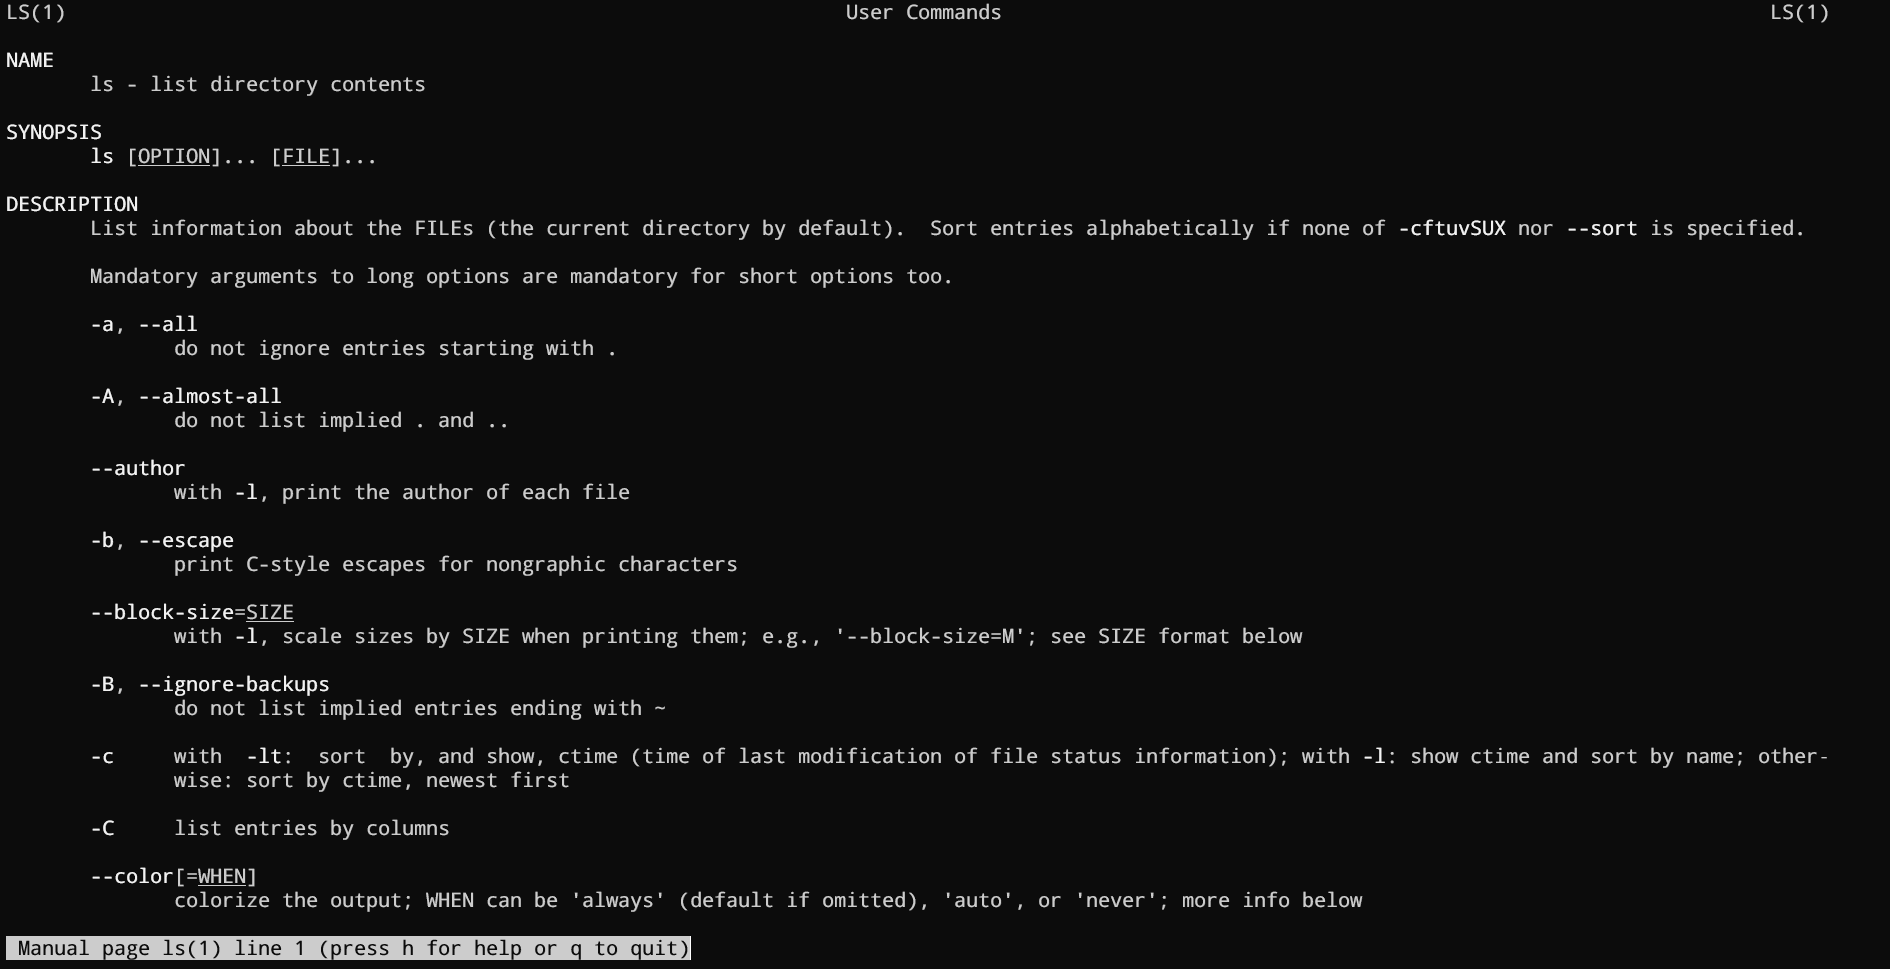 You can see options for a command in detail using
 man
How to Create and Execute Bash scripts
Script naming conventions
By naming convention, bash scripts end with .sh. However, bash scripts can run perfectly fine without the sh extension.
Adding the Shebang
Bash scripts start with a shebang. Shebang is a combination of bash # and bang ! followed by the bash shell path. This is the first line of the script. Shebang tells the shell to execute it via bash shell. Shebang is simply an absolute path to the bash interpreter.
Below is an example of the shebang statement.
#!/bin/bash
You can find your bash shell path (which may vary from the above) using the command:
which bash
Creating our first bash script
Our first script prompts the user to enter a path. In return, its contents will be listed.
Create a file named run_all.sh using the vi command. You can use any editor of your choice.
vi run_all.sh
Add the following commands in your file and save it:
#!/bin/bash
echo "Today is " `date`

echo -e "\nenter the path to directory"
read the_path

echo -e "\n you path has the following files and folders: "
ls $the_path
Let's take a deeper look at the script line by line. I am displaying the same script again, but this time with line numbers.
  1 #!/bin/bash
  2 echo "Today is " `date`
  3
  4 echo -e "\nenter the path to directory"
  5 read the_path
  6
  7 echo -e "\n you path has the following files and folders: "
  8 ls $the_path
- Line #1: The shebang (
#!/bin/bash) points toward the bash shell path. - Line #2: The
echocommand is displaying the current date and time on the terminal. Note that thedateis in backticks. - Line #4: We want the user to enter a valid path.
- Line #5: The
readcommand reads the input and stores it in the variablethe_path. - line #8: The
lscommand takes the variable with the stored path and displays the current files and folders.
Executing the bash script
To make the script executable, assign execution rights to your user using this command:
chmod u+x run_all.sh
Here,
chmodmodifies the ownership of a file for the current user :u.+xadds the execution rights to the current user. This means that the user who is the owner can now run the script.run_all.shis the file we wish to run.
You can run the script using any of the mentioned methods:
sh run_all.shbash run_all.sh./run_all.sh
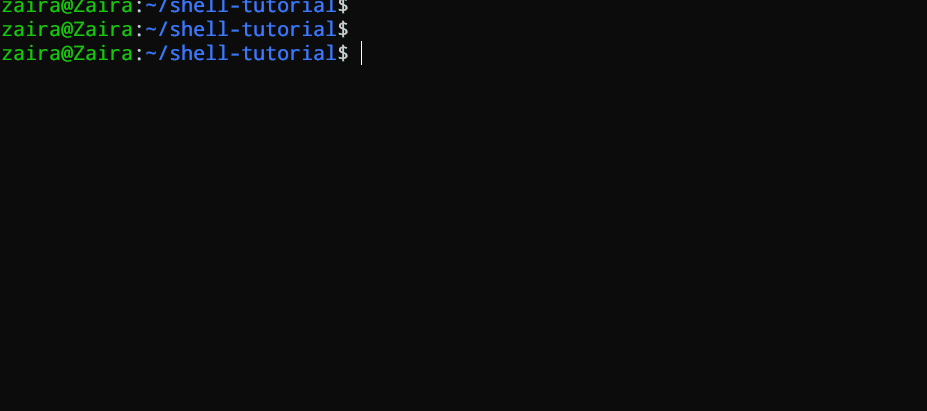
Let's see it running in action 🚀
Bash Scripting Basics
Comments in bash scripting
Comments start with a # in bash scripting. This means that any line that begins with a # is a comment and will be ignored by the interpreter.
Comments are very helpful in documenting the code, and it is a good practice to add them to help others understand the code.
These are examples of comments:
# This is an example comment
# Both of these lines will be ignored by the interpreter
Variables and data types in Bash
Variables let you store data. You can use variables to read, access, and manipulate data throughout your script.
There are no data types in Bash. In Bash, a variable is capable of storing numeric values, individual characters, or strings of characters.
In Bash, you can use and set the variable values in the following ways:
- Assign the value directly:
country=Pakistan
- Assign the value based on the output obtained from a program or command, using command substitution. Note that
$is required to access an existing variable's value.
same_country=$country
To access the variable value, append $ to the variable name.
zaira@Zaira:~$ country=Pakistan
zaira@Zaira:~$ echo $country
Pakistan
zaira@Zaira:~$ new_country=$country
zaira@Zaira:~$ echo $new_country
Pakistan
Variable naming conventions
In Bash scripting, the following are the variable naming conventions:
- Variable names should start with a letter or an underscore (
_). - Variable names can contain letters, numbers, and underscores (
_). - Variable names are case-sensitive.
- Variable names should not contain spaces or special characters.
- Use descriptive names that reflect the purpose of the variable.
- Avoid using reserved keywords, such as
if,then,else,fi, and so on as variable names.
Here are some examples of valid variable names in Bash:
name
count
_var
myVar
MY_VAR
And here are some examples of invalid variable names:
2ndvar (variable name starts with a number)
my var (variable name contains a space)
my-var (variable name contains a hyphen)
Following these naming conventions helps make Bash scripts more readable and easier to maintain.
Input and output in Bash scripts
Gathering input
In this section, we'll discuss some methods to provide input to our scripts.
- Reading the user input and storing it in a variable
We can read the user input using the read command.
#!/bin/bash

echo "What's your name?"

read entered_name

echo -e "\nWelcome to bash tutorial" $entered_name
- Reading from a file
This code reads each line from a file named input.txt and prints it to the terminal. We'll study while loops later in this article.
while read line
do
  echo $line
done < input.txt
- Command line arguments
In a bash script or function, $1 denotes the initial argument passed, $2 denotes the second argument passed, and so forth.
This script takes a name as a command-line argument and prints a personalized greeting.
echo "Hello, $1!"
We have supplied Zaira as our argument to the script.
#!/bin/bash
echo "Hello, $1!"
Output:

Displaying output
Here we'll discuss some methods to receive output from the scripts.
- Printing to the terminal:
echo "Hello, World!"
This prints the text "Hello, World!" to the terminal.
- Writing to a file:
echo "This is some text." > output.txt
This writes the text "This is some text." to a file named output.txt. Note that the >operator overwrites a file if it already has some content.
- Appending to a file:
echo "More text." >> output.txt
This appends the text "More text." to the end of the file output.txt.
- Redirecting output:
ls > files.txt
This lists the files in the current directory and writes the output to a file named files.txt. You can redirect output of any command to a file this way.
Basic Bash commands (echo, read, etc.)
Here is a list of some of the most commonly used bash commands:
cd: Change the directory to a different location.ls: List the contents of the current directory.mkdir: Create a new directory.touch: Create a new file.rm: Remove a file or directory.cp: Copy a file or directory.mv: Move or rename a file or directory.echo: Print text to the terminal.cat: Concatenate and print the contents of a file.grep: Search for a pattern in a file.chmod: Change the permissions of a file or directory.sudo: Run a command with administrative privileges.df: Display the amount of disk space available.history: Show a list of previously executed commands.ps: Display information about running processes.
Conditional statements (if/else)
Expressions that produce a boolean result, either true or false, are called conditions. There are several ways to evaluate conditions, including if, if-else, if-elif-else, and nested conditionals.
Syntax:
if [[ condition ]];
then
    statement
elif [[ condition ]]; then
    statement
else
    do this by default
fi
We can use logical operators such as AND -a and OR -o to make comparisons that have more significance.
if [ $a -gt 60 -a $b -lt 100 ]
Let's see an example of a Bash script that uses if, if-else, and if-elif-else statements to determine if a user-inputted number is positive, negative, or zero:
#!/bin/bash

echo "Please enter a number: "
read num

if [ $num -gt 0 ]; then
  echo "$num is positive"
elif [ $num -lt 0 ]; then
  echo "$num is negative"
else
  echo "$num is zero"
fi
The script first prompts the user to enter a number. Then, it uses an if statement to check if the number is greater than 0. If it is, the script outputs that the number is positive. If the number is not greater than 0, the script moves on to the next statement, which is an if-elif statement. Here, the script checks if the number is less than 0. If it is, the script outputs that the number is negative. Finally, if the number is neither greater than 0 nor less than 0, the script uses an else statement to output that the number is zero.
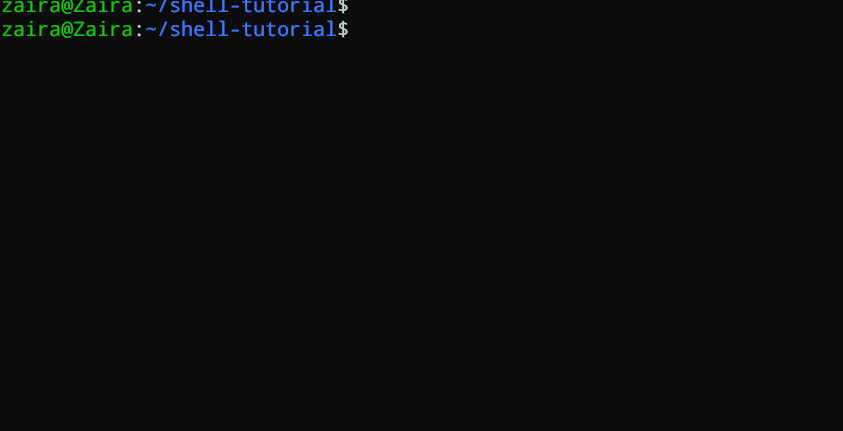
Seeing it in action 🚀

Looping and Branching in Bash
While loop
While loops check for a condition and loop until the condition remains true. We need to provide a counter statement that increments the counter to control loop execution.
In the example below, (( i += 1 )) is the counter statement that increments the value of i. The loop will run exactly 10 times.
#!/bin/bash
i=1
while [[ $i -le 10 ]] ; do
   echo "$i"
  (( i += 1 ))
done

For loop
The for loop, just like the while loop, allows you to execute statements a specific number of times. Each loop differs in its syntax and usage.
In the example below, the loop will iterate 5 times.
#!/bin/bash

for i in {1..5}
do
    echo $i
done

Case statements
In Bash, case statements are used to compare a given value against a list of patterns and execute a block of code based on the first pattern that matches. The syntax for a case statement in Bash is as follows:
case expression in
    pattern1)
        # code to execute if expression matches pattern1
        ;;
    pattern2)
        # code to execute if expression matches pattern2
        ;;
    pattern3)
        # code to execute if expression matches pattern3
        ;;
    *)
        # code to execute if none of the above patterns match expression
        ;;
esac
Here, "expression" is the value that we want to compare, and "pattern1", "pattern2", "pattern3", and so on are the patterns that we want to compare it against.
The double semicolon ";;" separates each block of code to execute for each pattern. The asterisk "*" represents the default case, which executes if none of the specified patterns match the expression.
Let's see an example.
fruit="apple"

case $fruit in
    "apple")
        echo "This is a red fruit."
        ;;
    "banana")
        echo "This is a yellow fruit."
        ;;
    "orange")
        echo "This is an orange fruit."
        ;;
    *)
        echo "Unknown fruit."
        ;;
esac
In this example, since the value of "fruit" is "apple", the first pattern matches, and the block of code that echoes "This is a red fruit." is executed. If the value of "fruit" were instead "banana", the second pattern would match and the block of code that echoes "This is a yellow fruit." would execute, and so on. If the value of "fruit" does not match any of the specified patterns, the default case is executed, which echoes "Unknown fruit."
How to Schedule Scripts using cron
Cron is a powerful utility for job scheduling that is available in Unix-like operating systems. By configuring cron, you can set up automated jobs to run on a daily, weekly, monthly, or specific time basis. The automation capabilities provided by cron play a crucial role in Linux system administration.
Below is the syntax to schedule crons:
# Cron job example
* * * * * sh /path/to/script.sh
Here, the *s represent minute(s) hour(s) day(s) month(s) weekday(s), respectively.
Below are some examples of scheduling cron jobs.
| Schedule | Description | Example |
|---|---|---|
0 0 |
Run a script at midnight every day | 0 0 /path/to/script.sh |
/5 |
Run a script every 5 minutes | /5 /path/to/script.sh |
0 6 1-5 |
Run a script at 6 am from Monday to Friday | 0 6 1-5 /path/to/script.sh |
0 0 1-7 |
Run a script on the first 7 days of every month | 0 0 1-7 /path/to/script.sh |
0 12 1 |
Run a script on the first day of every month at noon | 0 12 1 /path/to/script.sh |
Using crontab
The crontab utility is used to add and edit the cron jobs.
crontab -l lists the already scheduled scripts for a particular user.
You can add and edit the cron through crontab -e.
You can read more about corn jobs in my other article here.
How to Debug and Troubleshoot Bash Scripts
Debugging and troubleshooting are essential skills for any Bash scripter. While Bash scripts can be incredibly powerful, they can also be prone to errors and unexpected behavior. In this section, we will discuss some tips and techniques for debugging and troubleshooting Bash scripts.
Set the set -x option
One of the most useful techniques for debugging Bash scripts is to set the set -x option at the beginning of the script. This option enables debugging mode, which causes Bash to print each command that it executes to the terminal, preceded by a + sign. This can be incredibly helpful in identifying where errors are occurring in your script.
#!/bin/bash

set -x

# Your script goes here
Check the exit code
When Bash encounters an error, it sets an exit code that indicates the nature of the error. You can check the exit code of the most recent command using the $? variable. A value of 0 indicates success, while any other value indicates an error.
#!/bin/bash

# Your script goes here

if [ $? -ne 0 ]; then
    echo "Error occurred."
fi
Use echo statements
Another useful technique for debugging Bash scripts is to insert echo statements throughout your code. This can help you identify where errors are occurring and what values are being passed to variables.
#!/bin/bash

# Your script goes here

echo "Value of variable x is: $x"

# More code goes here
Use the set -e option
If you want your script to exit immediately when any command in the script fails, you can use the set -e option. This option will cause Bash to exit with an error if any command in the script fails, making it easier to identify and fix errors in your script.
#!/bin/bash

set -e

# Your script goes here
Troubleshooting crons by verifying logs
We can troubleshoot crons using the log files. Logs are maintained for all the scheduled jobs. You can check and verify in logs if a specific job ran as intended or not.
For Ubuntu/Debian, you can find cronlogs at:
/var/log/syslog
The location varies for other distributions.
A cron job log file can look like this:
2022-03-11 00:00:01 Task started
2022-03-11 00:00:02 Running script /path/to/script.sh
2022-03-11 00:00:03 Script completed successfully
2022-03-11 00:05:01 Task started
2022-03-11 00:05:02 Running script /path/to/script.sh
2022-03-11 00:05:03 Error: unable to connect to database
2022-03-11 00:05:03 Script exited with error code 1
2022-03-11 00:10:01 Task started
2022-03-11 00:10:02 Running script /path/to/script.sh
2022-03-11 00:10:03 Script completed successfully
Conclusion
In this article, we started with how to access the terminal and then ran some basic bash commands. We also studied what a bash shell is. We briefly looked at branching the code using loops and conditionals. Finally, we discussed automating the scripts using cron followed by some troubleshooting techniques.
Resources for learning more about Bash scripting
If you want to dig deeper into the world of bash scripting, I would suggest you have a look at this 6-hour course on Linux at freeCodeCamp.
What’s your favorite thing you learned from this tutorial? You can also connect with me on any of these platforms. 📧�
See you in the next tutorial, happy coding 😁
Banner image credits: Image by Freepik