
By Ali Haydar
Building a CSS library might seem like something you'd do out of pure curiosity, just to learn and explore. But it can be so much more than that.
I've seen custom-built CSS libraries used everywhere from big organisations to scrappy young startups.
What is a CSS Library?
You can think of a CSS library like a theme that you can use across multiple projects. It's helpful if you don't want to repeat the styling every time or copy-paste your code. It's also useful if you want to be consistent across your web apps (which is good for your brand).
So, a shared CSS library/theme will increase your efficiency and development speed and it can help you scale your product while maintaining consistency. This can also be a part of a more extensive design system.
The focus of this post will be more on building the CSS library rather than styling it. The output will be a library with a concept similar to bootstrap, where you can use CSS classes and style the associated HTML element.
So how can we build this kind of library, and what tools do we need to use?
Below is a summary of what we'll build:
- Create a library build with Vite, not a web app build
- Handle static assets used in your CSS file
- Use SASS instead of CSS when building the library
- Package the library with npm
How to Set Up the Project
We will use Vite to build our CSS library. Then we'll package it with npm, and finally use it in a new front-end project.
Vite is a dev server and a build tool that makes implementing web projects a fast and smooth experience.
Follow these steps to get started:
- Run
npm init @vitejs/app - Enter a project name
- Select a framework (Vanilla, Vue, React, etc.) – here we will choose "vanilla" as we're focused on CSS
The entry to the project is index.html. We can use this file to test what we're building. But it will not be packaged as part of the library we're creating.
How to Update the Boilerplate Code
First, let us tidy up the existing boilerplate code.
We'll update the HTML file to include a button and a div file with a logo in the background like this:
  <!DOCTYPE html>
  <html lang="en">
    <head>
      <meta charset="UTF-8" />
      <link rel="icon" type="image/svg+xml" href="favicon.svg" />
      <meta name="viewport" content="width=device-width, initial-scale=1.0" />
      <title>Vite App</title>
    </head>
    <body>
      <div id="app">
        <div class="logo"></div>
        <button class="tomato">Click me</button>
      </div>
      <script type="module" src="/src/main.ts"></script>
    </body>
  </html>
Then, under the "src" directory, delete the contents of the main.ts file, keeping the first line that imports style.css
Next, in the style.css file, add the following code:
  .tomato {
  background-color: tomato;
  }
  .logo {
  background: url(/logo.png) no-repeat;
  height: 300px;
  }
We need to copy the logo.png file under the root folder of the project (feel free to use any other image instead of logo.png and change the height accordingly).
How to Build Our CSS Library
Before creating a build, let's run the app locally. In your terminal:
- Navigate to the root folder of your project
- Run
npm installto install the project dependencies - Run
npm run devto start the local server
Open the app in your browser: http://localhost:3000 (usually, it's on port 3000 unless that port's already being used by another app).
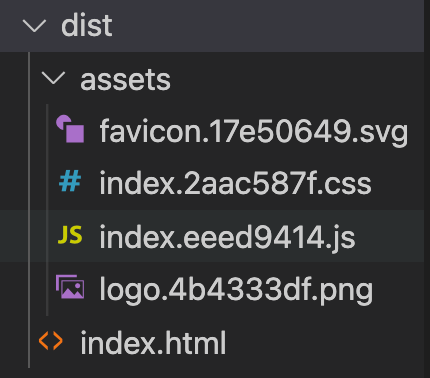
Now it's time to build the project, so just type npm run build. This will create a dist folder with the following files:
How to Configure the Build
The generated folder looks like a build for a web app that needs to be hosted and served. But we're looking to build a library instead. So we need to add some configurations to achieve that:
At the root level of your project, create a new file config.vite.js:
  import { defineConfig } from "vite";
  import path from "path";

  module.exports = defineConfig({
  build: {
      lib: {
      entry: path.resolve(__dirname, "src/main.ts"),
      name: "MyCssLib",
      },
  },
  });
Run npm run build again. Notice the new structure of the dist folder:
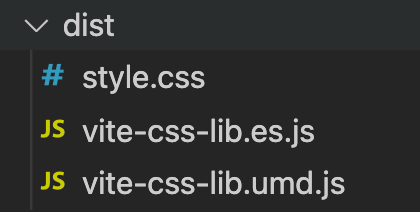
In this case, we no longer have an HTML file in the bundle, and our styles are still within a styles.css file. But you'll see here that the logo file we are referencing in our CSS file is no longer there.
What happened here is that Vite inlined the assets as a base64 data URL. So using this new CSS file will still work properly – similar to when referencing the asset file:
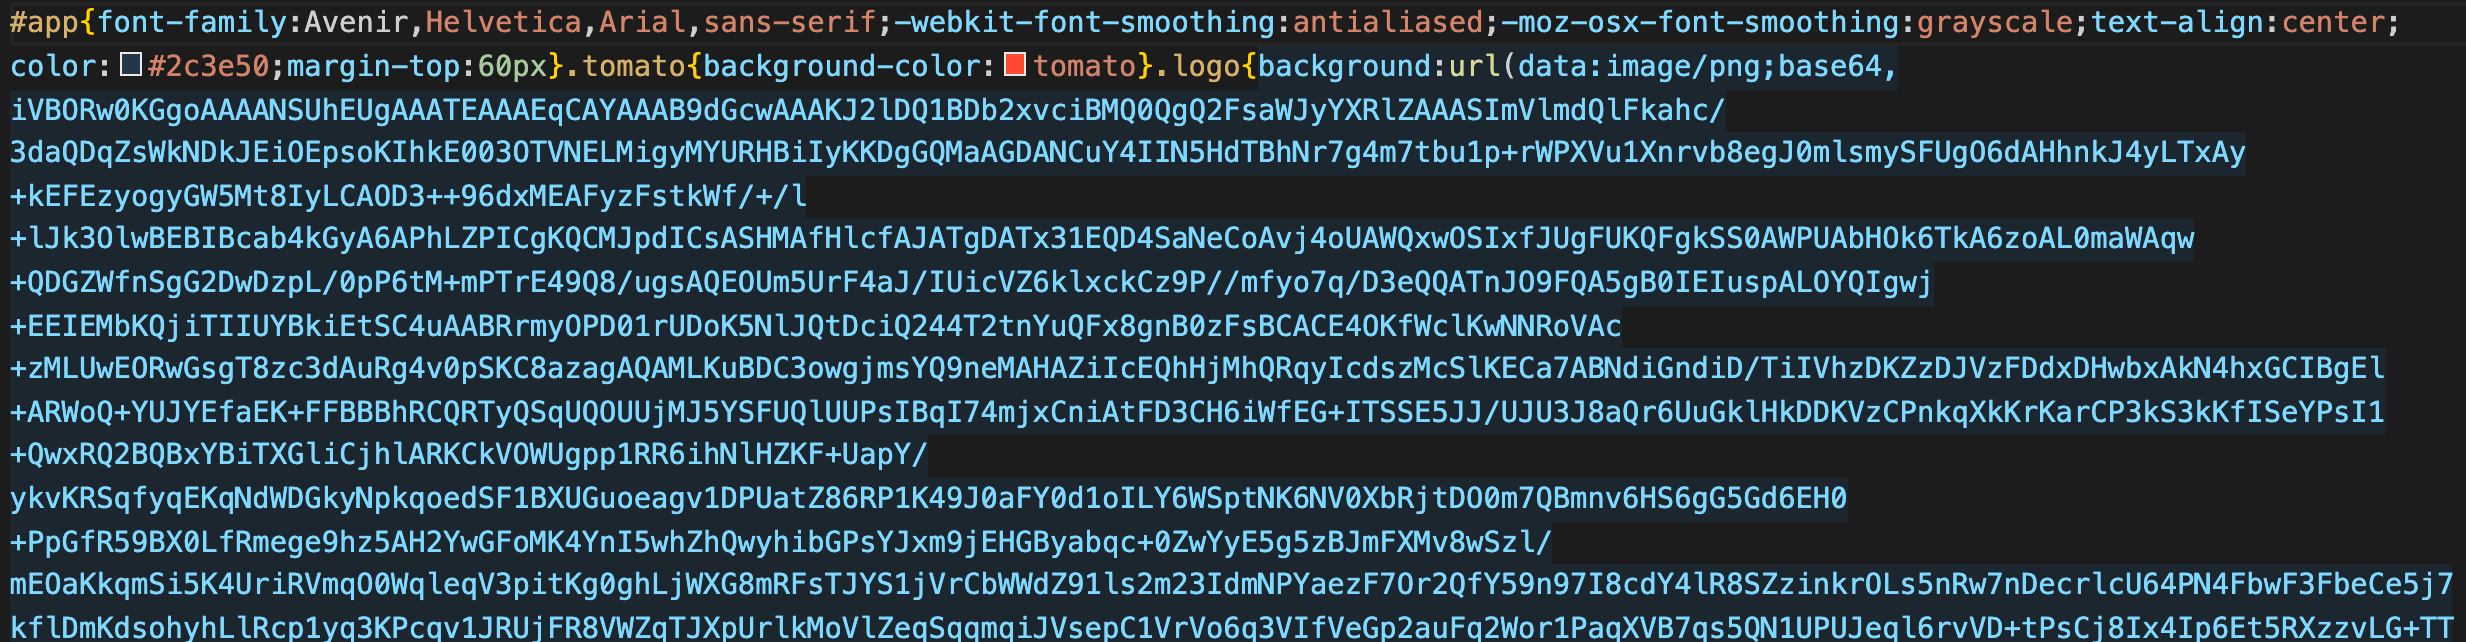
This is cool, but it might cause a problem in larger projects where the CSS file might become very big if it had multiple referenced assets.
How to Handle the Assets
Vite offers a simple way to handle assets, where you keep the same file and the path referenced in CSS still works.
On the root of your project, create a public folder and move the logo.png file into it. The local web app will still recognise the logo (check that this is still working on http://localhost:3000).
Run npm run build again. The new dist folder will look as follows:
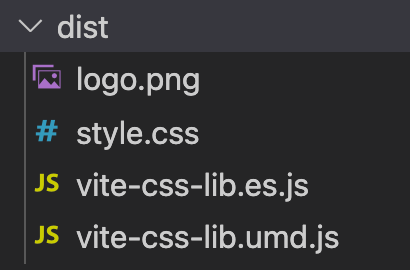
Notice that the logo file is still there at the root level. If you open the CSS file, it will be referencing that same logo file.
It's convenient here to have an assets folder to contain all of your assets. You can create this folder under the public directory. Remember to update the path to the assets in your CSS file (from /logo.png to /assets/logo.png in this case).
How to Use SASS for Styling
Devs often use SASS for styling because it provides a lot of flexibility and organisation. Vite handles SASS out of the box. Let's check it out:
Install SASS by running npm install sass. Under the "src" folder, change the name of the style.css file to style.scss
Next, add some SASS changes to the style.scss file. For example, use a color variable:
  $color: tomato;

  .tomato {
  background-color: $color;
  }
Then you'll update the "main.ts" file to point to style.scss instead of style.css.
Run npm run build to create a new build, and check the "style.css" file that got generated in the "dist" folder – it has the correct CSS:
.tomato{background-color:tomato}
How to Package the Library
Now it is time to package the library (whatever got generated in the dist folder). We will use npm to do this.
First, you need to update the "package.json" file to include a new property called files. According to the npm documentation, the files field is an array of file patterns that describes the entries to be included when your package is installed as a dependency.
We need only to package the generated CSS file, so the additional entry in the "package.json" file will be files: [dist/style.css].
Next, you'll run npm pack. This will create a new file. In this case, "vite-CSS-lib-0.0.0.tgz".
How to Use the Package
Start by creating a new project (which you can do in the same way we started with Vite). Once it's done, follow these steps:
- Install the newly created package:
npm install <path-to-lib>/vite-css-lib-0.0.0.tgz - In your "main.js" file, import the CSS file:
import 'node_modules/vite-css-lib/dist/style.css - In your "index.html" file, add a button with a "tomato" class:
<button class="tomato">Submit</button>
Run your app. It should have a button with a tomato background colour.
Things to Improve in the Library
Of course, this isn't a finished product – it can always be improved.
You can start by exporting the SASS files rather than a compiled CSS file so that apps depending on your library can use SASS directly. You can do this through a Vite/Rollup plugin: https://vitejs.dev/guide/api-plugin.html
Also, when you're packaging the library with npm, everything within package.json will be included in the package. You can tidy up the package.json file to stop including any unnecessary scripts/dependencies. You can read more about how to do this here.
Finally, set up a bundle with a JS file that exports the created CSS file to enable importing the library without having to reference node_modules/lib/style.css.
I hope this article was helpful. How would you enhance this process? How would you build a CSS library?