
By Nishant Kumar
In this article, we'll build a Google Docs clone using React, Material UI, and Firebase.
The final app will look like this:
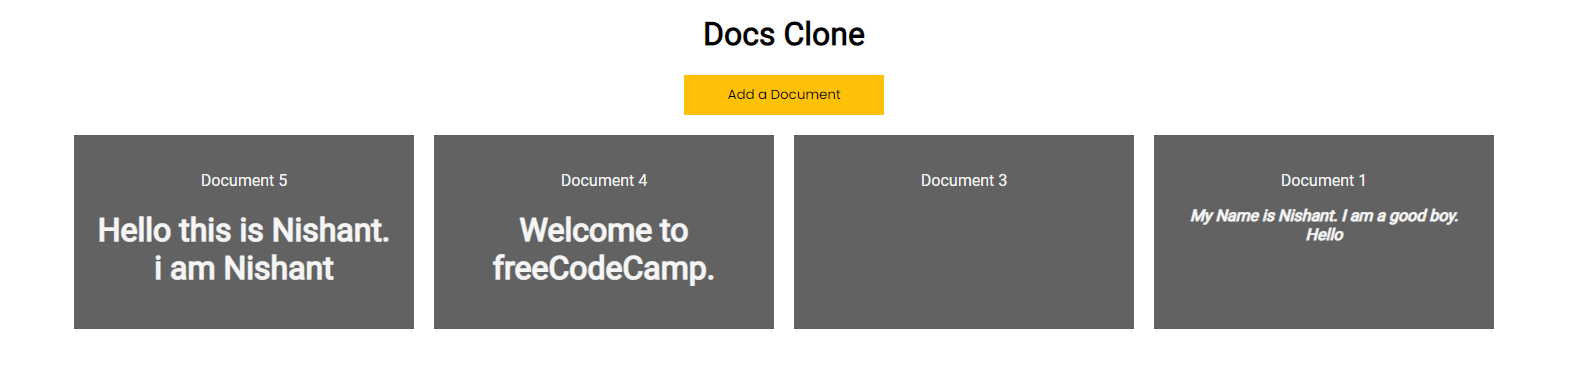
If we click any document, it will open up and we can edit them however we need to.
And the most amazing feature is that we can edit a document in real time. This means that if two people are working on the same document, their progress will be reflected in both instances.
But before we start, make sure you have Node installed in your system. If not, go to https://nodejs.org/en/download/ to download and install it.
If you'd like to follow along in video format, here's this tutorial on my YouTube channel:
Basic Project Setup
Let's first create a React app using the below command:
npx create-react-app google-docs-clone
This will install all the packages and dependencies into a local folder.
Then, simply navigate into the project folder and run npm start to run the app.
We will see all these code here that we need to remove. We will start with a blank canvas.
Next create a folder called components. Inside that folder, let's create a file called docs.js.
Make this component a functional component, like this:
import React from 'react'

export default function Docs() {
  return (
    <div>
        <h1>docs</h1>
    </div>
  )
}
Now, import this file into the main App.js file.
import './App.css';
import Docs from './components/docs';

function App() {
  return (
    <Docs />
  );
}

export default App;
And we'll see this output on the screen:
 Google docs clone showing output "docs" in upper left corner
Now, let's make the title appear in the center. So in docs.js, give the main div a className of docs-main.
import React from 'react'

export default function Docs() {
  return (
    <div className='docs-main'>
        <h1>Docs Clone</h1>
    </div>
  )
}
And in App.css file, add the following styles:
.docs-main{
    text-align: center;
}
Now our app looks like this:
 Google docs clone with title in center
Now, we need a button to add our documents. So, let's create it with this code:
import React from 'react'

export default function Docs() {
  return (
    <div className='docs-main'>
        <h1>Docs Clone</h1>

        <button className='add-docs'>
            Add a Document
        </button>
    </div>
  )
}
And the CSS looks like this:
.add-docs{
    height: 40px;
    width: 200px;
    background-color: #ffc107;
    border: none;
    cursor: pointer;
}
Let's import some fonts from Google Fonts. Place this at the top of the CSS file:
@import url('https://fonts.googleapis.com/css2?family=Poppins&family=Roboto&display=swap');
@import url('https://fonts.googleapis.com/css2?family=Poppins&family=Roboto&display=swap');

.docs-main{
    text-align: center;
    font-family: 'Roboto', sans-serif;
}

.add-docs{
    height: 40px;
    width: 200px;
    background-color: #ffc107;
    border: none;
    cursor: pointer;
    font-family: 'Poppins', sans-serif;
}
To add fonts, simply do this in the respective classNames.
How to Install Material UI
To install Material UI, simply type the command below. If you want to read the documentation, head over to https://mui.com/.
npm install @mui/material @emotion/react @emotion/styled
Now, let's create one more component for the modal. We'll use this modal to add documents to the Firebase database.
import * as React from 'react';
import Box from '@mui/material/Box';
import Button from '@mui/material/Button';
import Typography from '@mui/material/Typography';
import Modal from '@mui/material/Modal';

const style = {
    position: 'absolute',
    top: '50%',
    left: '50%',
    transform: 'translate(-50%, -50%)',
    width: 400,
    bgcolor: 'background.paper',
    border: '2px solid #000',
    boxShadow: 24,
    p: 4,
};

export default function Modal() {
    const [open, setOpen] = React.useState(false);
    const handleOpen = () => setOpen(true);
    const handleClose = () => setOpen(false);

    return (
        <div>
            <Modal
                open={open}
                onClose={handleClose}
                aria-labelledby="modal-modal-title"
                aria-describedby="modal-modal-description"
            >
                <Box sx={style}>
                    <Typography id="modal-modal-title" variant="h6" component="h2">
                        Text in a modal
                    </Typography>
                    <Typography id="modal-modal-description" sx={{ mt: 2 }}>
                        Duis mollis, est non commodo luctus, nisi erat porttitor ligula.
                    </Typography>
                </Box>
            </Modal>
        </div>
    );
}
This is a simple modal component from Material UI. Now we have to import this component into our Docs.js component.
And we need to move a few things from Modal.js to Docs.js.
const [open, setOpen] = React.useState(false);
const handleOpen = () => setOpen(true);
If we click the Add a Document button, the modal will open using these functions:
import React, { useState } from 'react';
import Modal from './Modal';

export default function Docs() {
    const [open, setOpen] = React.useState(false);
    const handleOpen = () => setOpen(true);
    return (
        <div className='docs-main'>
            <h1>Docs Clone</h1>

            <button
                className='add-docs'
                onClick={handleOpen}
            >
                Add a Document
            </button>

            <Modal
                open={open}
                setOpen={setOpen}
            />
        </div>
    )
}
So, pass these functions and states as props into the modal component and receive them.
import * as React from 'react';
import Box from '@mui/material/Box';
import Button from '@mui/material/Button';
import Typography from '@mui/material/Typography';
import Modal from '@mui/material/Modal';

const style = {
    position: 'absolute',
    top: '50%',
    left: '50%',
    transform: 'translate(-50%, -50%)',
    width: 400,
    bgcolor: 'background.paper',
    border: '2px solid #000',
    boxShadow: 24,
    p: 4,
};

export default function ModalComponent({
    open,
    setOpen,
}) {
    const handleClose = () => setOpen(false);

    return (
        <div>
            <Modal
                open={open}
                onClose={handleClose}
                aria-labelledby="modal-modal-title"
                aria-describedby="modal-modal-description"
            >
                <Box sx={style}>
                    <Typography id="modal-modal-title" variant="h6" component="h2">
                        Text in a modal
                    </Typography>
                    <Typography id="modal-modal-description" sx={{ mt: 2 }}>
                        Duis mollis, est non commodo luctus, nisi erat porttitor ligula.
                    </Typography>
                </Box>
            </Modal>
        </div>
    );
}
Now, this is how our page looks with the modal:
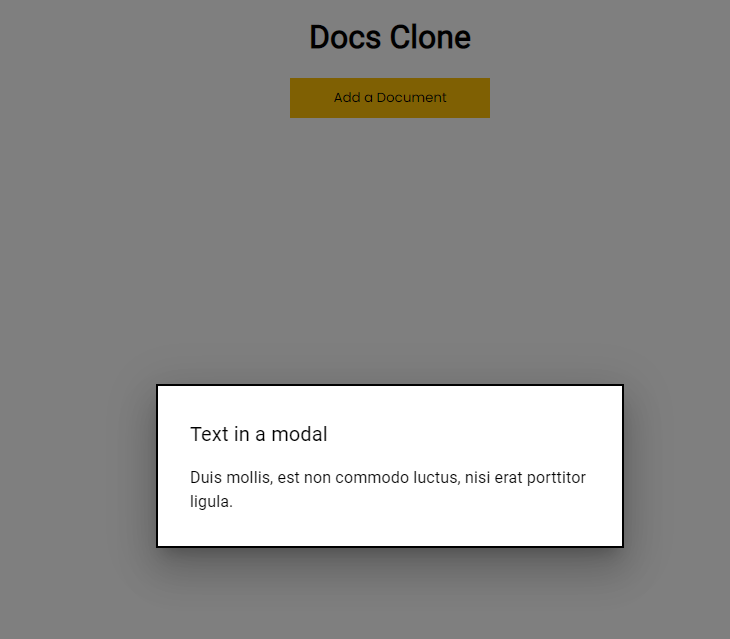 Google docs clone page with model showing
Let's add an input in the Modal, for the filename.
<Modal
                open={open}
                onClose={handleClose}
                aria-labelledby="modal-modal-title"
                aria-describedby="modal-modal-description"
            >
                <Box sx={style}>
                    <input
                        placeholder='Add the Title'
                        className='add-input'
                    />
                </Box>
            </Modal>
Let's give it some styles with the following:
.add-input{
    width: 95%;
    height: 40px;
    outline: none;
    border: 1px solid #676767;
    border-radius: 0px;
    padding: 10px;
    font-family: 'Poppins', sans-serif;
}
And now, this is how our Modal looks:
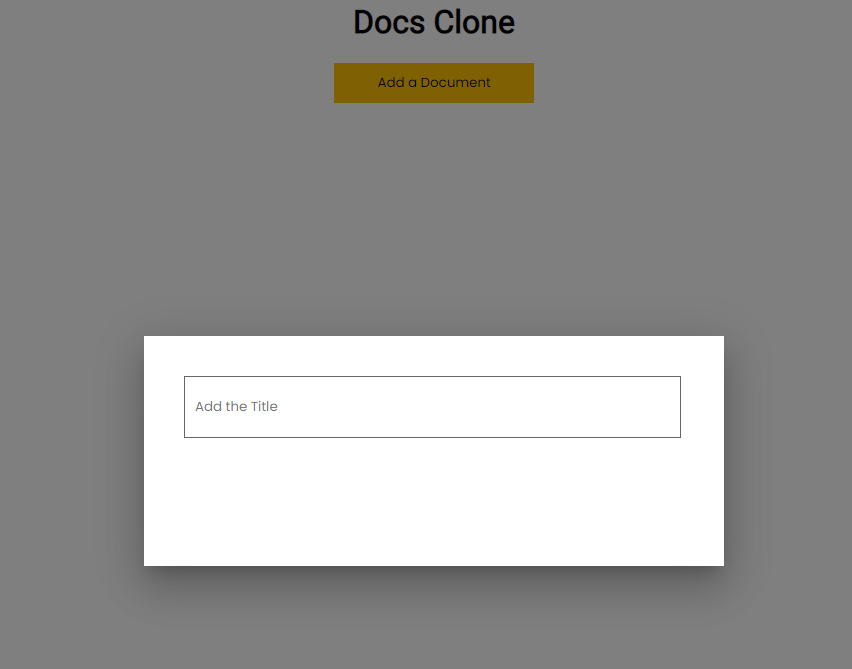 Modal with styling added
Let's also add a Button. We can copy the Add a Document Button.
import * as React from 'react';
import Box from '@mui/material/Box';
import Button from '@mui/material/Button';
import Typography from '@mui/material/Typography';
import Modal from '@mui/material/Modal';

const style = {
    position: 'absolute',
    top: '50%',
    left: '50%',
    transform: 'translate(-50%, -50%)',
    width: 500,
    height: 150,
    bgcolor: 'background.paper',
    boxShadow: 24,
    p: 5,
};

export default function ModalComponent({
    open,
    setOpen,
}) {
    const handleClose = () => setOpen(false);

    return (
        <div>
            <Modal
                open={open}
                onClose={handleClose}
                aria-labelledby="modal-modal-title"
                aria-describedby="modal-modal-description"
            >
                <Box sx={style}>
                    <input
                        placeholder='Add the Title'
                        className='add-input'
                    />
                    <div className='button-container'>
                        <button
                            className='add-docs'
                        >
                            Add
                        </button>
                    </div>
                </Box>
            </Modal>
        </div>
    );
}
And the CSS looks like this:
.button-container{
    text-align: center;
    margin: 30px;
}
This is how it looks now:
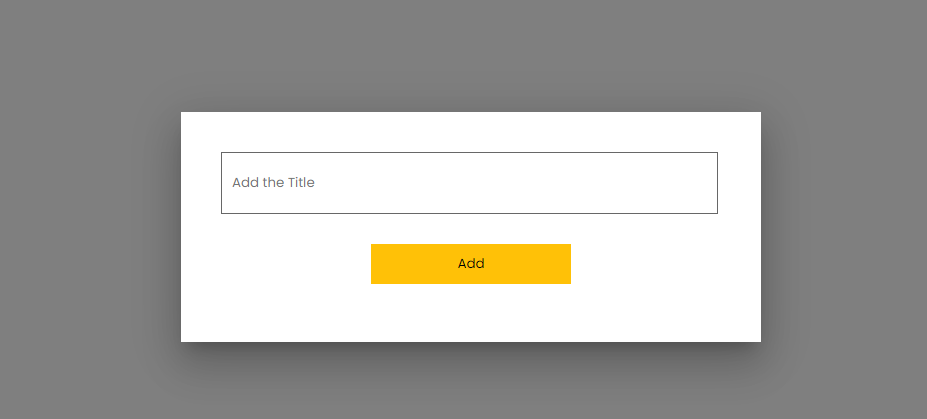 Modal with styling and button added
How to Add Firebase to Our App
Now, let's install Firebase for the database. Simply install Firebase using the below command:
npm install firebase
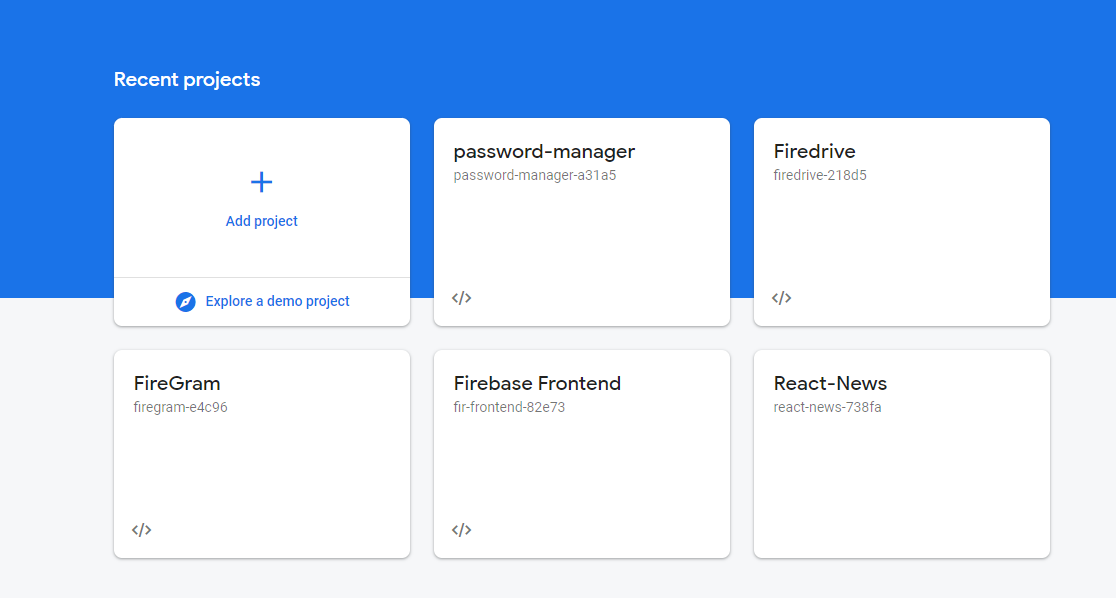
Head over to https://firebase.google.com/ and click Go to console at the top right.
Then, click Add Project.
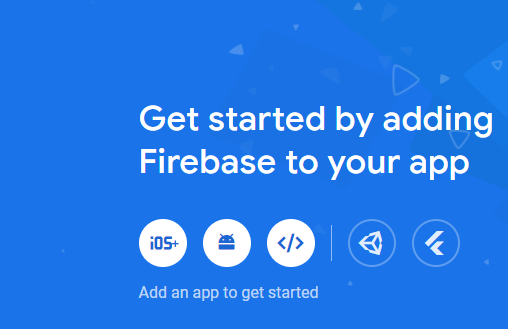
After creating the Project, click the code button to create a web app in Firebase. Give it a name and we are ready to go.
Now, we will add all these config data that we have to store in our React app. So, create a file called firebaseConfig.js and add them.
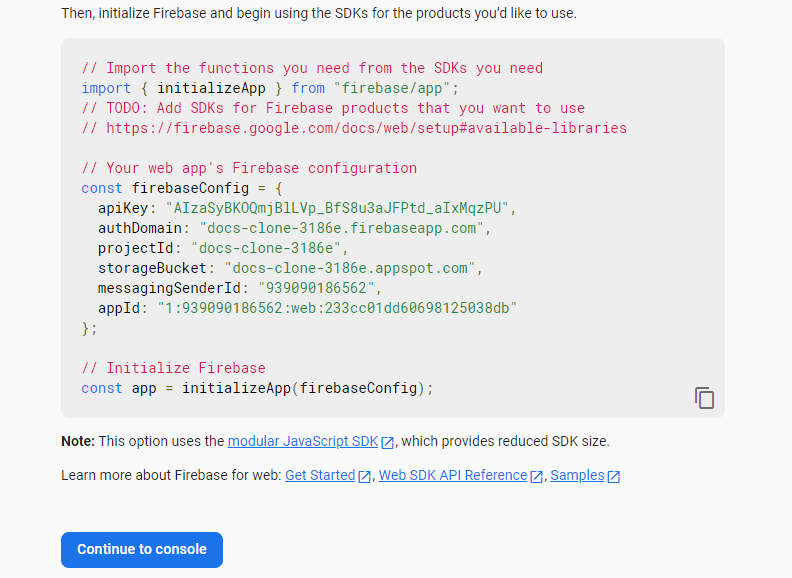
We are going to need the database, so let's initalize it. Also, export the const app and database like this:
import { initializeApp } from "firebase/app";
import { getFirestore } from 'firebase/firestore';

const firebaseConfig = {
  //Your Firebase Data
};

export const app = initializeApp(firebaseConfig);
export const database = getFirestore(app)
Import the app and database into App.js file. And pass the database as props to the Docs component. We'll use it later to add data to Firebase Firestore.
import './App.css';
import Docs from './components/docs';
import { app, database } from './firebaseConfig';

function App() {
  return (
    <Docs database={database}/>
  );
}

export default App;
And in the Docs component. Also, let's receive the database export from props.
import React, { useState } from 'react';
import Modal from './Modal';

export default function Docs({
    database
}) {
    const [open, setOpen] = React.useState(false);
    const handleOpen = () => setOpen(true);
    return (
        <div className='docs-main'>
            <h1>Docs Clone</h1>

            <button
                className='add-docs'
                onClick={handleOpen}
            >
                Add a Document
            </button>

            <Modal
                open={open}
                setOpen={setOpen}
            />
        </div>
    )
}
Now, let's configure our Firestore Database.
Go to Firestore database from the left sidebar, and click Create Database.
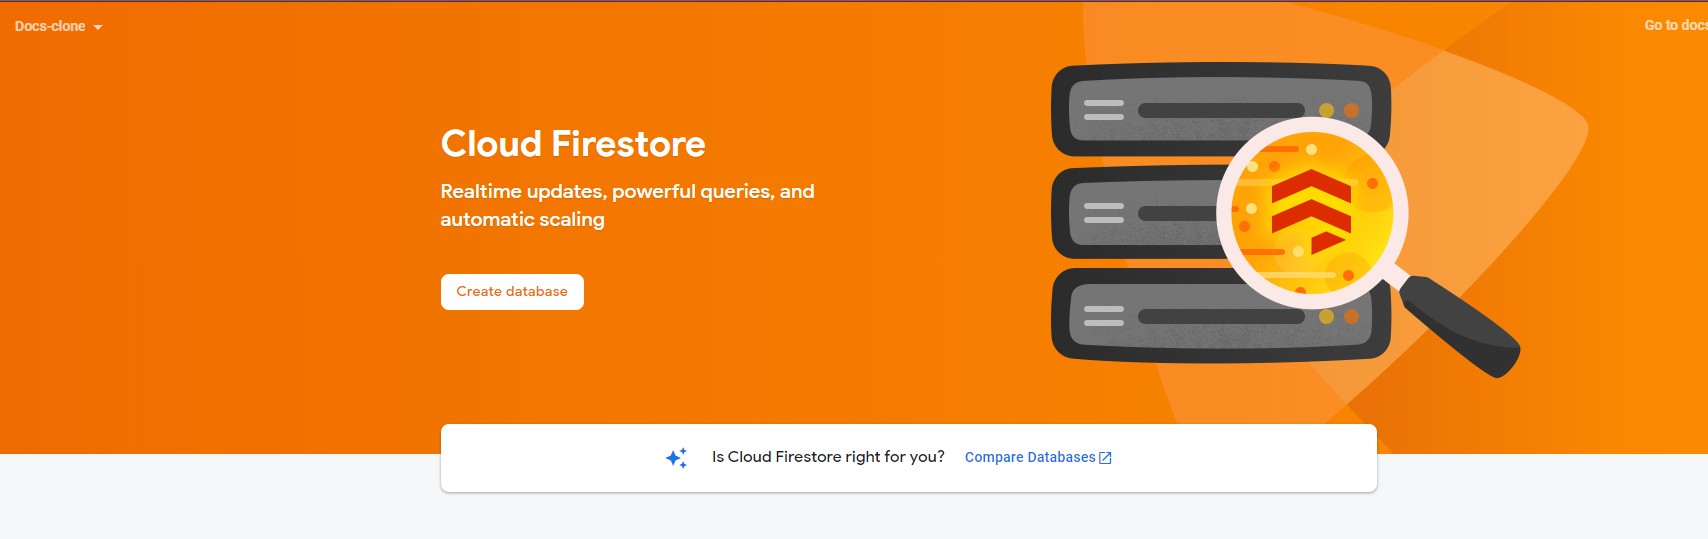
We will start our Database in Production Mode. So, click Next, and then Enable.
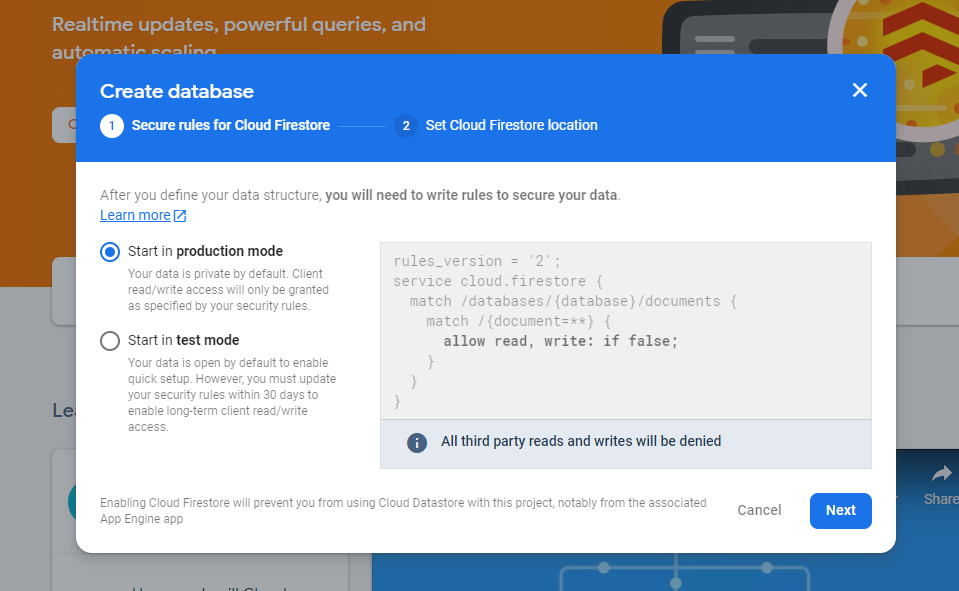
We have to make the security rules public, just for now. So, click Rules at the top tab and edit the following rules. This means that anyone can write data or read them, even without authentication.
rules_version = '2';
service cloud.firestore {
  match /databases/{database}/documents {
    match /{document=**} {
      allow read, write;
    }
  }
}
How to Add Docs Data to the Firestore Database
Now, let's actually add our data. But before that, we need to get the data from the input field.
So in the Docs component, create one state that will hold this data.
const [title, setTitle] = useState('')
Pass the title and setTitle to the modal component.
<Modal
                open={open}
                setOpen={setOpen}
                title={title}
                setTitle={setTitle}
            />
Receive them both as props, and set them in the input field.
import * as React from 'react';
import Box from '@mui/material/Box';
import Button from '@mui/material/Button';
import Typography from '@mui/material/Typography';
import Modal from '@mui/material/Modal';

const style = {
    position: 'absolute',
    top: '50%',
    left: '50%',
    transform: 'translate(-50%, -50%)',
    width: 500,
    height: 150,
    bgcolor: 'background.paper',
    boxShadow: 24,
    p: 5,
};

export default function ModalComponent({
    open,
    setOpen,
    title,
    setTitle
}) {
    const handleClose = () => setOpen(false);

    return (
        <div>
            <Modal
                open={open}
                onClose={handleClose}
                aria-labelledby="modal-modal-title"
                aria-describedby="modal-modal-description"
            >
                <Box sx={style}>
                    <input
                        placeholder='Add the Title'
                        className='add-input'
                        onChange={(event) => setTitle(event.target.value)}
                        value={title}
                    />
                    <div className='button-container'>
                        <button
                            className='add-docs'
                        >
                            Add
                        </button>
                    </div>
                </Box>
            </Modal>
        </div>
    );
}
Now, if we type something in the input, it will be stored inside the title state.
Next, we need a function that will trigger the add data functions, so let's create it.
In Docs.js, create a function and pass it to the modal component:
const addData = () => {

}
Receive it in the modal component and simply bind it to the Add button like this:
<div className='button-container'>
                        <button
                            className='add-docs'
                            onClick={addData}
                        >
                            Add
                        </button>
                    </div>
Now, the addData function will run when we click the Add button.
Now to send data from React to Firebase dynamically, let's import a few things from Firebase Firestore:
import { addDoc, collection } from 'firebase/firestore';
Here, we'll use collection to create a data collection in Firebase, and addDoc will add data to that collection.
Let's first create a collection reference. It will take the database that we got from the firebaseConfig.js and the name of the collection we want to use.
const collectionRef = collection(database, 'docsData')
Now, in the addData function, let's use addDoc. This addDoc function will take the collection reference, and the data itself.
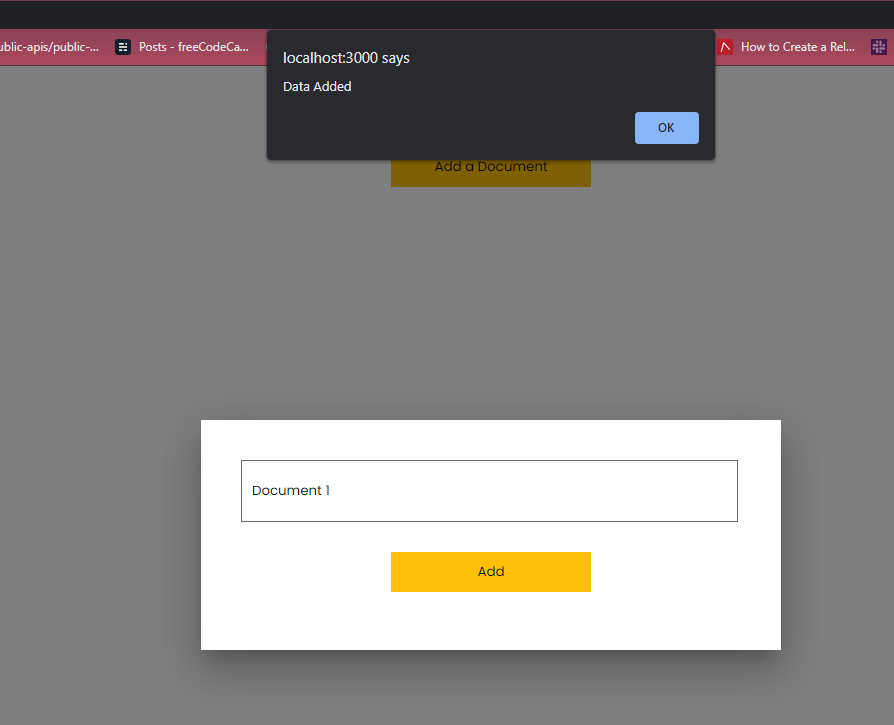
const addData = () => {
        addDoc(collectionRef, {
            title: title
        })
        .then(() => {
            alert('Data Added')
        })
        .catch(() => {
            alert('Cannot add data')
        })
    }
Now, add something in the text input and click Add. It will be added into Firebase Firestore, with an alert that data has been added. But if it fails, we will get "Cannot add data."
If we refresh the database, we'll see this new entry:

And that's how we add data. Let's also close the modal after adding the data.
Create a function handleClose, and call this function right after the then block in the addData function.
const addData = () => {
        addDoc(collectionRef, {
            title: title
        })
        .then(() => {
            alert('Data Added');
            handleClose()
        })
        .catch(() => {
            alert('Cannot add data')
        })
    }
How to Read the Data from Firebase
Now, let's read the data that we added to Firebase. We will need the onSnapshot function for that. The onSnapshot function gets data in real time.
First, import it from Firebase like this:
import { addDoc, collection, onSnapshot } from 'firebase/firestore';
Then, create a function getData that will get triggered when our page loads. So, we will put this onSnapshot into the React useEffect Hook.
const getData = () => {
        onSnapshot(collectionRef, (data) => {
            console.log(data.docs.map((doc) => {
                return {...doc.data(), id: doc.id}
            }))
        })
    }
Then, call this function inside the useEffect Hook.
useEffect(() => {
        getData()
    }, [])

But as you can see, the we are getting the data twice. That's because we are using React version 18, which includes concurrent rendering. That's why the useEffect hook will run twice.
To solve this, we need to create a useRef reference.
const isMounted = useRef()
Then in the useEffect Hook, we have to check if isMounted.current is true. So, if it is true, we will return nothing. And then we will set isMounted.current to true, and we will then call our getData function.
useEffect(() => {
        if(isMounted.current){
            return
        }

        isMounted.current = true;
        getData()
    }, [])
And if we now refresh the page, we will get the data only once.

Now, we have to include this data in an array state. So, let's do that.
Create a state of docsData.
const [docsData, setDocsData] = useState([]);
And set the incoming data inside this state using setDocsData.
const getData = () => {
        onSnapshot(collectionRef, (data) => {
            setDocsData(data.docs.map((doc) => {
                return {...doc.data(), id: doc.id}
            }))
        })
    }
Now, let's map our array for the data to show up in the UI.
<div>
                {docsData.map((doc) => {
                    return (
                        <div>
                            <p>{doc.title}</p>
                        </div>
                    )
                })}
            </div>
This will display all the data in our React app.
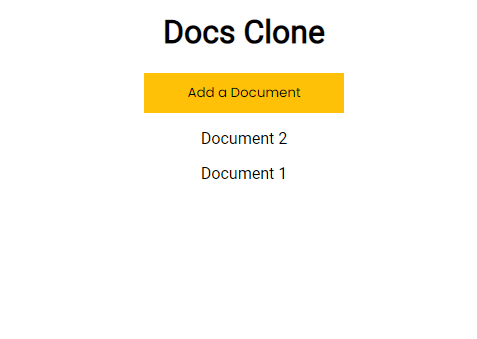
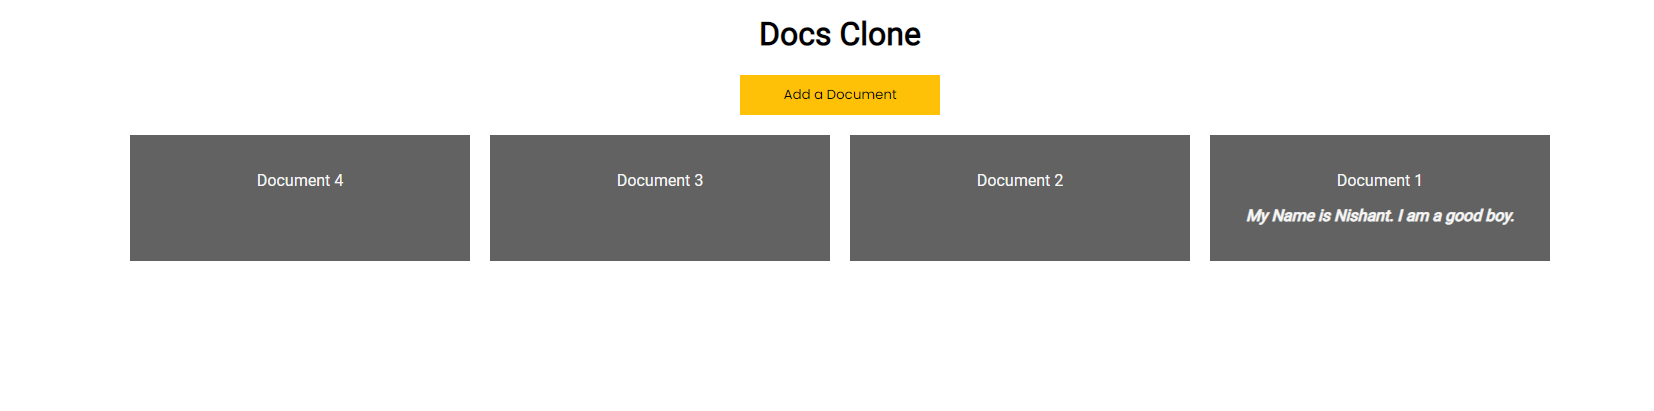
We will see both documents on our page. But let's make them appear in a grid. Give the div containers classNames of grid-main and grid-child.
<div className='grid-main'>
                {docsData.map((doc) => {
                    return (
                        <div className='grid-child'>
                            <p>{doc.title}</p>
                        </div>
                    )
                })}
            </div>
And in the CSS, add the following classes:
.grid-main{
    display: grid;
    grid-template-columns: auto auto auto auto;
    color: whitesmoke;
    margin-top: 20px;
    gap: 20px;
    justify-content: center;
}

.grid-child{
    padding: 20px;
    background-color: rgb(98, 98, 98);
    width: 300px;
    cursor: pointer;
}
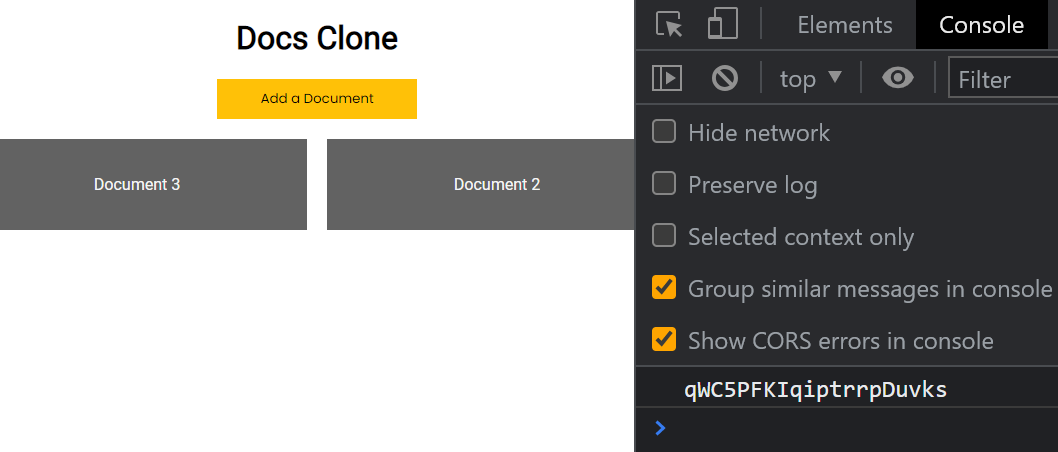
Now, our app will look like this:

How to Get the ID and Redirect to the Edit Docs Page
Now, each of these items above has an ID. We will use these IDs to redirect to another page where we can edit the items and write our main content.
For that, we need two packages. One is the React-Router to redirect us, and another is the React-Quill for our editor. Install them like this:
npm i react-quill react-router-dom@6
Now, let's configure routing to another page. But we need another page first. So, let's create it.
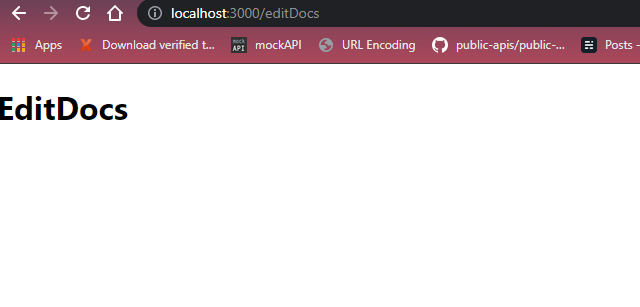
Create a component called EditDocs. Make it a functional component.
import React from 'react'

export default function EditDocs() {
  return (
    <div>EditDocs</div>
  )
}
To configure routing, come to index.js, the app's entry point. Wrap the inside BrowserRouter.
import React from 'react';
import ReactDOM from 'react-dom/client';
import './index.css';
import App from './App';
import reportWebVitals from './reportWebVitals';
import { BrowserRouter } from "react-router-dom";

const root = ReactDOM.createRoot(document.getElementById('root'));
root.render(
  <React.StrictMode>
    <BrowserRouter>
      <App />
    </BrowserRouter>
  </React.StrictMode>
);

// If you want to start measuring performance in your app, pass a function
// to log results (for example: reportWebVitals(console.log))
// or send to an analytics endpoint. Learn more: https://bit.ly/CRA-vitals
reportWebVitals();
Now, we can use routing anywhere because we are declaring BrowserRouter at the basic level.
Now, come to the App.js file. Import Routes and Route from React-Router. We are also appending the ID in the editDocs path, so that we can see the id in the address bar.
import { Routes, Route } from "react-router-dom";
import './App.css';
import Docs from './components/docs';
import EditDocs from './components/EditDocs';
import { Routes, Route } from "react-router-dom";
import { app, database } from './firebaseConfig';

function App() {
  return (
    <Routes>
      <Route path="/" element={<Docs database={database} />} />
      <Route path="/editDocs/:id" element={<EditDocs database={database}/>} />
    </Routes>
  );
}

export default App;
And add the following routes. If we go to '/editDocs/:id', we will see our editDocs page.
Now, we need to get the specific ID from the documents and send it to the editDocs page.
Create a function getID and assign the function to the documents.
const getID = () => {

}
<div className='grid-main'>
                {docsData.map((doc) => {
                    return (
                        <div className='grid-child' onClick={() => getID(doc.id)}>
                            <p>{doc.title}</p>
                        </div>
                    )
                })}
            </div>
Now, if we click the document, we will get its ID if we log it in the console.
const getID = (id) => {
        console.log(id)
    }
Now, let's send this ID to the editDocs page using useNavigate.
First, import useNavigate from react-router.
import { useNavigate } from 'react-router-dom';
Then, create an instance of useNavigate like this:
let navigate = useNavigate();
Then, to pass the ID, simply do this. We will send ourselves to the editDocs page, along with the ID.
const getID = (id) => {
        navigate(`/editDocs/${id}`)
}
Now, let's receive our ID at the other end. In the editDocs component, we need to useParams from react-router.
So, import it and create an instance:
import { useParams } from 'react-router-dom';

let params = useParams();
Also if we console it, we will see the ID.
import { useParams } from 'react-router-dom';

let params = useParams();
console.log(params)

We can see that we get the ID in the address bar as well as the console.
Now, let's add React Quill to our editDocs page.
import React from 'react';
import { useParams } from 'react-router-dom';
import ReactQuill from 'react-quill';
import 'react-quill/dist/quill.snow.css';
export default function EditDocs() {
    let params = useParams();
    return (
        <div>
            <h1>EditDocs</h1>

            <ReactQuill />
        </div>
    )
}
We have to import React-Quill and the CSS.
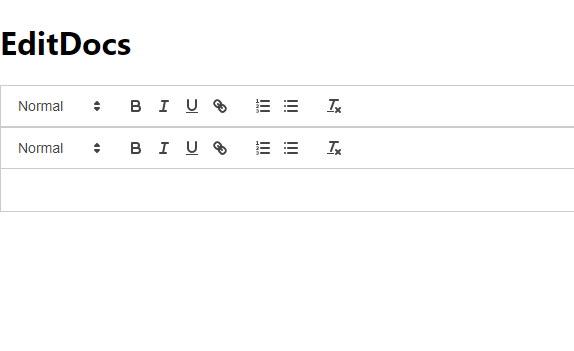
But we can see we have two toolbars here. To solve this, just remove React.StrictMode from index.js.
import React from 'react';
import ReactDOM from 'react-dom/client';
import './index.css';
import App from './App';
import reportWebVitals from './reportWebVitals';
import { BrowserRouter } from "react-router-dom";

const root = ReactDOM.createRoot(document.getElementById('root'));
root.render(
  <BrowserRouter>
    <App />
  </BrowserRouter>
);

// If you want to start measuring performance in your app, pass a function
// to log results (for example: reportWebVitals(console.log))
// or send to an analytics endpoint. Learn more: https://bit.ly/CRA-vitals
reportWebVitals();
And we will be fine.
Now, we need a state for this React Quill data. So, let's create it. Also, we'll create a function to trigger when we type.
const [docsDesc, setDocsDesc] = useState('');
    const getQuillData = () => {

    }
Now, let's bind the function and the state to React Quill.
<ReactQuill
   value={docsDesc}
   onChange={getQuillData}
/>
In the getQuillData function, let's bind the value to the docsDesc state, using the setDocsDesc function.
const getQuillData = (value) => {
        setDocsDesc(value)
    }
And we are done here. You can console this docsDesc state to check.
Now we have the ID, and the data that we can use to update the document. So, let's do that.
How to Update the Document
We need two things, updateDoc and the collection function. We will use a Debounce function to call the updateDoc function. This means that when we finish typing, after 5 or 10 seconds, our updateDoc function will run.
So, let's create a function:
const updateDocsData = () => {

}
We also need to specify the collection. For that, we need the database from App.js. So, let's get it using props.
<Route path="/editDocs/:id" element={<EditDocs database={database}/>} />
Now, let's create a collection reference.
const collectionRef = collection(database, 'docsData')
Now for debouncing, we need the updateDocsData in a useEffect hook.
useEffect(() => {
        const updateDocsData = () => {

        }
 }, [])
Now, let's add a setTimeout function with an interval. This means that function will run after that specified interval. Make the interval 1000 milliseconds, or 1 second.
useEffect(() => {
    const updateDocsData = setTimeout(() => {

    }, 1000)
    return () => clearTimeout(updateDocsData)
  }, [])
Now, inside setTimeOut, let's add the updateDoc function. So inside the document variable, we are passing collectionRef and the ID from the params. And then, the updateDoc takes that variable document as first parameter.
const updateDocsData = setTimeout(() => {
            const document = doc(collectionRef, params.id)
            updateDoc(document, {

            })
        }, 1000)
Let's also import the doc function. It specifies which document to update using the ID as primary key.
import {
    updateDoc,
    collection,
    doc
} from 'firebase/firestore';
Now let's pass the data in the second parameter, in the updateDoc function.
useEffect(() => {
        const updateDocsData = setTimeout(() => {
            const document = doc(collectionRef, params.id)
            updateDoc(document, {
                docsDesc: docsDesc
            })
        }, 1000)
        return () => clearTimeout(updateDocsData)
    }, [])
In the dependency array, add the state of docsDesc. So after we type something, the updateDoc function will run after 1 seconds.
useEffect(() => {
        const updateDocsData = setTimeout(() => {
            const document = doc(collectionRef, params.id)
            updateDoc(document, {
                docsDesc: docsDesc
            })
            .then(() => {
                alert('Saved')
            })
            .catch(() => {
                alert('Cannot Save')
            })
        }, 1000)
        return () => clearTimeout(updateDocsData)
    }, [docsDesc])
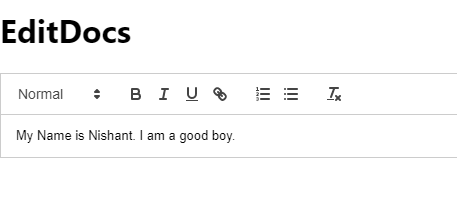
So, type something in the editor, and it will be saved inside the database.

And the data here:
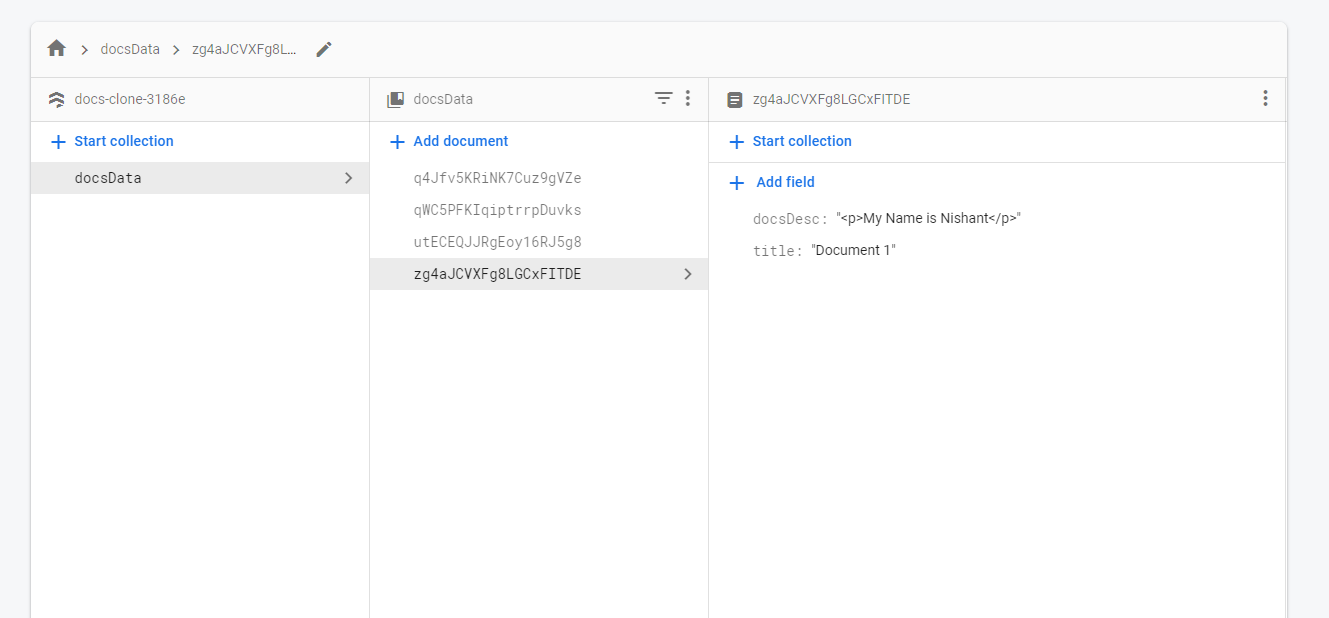
If we add something further, we will append the previous data:

How to Get the Data Back from the Database to the Editor
Now, if we go back and click any document, the data will be null, or erased. So, we have to get data from the database and set it to the editor.
We will use the onSnapshot function to do that.
import {
    updateDoc,
    collection,
    doc,
    onSnapshot
} from 'firebase/firestore';
const getData = () => {

    }

    useEffect(() => {
        if(isMounted.current){
            return
        }

        isMounted.current = true;
        getData()
    }, [])
So, it's just like we did in the Docs component. We need to specify which data to get using the ID parameter. And then we pass this document to the onSnapshot function to get the data we need.
const getData = () => {
        const document = doc(collectionRef, params.id)
        onSnapshot(document, (docs) => {
            console.log(docs.data().docsDesc)
        })
    }

Let's set this docs.data().docsDesc in docsDesc state using setDocsDesc. So, if the document loads, it will be set there.
Add some data, then go back. And if you come back to the same component, the document description will be there.
Now in the home page where we are seeing all the data, we need to add the description too, if it exists.
<div dangerouslySetInnerHTML={{__html: doc.docsDesc}} />
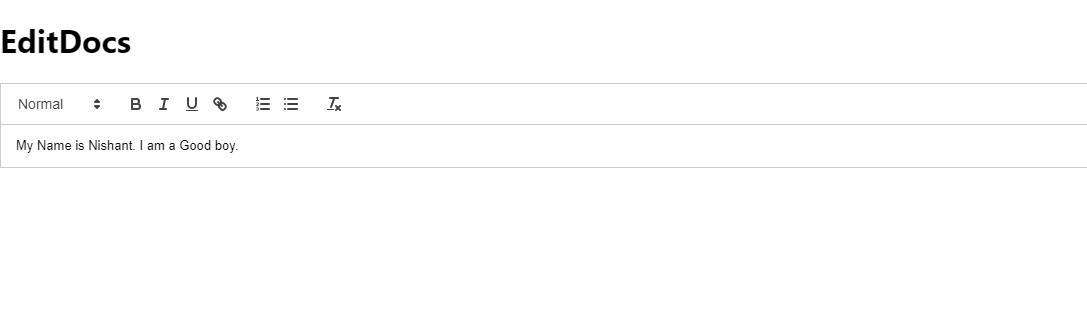
We are using dangerouslySetInnerHTML because data is added in the form of tags in React Quill. That makes it easier to render the formatting.
See, I have added some formatting like Bold and Italic texts.
Now, we need to make some slight modifications. In the App.js file (where we are adding the document title) let's also add the description, which will initially be empty.
const addData = () => {
        addDoc(collectionRef, {
            title: title,
            docsDesc: ''
        })
        .then(() => {
            alert('Data Added');
            handleClose()
        })
        .catch(() => {
            alert('Cannot add data')
        })
    }
So if we create a document, we will have the docsDesc in the Firestore Document. That will prevent our app from crashing when we go the EditDocs page.
Now, in the EditDocs page, let's add the document title so that it shows up on the top. Create a state called documentTitle and set it.
const [documentTitle, setDocumentTitle] = useState('')

const getData = () => {
        const document = doc(collectionRef, params.id)
        onSnapshot(document, (docs) => {
            setDocumentTitle(docs.data().title)
            setDocsDesc(docs.data().docsDesc);
        })
    }
And display this state on the top:
<h1>{documentTitle}</h1>
Here is the whole code for the EditDocs page till now:
import React, { useEffect, useState, useRef } from 'react';
import { useParams } from 'react-router-dom';
import ReactQuill from 'react-quill';
import 'react-quill/dist/quill.snow.css';
import {
    updateDoc,
    collection,
    doc,
    onSnapshot
} from 'firebase/firestore';
export default function EditDocs({
    database
}) {
    const isMounted = useRef()
    const collectionRef = collection(database, 'docsData')
    let params = useParams();
    const [documentTitle, setDocumentTitle] = useState('')
    const [docsDesc, setDocsDesc] = useState('');
    const getQuillData = (value) => {
        setDocsDesc(value)
    }
    useEffect(() => {
        const updateDocsData = setTimeout(() => {
            const document = doc(collectionRef, params.id)
            updateDoc(document, {
                docsDesc: docsDesc
            })
                .then(() => {
                    alert('Saved')
                })
                .catch(() => {
                    alert('Cannot Save')
                })
        }, 1000)
        return () => clearTimeout(updateDocsData)
    }, [docsDesc])

    const getData = () => {
        const document = doc(collectionRef, params.id)
        onSnapshot(document, (docs) => {
            setDocumentTitle(docs.data().title)
            setDocsDesc(docs.data().docsDesc);
        })
    }

    useEffect(() => {
        if (isMounted.current) {
            return
        }

        isMounted.current = true;
        getData()
    }, [])
    return (
        <div>
            <h1>{documentTitle}</h1>

            <ReactQuill
                value={docsDesc}
                onChange={getQuillData}
            />
        </div>
    )
}
How to Add Some Styling
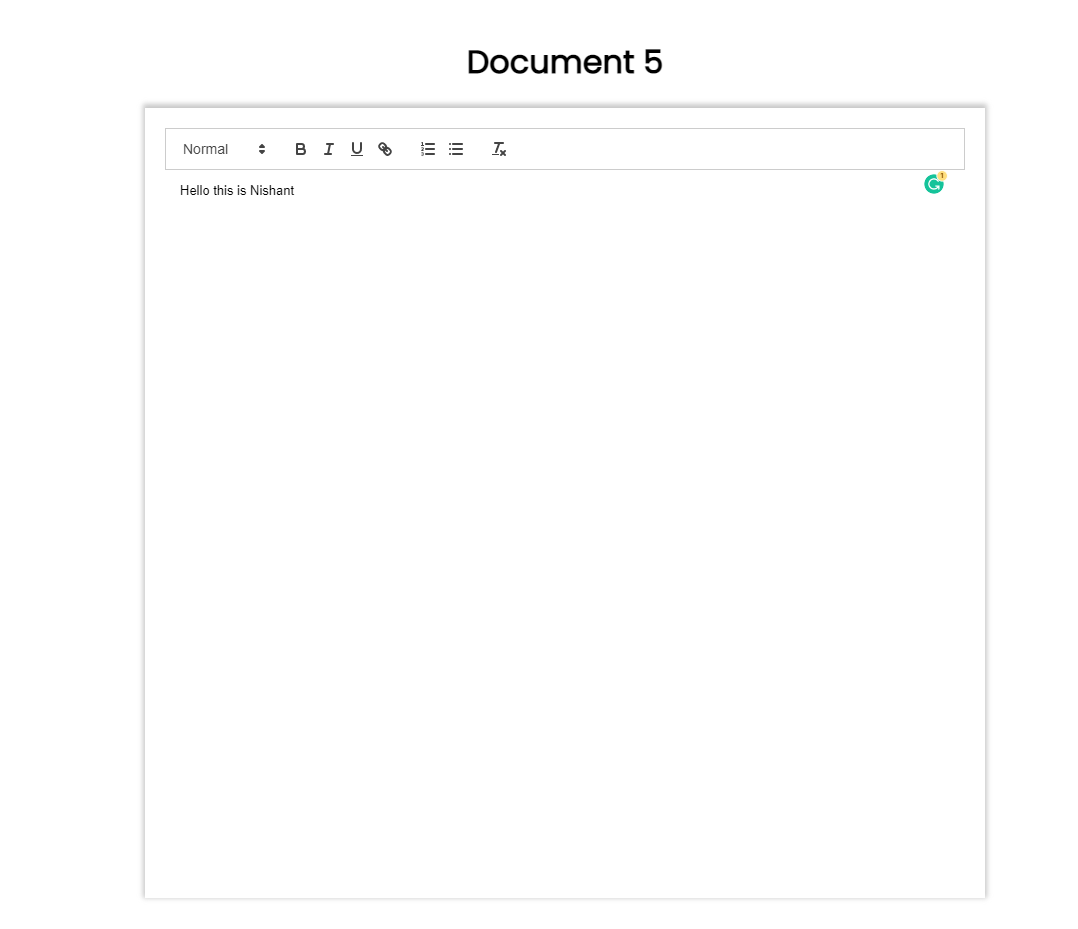
Now let's add some styling in this EditDocs page:
<div className='editDocs-main'>
            <h1>{documentTitle}</h1>
            <div className='editDocs-inner'>
                <ReactQuill
                    className='react-quill'
                    value={docsDesc}
                    onChange={getQuillData}
                />
            </div>
        </div>
And in the CSS, add the following styling:
.editDocs-main {
    font-family: 'Poppins', sans-serif;
    padding: 20px;
    display: flex;
    justify-content: center;
    align-items: center;
    flex-direction: column;
}

.editDocs-inner {
    width: 800px;
    box-shadow: 0px -2px 5px 2px rgba(181, 181, 181, 0.75);
    -webkit-box-shadow: 0px -2px 5px 2px rgba(181, 181, 181, 0.75);
    -moz-box-shadow: 0px -2px 5px 2px rgba(181, 181, 181, 0.75);
    padding: 20px;
    height: 750px;
}

.ql-container.ql-snow {
    border: none !important;
}
We are adding a box shadow, we are removing the React Quill border, and we are centering everything.
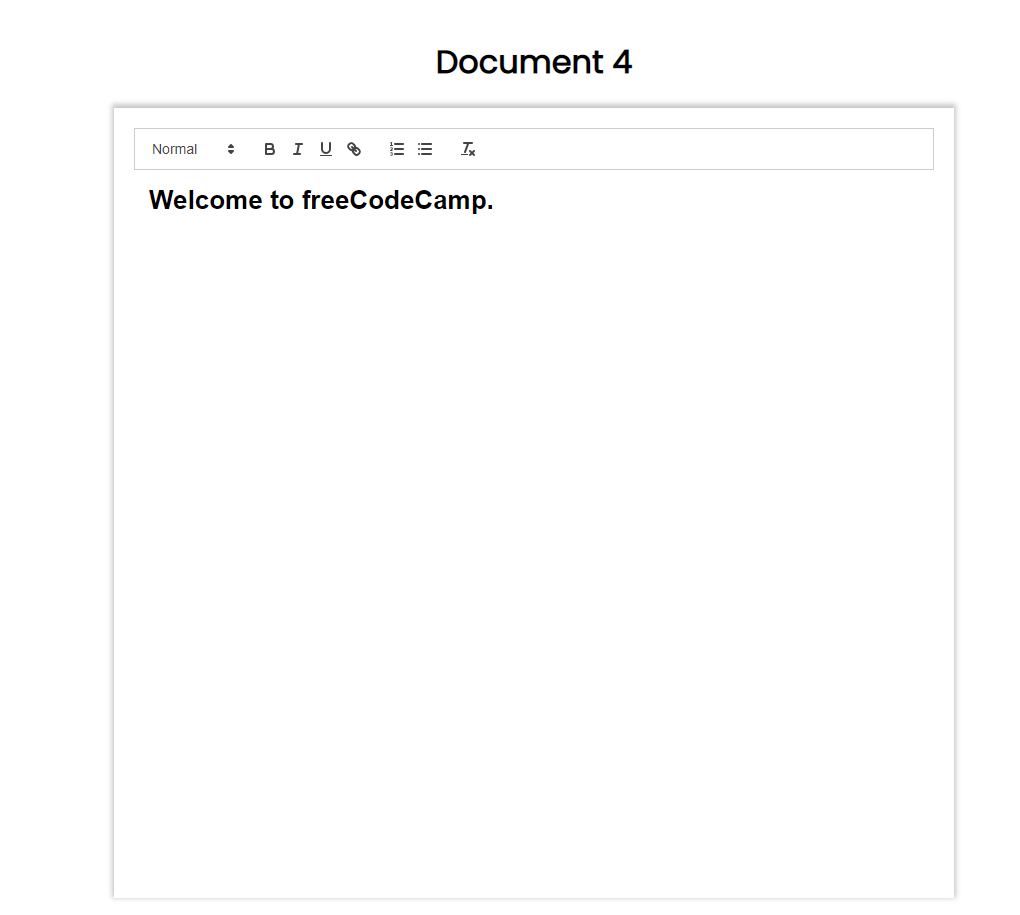
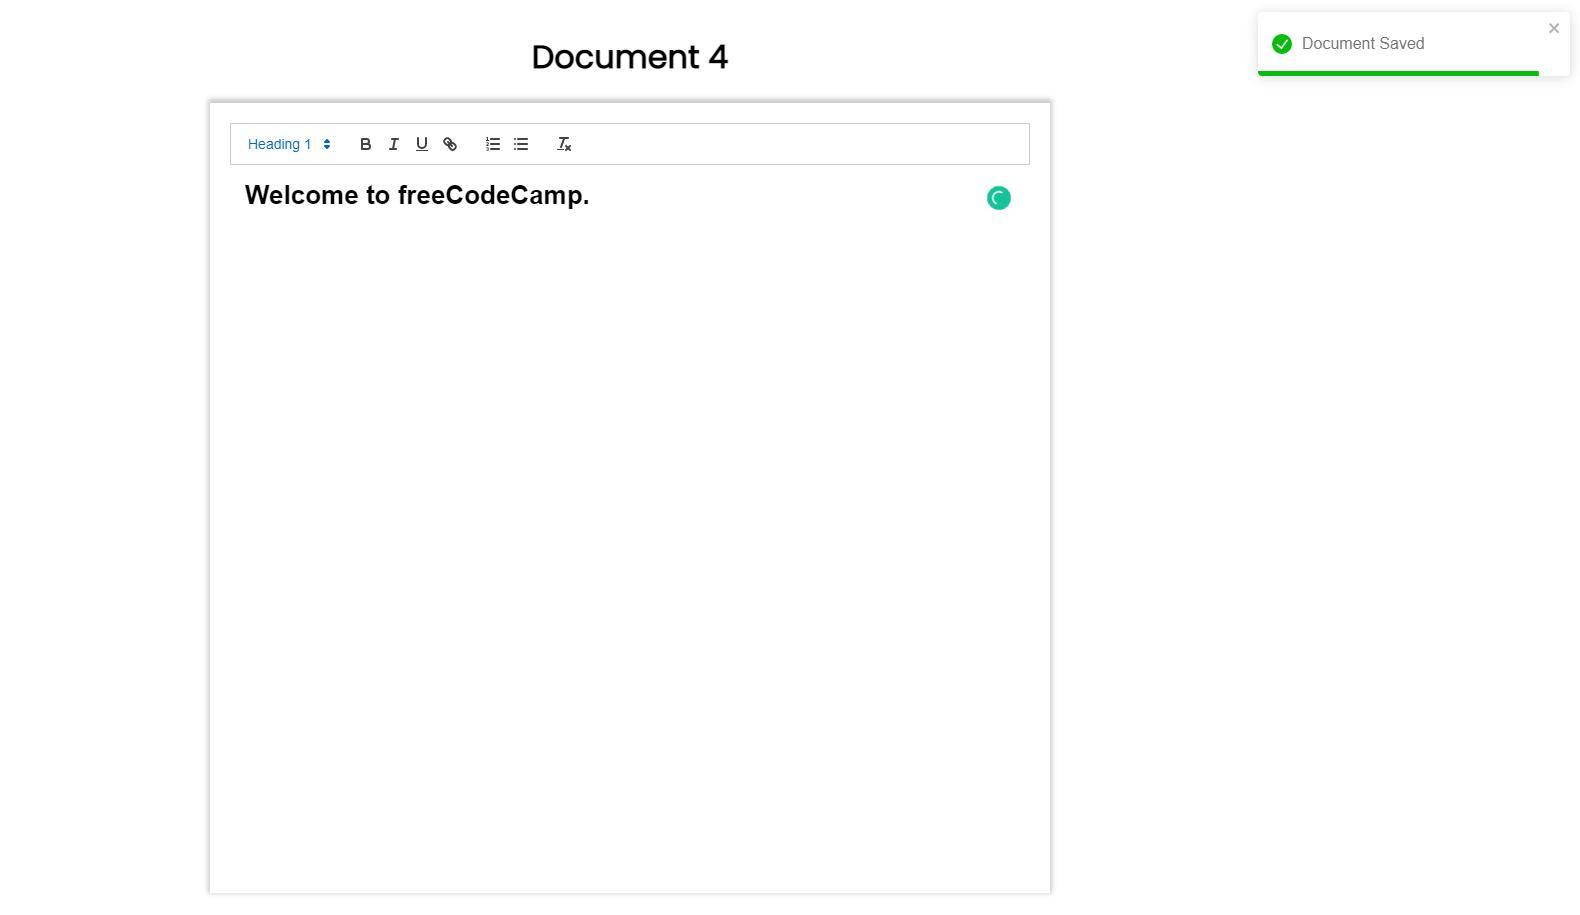
This is how our edit document page looks now:
Now for our final thing: let's replace our alerts with toast messages. We need one more package called React Toastify. So, let's install it.
npm i react-toastify
Then we need to import these two things:
import { ToastContainer, toast } from 'react-toastify';
import 'react-toastify/dist/ReactToastify.css';
And then, the component.
Now, for the toast message, simply do this:
useEffect(() => {
        const updateDocsData = setTimeout(() => {
            const document = doc(collectionRef, params.id)
            updateDoc(document, {
                docsDesc: docsDesc
            })
                .then(() => {
                    toast.success('Document Saved', {
                        autoClose: 2000
                    })
                })
                .catch(() => {
                    toast.error('Cannot Save Document', {
                        autoClose: 2000
                    })
                })
        }, 1000)
        return () => clearTimeout(updateDocsData)
    }, [docsDesc])
We have toast.success for success alerts, and toast.error for error alerts.
Conclusion
And there you have it, you've built a Google Docs clone. You are free to experiment and make this better.
You can get the full code here: https://github.com/nishant-666/Google-Docs-Clone
Also, check out my channel Cybernatico for more amazing tutorials like these.
Happy Learning.