
In this tutorial, we will discuss how to build a Job Description Generator with Next.js, and ChatGPT, a powerful language generation model developed by OpenAI.
We will also use TailwindCSS, a utility-first CSS framework, to style our Next.js app.
Check out the GitHub Repo here if you want to jump right into the code.
And here's a link to the deployed version: https://ai-job-description.vercel.app/.
Now let's get started.
Prerequisites
Before we get started, you should have:
- Knowledge of HTML, CSS, and JavaScript.
- Basic understanding of React and Next.js.
- Node and NPM are installed on your local dev machine.
- Any code editor of your choice. (example VSCode)
If you feel like your progress could be improved because you need to learn more about these subjects, check out https://www.freecodecamp.org/learn. The awesome modules there will get you started in no time.
How to Setup and Install Next.js
We will use Create Next App to initialize a Next.js project quickly. In your project's root directory, run the following commands in the terminal:
npx create-next-app@latest ai-job-description --src-dir
cd ai-job-description
npm run dev
Select No when prompted for extra configs.
✔ Would you like to use TypeScript with this project? … No / Yes
✔ Would you like to use ESLint with this project? … No / Yes
? Would you like to use experimental `app/` directory with this project? › No / ✔ Would you like to use experimental `app/` directory with this project? … No
You can run the following command if you want to create a TypeScript project:
npx create-next-app@latest ai-job-description --typescript --src-dir
cd ai-job-description
npm run dev
The last command, npm run dev, will start the development server on your system's port 3000.
Navigate to http://localhost:3000 in the browser. Here is what your app will look like:
 Next.js 13
You can now close the development server. The next step is clean the sample code generated by Create Next App and configure the project to use TailwindCSS.
Run the following commands to install TailwindCSS to the project.
npm install -D tailwindcss postcss autoprefixer
npx tailwindcss init -p
The last command will create a tailwind.config.js file in your project’s root directory.
Update the tailwind.config.js file like this to include the paths to our files:
module.exports = {
  content: [
    "./src/pages/**/*.{js,ts,jsx,tsx}",
    "./src/components/**/*.{js,ts,jsx,tsx}",
  ],
  theme: {
    extend: {},
  },
  plugins: [],
};
- Delete the
src/styles/Home.module.cssfile. - Update the
src/styles/globals.csslike this.
@tailwind base;
@tailwind components;
@tailwind utilities;
- Modify
src/pages/index.jslike this:
// src/pages/index.js
import Head from "next/head";
import { Inter } from "@next/font/google";

const inter = Inter({ subsets: ["latin"] });

export default function Home() {
  return (
    <>
      <Head>
        <title>AI Job Description Generator</title>
        <meta name="description" content="AI Job Description Generator" />
        <meta name="viewport" content="width=device-width, initial-scale=1" />
        <link rel="icon" href="/favicon.ico" />
      </Head>
      <main className={"bg-white min-h-screen "}>
        <div className="flex flex-col items-center justify-center px-4 py-2">
          <h1 className="text-4xl md:text-6xl font-bold">
            AI Job Description Generator
            <span className="text-4xl md:text-6xl font-bold text-blue-600">
              .
            </span>
          </h1>
          <p className="mt-3 text-2xl">
            Create Beautiful
            <span className="text-2xl font-bold text-blue-600">
              {" "}
              Job Descriptions{" "}
            </span>
            in Seconds
          </p>
        </div>
      </main>
    </>
  );
}
We added a simple heading and subtitle to our app in the above code. Restart the dev server by running the npm run dev command and again head over to http://localhost:3000/ in the browser. Your app will look something like this:
 AI Job Description Generator
How to Generate an OpenAI API Key
In this section, we will discuss how you can generate an OpenAI API Key. Head over to https://beta.openai.com/signup in the browser and create an account on OpenAI if you still need to do so.
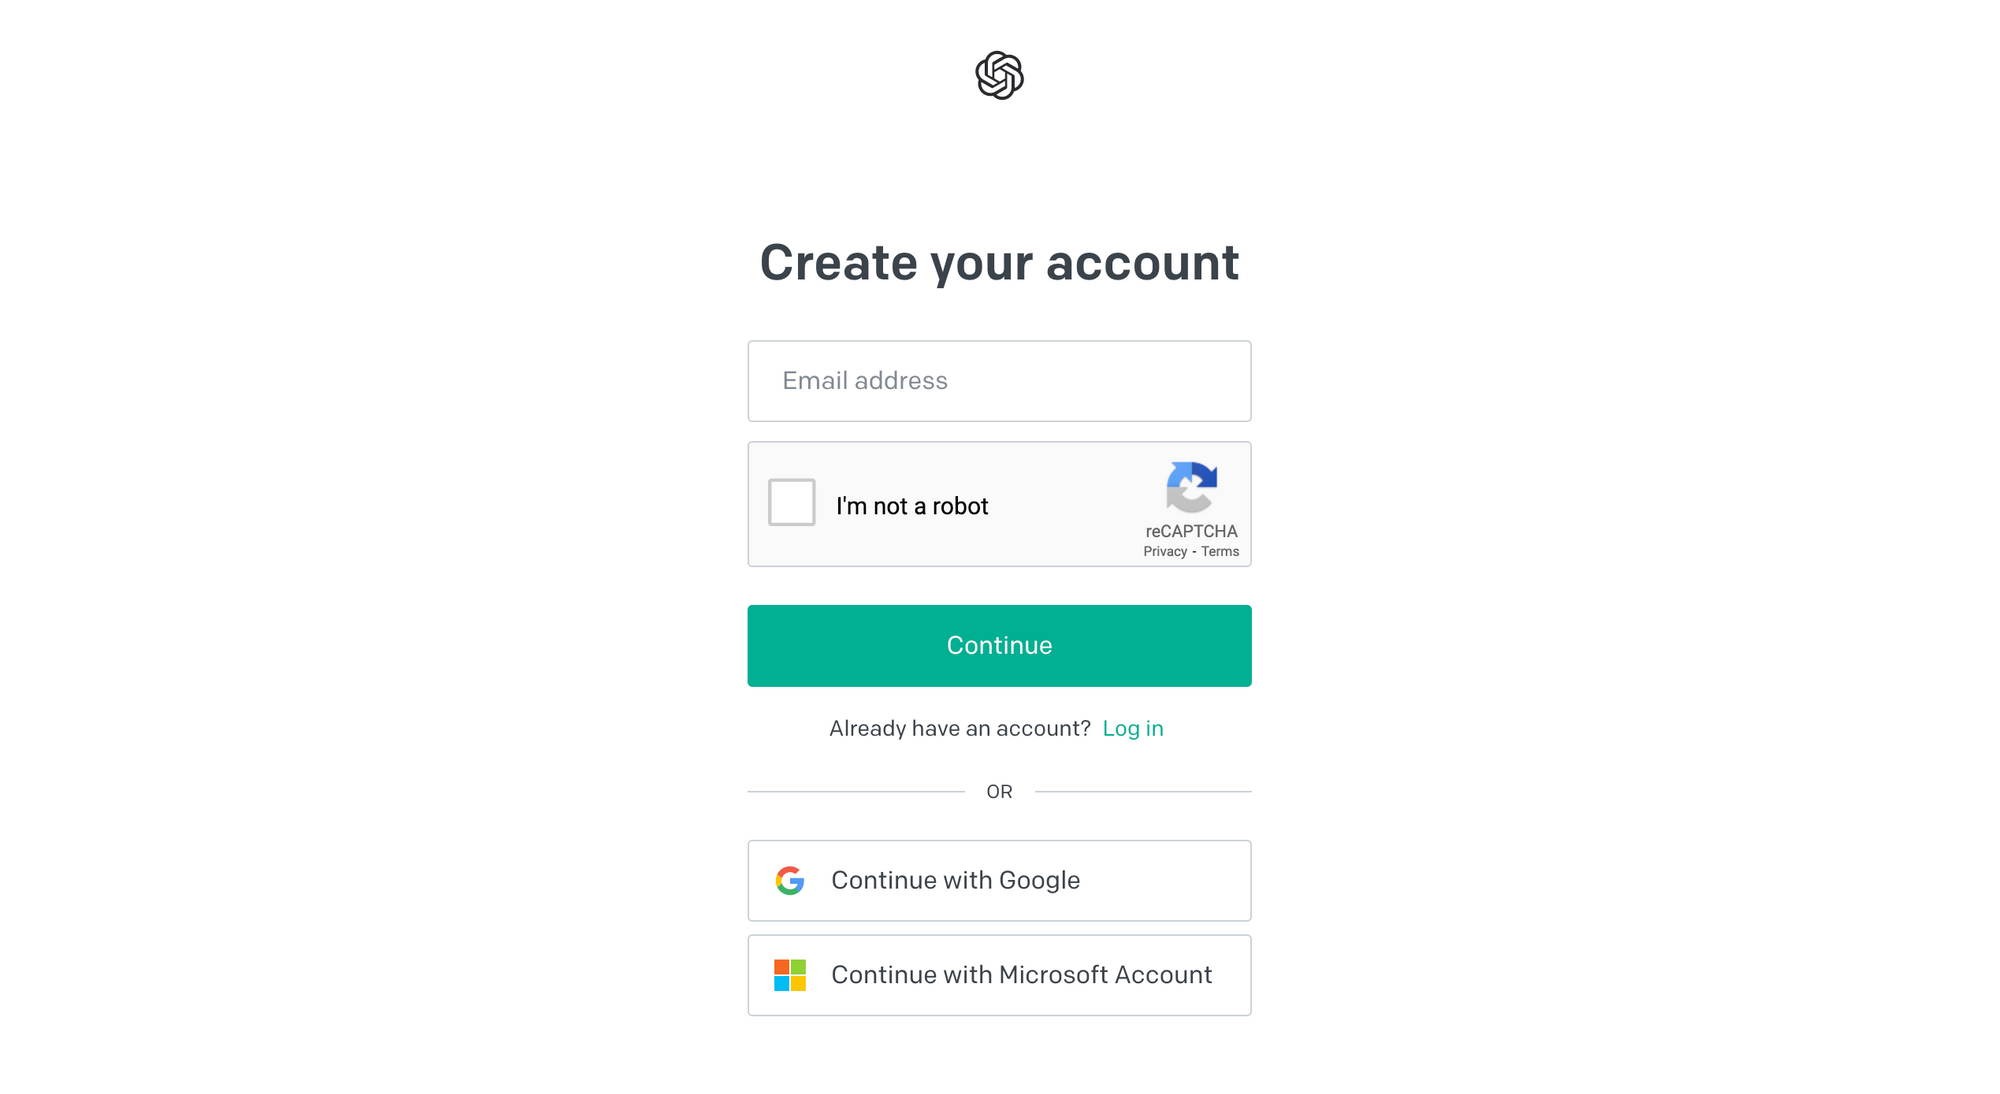 https://beta.openai.com/signup
After creating an account, navigate to https://beta.openai.com/account/api-keys and click on + Create new secret key.
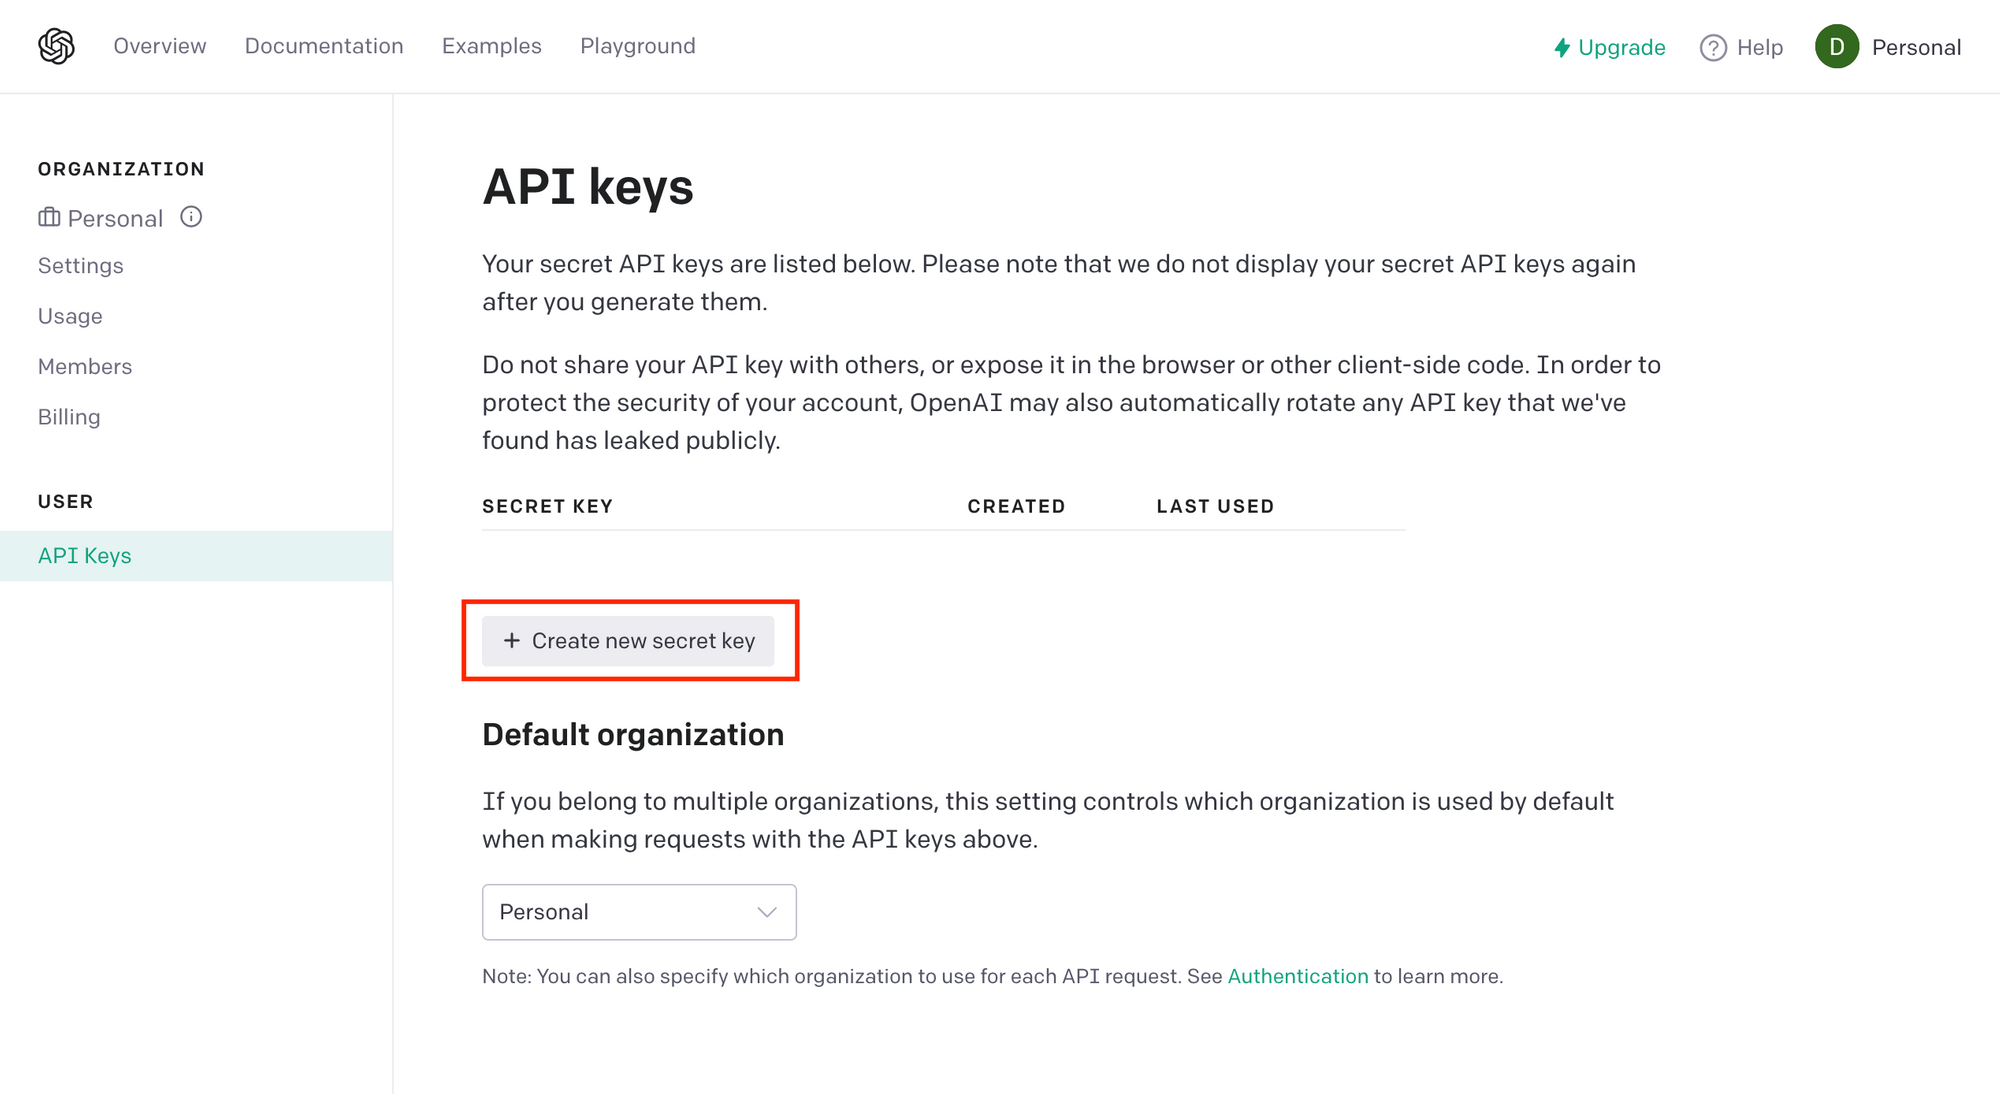
This will generate a new API Key – copy this key. Run the following command to create a .env file:
touch .env
Inside this .env file, create a new environment variable named OPENAI_API_KEY and paste the API key there.
OPENAI_API_KEY = <REPLACE_WITH_YOUR_KEY>
Next.js has built-in support for loading environment variables from .env into process.env. You can read more about it here.
How to Build the UI of the App
To generate the Job Descriptions, we need some basic details about the job itself. In this section, we will create the form to take user input.
We will ask the user about Job Title, Industry, Tone, and Keywords to include in the Job Description. You can modify the fields to create a custom Job Description Generator.
For example, if you want to build this for the Tech Industry, you can hardcode that info and remove the corresponding fields.
We will show the result of the ChatGPT API request in a text area and give the user the option to copy the output to their clipboard.
Run the following commands in the root directory to create a file named Dashboard.js in the components folder.
cd src
mkdir components
cd components
touch Dashboard.js
Add the following code to the Dashboard.js file:
import React, { useState } from "react";

export default function Dashboard() {
  const [jobDescription, setJobDescription] = useState("");

  const [jobTitle, setJobTitle] = useState("");
  const [industry, setIndustry] = useState("");
  const [keyWords, setKeyWords] = useState("");
  const [tone, setTone] = useState("");
  const [numWords, setNumWords] = useState("");

  const [isGenerating, setIsGenerating] = useState(false);
  const [isCopied, setIsCopied] = useState(false);

  return (
    <div className="max-w-7xl w-full mx-auto px-4 sm:px-6 lg:px-8 py-12">
      <div className="grid gap-y-12 md:grid-cols-2 md:gap-x-12 ">
        <div className="">
          <form>
            <div className="flex flex-col">
              <label className="sr-only" htmlFor="jobTitle">
                Job Title
              </label>
              <input
                type="text"
                className="block w-full rounded-md bg-white border border-gray-400 shadow-sm focus:border-indigo-500 focus:ring-indigo-500 sm:text-sm px-4 py-2 placeholder-gray-500 my-2 text-gray-900"
                name="jobTitle"
                placeholder="Job Title"
                id="jobTitle"
                value={jobTitle}
                onChange={(e) => setJobTitle(e.target.value)}
                required
              />
            </div>
            <div className="flex flex-col">
              <label htmlFor="industry" className="sr-only">
                Industry
              </label>
              <input
                value={industry}
                onChange={(e) => setIndustry(e.target.value)}
                className="block w-full rounded-md bg-white border border-gray-400 shadow-sm focus:border-indigo-500 focus:ring-indigo-500 sm:text-sm px-4 py-2 placeholder-gray-500 my-2 text-gray-900"
                placeholder="Industry (Optional)"
                type="text"
                name="industry"
                id="industry"
              />
            </div>
            <div className="flex flex-col">
              <label htmlFor="keywords" className="sr-only">
                Keywords for AI (Optional)
              </label>
              <textarea
                rows={7}
                value={keyWords}
                onChange={(e) => setKeyWords(e.target.value)}
                name="keyWords"
                id="keyWords"
                placeholder="Keywords for AI (Optional)"
                className="block w-full rounded-md bg-white border border-gray-400 shadow-sm focus:border-indigo-500 focus:ring-indigo-500 sm:text-sm px-4 py-2 placeholder-gray-500 my-2 text-gray-900"
              />
            </div>
            <div className="flex flex-col">
              <label className="sr-only" htmlFor="tone">
                Tone
              </label>

              <select
                value={tone}
                onChange={(e) => setTone(e.target.value)}
                className="block w-full rounded-md bg-white border border-gray-400 shadow-sm focus:border-indigo-500 focus:ring-indigo-500 sm:text-sm px-4 py-2 placeholder-gray-500 my-2 text-gray-900"
                name="tone"
                id="tone"
              >
                <option value="default">Select Tone (Optional)</option>
                <option value="casual">Casual</option>
                <option value="friendly">Friendly</option>
                <option value="professional">Professional</option>
                <option value="formal">Formal</option>
              </select>
            </div>
            <div className="flex flex-col">
              <label htmlFor="words" className="sr-only">
                Words (Optional)
              </label>
              <input
                value={numWords}
                onChange={(e) => setNumWords(e.target.value)}
                type="number"
                className="block w-full rounded-md bg-white border border-gray-400 shadow-sm focus:border-indigo-500 focus:ring-indigo-500 sm:text-sm px-4 py-2 placeholder-gray-500 my-2 text-gray-900"
                placeholder="Number Of Words - Default 200 (Optional)"
                name="words"
                id="words"
              />
            </div>

            <button
              className={`bg-blue-600 w-full hover:bg-blue-700 text-white font-bold mt-6 py-2 px-4 rounded
                ${
                  isGenerating || jobTitle === ""
                    ? "cursor-not-allowed opacity-50"
                    : ""
                }`}
              type="submit"
              disabled={isGenerating || jobTitle === ""}
            >
              {isGenerating ? "Generating..." : "Generate Job Description"}
            </button>
          </form>
        </div>
        <div className="">
          <div className="flex flex-col">
            <label htmlFor="output" className="sr-only">
              Output
            </label>
            <textarea
              rows={
                jobDescription === ""
                  ? 7
                  : jobDescription.split("\\n").length + 12
              }
              name="output"
              onChange={(e) => setJobDescription(e.target.value)}
              value={jobDescription}
              disabled={jobDescription === ""}
              id="output"
              placeholder="AI Generated Job Description"
              className="block w-full rounded-md bg-white border border-gray-400 shadow-sm focus:border-indigo-500 focus:ring-indigo-500 sm:text-sm px-4 py-2 placeholder-gray-500 my-2 text-gray-900"
            />
            <button
              onClick={() => {}}
              className="bg-blue-600 hover:bg-blue-700 text-white font-bold py-2 px-4 rounded"
              type="submit"
              disabled={jobDescription === ""}
            >
              {isCopied ? "Copied" : "Copy to Clipboard"}
            </button>
          </div>
        </div>
      </div>
    </div>
  );
}
Here's what we are doing:
First, we start by importing the useState hook from react. Hooks are functions that allow you to use React features, such as defining state, without having to write a class.
The useState lets you track the state, that is data or properties, in a functional component. Here we are using the useState hook to track the value of all the input fields.
We defined the following states:
  const [jobDescription, setJobDescription] = useState("");

  const [jobTitle, setJobTitle] = useState("");
  const [industry, setIndustry] = useState("");
  const [keyWords, setKeyWords] = useState("");
  const [tone, setTone] = useState("");
  const [numWords, setNumWords] = useState("");

  const [isGenerating, setIsGenerating] = useState(false);
  const [isCopied, setIsCopied] = useState(false);
The jobDescription state is for the job description sent by the ChatGPT API. The jobTitle, industry, keyWords, tone and numWords are the state for all the form fields. The isGenerating is used to track whether the request is being processed after the user hits the Generate button. The isCopied state follows whether the user has copied the output Job Description successfully.
We use TailwindCSS to create a grid of two columns. The first column will have the input form, and the other column will render the output Job Description.
<div className="grid gap-y-12 md:grid-cols-2 md:gap-x-12">
...
</div>
We create a form element in the first column and define its input fields.
<form>
  <div className="flex flex-col">
    <label className="sr-only" htmlFor="jobTitle">
      Job Title
    </label>
    <input
      type="text"
      className="block w-full rounded-md bg-white border border-gray-400 shadow-sm focus:border-indigo-500 focus:ring-indigo-500 sm:text-sm px-4 py-2 placeholder-gray-500 my-2 text-gray-900"
      name="jobTitle"
      placeholder="Job Title"
      id="jobTitle"
      value={jobTitle}
      onChange={(e) => setJobTitle(e.target.value)}
      required
    />
  </div>
...
</form>
The jobTitle field is the only required field in the form and is needed to generate the Job Description. We set the value of this input field to jobTitle state and pass the setJobTitle() function to the onChange() event which will update the jobTitle whenever the user types inside the input field. Now, the state, jobTitle state and the input field are interlinked.

We use the same format to create other input fields for Industry and Number of Words.
For the keywords, we use a textarea for the user to enter any relevant info or keywords for the Job Description.
<div className="flex flex-col">
  <label htmlFor="keywords" className="sr-only">
    Keywords for AI (Optional)
  </label>
  <textarea
    rows={7}
    value={keyWords}
    onChange={(e) => setKeyWords(e.target.value)}
    name="keyWords"
    id="keyWords"
    placeholder="Keywords for AI (Optional)"
    className="block w-full rounded-md bg-white border border-gray-400 shadow-sm focus:border-indigo-500 focus:ring-indigo-500 sm:text-sm px-4 py-2 placeholder-gray-500 my-2 text-gray-900"
  />
</div>
Here is how this textarea fields looks:

We also create a select field for the tone of the Job Description. You can customize the options according to your needs.
This app has four tones – Casual, Friendly, Professional, and Formal. Like the input field above for jobTitle, we use the value and onChange event to interlink the select field to the tone state.
<div className="flex flex-col">
  <label className="sr-only" htmlFor="tone">
    Tone
  </label>

  <select
    value={tone}
    onChange={(e) => setTone(e.target.value)}
    className="block w-full rounded-md bg-white border border-gray-400 shadow-sm focus:border-indigo-500 focus:ring-indigo-500 sm:text-sm px-4 py-2 placeholder-gray-500 my-2 text-gray-900"
    name="tone"
    id="tone"
  >
    <option value="default">Select Tone (Optional)</option>
    <option value="casual">Casual</option>
    <option value="friendly">Friendly</option>
    <option value="professional">Professional</option>
    <option value="formal">Formal</option>
  </select>
</div>

The final field in the form is a button to trigger the generation of the Job Description.
<button
  className={`bg-blue-600 w-full hover:bg-blue-700 text-white font-bold mt-6 py-2 px-4 rounded
                ${
                  isGenerating || jobTitle === ""
                    ? "cursor-not-allowed opacity-50"
                    : ""
                }`}
  type="submit"
  disabled={isGenerating || jobTitle === ""}
>
  {isGenerating ? "Generating..." : "Generate Job Description"}
</button>
We don’t want users to click on the Generate button without any Job Title and create empty requests. So in the above button, we use the isGenerating and jobTitle state to disable the button when the jobTitle is empty. We also change the button's text to Generating when the API request is in process.

We add a textarea field to display the output Job Description in the second column. This textarea is disabled while the jobDescription state is empty.
<div className="flex flex-col">
  <label htmlFor="output" className="sr-only">
    Output
  </label>
  <textarea
    rows={jobDescription === "" ? 7 : jobDescription.split("\\n").length + 12}
    name="output"
    onChange={(e) => setJobDescription(e.target.value)}
    value={jobDescription}
    disabled={jobDescription === ""}
    id="output"
    placeholder="AI Generated Job Description"
    className="block w-full rounded-md bg-white border border-gray-400 shadow-sm focus:border-indigo-500 focus:ring-indigo-500 sm:text-sm px-4 py-2 placeholder-gray-500 my-2 text-gray-900"
  />
  ...
</div>
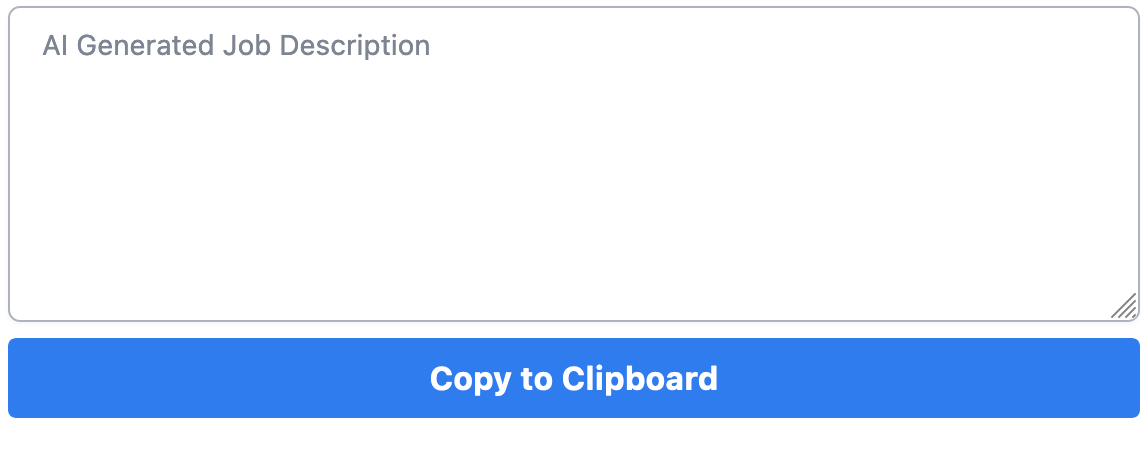
We also add a copy button to the second column so users can easily copy the output Job Description. This button is also disabled while the jobDescription state is empty.
<button
  onClick={() => {}}
  className="bg-blue-600 hover:bg-blue-700 text-white font-bold py-2 px-4 rounded"
  type="submit"
  disabled={jobDescription === ""}
>
  {isCopied ? "Copied" : "Copy to Clipboard"}
</button>
Here is how the second column looks:
Next, we update the index.js file like this to import and add the Dashboard component:
import Head from "next/head";
import { Inter } from "@next/font/google";
import Dashboard from "@/components/Dashboard";

const inter = Inter({ subsets: ["latin"] });

export default function Home() {
  return (
    <>
      <Head>
        <title>AI Job Description Generator</title>
        <meta name="description" content="AI Job Description Generator" />
        <meta name="viewport" content="width=device-width, initial-scale=1" />
        <link rel="icon" href="/favicon.ico" />
      </Head>
      <main className={"bg-white min-h-screen "}>
        <div className="flex flex-col items-center justify-center px-4 py-2">
          <h1 className="text-4xl md:text-6xl font-bold">
            AI Job Description Generator
            <span className="text-4xl md:text-6xl font-bold text-blue-600">
              .
            </span>
          </h1>
          <p className="mt-3 text-2xl">
            Create Beautiful
            <span className="text-2xl font-bold text-blue-600">
              {" "}
              Job Descriptions{" "}
            </span>
            in Seconds
          </p>
        </div>
        <Dashboard />
      </main>
    </>
  );
}
Your app will look something like this:
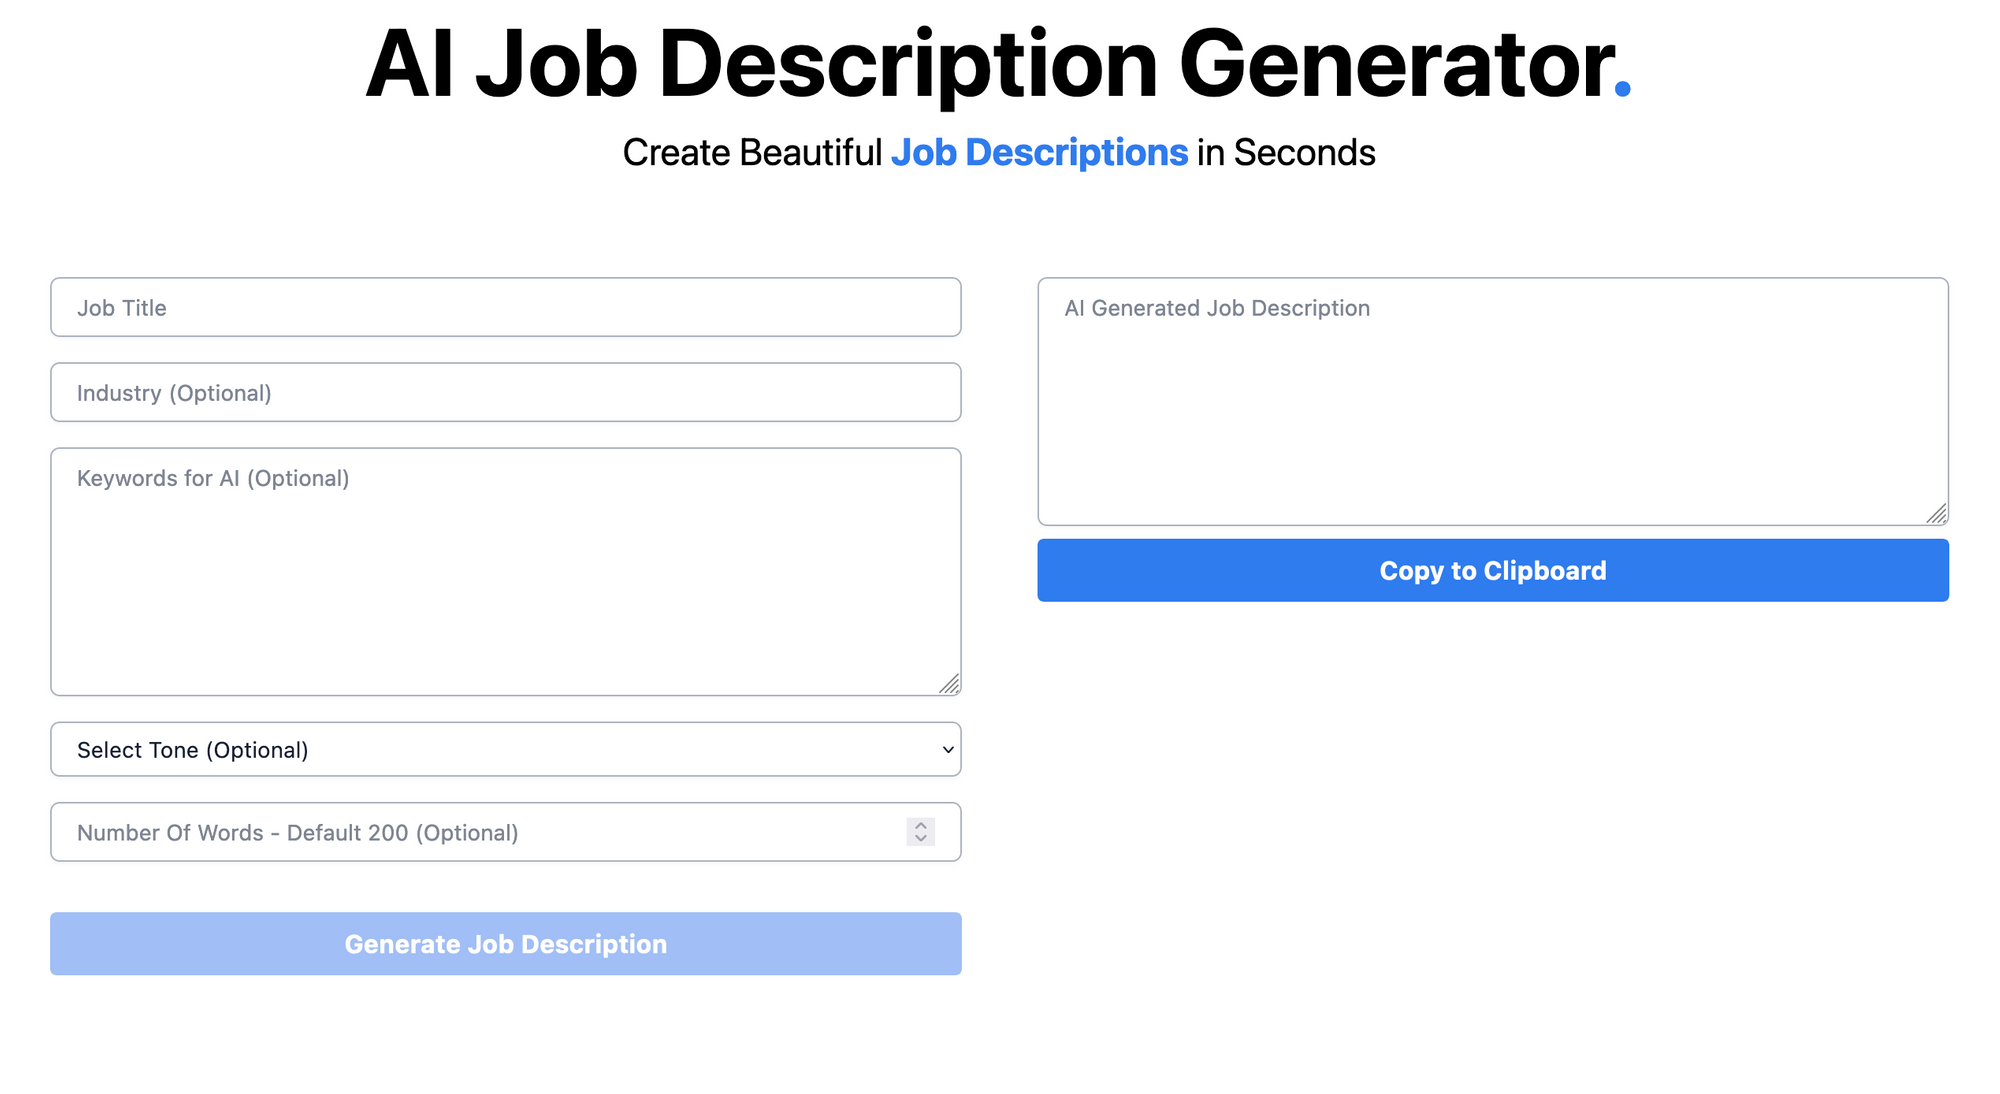
You can add values to the empty fields, but it's not functional yet. We will add the logic to fetch and display the Job Description in the next section.
How to Fetch Data from ChatGPT
In this section, we will discuss how you can create a Next.js API route that sends a request to ChatGPT to generate the Job Description from user input data.
Next.js provides an easy solution to build your API without needing another project, for example, a Node-Express project.
From the NextJS Docs:
Files in the folder pages/api are mapped to the /api/ route and treated as API endpoints rather than pages. These files are server-side only and do not add to the size of the client-side bundle.*
First, run the following command in the project's root to create an API route.
cd src/pages/api
touch returnJobDescription.js
Then add the following code to the returnJobDescription.js file:
const generateDescription = async ({
  jobTitle,
  industry,
  keyWords,
  tone,
  numWords,
}) => {
  try {
    const response = await fetch(
      "https://api.openai.com/v1/engines/text-davinci-003/completions",
      {
        method: "POST",
        headers: {
          "Content-Type": "application/json",
          Authorization: `Bearer ${process.env.OPENAI_API_KEY}`,
        },
        body: JSON.stringify({
          prompt: `Write a job description for a  ${jobTitle} role
          ${industry ? `in the ${industry} industry` : ""} that is around ${
            numWords || 200
          } words in a ${tone || "neutral"} tone. ${
            keyWords ? `Incorporate the following keywords: ${keyWords}.` : ""
          }. The job position should be described in a way that is SEO friendly, highlighting its unique features and benefits.`,
          max_tokens: 100,
          temperature: 0.5,
        }),
      }
    );
    const data = await response.json();

    return data.choices[0].text;
  } catch (err) {
    console.error(err);
  }
};

export default async function handler(req, res) {
  const { jobTitle, industry, keyWords, tone, numWords } = req.body;

  const jobDescription = await generateDescription({
    jobTitle,
    industry,
    keyWords,
    tone,
    numWords,
  });

  res.status(200).json({
    jobDescription,
  });
}
Here’s what we are doing:
First, we create an async function named generateJobDescription that takes jobTitle, industry, tone, numWords and keywords as arguments.
const generateDescription = async ({
  jobTitle,
  industry,
  keyWords,
  tone,
  numWords,
}) => {
...
}
Then we then use fetch API inside a try/catch block to create a POST request to the OpenAI ChatGPT endpoint. You can read more about fetch API here. You can also use the OpenAI NodeJS package instead of the fetch API.
The requests are sent to the following endpoint: https://api.openai.com/v1/engines/text-davinci-003/completions
Here the text-davinci-003 is the model for the ChatGPT, and completions is the task we want to perform. You can read about other OpenAI models here.
  try {
    const response = await fetch(
      "https://api.openai.com/v1/engines/text-davinci-003/completions",
      {
        method: "POST",
        headers: {
          "Content-Type": "application/json",
          Authorization: `Bearer ${process.env.OPENAI_API_KEY}`,
        },
        body: JSON.stringify({
          prompt: `Write a job description for a  ${jobTitle} role
          ${industry ? `in the ${industry} industry` : ""} that is around ${
            numWords || 200
          } words in a ${tone || "neutral"} tone. ${
            keyWords ? `Incorporate the following keywords: ${keyWords}.` : ""
          }. The job position should be described in a way that is SEO friendly, highlighting its unique features and benefits.`,
          max_tokens: 100,
          temperature: 0.5,
        }),
      }
    );

...
}
catch (err) {
    console.error(err);
  }
The OpenAI API uses the API key we generated previously to authenticate the requests. We add it to the Authorization HTTP header like this:
headers: {
 Authorization: `Bearer ${process.env.OPENAI_API_KEY}`,
},
In the body of the POST request, we add the user input values to a pre-configured prompt for the Job Description. This prompt can be a string, array of strings, array of tokens, or array of token arrays. You can customize this prompt accordingly.
We have added a default value for numWords and tone in the prompt, that is 200 and neutral, respectively. You can read more about this here.
body: JSON.stringify({
    prompt: `Write a job description for a  ${jobTitle} role
          ${industry ? `in the ${industry} industry` : ""} that is around ${
        numWords || 200
    } words in a ${tone || "neutral"} tone. ${
        keyWords ? `Incorporate the following keywords: ${keyWords}.` : ""
    }. The job position should be described in a way that is SEO friendly, highlighting its unique features and benefits.`,
    max_tokens: 100,
    temperature: 0.5,
})
Tokens are common sequences of characters found in the text. The max_tokens is the maximum token used to generate the Job Description. You can read more about tokens here.
The temperature specifies the sampling temperature to use. Higher values means the model will take more risks. For example, 0.9 will be best for more creative applications, and 0 (argmax sampling) for the ones with a well-defined answer.
Finally, we parse the response stream from OpenAI API to JSON format and return it from the function. You can read more about the json() method here.
const data = await response.json();
return data.choices[0].text;
This generateDescription function is used inside the NextJS API route handler, and the output from OpenAI API is returned from the API route.
export default async function handler(req, res) {
  const { jobTitle, industry, keyWords, tone, numWords } = req.body;

  const jobDescription = await generateDescription({
    jobTitle,
    industry,
    keyWords,
    tone,
    numWords,
  });

  res.status(200).json({
    jobDescription,
  });
}
How to Integrate the NextJS API Route
We have created the UI and the API route. Now its time to bring them together and complete our app. In this section, we will integrate our frontend and backend together.
First, create a function named handleSubmit in Dashboard.js file right below where you defined the states.
const handleSubmit = async (e) => {
    e.preventDefault();
    setIsGenerating(true);
    const res = await fetch("/api/returnJobDescription", {
      method: "POST",
      headers: {
        "Content-Type": "application/json",
      },
      body: JSON.stringify({
        jobTitle,
        industry,
        keyWords,
        tone,
        numWords,
      }),
    });
    setIsGenerating(false);
    const data = await res.json();
    setJobDescription(data.jobDescription.trim());
  };
In the above function, we first prevent the page from reloading using e.preventDefault() when the form is submitted. We then update the isGenerating state to true using setIsGenerating(true).
We again use the fetch API to send a POST request to our NextJS API route /api/returnJobDescription with the user input values in the request's body.
body: JSON.stringify({
    jobTitle,
    industry,
    keyWords,
    tone,
    numWords,
})
After the request, we set the isGenerating state back to false. Then we convert the response to JSON format and set it to the jobDescription state.
setIsGenerating(false);
const data = await res.json();
setJobDescription(data.jobDescription.trim());
Next, update the form with the onSubmit event and pass the handleSubmit() function to it
<form onSubmit={(e) => handleSubmit(e)}>
...
</form>
Finally, we create the handleCopy function to copy the jobDescription state to the clipboard.
const handleCopy = () => {
    navigator.clipboard.writeText(jobDescription);
    setIsCopied(true);
  };
Update the Copy to Clipboard like this:
<button
    onClick={handleCopy}
    className="bg-blue-600 hover:bg-blue-700 text-white font-bold py-2 px-4 rounded"
    type="submit"
    disabled={jobDescription === ""}
>
    {isCopied ? "Copied" : "Copy to Clipboard"}
</button>
Here is the complete code for the Dashboard.js file:
import React, { useState } from "react";

export default function Dashboard() {
  const [jobDescription, setJobDescription] = useState("");

  const [jobTitle, setJobTitle] = useState("");
  const [industry, setIndustry] = useState("");
  const [keyWords, setKeyWords] = useState("");
  const [tone, setTone] = useState("");
  const [numWords, setNumWords] = useState("");

  const [isGenerating, setIsGenerating] = useState(false);
  const [isCopied, setIsCopied] = useState(false);

  const handleCopy = () => {
    navigator.clipboard.writeText(jobDescription);
    setIsCopied(true);
  };

  const handleSubmit = async (e) => {
    e.preventDefault();
    setIsGenerating(true);
    const res = await fetch("/api/returnJobDescription", {
      method: "POST",
      headers: {
        "Content-Type": "application/json",
      },
      body: JSON.stringify({
        jobTitle,
        industry,
        keyWords,
        tone,
        numWords,
      }),
    });
    setIsGenerating(false);
    const data = await res.json();
    setJobDescription(data.jobDescription.trim());
  };

  return (
    <div className="max-w-7xl w-full mx-auto px-4 sm:px-6 lg:px-8 py-12">
      <div className="grid gap-y-12 md:grid-cols-2 md:gap-x-12 ">
        <div className="">
          <form onSubmit={(e) => handleSubmit(e)}>
            <div className="flex flex-col">
              <label className="sr-only" htmlFor="jobTitle">
                Job Title
              </label>
              <input
                type="text"
                className="block w-full rounded-md bg-white border border-gray-400 shadow-sm focus:border-indigo-500 focus:ring-indigo-500 sm:text-sm px-4 py-2 placeholder-gray-500 my-2 text-gray-900"
                name="jobTitle"
                placeholder="Job Title"
                id="jobTitle"
                value={jobTitle}
                onChange={(e) => setJobTitle(e.target.value)}
                required
              />
            </div>
            <div className="flex flex-col">
              <label htmlFor="industry" className="sr-only">
                Industry
              </label>
              <input
                value={industry}
                onChange={(e) => setIndustry(e.target.value)}
                className="block w-full rounded-md bg-white border border-gray-400 shadow-sm focus:border-indigo-500 focus:ring-indigo-500 sm:text-sm px-4 py-2 placeholder-gray-500 my-2 text-gray-900"
                placeholder="Industry (Optional)"
                type="text"
                name="industry"
                id="industry"
              />
            </div>
            <div className="flex flex-col">
              <label htmlFor="keywords" className="sr-only">
                Keywords for AI (Optional)
              </label>
              <textarea
                rows={7}
                value={keyWords}
                onChange={(e) => setKeyWords(e.target.value)}
                name="keyWords"
                id="keyWords"
                placeholder="Keywords for AI (Optional)"
                className="block w-full rounded-md bg-white border border-gray-400 shadow-sm focus:border-indigo-500 focus:ring-indigo-500 sm:text-sm px-4 py-2 placeholder-gray-500 my-2 text-gray-900"
              />
            </div>
            <div className="flex flex-col">
              <label className="sr-only" htmlFor="tone">
                Tone
              </label>

              <select
                value={tone}
                onChange={(e) => setTone(e.target.value)}
                className="block w-full rounded-md bg-white border border-gray-400 shadow-sm focus:border-indigo-500 focus:ring-indigo-500 sm:text-sm px-4 py-2 placeholder-gray-500 my-2 text-gray-900"
                name="tone"
                id="tone"
              >
                <option value="default">Select Tone (Optional)</option>
                <option value="casual">Casual</option>
                <option value="friendly">Friendly</option>
                <option value="professional">Professional</option>
                <option value="formal">Formal</option>
              </select>
            </div>
            <div className="flex flex-col">
              <label htmlFor="words" className="sr-only">
                Words (Optional)
              </label>
              <input
                value={numWords}
                onChange={(e) => setNumWords(e.target.value)}
                type="number"
                className="block w-full rounded-md bg-white border border-gray-400 shadow-sm focus:border-indigo-500 focus:ring-indigo-500 sm:text-sm px-4 py-2 placeholder-gray-500 my-2 text-gray-900"
                placeholder="Number Of Words - Default 200 (Optional)"
                name="words"
                id="words"
              />
            </div>

            <button
              className={`bg-blue-600 w-full hover:bg-blue-700 text-white font-bold mt-6 py-2 px-4 rounded
                ${
                  isGenerating || jobTitle === ""
                    ? "cursor-not-allowed opacity-50"
                    : ""
                }`}
              type="submit"
              disabled={isGenerating || jobTitle === ""}
            >
              {isGenerating ? "Generating..." : "Generate Job Description"}
            </button>
          </form>
        </div>
        <div className="">
          <div className="flex flex-col">
            <label htmlFor="output" className="sr-only">
              Output
            </label>
            <textarea
              rows={
                jobDescription === ""
                  ? 7
                  : jobDescription.split("\n").length + 12
              }
              name="output"
              value={jobDescription}
              onChange={(e) => setJobDescription(e.target.value)}
              disabled={jobDescription === ""}
              id="output"
              placeholder="AI Generated Job Description"
              className="block w-full rounded-md bg-white border border-gray-400 shadow-sm focus:border-indigo-500 focus:ring-indigo-500 sm:text-sm px-4 py-2 placeholder-gray-500 my-2 text-gray-900"
            />
            <button
              onClick={handleCopy}
              className="bg-blue-600 hover:bg-blue-700 text-white font-bold py-2 px-4 rounded"
              type="submit"
              disabled={jobDescription === ""}
            >
              {isCopied ? "Copied" : "Copy to Clipboard"}
            </button>
          </div>
        </div>
      </div>
    </div>
  );
}
Here is the above code in action:

You did it! 🎉
Congrats 👏 on building this AI Job Description Generator project.
Conclusion
In this tutorial, we learned how to build a Job Description Generator with Next.js using the OpenAI ChatGPT.
We also discussed how to install TailwindCSS to a NextJS project and how to create Next.js API routes.
Here are some additional resources that can be helpful:
This tutorial is a preview from one of the projects of the free ebook 8 AI Projects. You can get early access to the full 8 project tutorials 8AIProjects.
If you're inspired to add features yourself, please do share and tag me – I'd love to hear about them :)