By Shayan
Say you're working on your new great idea – a web or mobile app, and a back end server. Nothing too complicated so far. Until you realize that you need to stream data from your server to these clients.
Usually, when working on this, the first thing that comes to mind is to use one of the cool kids on the block, like WebSockets, SocketIO, or even a paid service that takes care of it for you.
But there's another method that's usually left out, and you might not have heard about it yet. It's called SSE, short for Server-Sent Events.
SSE has a special place in my heart because of its simplicity. It's lightweight, efficient, and very powerful.
To explain SSE in detail and how I use it, I will go over a small side project of mine that I think is an excellent showcase of SSE. I'll be using Typescript, Express, and RxJS, so get your environment ready and buckle up as we are about to dive into some code.
Before we get started, there is something that you should know about SSE. As its name suggests, Server-Sent Events is uni-directional from your server to the client. This may be a deal-breaker if your client needs to stream back data to the server. But this is not the case in many scenarios, and we can just rely on REST to send data to the server.
What's the Project?
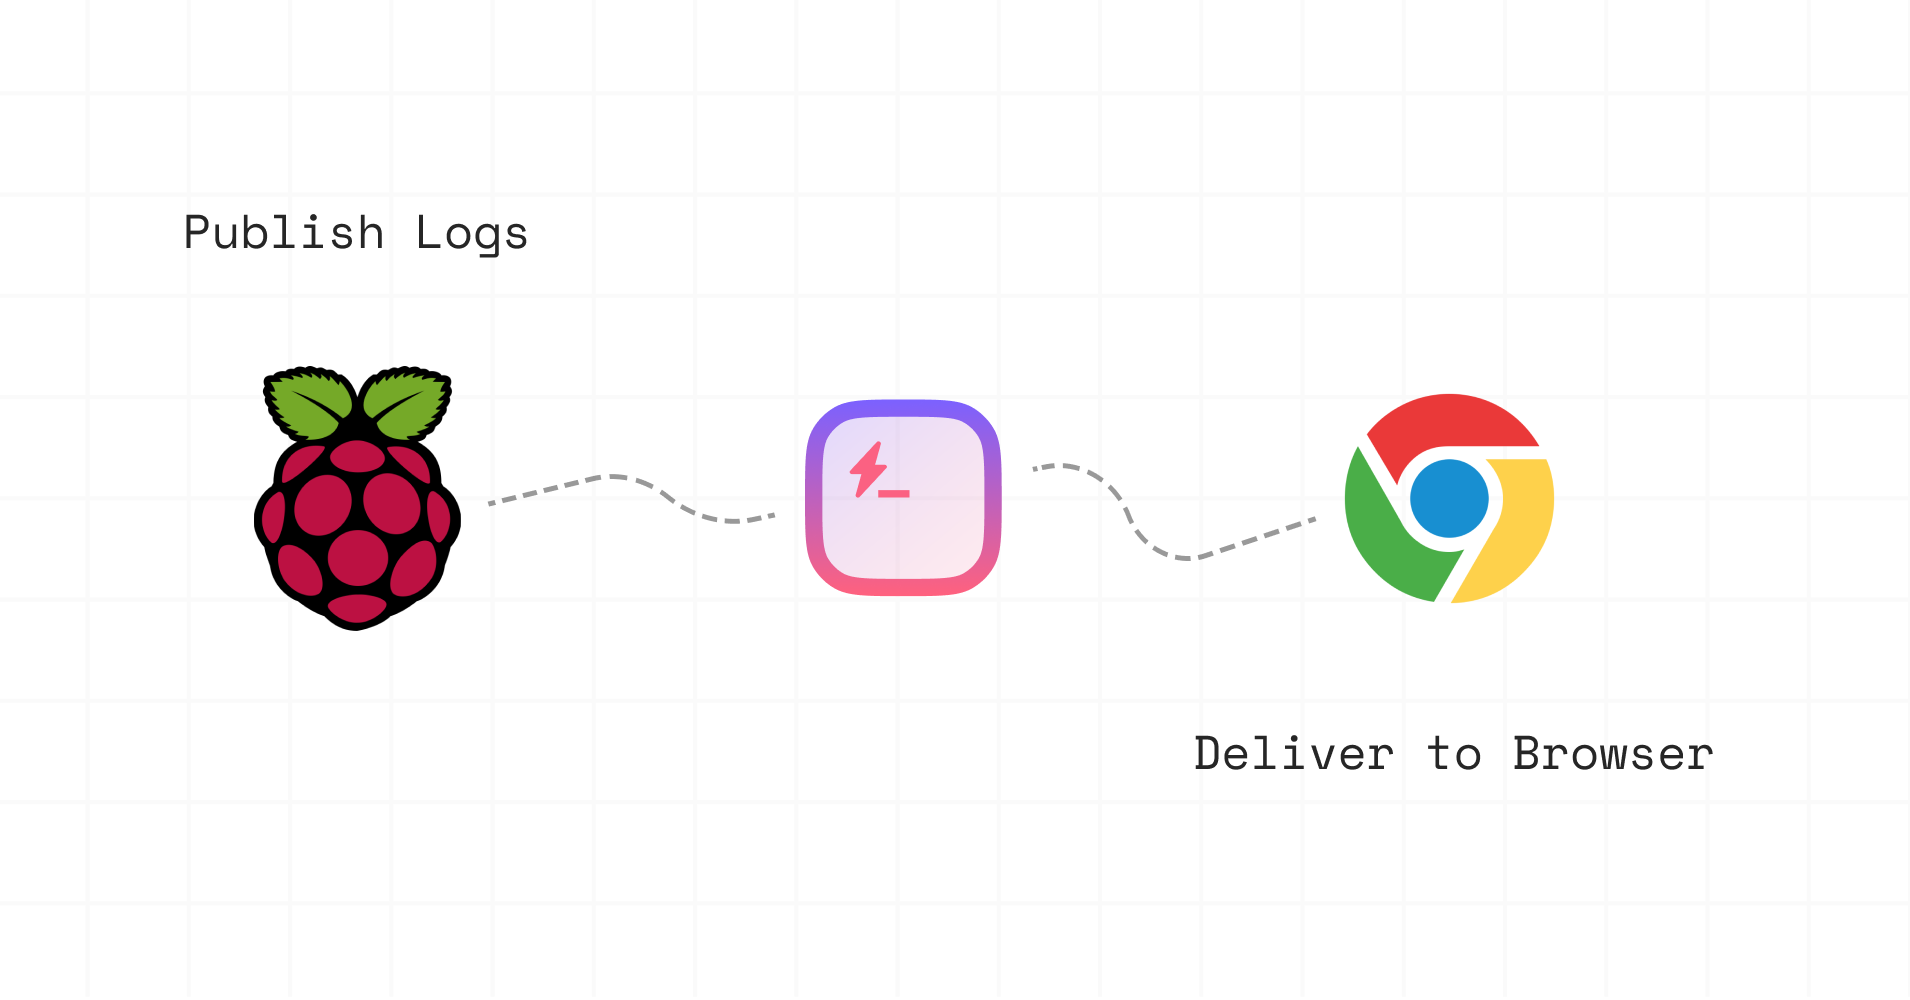
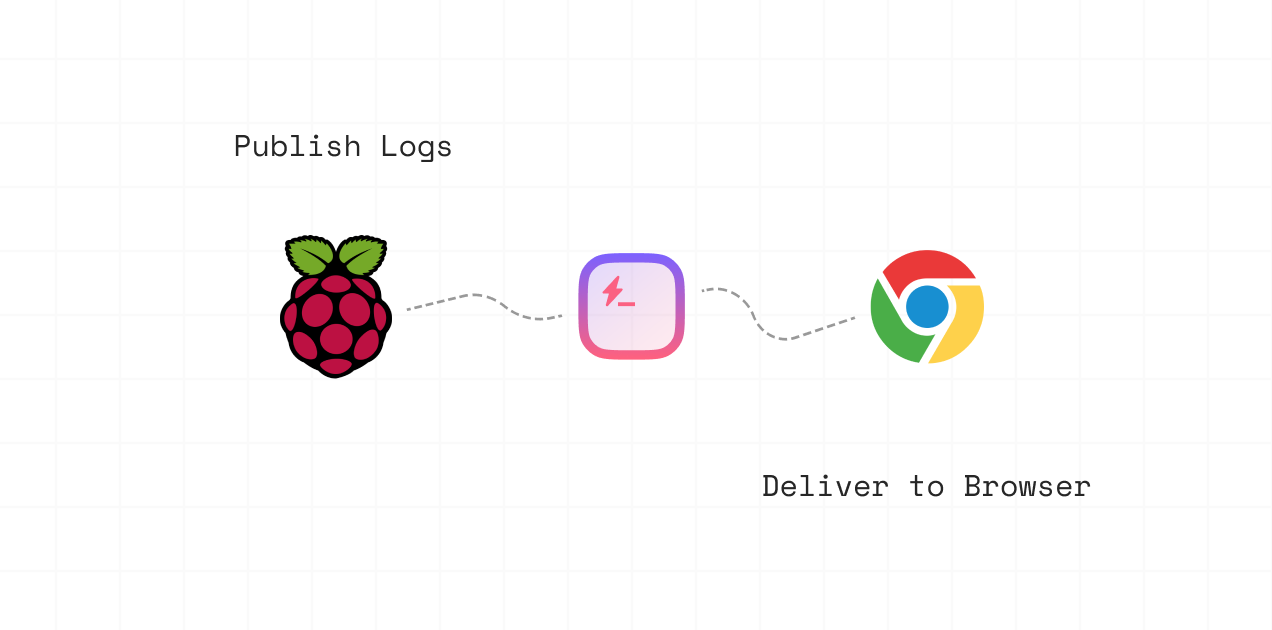
The idea of this project is simple: I have a bunch of scripts running around on Raspberry Pis, droplets on Digital Ocean, and other places that are not easily accessible to me. So I want a way to print out logs and view them from anywhere.
As a solution, I would like a basic web app to push my logs and have a direct link to my session that I can open on any device or even share with others.
There are a couple of things to keep in mind before we proceed.
First, logs coming from my scripts are not that frequent, and the overhead of using HTTP is negligible for my use case. Because of this, I decided to publish my logs over a basic REST API and use SSE on the client-side to subscribe the incoming logs.
 Logging Example
Second, this tool is mainly for quickly debugging things I'm working on. There are many production-ready and enterprise tools out there that I could use instead. But I wanted something very light and easy to use.
Let's Write Some Server-side Code
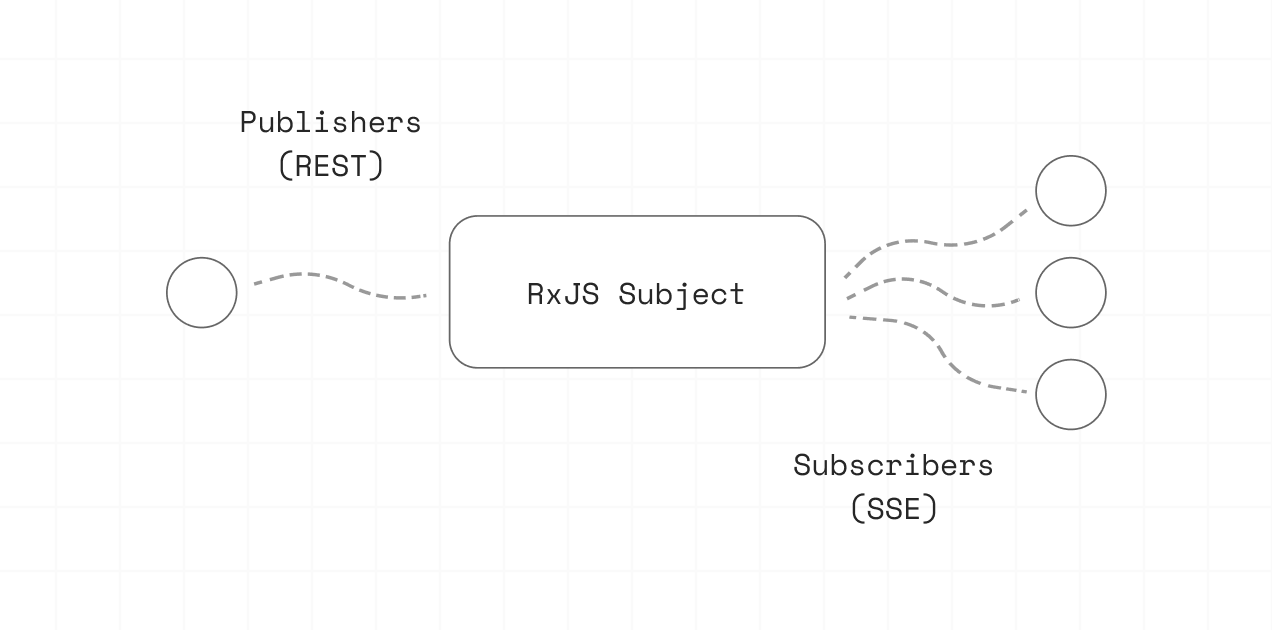
The server-side setup is straightforward. So let's start with a diagram to give you an idea of the setup before explaining everything in detail.
 Server Diagram
If we think of our backend server as a pipeline, on one end we have a series of publishers – in our case, the scripts publishing logs. On the other end, we have some clients subscribing to these logs.
To connect these two ends, I will be using an RxJS Subject. It will allow me to publish anything from the publishers over REST and then subscribe to these events and forward the messages to the clients over SSE.
To get started, let's define our Log interface. To keep things simple, I will only define a content field that will hold our log information.
interface Log {
  content: string;
}
How to set up RxJS
Let's import RxJS, create a new Subject for our Logs, and define a function to publish our logs to this Subject.
Of course, we could export our Subject and directly call it from our router, but I prefer to abstract away the implementation and only provide the emit function to the rest of my code.
import { Subject } from 'rxjs';

// Log Subject
const NewLog$ = new Subject<Log>();

/**
 * Emit a new log to the RxJS subject
 * @param log
 */
export function emitNewLog(log: Log): void {
    NewLog$.next(log);
}
Finally, let's define a new route on our Express server that would accept new logs from our client and publish them to the emitNewLog method that we have just created.
app.post('/', (req: Request, res: Response) => {
  const content = req.body.content;
  const log: Log = { content: content };
  emitNewLog(log);
  return res.status(200).json({ ok: true });
});
We are now done with the publishing side. What's left is to define our SSE route, subscribe to the RxJS Subject, and deliver the logs to our client.
How to set up the SSE Route
Let's define a new route for our SSE connection. To enable SSE, we need to flush a couple of headers back to our client.
We want the ‘Connection’ set to ‘keep-alive’, ‘Cache-Control’ set to ‘no-cache’, and ‘Content-Type’ set to ‘text/event-stream’. This way our client will understand that this is an SSE route.
In addition, I have added ‘Access-Control-Allow-Origin’ for CORS and ‘X-Accel-Buffering’ set to ‘no’ to keep Nginx from messing with this route. Finally, we can flush the headers back to our client to kickstart the event stream.
app.get('/', (req: Request, res: Response) => {
  res.setHeader('Cache-Control', 'no-cache');
  res.setHeader('Content-Type', 'text/event-stream');
  res.setHeader('Connection', 'keep-alive');
  res.setHeader('Access-Control-Allow-Origin', '*');
  res.setHeader('X-Accel-Buffering', 'no');
  res.flushHeaders();
});
We can now start streaming data by writing something into our response.
SSE provides a text-based protocol that we can use to help our clients differentiate between the event types. Each one of our events should look like the following:
event: ${event name}\n
data: ${event data}\n\n
To make my life a bit easier, I have created a helper function to take care of serialization for us.
/**
 * SSE message serializer
 * @param event: Event name
 * @param data: Event data
 */
function serializeEvent(event: string, data: any): string {
  const jsonString = JSON.stringify(data);
  return `event: ${event}\ndata: ${jsonString}\n\n`;
}
We can now subscribe to the RxJS Subject we created earlier, serialize each new log, and write it as a NEW_LOG event to our connection.
app.get('/', (req: Request, res: Response) => {
  res.setHeader('Cache-Control', 'no-cache');
  res.setHeader('Content-Type', 'text/event-stream');
  res.setHeader('Connection', 'keep-alive');
  res.setHeader('Access-Control-Allow-Origin', '*');
  res.setHeader('X-Accel-Buffering', 'no');
  res.flushHeaders();

  NewLog$.subscribe((log: Log) => {
    res.write(serializeEvent('NEW_LOG', log));
  });

}
Finally, we have to make sure to unsubscribe from our observer when the SSE connection is closed. Putting all of these together, we should have something like this:
app.get('/', (req: Request, res: Response) => {
  res.setHeader('Cache-Control', 'no-cache');
  res.setHeader('Content-Type', 'text/event-stream');
  res.setHeader('Connection', 'keep-alive');
  res.setHeader('Access-Control-Allow-Origin', '*');
  res.setHeader('X-Accel-Buffering', 'no');
  res.flushHeaders();

  const stream$ = NewLog$.subscribe((log: Log) => {
    res.write(serializeEvent('NEW_LOG', log));
  });

  req.on('close', () => {
    stream$.unsubscribe();
  });
});
That’s it! We are done with our backend server and it’s time to move to the frontend code.
Write the Client Code
Subscribing to our SSE route on the browser is very straightforward. First, let’s move to our client code and create a new instance of the EventSource interface and pass our endpoint to the constructor.
const eventSource = new EventSource("/");
Then, we can add event listeners for the events we want to subscribe to (in our case, NEW_LOG) and define a callback method to handle our log.
eventSource.addEventListener(
   "NEW_LOG", (event) => {
       const log = JSON.parse(event.data);
       // use the data to update the UI
    }, false
);
And finally, we can close the connection whenever we are done listening to these events.
eventSource.close();
Conclusion
As you can see, Server-Sent Events make it very easy to stream content from the server to the client. They are specifically helpful because we get a built-in interface in most modern browsers, and we can easily poly-fill for those that do not provide the interface.
In addition, SSE automatically handles re-connect for us in case the client loses connection with the server. Therefore, it is a valid alternative to SocketIO and WebSockets in various scenarios where we need a uni-directional event streaming from the server.
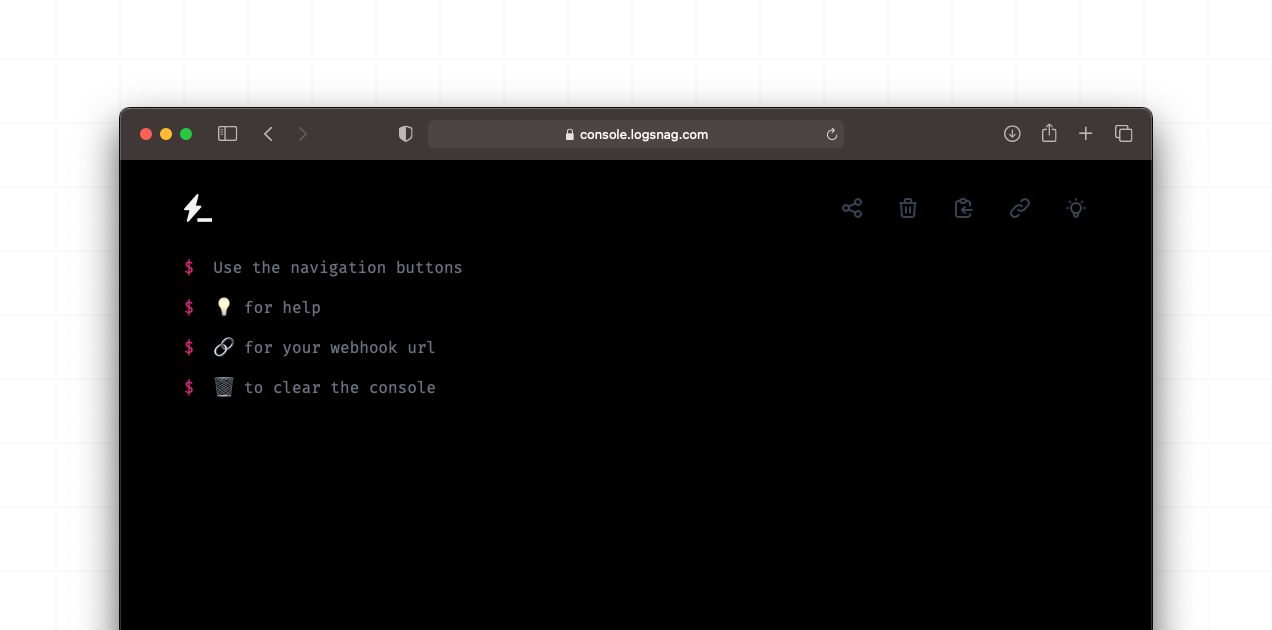
If you are further interested in this project, I have added a couple of extra functionalities to the code that we just went over and a web GUI that you can check out here: LogSnag Console.
 Console Demo