

In a world where online content is growing exponentially, it's more important than ever to produce unique content that stands out.
Paraphrasing tools can offer a quick solution to help you develop unique ideas and create original content.
With the help of ReactJs and ChatGPT Turbo, developers can build a powerful and efficient paraphrasing tool that delivers accurate and effective results.
With AI, you can automate repetitive tasks, test code more efficiently, and improve the overall quality of your software. Recently, we have seen a ton of developers asking questions like "How do I create a chatbot in Reactjs?", "How do I use ChatGPT API in React?", and "Can ChatGPT write JavaScript code?"
This article will teach us how to build a paraphrasing tool using ReactJs, ChatGPT Turbo, and TailwidCSS for styling.
Introduction to ChatGPT Turbo
ChatGPT Turbo is a recently introduced feature by OpenAI for ChatGPT Plus subscribers, which aims to provide superior responses at an accelerated pace.
Turbo mode is presently in its alpha phase, but we will use the gpt-3.5-turbo mode in this tutorial. Turbo mode is designed to deliver high-quality responses. It is an advanced version of ChatGPT's Default mode, requiring minimal computational resources for real-time applications.
Prerequisites
- Make sure to have Node.js and npm installed on your computer. If you don't, you can go here.
You can verify that you have Node.js installed by using the following terminal command:
node -v && npm -v
Install and configure Git on your PC. If you haven't, go here to install it.
You should have a basic understanding of JavaScript/TypeScript
Project Setup and Installation
To quickly get started with the project setup and installation, clone this project on GitHub. Make sure you're on the starter branch using the following command:
git clone https://github.com/Olanetsoft/ai-paraphrasing-tool-with-nextjs.git
Next, launch the project locally after cloning it using the following command in your terminal.
Here's how you can install the project using npm:
cd ai-paraphrasing-tool-with-nextjs && npm i && npm start
How to Design the Layout for the Paraphrasing Tool
In the previous step, you cloned and installed the starter project we will be using in this article. It contains the default layout for the project we will build in this tutorial.
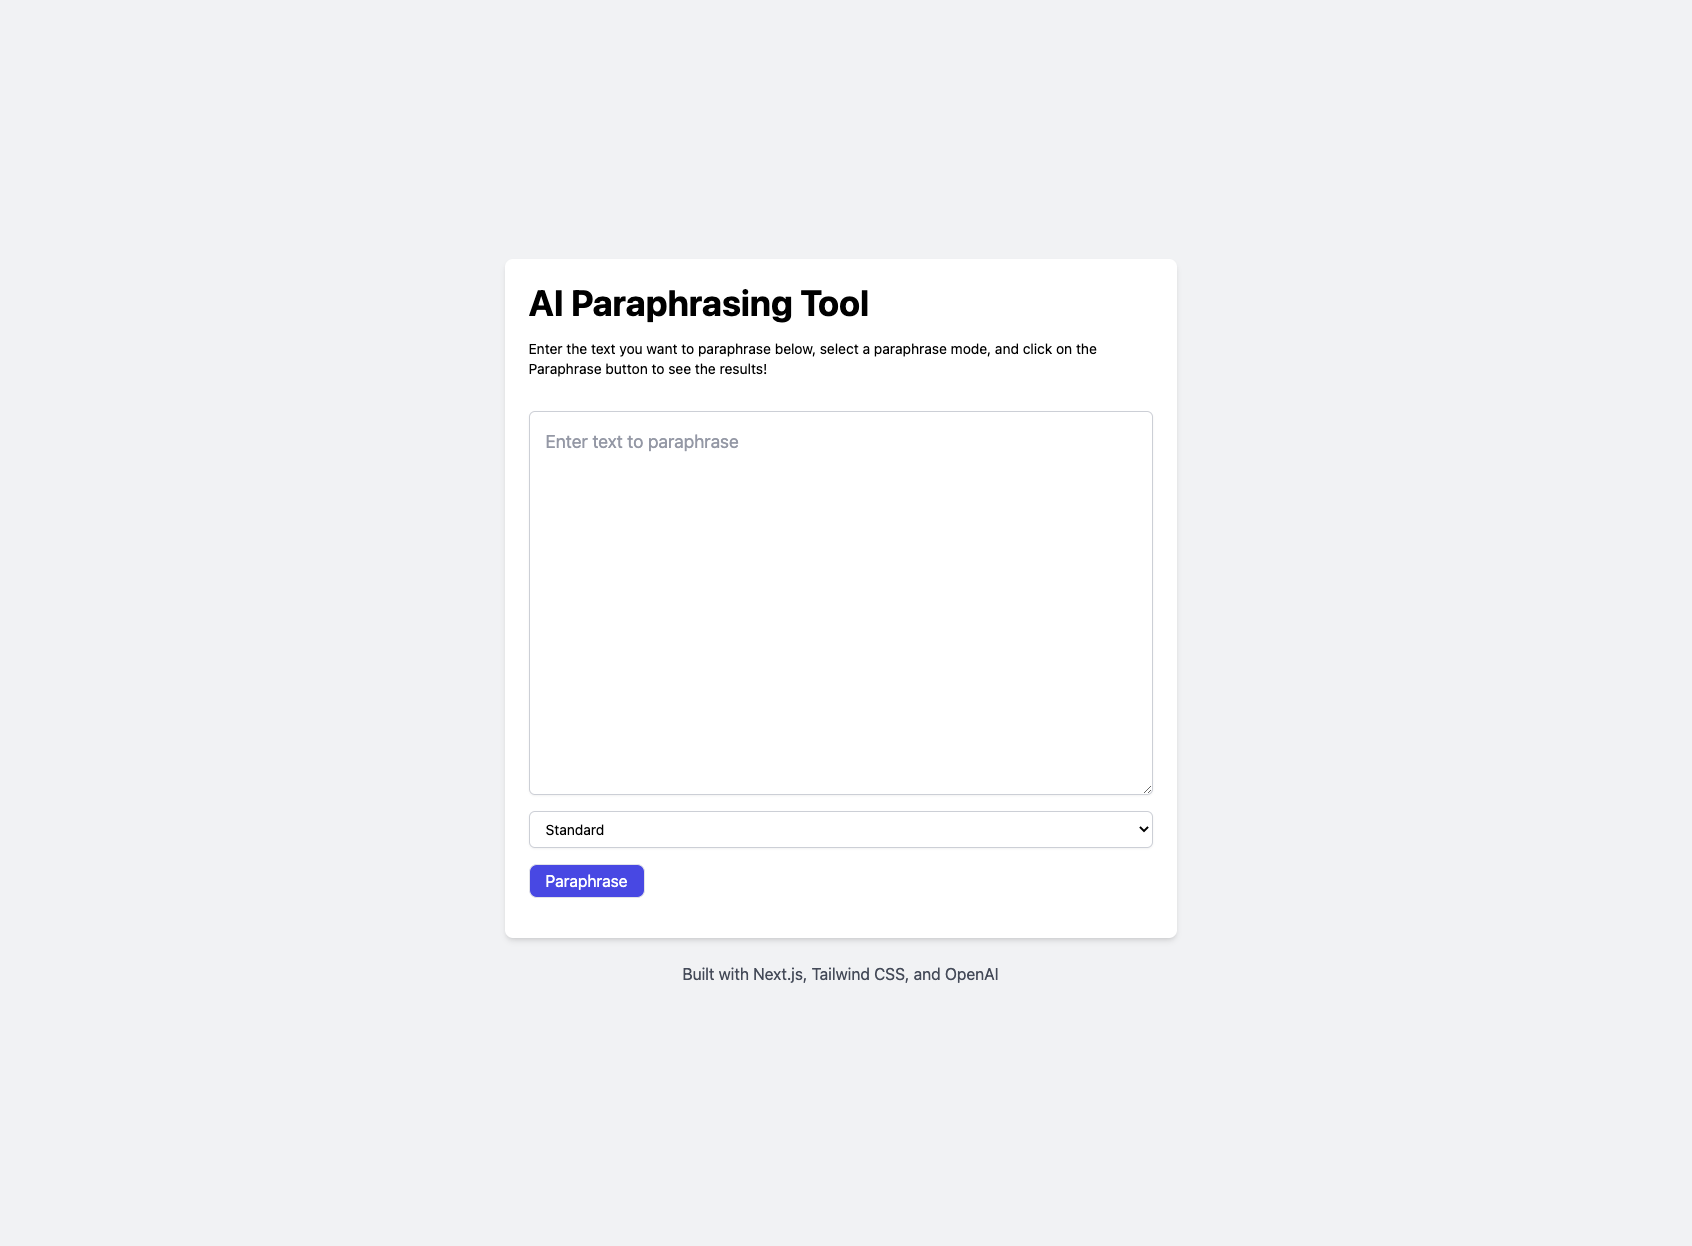
Navigate to http://localhost:3000/ in the browser. Here is what you should have after cloning and installing the project:
Navigate to the project directory and rename the .env.example to env. Or you can create a new .env file with the following command in the root directory of the project.
touch .env
Update the .env with the following:
NEXT_PUBLIC_ENV_VARIABLE_OPEN_AI_API_KEY=<Your-API-Key>
Replace <Your-API-Key> with your API key from OpenAI. Visit the OpenAI website, create an account for free, and generate an API key.
You should have something similar to what is shown below to implement the paraphrasing functionality in your application with ChapGPT Turbo.
How to Integrate ChatGPT Turbo
In this section, you will integrate ChatGPT Turbo and implement the paraphrasing functionality.
To start with, let's navigate to the paraphrase.ts file under the api directory and add the following snippet:
// Import necessary types from Next.js
import type { NextApiRequest, NextApiResponse } from "next";

// Check if required environment variable is set
if (!process.env.NEXT_PUBLIC_ENV_VARIABLE_OPEN_AI_API_KEY) {
  throw new Error("Missing env var from OpenAI");
}

// Define ChatGPTAgent type as a union of user and system
export type ChatGPTAgent = "user" | "system";

// Define ChatGPTMessage interface
interface ChatGPTMessage {
  role: ChatGPTAgent;
  content: string;
}

// Define promptPayload interface
interface promptPayload {
  model: string;
  messages: ChatGPTMessage[];
  temperature: number;
  max_tokens: number;
}

// Define async handler function
const handler = async (req: NextApiRequest, res: NextApiResponse) => {
  try {
    // Get prompt from request body
    const prompt = req.body.prompt;

    // Validate the prompt
    if (!prompt) {
      return new Response("No prompt in the request", { status: 400 });
    }

    // Define payload object to send to OpenAI API
    const payload: promptPayload = {
      model: "gpt-3.5-turbo",
      messages: [{ role: "user", content: prompt }],
      temperature: 1,
      max_tokens: 500,
    };

    // Send request to OpenAI API and wait for response
    const response = await fetch("https://api.openai.com/v1/chat/completions", {
      headers: {
        "Content-Type": "application/json",
        Authorization: `Bearer ${
          process.env.NEXT_PUBLIC_ENV_VARIABLE_OPEN_AI_API_KEY ?? ""
        }`,
      },
      method: "POST",
      body: JSON.stringify(payload),
    });

    // Parse response JSON and send it back in the response
    const data = await response.json();
    return res.json(data);
  } catch (error) {
    // Log any errors that occur during the request
    console.log("The Error: ", error);
  }
};

// Export the handler function as the default export
export default handler;
Let's go through what's going on in the code snippet above:
Import the
NextApiRequestandNextApiResponsetypes from Next.js.Check if
NEXT_PUBLIC_ENV_VARIABLE_OPEN_AI_API_KEY, an environment variable, is set and throw an error if it's not.Define a type and two interfaces for ChatGPT agents and messages –
ChatGPTAgentandChatGPTMessage, respectively.Define an interface for the request payload to OpenAI API and an async handler function that takes a Next.js request and response as arguments.
Get a prompt from the request body and validate it.
Send a request to
OpenAI APIwith the prompt and other parameters in the request payload.Parse and return the JSON response from the OpenAI API.
Next, we will consume the new endpoint we just implemented. Navigate to the index.vue file in the pages directory, and update it with the following code snippet:
//...

// Define a default function component called Home
export default function Home() {

  // Define three state variables for the original text, paraphrased text, and paraphrase mode
  const [originalText, setOriginalText] = useState<string>("");
  const [paraphrasedText, setParaphrasedText] = useState<string>("");
  const [paraphraseMode, setParaphraseMode] = useState<string>("Standard");

  // Define a ref for the text area element
  const textAreaRef = useRef(null);

  // Define a state variable for the loading state of the paraphrasing operation
  const [loading, setLoading] = useState<boolean>(false);

  // Construct a prompt string based on the original text and paraphrase mode
  const prompt = `Paraphrase "${originalText}" using ${paraphraseMode} mode. Do not add any additional word.`;

  // Define an async function to handle the paraphrasing operation
  const handleParaphrase = async (e: React.FormEvent) => {
    // Prevent form submission if original text is empty
    if (!originalText) {
      toast.error("Enter text to paraphrase!");
      return;
    }

    // Set the loading state and reset the paraphrased text
    setLoading(true);

    // Send a POST request to the "/api/paraphrase" API endpoint with the prompt in the request body
    const response = await fetch("/api/paraphrase", {
      method: "POST",
      headers: {
        "Content-Type": "application/json",
      },
      body: JSON.stringify({
        prompt,
      }),
    });

    // Parse the response as JSON
    const data = await response.json();

    // Set the paraphrased text to the first choice's message content in the response
    setParaphrasedText(data.choices[0].message.content);

    // Reset the loading state
    setLoading(false);
  };

  // Return the JSX for the Home component
  return (
    <>
    {/* //... */}
    </>
  );
}
In the code snippet above:
Initialize three state variables using the
useStatehook:originalText,paraphrasedText, andparaphraseMode.Initialize a reference to a
textareaelement using theuseRefhook and a loading state variable.Define
handleParaphrase, a function that sends aPOSTrequest to/api/paraphrasewith a prompt to paraphrase the text in the originalText state variable using the selectedparaphraseMode.
The component returns a UI with a textarea element for inputting text to paraphrase, a select element for choosing the paraphrase mode, a button for initiating the paraphrasing process, and a div element for displaying the paraphrased text.
Update the Paraphrase button with the following code snippet to add the onClick event:
  <button
     onClick={handleParaphrase}
     //...
     >
       Paraphrase
 </button>
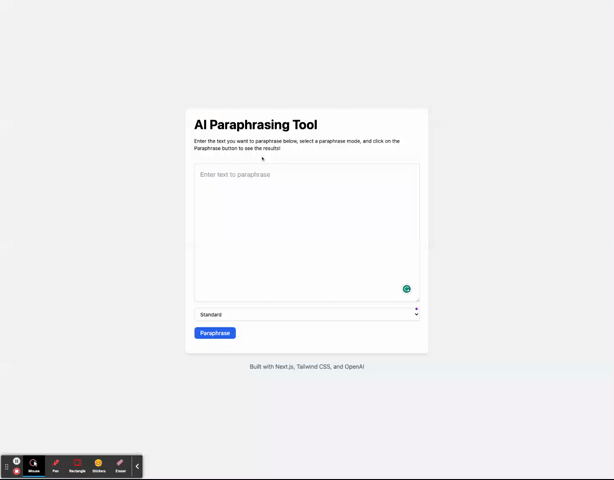
Let's test our application. You should have something similar to what you see below:
You can find the complete code in this GitHub repository here.
Conclusion
This article provides a step-by-step guide on how to build a paraphrasing tool using ReactJs, ChatGPT Turbo, and TailwindCSS for styling the application.
I'd love to connect with you via Twitter | LinkedIn | GitHub | Portfolio
See you in my next blog article. Take care!