

Most sites that display a list of data in a table typically have some kind of filter functionality implemented. This helps the user filter relevant items based on the text they type into the form input.
In this quick tutorial, we are going to build a responsive filterable table which looks like this:

A responsive table filtered by programming language
The table will contain a list of developers. Each row contains a name, an age, and programming language. When a user types into the input field, the table will filter and return the rows which match the value entered.
During the process of building this, you will learn about some CSS properties as well as DOM access/manipulation with JavaScript.
You can get the example code from CodePen.
Getting Started
You will need to create three simple files in your project folder. They are index.html for the HTML markup, styles.css for the styling, and index.js for the script.
<!DOCTYPE html>
<html lang="en">
<head>
  <meta charset="UTF-8">
  <meta name="viewport" content="width=device-width, initial-scale=1.0">
  <meta http-equiv="X-UA-Compatible" content="ie=edge">
  <title>Filterable Table</title>
  <link rel="stylesheet" href="styles.css">
</head>
<body>

  <script src="index.js" type="text/javascript"></script>
</body>
</html>
Make sure to link your stylesheet and script file as I have done in the HTML above.
HTML Markup For The Table
Add the following markup inside the body tags:
<div class="app">
    <input type="text" id="searchInput" placeholder="filter developer...">

    <table>
      <thead>
        <tr>
          <th>Name</th>
          <th>Age</th>
          <th>Language</th>
        </tr>
      </thead>
      <tbody id="names">
        <tr>
          <td>Kingsley</td>
          <td>32</td>
          <td>JavaScript</td>
        </tr>
        <tr>
          <td>Samuel</td>
          <td>22</td>
          <td>Python</td>
        </tr>
        <tr>
          <td>Joyce</td>
          <td>28</td>
          <td>Ruby</td>
        </tr>
        <tr>
          <td>Jake</td>
          <td>29</td>
          <td>Python</td>
        </tr>
        <tr>
          <td>Daniel</td>
          <td>40</td>
          <td>JavaScript</td>
        </tr>
        <tr>
          <td>Mary</td>
          <td>21</td>
          <td>C</td>
        </tr>
        <tr>
          <td>David</td>
          <td>26</td>
          <td>JavaScript</td>
        </tr>
        <tr>
          <td>Kelly</td>
          <td>31</td>
          <td>React</td>
        </tr>
        <tr>
          <td>Cleo</td>
          <td>43</td>
          <td>Java</td>
        </tr>
        <tr>
          <td>Peter</td>
          <td>19</td>
          <td>Vue</td>
        </tr>
        <tr>
          <td>George</td>
          <td>59</td>
          <td>Cobol</td>
        </tr>
        <tr>
          <td>James</td>
          <td>29</td>
          <td>JavaScript</td>
        </tr>
        <tr>
          <td>Ethan</td>
          <td>22</td>
          <td>PHP</td>
        </tr>
        <tr>
          <td>Sandra</td>
          <td>29</td>
          <td>R</td>
        </tr>
        <tr>
          <td>Pires</td>
          <td>34</td>
          <td>React Native</td>
        </tr>
        <tr>
          <td>Martha</td>
          <td>30</td>
          <td>React</td>
        </tr>
      </tbody>
    </table>
  </div>
The first element is the form input. We'll use this to collect data from the user.
Then we have the table. The table consists of a head (thead) and a body (tbody). The head has a single row (tr) of data, which is the heading. The body has 16 rows of data, each of which consist of a name, age, and programming language.
We wrap both these elements in a parent div tag. They will help us with alignment as we will see later in the CSS.
Save the file and open the app on a web browser.
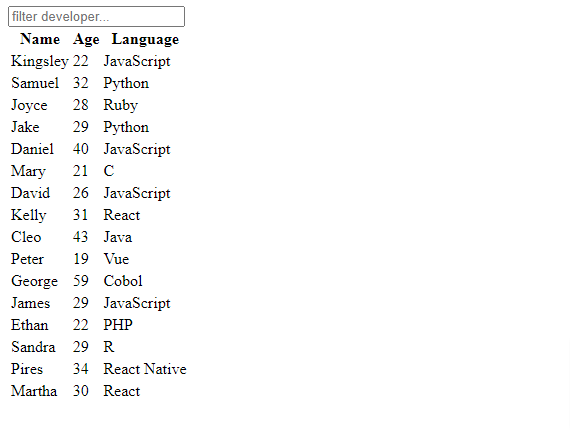
Table HTML
How to Style the Table with CSS
We will now apply some styling to the table. First, we set the base styles like this:
@import url("https://fonts.googleapis.com/css2?family=Lato:wght@300&display=swap");

/* Set no margin and padding around body. Set height to take up entire screen height. Align everything to the center, both horizontally and vertically */

body {
  margin: 0;
  height: 100vh;
  padding: 0;
  font-family: "lato", sans-seriff;
  display: grid;
  justify-content: center;
  align-items: center;
  font-size: 20px;
}

/* Remove border and outline around input. Set width to take up the entire width of parent and set margin on bottom */

#searchInput {
  border: none;
  outline: none;
  width: 100%;
  margin-bottom: 20px;
}

/* When input gains focus, add a blue border below it */

#searchInput:focus {
  border-bottom: 2px solid #4575b6;
}
The table will get aligned to the center.

Center aligned table
To make the table look better, we can use the following styling rules:
/* Sets width of table container (div) to 80% of browser window's width and the height to 100% of window's height. `vh` and `vw` makes the table responsive because it scales along with screen size. Also set margin of 20px to top and bottom */

.app {
  width: 80vw;
  height: 100vh;
  margin: 20px 0;
}

/* Collapse all borders separating each cell. Table takes up entire width of .app. Set gray shadow around table */
table {
  border-collapse: collapse;
  width: 100%;
  box-shadow: 0 5px 7px gray;
}

/* Set shadow on just the table head */
thead {
  box-shadow: 0px 0px 10px gray;
}

/* Add some space around table heading. Align text to right and transform to uppercase */

th {
  padding: 1rem 3rem;
  text-transform: uppercase;
  letter-spacing: 1px;
  text-align: left;
}

/* Add padding on each cell */
td {
  padding: 0.5rem 3rem;
  font-size: 1rem;
}

/* Create alternating color(blue) across the rows. Set blue on all even ones (2, 4, 6 ...) */

tr:nth-child(even) {
  background-color: #dee8f5;
}
Now our table looks a bit better and it's also responsive.
Table is now responsive
How to Implement the Filter Functionality with JavaScript
The table is pretty much static at this point. Using JavaScript, we will implement the logic for filtering the names based on what a user types into the form field.
In your script file, define a function called filter. In the first three lines we access the user's input value, pass the table body <tbody> into the variable names, and finally access all table rows <tr> from inside of the <tbody> .
We also change the value to uppercase to make sure everything is consistent (the user might type 'j' instead of 'J').
  /* This function will check for the user's input and based on that will either hide or display a particular row */

  function filter() {
    // Access text value and elements from the DOM
    let value = document.getElementById("searchInput").value.toUpperCase();
    let names = document.getElementById("names");
    let rows = names.getElementsByTagName("tr");

   // Code continues
Next, we loop through each array. For each row, we access the last column (language column) and get its text content (actual value).
for (i = 0; i < rows.length; i++) {
    let column = rows[i].getElementsByTagName("td")[2];
    let language = column.textContent;

    rows[i].style.display =
      language.toUpperCase().indexOf(value) > -1 ? "" : "none";
  }
}

document.getElementById("searchInput").addEventListener("keyup", filter);
If the actual string value from the table contains any of the user's values from their input, we display that row. Otherwise, we hide it. We also used the ternary operator to shorten the conditional statement.
Finally, we add an event listener on the input. Every time the key is released, the filter will be invoked.
Here is the full code for that:
function filter() {
  let value = document.getElementById("searchInput").value.toUpperCase();
  var names = document.getElementById("names");
  var rows = names.getElementsByTagName("tr");

  for (i = 0; i < rows.length; i++) {
    let column = rows[i].getElementsByTagName("td")[2];
    let language = column.textContent;

    rows[i].style.display =
      language.toUpperCase().indexOf(value) > -1 ? "" : "none";
  }
}

document.getElementById("searchInput").addEventListener("keyup", filter);
Your table should look similar to this in the end:
Wrapping Up
With just HTML, CSS, and JavaScript you can create some really stylish elements with advanced features.
I hope you learned a thing or two from this. Once again, you can check out the code on CodePen and tweak it as you like.
Thanks for following along.