By Nishant Kumar
In this article, we'll build a RESTful API using Node, Express, and MongoDB. We will create endpoints for creating data, reading data, updating data, and deleting data (basic CRUD operations).
But before we get started, make sure you have Node installed in your system. If not, go to https://nodejs.org/en/download/ to download and install it.
Let's do the basic setup first
In an empty folder, run the following command:
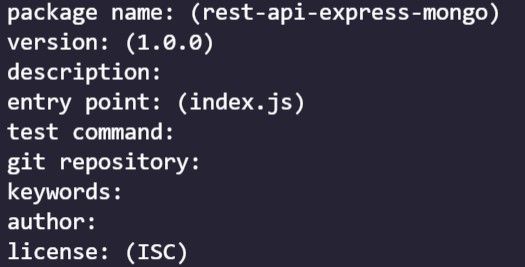
npm init
This command will ask you for various details, such as the name of your project, the author, the repository, and more. Then it will generate a package.json file in that folder.
{
  "name": "rest-api-express-mongo",
  "version": "1.0.0",
  "description": "",
  "main": "index.js",
  "scripts": {
    "test": "echo \"Error: no test specified\" && exit 1"
  },
  "author": "",
  "license": "ISC"
}
This Package.json file will contain all the scripts, like how to run the app, or how to test the app, as well as all the dependencies.
We need to install a few dependencies now.
npm i express mongoose nodemon dotenv
Here,
- Express will be used for the middleware to create various CRUD endpoints.
- Mongoose for managing data in MongoDB using various queries.
- Nodemon to restart our server every time we save our file.
- Dotenv to manage a .env file.
So go ahead and install them.
After they have finished installing, create one file named index.js. This will be the entry point for our application.
And in this file, let's add Express and Mongoose, and run the file.
const express = require('express');
const mongoose = require('mongoose');
Now, transfer the contents of Express into a new constant called app.
const express = require('express');
const mongoose = require('mongoose');

const app = express();
Now, let's listen the changes of this file on port 3000.
const express = require('express');
const mongoose = require('mongoose');

const app = express();

app.use(express.json());

app.listen(3000, () => {
    console.log(`Server Started at ${3000}`)
})
Now, the server is set on Port 3000. Let's write the script to start our server. We have also added the app.use. Inside that, we have a code snippet that allows us to accept the data in JSON format.
In the package.json file, add a script which says the following:
"scripts": {
    "start": "nodemon index.js"
},
This means that we can start our server using npm start, and it will run using the Nodemon package that we previously installed.
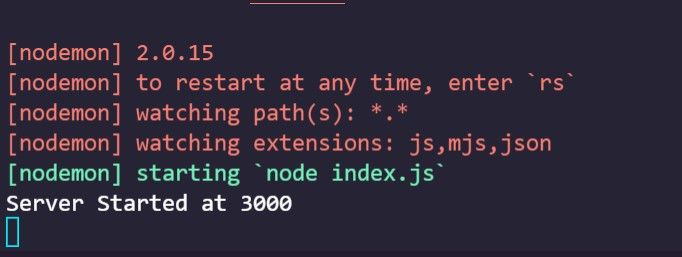
Type npm start in the terminal, and we will see the following output in the terminal:
How to Configure the MongoDB Database
Now, let's configure the mongoDB Database. Head over to https://account.mongodb.com/account/login and create your account, or sign in if you already have one.
After signing in, we have to create a database.
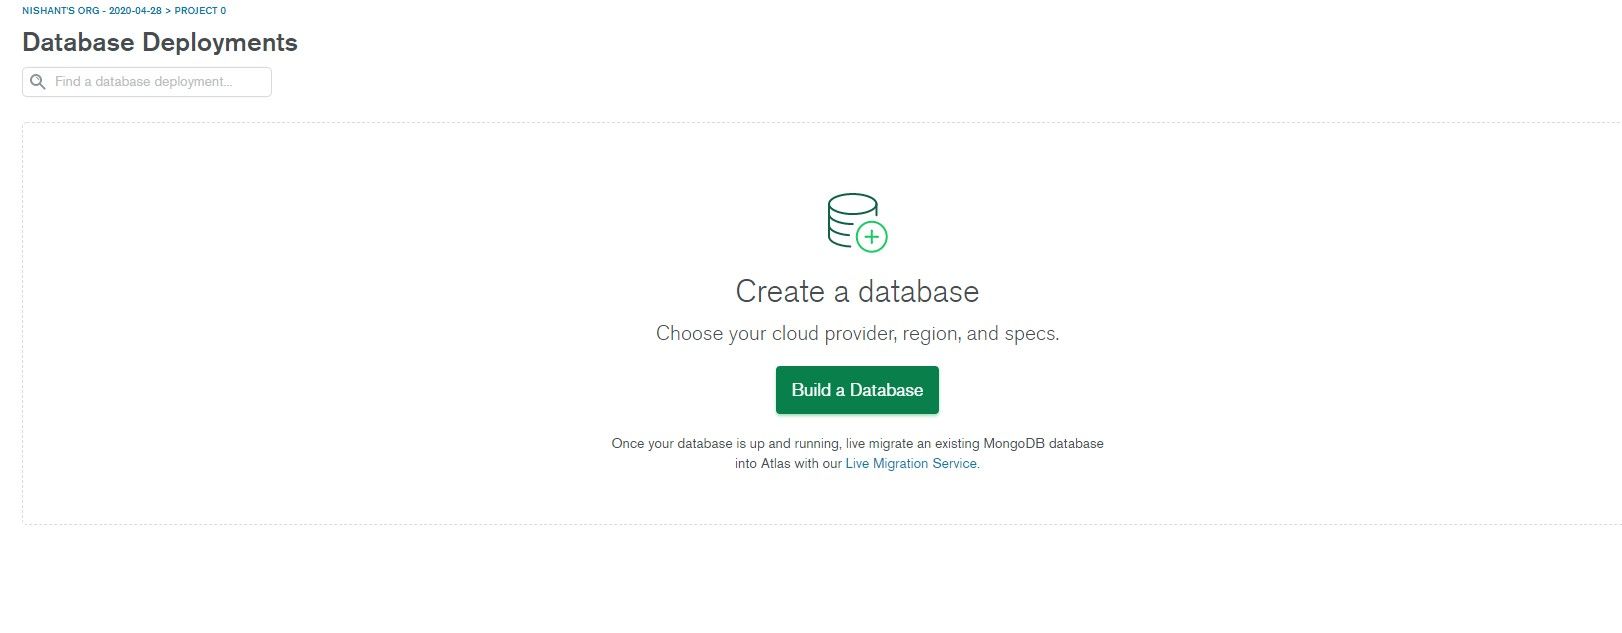
So, create a Free Shared Cluster.
It will ask you the username and the password, so fill those in.
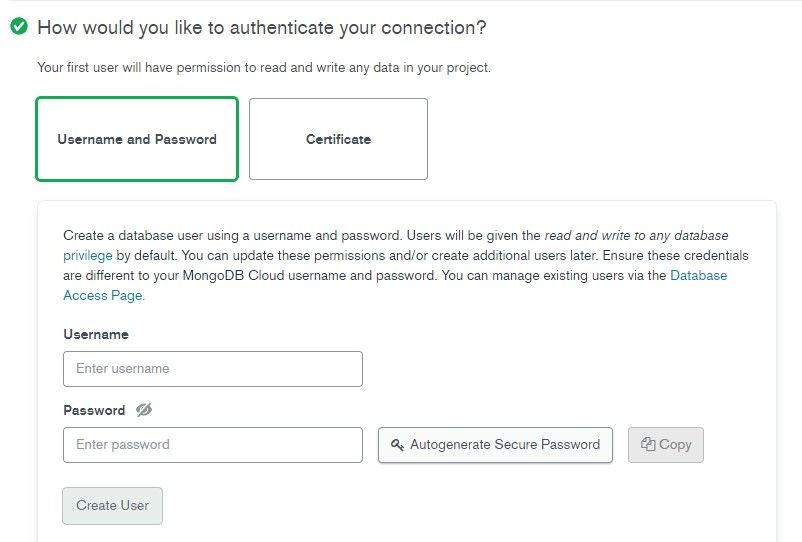
Then, add your IP Address.
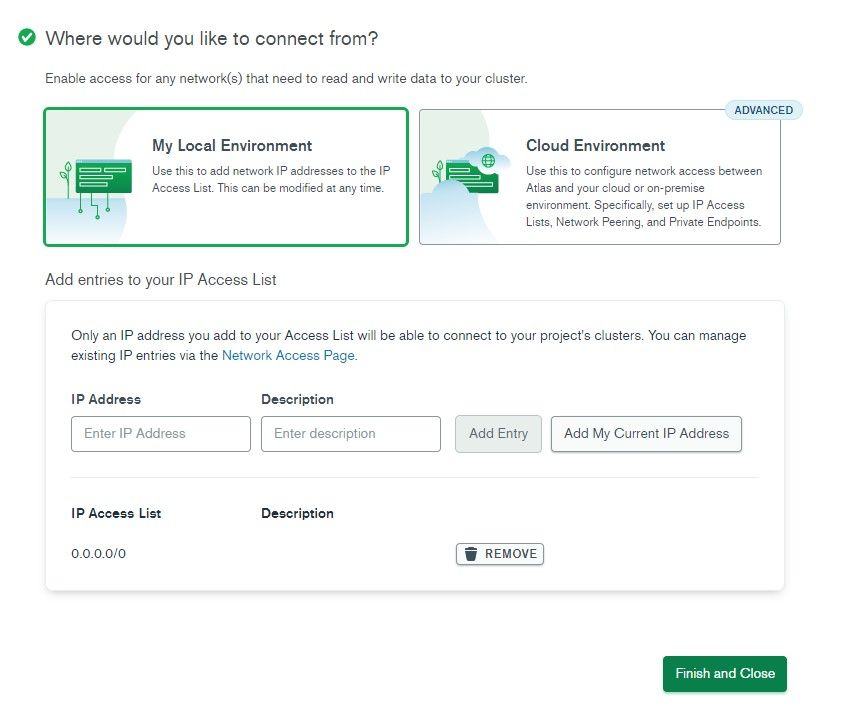
Click Finish and Close.
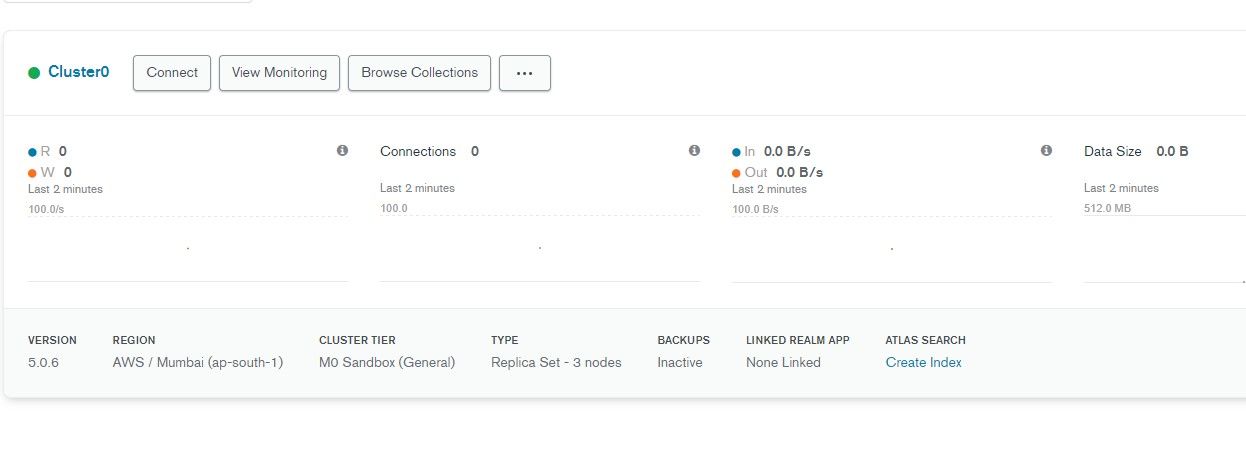
It will take some time for our cluster to finish, so let's wait. Meanwhile, create a file called .env in the project folder.
And in the Cluster Home page, click the connect button.
The following window will appear:
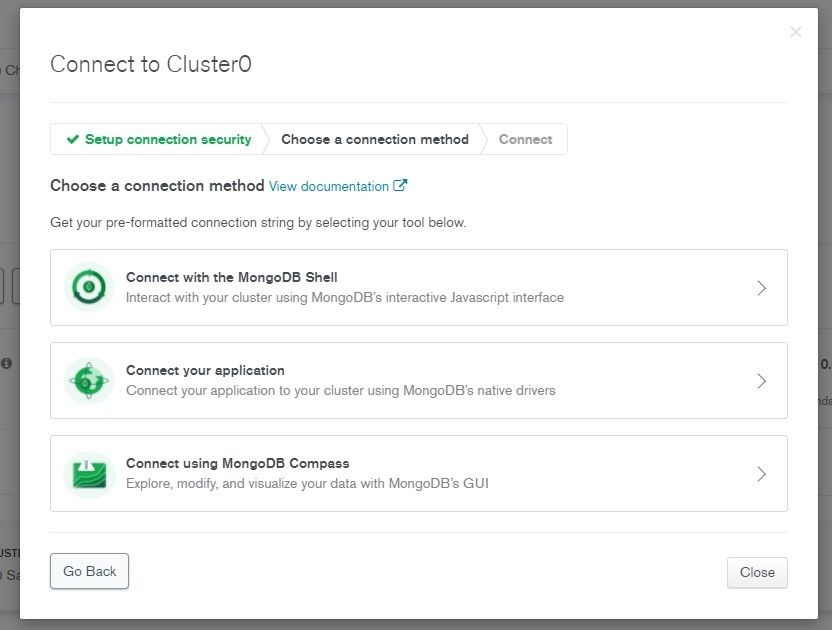
Click MongoDB Compass, and it will return the following string. Also, download and install MongoDB Compass.
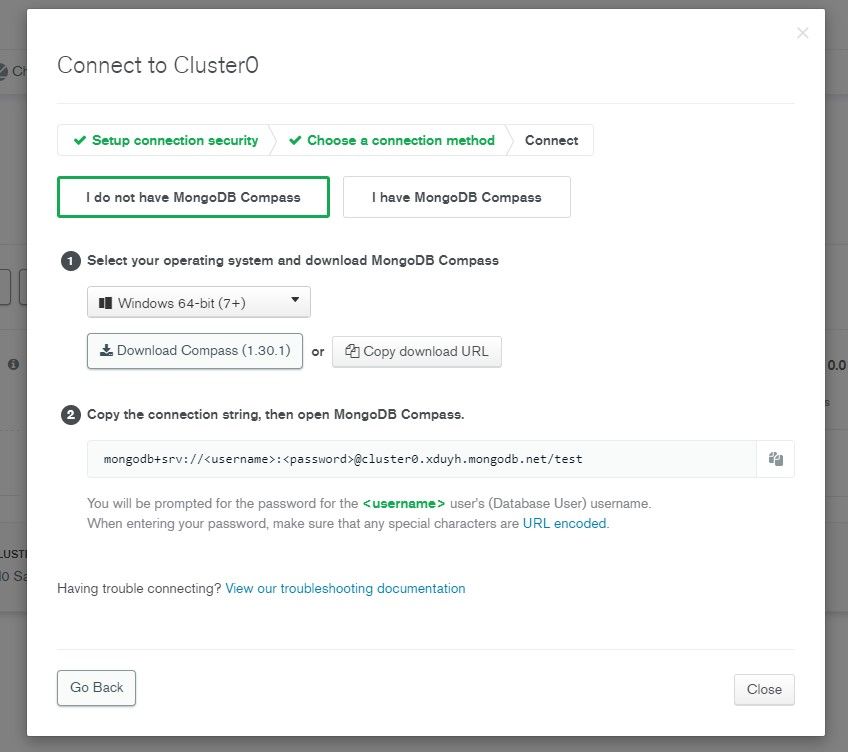
Add your username and password to this string that you have used before. The final connecting string will look something like this:
mongodb+srv://nishant:********@cluster0.xduyh.mongodb.net/testDatabase
Here, nishant is the username, followed by the password, and last is the database name.
So, paste this string into the .env file.
DATABASE_URL = mongodb+srv://nishant:*******@cluster0.xduyh.mongodb.net/testDatabase
Now in MongoDB Compass, add this string as well.
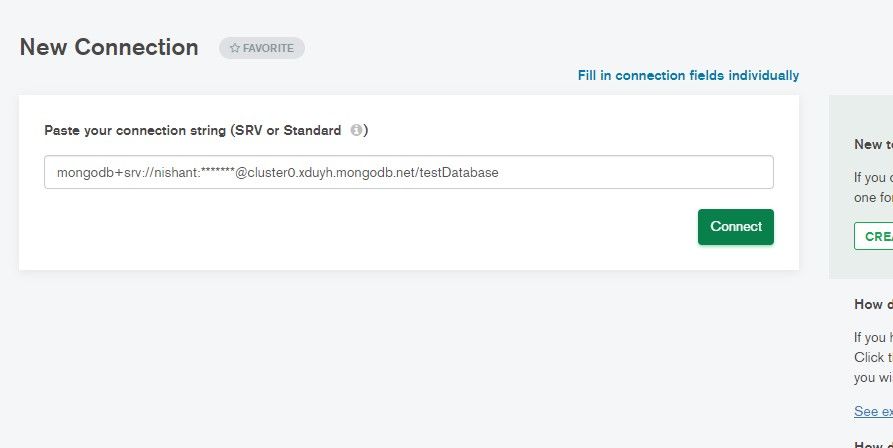
Then, click Connect.
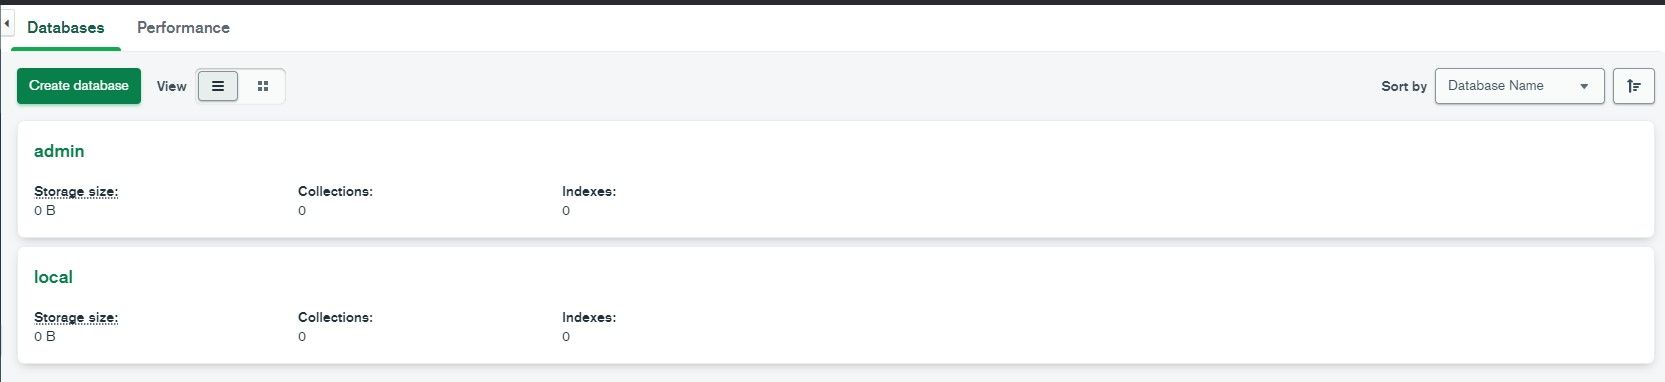
Here, we will get two Databases which are default. A third one will be automatically created later.
Now, let's import the contents of our .env file in the script file, index.js.
require('dotenv').config();

const mongoString = process.env.DATABASE_URL
Here, we are storing the string into a variable called mongoString.
Now, let's connect the database to our server using Mongoose.
mongoose.connect(mongoString);
const database = mongoose.connection
Now, we have to throw a success or an error message depending on whether our database connection is successful or fails.
database.on('error', (error) => {
console.log(error)
})
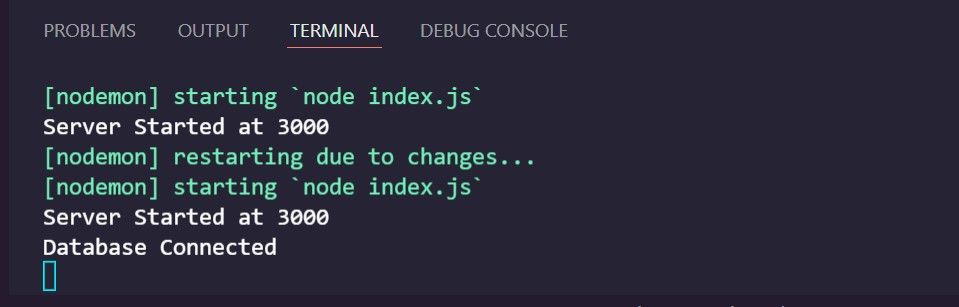
database.once('connected', () => {
console.log('Database Connected');
})
Here, database.on means it will connect to the database, and throws any error if the connection fails. And database.once means it will run only one time. If it is successful, it will show a message that says Database Connected.
Here is the whole code up to this point:
require('dotenv').config();

const express = require('express');
const mongoose = require('mongoose');
const mongoString = process.env.DATABASE_URL;

mongoose.connect(mongoString);
const database = mongoose.connection;

database.on('error', (error) => {
    console.log(error)
})

database.once('connected', () => {
    console.log('Database Connected');
})
const app = express();

app.use(express.json());

app.listen(3000, () => {
    console.log(`Server Started at ${3000}`)
})
How to Create our Routes for the Endpoints
Create a folder called routes, and inside make a file called routes.js.
Import this file into our main script file, index.js.
const routes = require('./routes/routes');
Also, let's use this routes file.
const routes = require('./routes/routes');

app.use('/api', routes)
Here, this app.use takes two things. One is the base endpoint, and the other is the contents of the routes. Now, all our endpoints will start from '/api'.
We will get an error because we don't have anything inside the routes file. So, let's add them.
const express = require('express');

const router = express.Router()

module.exports = router;
Here, we are using Router from Express, and we are exporting it too using module.exports. And now, our app will work fine.
How to Write our Endpoints
Now, let's write our endpoints here in this routes file. We will have five routes for the following actions:
- Posting data to Database.
- Getting all the data from the Database.
- Getting data based on the ID.
- Updating data based on the ID.
- Deleting data based on the ID.
So, let's create the routes for these actions:
//Post Method
router.post('/post', (req, res) => {
    res.send('Post API')
})

//Get all Method
router.get('/getAll', (req, res) => {
    res.send('Get All API')
})

//Get by ID Method
router.get('/getOne/:id', (req, res) => {
    res.send('Get by ID API')
})

//Update by ID Method
router.patch('/update/:id', (req, res) => {
    res.send('Update by ID API')
})

//Delete by ID Method
router.delete('/delete/:id', (req, res) => {
    res.send('Delete by ID API')
})
We have five methods that use the REST Methods of Post, Get, Patch, and Delete.
This router is taking the route as the first parameter. Then in the second parameter it's taking a callback.
In the callback, we have a res and a req. res means response, and req means request. We use res for sending responses to our client, like Postman, or any front-end client. And we use req for receiving requests from a client app like Postman, or any front-end client.
Then in the callback body, we are printing a message that says the respective API message.
Save this, and open Postman to check the endpoints. Download Postman if you don't have it. It is an amazing tool to test API endpoints.
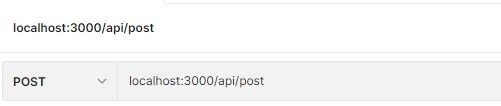
Add this address in the address bar, then click Send, or press enter.
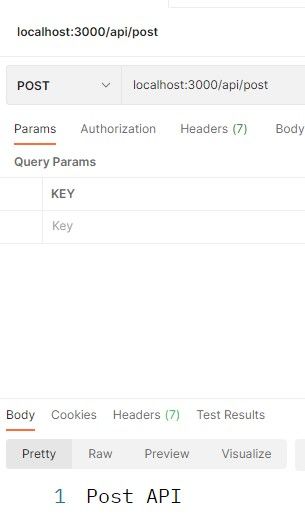
We will get this message in the body of Postman, because we are simply sending a Message using res.send.
Now, let's take a response from a client app. Let's simply print an ID.
We have to change the getOne function first. We are getting the ID using req.params.id, and then sending it to the client app using res.send.
//Get by ID Method
router.get('/getOne/:id', (req, res) => {
    res.send(req.params.id)
})
localhost:3000/api/getOne/1000
Add this endpoint in the address bar. Here, we are using getOne Endpoint, followed by the ID. Then, click Send.
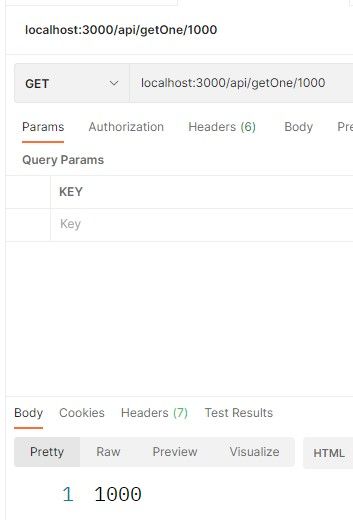
We will get the ID in the response body in Postman.
How to Create the Model
Now, let's create a Model that will define our database structure.
Create a folder called model and inside, a file called model.js.
const mongoose = require('mongoose');

const dataSchema = new mongoose.Schema({
    name: {
        required: true,
        type: String
    },
    age: {
        required: true,
        type: Number
    }
})

module.exports = mongoose.model('Data', dataSchema)
Here, we have a schema that defines our database structure. It has a name and an age property. Both fields have types and both are required.
Then, we are simply exporting the schema model.
Now, import this model inside the routes.js file.
const Model = require('../models/model');
How to Post Data to the Database
Let's create the data body to post using the model we just created.
router.post('/post', (req, res) => {
    const data = new Model({
        name: req.body.name,
        age: req.body.age
    })
})
Our name and age is accepting the name and age from req body. We get this data from the client app such as Postman, or any frontend client like React or Angular.
We will also create a try-catch block to handle success messages and errors.
//Post Method
router.post('/post', (req, res) => {
    const data = new Model({
        name: req.body.name,
        age: req.body.age
    })

    try{

    }
    catch(error){

    }
})
In the try block, we are saving the data using data.save(). Then, we are storing the data in a const called dataToSave.
We are also sending the success message with the data in the response body.
And in the catch block, we are receiving any errors if we get any.
//Post Method
router.post('/post', (req, res) => {
    const data = new Model({
        name: req.body.name,
        age: req.body.age
    })

    try {
        const dataToSave = data.save();
        res.status(200).json(dataToSave)
    }
    catch (error) {
        res.status(400).json({message: error.message})
    }
})
Now, let's add some data from Postman. But before that, this function needs to be asynchronous to work. So, we will use async-await.
router.post('/post', async (req, res) => {
    const data = new Model({
        name: req.body.name,
        age: req.body.age
    })

    try {
        const dataToSave = await data.save();
        res.status(200).json(dataToSave)
    }
    catch (error) {
        res.status(400).json({message: error.message})
    }
})
If we add the data in the body and click Send, we will get the following:

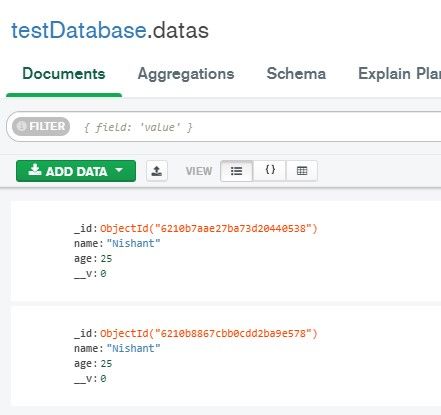
It's also generating a unique ID. Open the MongoDB Compass app, and you will see the database and this record you just created:
How to Get All the Data
Getting data is simple too. Just a few lines of code:
router.get('/getAll', async (req, res) => {
    try{
        const data = await Model.find();
        res.json(data)
    }
    catch(error){
        res.status(500).json({message: error.message})
    }
})
Here, we are using the Model.find method to fetch all the data from the database. Then, we are returning it back in JSON format. If we have an error, we will get that too.

If we call this endpoint in Postman, we will get an array of objects in the Postman body.
How to Get Data Based on the ID
This one is also simple. We just have to pass the ID of the document, which is req.params.id, in a method called findById.
//Get by ID Method
router.get('/getOne/:id', async (req, res) => {
    try{
        const data = await Model.findById(req.params.id);
        res.json(data)
    }
    catch(error){
        res.status(500).json({message: error.message})
    }
})
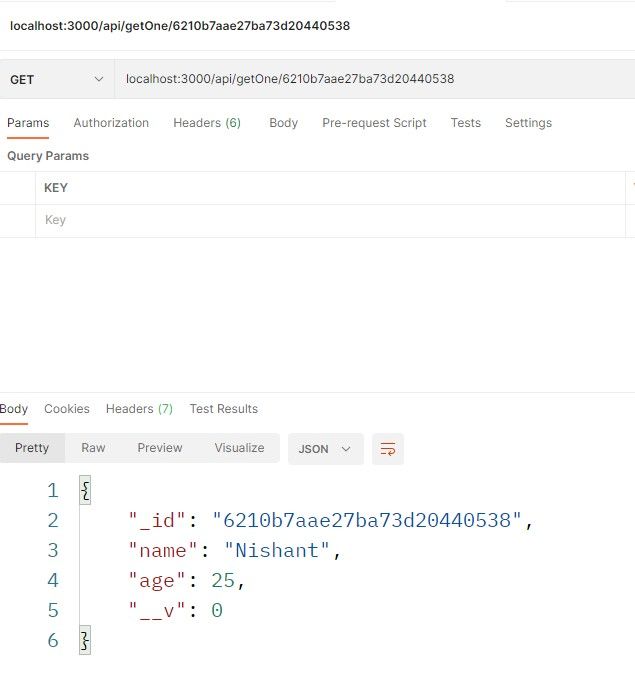
If we click Send, we will get the data based on the ID.
How to Update and Delete Data Based on the ID
First, let's target the update method using the patch method.
//Update by ID Method
router.patch('/update/:id', async (req, res) => {
    try {
        const id = req.params.id;
        const updatedData = req.body;
        const options = { new: true };

        const result = await Model.findByIdAndUpdate(
            id, updatedData, options
        )

        res.send(result)
    }
    catch (error) {
        res.status(400).json({ message: error.message })
    }
})
Here we have three parameters that we are passing in the findByIdAndUpdate method, which we use to find a document by ID and update it.
The req.params.id is the const id, updatedData which contains the req.body, and the options, which specifies whether to return the updated data in the body or not.
Let's test it out now. Just paste the ID of a specific document, and click Send. Change the endpoints as well.
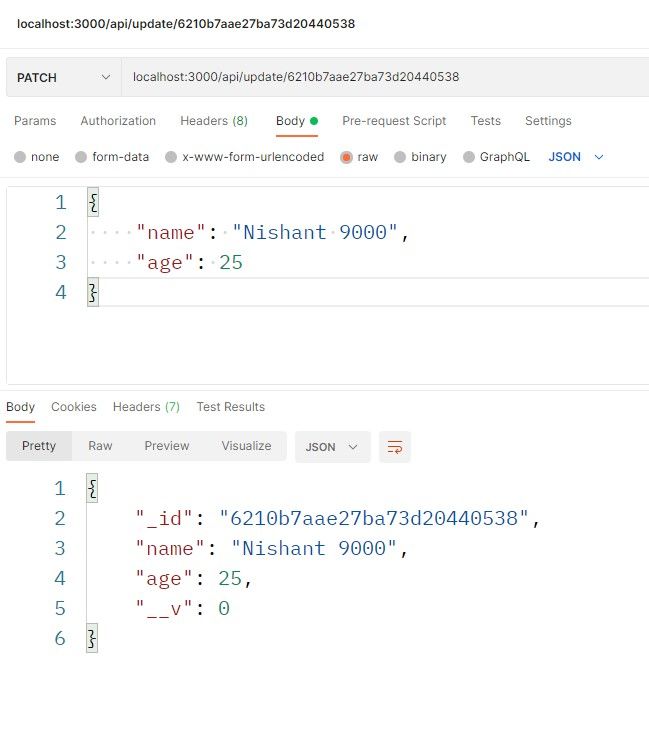
We are updating using one ID, and it's getting updated.
Deleting is also simple. Let's implement it:
//Delete by ID Method
router.delete('/delete/:id', async (req, res) => {
    try {
        const id = req.params.id;
        const data = await Model.findByIdAndDelete(id)
        res.send(`Document with ${data.name} has been deleted..`)
    }
    catch (error) {
        res.status(400).json({ message: error.message })
    }
})
We are getting the ID here, and then we are using Model.findByIdAndDelete to delete that field, while passing the id.
We are storing the updated data in a const data.
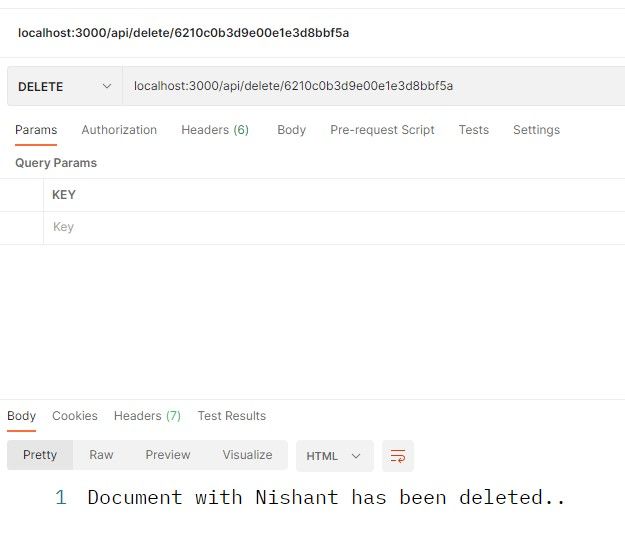
In the response, we will get the message that that document with the specific name has been deleted.
If we test this, we will get the following:
So, all five methods are done. We can Post data and Get all the data (based on ID too). We can also Update them and Delete them.
Thank you for reading!
In this article, you learned all about how to design and develop a RESTful API using Node, Express, and MongoDB.
Now you can use these endpoints to build a Full-Stack application, with Vanilla JavaScript, React, Angular, Next, or Vue.js.
You can also check out my video on the same topic, RESTful APIs - Build a RESTful API using Node, Express, and MongoDB
Feel free to download the code from Github and experiment.
Happy Learning.