By Paul Akinyemi
In this article, you will be recreating the guessing game Wordle. This article covers the core game logic but does not implement sharing your results. The article also doesn't cover the functionality that generates game statistics.
This tutorial is intended for beginner front-end developers that want to build a fun, vanilla JavaScript project.
You can check out a demo of the finished project here.
Prerequisites
This tutorial assumes a basic understanding of:
- HTML
- CSS
- Javascript
- NPM
How to Build the Wordle Clone
These are the steps you'll be taking to build the Wordle clone:
- Project Setup
- Creating the game board
- Creating the on-screen keyboard
- Accepting user input
- Adding notifications
- Making the on-screen keyboard generate input
- Adding animation
Project Setup
Before building the game, you need to get some components in place. First, you need to create a folder for all the source code of our clone. Call this folder build.
After you've done that, set up your development server.
Live-server
You'll be using a development server called live-server. This step is optional, but saves you the trouble of reloading the page after every change to the source code.
Install live-server by typing the following in your terminal :
npm install live-server
HTML Setup
Inside build, create an HTML file and name it index.html. Put the following code into it:
<!DOCTYPE html>
<html lang="en">
<head>
    <meta charset="UTF-8">
    <meta http-equiv="X-UA-Compatible" content="IE=edge">
    <meta name="viewport" content="width=device-width, initial-scale=1.0">
    <title>Wordle</title>
</head>
<body>
    <h1> Wordle Clone </h1>

    <div id="game-board">

    </div>
</body>
</html>
The HTML code creates a header for our game and makes the container for the game board.
You're going to be using a JavaScript library called Toastr for in-game notifications and a CSS library called Animate.css for the board animations.
To include them in your project, add the following links to the head of your index.html file.
 <link href="https://cdnjs.cloudflare.com/ajax/libs/toastr.js/latest/toastr.min.css" rel="stylesheet"/>

<link
    rel="stylesheet"
        href="https://cdnjs.cloudflare.com/ajax/libs/animate.css/4.1.1/animate.min.css"
  />
Those links will fetch the CSS for both Animate.css and Toastr. Put the following code in index.html, just before the closing body tag:
<script
src="https://code.jquery.com/jquery-3.6.0.min.js"
integrity="sha256-/xUj+3OJU5yExlq6GSYGSHk7tPXikynS7ogEvDej/m4="
crossorigin="anonymous"></script>
<script src="https://cdnjs.cloudflare.com/ajax/libs/toastr.js/latest/toastr.min.js"></script>
That code will fetch the JavaScript for Toastr and jQuery (because Toastr depends on it).
JavaScript Setup
Your JavaScript will live in a file called script.js. Create script.js, and place it inside build.
Put this code at the top of script.js:
import { WORDS } from "./words.js";

const NUMBER_OF_GUESSES = 6;
let guessesRemaining = NUMBER_OF_GUESSES;
let currentGuess = [];
let nextLetter = 0;
let rightGuessString = WORDS[Math.floor(Math.random() * WORDS.length)]
console.log(rightGuessString)
This code snippet initialises the global variables we'll be using for our game and picks a random word from the array WORDS as the right guess for this round. We also log the right guess to the console, to debug our code if necessary.
The list of allowed words we'll be using will be hardcoded and stored as an array in the file words.js. Create words.js, inside build, and copy the JavaScript from this link into it.
Words.js should look like this:
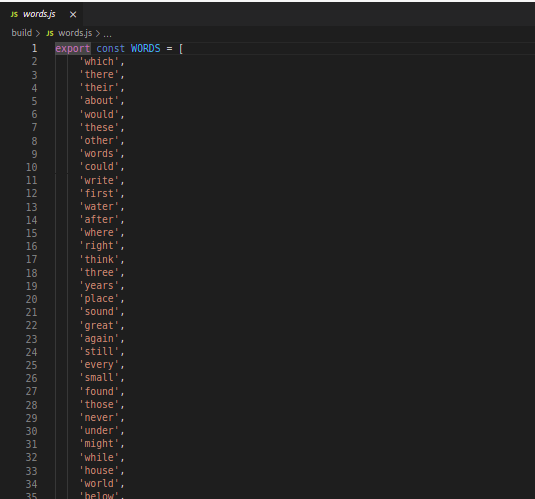 what words.js should look like
CSS Setup
Name your CSS file style.css. Style.css should also be placed in build.
h1 {
 text-align: center;
}
The only CSS setup we need is a bit of code to centre the text of our header
Putting it all together
Finally, link script.js as a module in your index.html, then link style.css.
At this point, your index.html should look like this:
<!DOCTYPE html>
<html lang="en">
<head>
    <meta charset="UTF-8">
    <meta http-equiv="X-UA-Compatible" content="IE=edge">
    <meta name="viewport" content="width=device-width, initial-scale=1.0">
    <title>Wordle</title>
    <link rel="stylesheet" href="style.css">
    <link href="https://cdnjs.cloudflare.com/ajax/libs/toastr.js/latest/toastr.min.css" rel="stylesheet"/>
    <link
    rel="stylesheet"
    href="https://cdnjs.cloudflare.com/ajax/libs/animate.css/4.1.1/animate.min.css"
  />
</head>
<body>
    <h1> Wordle Clone </h1>

    <div id="game-board">

    </div>
<script
src="https://code.jquery.com/jquery-3.6.0.min.js"
integrity="sha256-/xUj+3OJU5yExlq6GSYGSHk7tPXikynS7ogEvDej/m4="
crossorigin="anonymous"></script>
<script src="https://cdnjs.cloudflare.com/ajax/libs/toastr.js/latest/toastr.min.js"></script>
<script src="script.js" type="module"></script>
</body>
</html>
and your file structure should look like this:
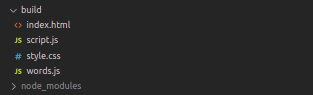 screenshot of file tree
Start live-server by typing this into your console:
live-server build
That's it for setup.
How to Create the Game Board
You're going to create the game board by writing a JavaScript function. Let's call the function initBoard. Add this code to your script.js file:
function initBoard() {
    let board = document.getElementById("game-board");

    for (let i = 0; i < NUMBER_OF_GUESSES; i++) {
        let row = document.createElement("div")
        row.className = "letter-row"

        for (let j = 0; j < 5; j++) {
            let box = document.createElement("div")
            box.className = "letter-box"
            row.appendChild(box)
        }

        board.appendChild(row)
    }
}

initBoard()
So what does this code do? initBoard creates one row for each guess we give the user and creates 5 boxes for each row. There is one box for each letter of the guess, and the function makes them all children of the row.
initBoard then adds each row to the board container. Each row is given the class letter-row, and each box is assigned letter-box.
Next, you're going to style the board with some CSS. Place the following code in your style.css file:
#game-board {
  display: flex;
  align-items: center;
  flex-direction: column;
}

.letter-box {
  border: 2px solid gray;
  border-radius: 3px;
  margin: 2px;
  font-size: 2.5rem;
  font-weight: 700;
  height: 3rem;
  width: 3rem;
  display: flex;
  justify-content: center;
  align-items: center;
  text-transform: uppercase;
}

.filled-box {
  border: 2px solid black;
}

.letter-row {
  display: flex;
}
This CSS does a few things:
- centers the rows of the board horizontally and vertically
- sets a height, width, and border for each box on the board
- creates a distinct look for a box filled with a letter
At this point, when you load index.html in your browser, it should look like this:
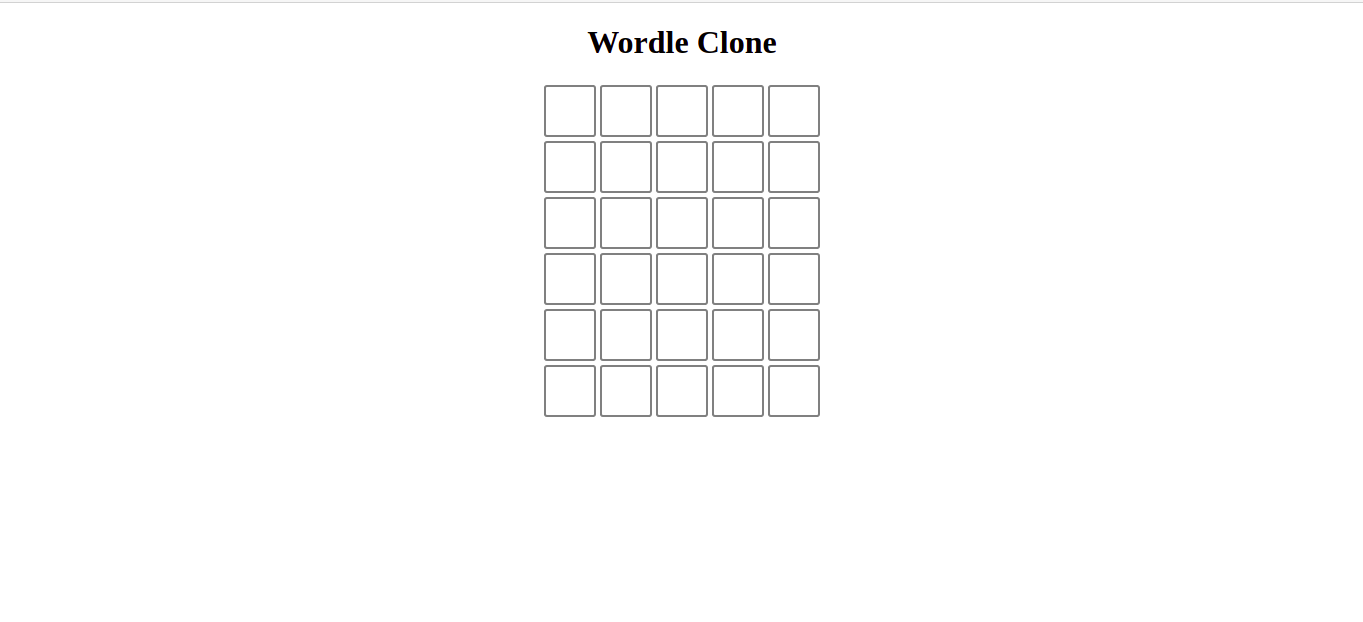 screenshot of game
How to Create the On-screen Keyboard
The simplest way to create the keyboard is with HTML. Add this code to your index.html, after the game board div:
   <div id="keyboard-cont">
        <div class="first-row">
            <button class="keyboard-button">q</button>
            <button class="keyboard-button">w</button>
            <button class="keyboard-button">e</button>
            <button class="keyboard-button">r</button>
            <button class="keyboard-button">t</button>
            <button class="keyboard-button">y</button>
            <button class="keyboard-button">u</button>
            <button class="keyboard-button">i</button>
            <button class="keyboard-button">o</button>
            <button class="keyboard-button">p</button>
        </div>
        <div class="second-row">
            <button class="keyboard-button">a</button>
            <button class="keyboard-button">s</button>
            <button class="keyboard-button">d</button>
            <button class="keyboard-button">f</button>
            <button class="keyboard-button">g</button>
            <button class="keyboard-button">h</button>
            <button class="keyboard-button">j</button>
            <button class="keyboard-button">k</button>
            <button class="keyboard-button">l</button>
        </div>
        <div class="third-row">
            <button class="keyboard-button">Del</button>
            <button class="keyboard-button">z</button>
            <button class="keyboard-button">x</button>
            <button class="keyboard-button">c</button>
            <button class="keyboard-button">v</button>
            <button class="keyboard-button">b</button>
            <button class="keyboard-button">n</button>
            <button class="keyboard-button">m</button>
            <button class="keyboard-button">Enter</button>
        </div>
    </div>
Now, style the markup by adding this CSS to the end of style.css:
#keyboard-cont {
  margin: 1rem 0;
  display: flex;
  flex-direction: column;
  align-items: center;
}

#keyboard-cont div {
  display: flex;
}

.second-row {
  margin: 0.5rem 0;
}

.keyboard-button {
  font-size: 1rem;
  font-weight: 700;
  padding: 0.5rem;
  margin: 0 2px;
  cursor: pointer;
  text-transform: uppercase;
}
This is what your index.html should look like in the browser now:
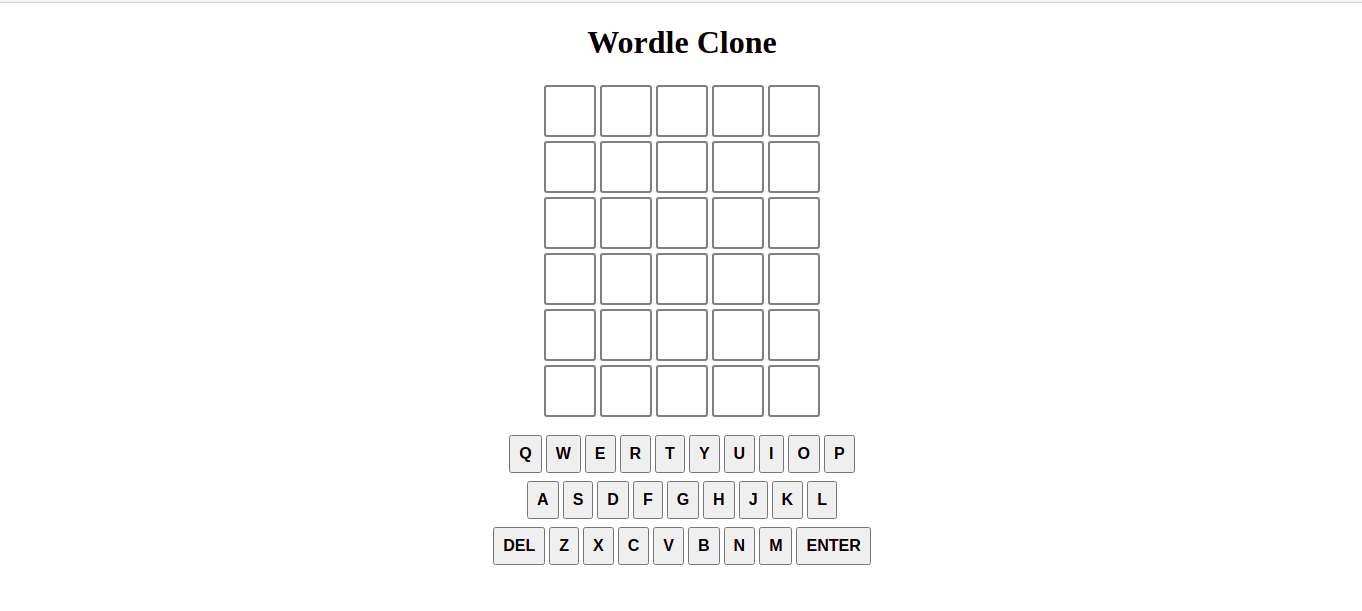 screenshot of on-screen keyboard
How to Accept User Input
The strategy for user input is simple: when the player presses a key on the keyboard, we want to place that key in the right place on the board. You're going to accomplish this by listening for the keyup event.
When the player presses a key, you want to find out what that key was. If the key was a single letter, you want to put it in the right spot on the board.
You figure out where the right spot on the board is by checking the number of guesses the player has left and how many letters the player has entered so far.
If the key pressed was Enter or Backspace, you check the guess or delete one letter from the current guess. Any other key we ignore.
Add this code to script.js:
document.addEventListener("keyup", (e) => {

    if (guessesRemaining === 0) {
        return
    }

    let pressedKey = String(e.key)
    if (pressedKey === "Backspace" && nextLetter !== 0) {
        deleteLetter()
        return
    }

    if (pressedKey === "Enter") {
        checkGuess()
        return
    }

    let found = pressedKey.match(/[a-z]/gi)
    if (!found || found.length > 1) {
        return
    } else {
        insertLetter(pressedKey)
    }
})
The code uses a regular expression to check that the key we pressed was an alphabetical key representing a single letter. If the name of the key doesn't have any letters (it was a number), or it has multiple letters (Shift, Tab), we ignore the event. Otherwise, we insert the letter into the board.
insertLetter
Let's define the insertLetter function. It looks like this:
function insertLetter (pressedKey) {
    if (nextLetter === 5) {
        return
    }
    pressedKey = pressedKey.toLowerCase()

    let row = document.getElementsByClassName("letter-row")[6 - guessesRemaining]
    let box = row.children[nextLetter]
    box.textContent = pressedKey
    box.classList.add("filled-box")
    currentGuess.push(pressedKey)
    nextLetter += 1
}
insertLetter checks that there's still space in the guess for this letter, finds the appropriate row, and puts the letter in the box.
deleteLetter
deleteLetter looks like this:
function deleteLetter () {
    let row = document.getElementsByClassName("letter-row")[6 - guessesRemaining]
    let box = row.children[nextLetter - 1]
    box.textContent = ""
    box.classList.remove("filled-box")
    currentGuess.pop()
    nextLetter -= 1
}
deleteLetter gets the correct row, finds the last box and empties it, and then resets the nextLetter counter.
checkGuess
The checkGuess function looks like this:
function checkGuess () {
    let row = document.getElementsByClassName("letter-row")[6 - guessesRemaining]
    let guessString = ''
    let rightGuess = Array.from(rightGuessString)

    for (const val of currentGuess) {
        guessString += val
    }

    if (guessString.length != 5) {
        alert("Not enough letters!")
        return
    }

    if (!WORDS.includes(guessString)) {
        alert("Word not in list!")
        return
    }


    for (let i = 0; i < 5; i++) {
        let letterColor = ''
        let box = row.children[i]
        let letter = currentGuess[i]

        let letterPosition = rightGuess.indexOf(currentGuess[i])
        // is letter in the correct guess
        if (letterPosition === -1) {
            letterColor = 'grey'
        } else {
            // now, letter is definitely in word
            // if letter index and right guess index are the same
            // letter is in the right position
            if (currentGuess[i] === rightGuess[i]) {
                // shade green
                letterColor = 'green'
            } else {
                // shade box yellow
                letterColor = 'yellow'
            }

            rightGuess[letterPosition] = "#"
        }

        let delay = 250 * i
        setTimeout(()=> {
            //shade box
            box.style.backgroundColor = letterColor
            shadeKeyBoard(letter, letterColor)
        }, delay)
    }

    if (guessString === rightGuessString) {
        alert("You guessed right! Game over!")
        guessesRemaining = 0
        return
    } else {
        guessesRemaining -= 1;
        currentGuess = [];
        nextLetter = 0;

        if (guessesRemaining === 0) {
            alert("You've run out of guesses! Game over!")
            alert(`The right word was: "${rightGuessString}"`)
        }
    }
}
checkGuess is pretty long, so let's break it down. It does a few things:
- Makes sure the guess is 5 letters
- Makes sure the guess is a valid list
- Checks each letter of the word and shades them
- Tells the user about the end of the game
checkGuess uses a simple algorithm to decide what color to shade each letter:
- Checks if the letter is in the correct word
- If the letter is not in the word, shades letter grey
- If the letter is in the word, check if it's in the right position
- If the letter is in the right position, shades green
- Else, shades yellow
checkGuess uses a function shadeKeyboard to color the keys of the on-screen keyboard, but it's not defined yet. Let's do that next.
shadeKeyboard
function shadeKeyBoard(letter, color) {
    for (const elem of document.getElementsByClassName("keyboard-button")) {
        if (elem.textContent === letter) {
            let oldColor = elem.style.backgroundColor
            if (oldColor === 'green') {
                return
            }

            if (oldColor === 'yellow' && color !== 'green') {
                return
            }

            elem.style.backgroundColor = color
            break
        }
    }
}
shadeKeyBoard receives the letter on the on-screen keyboard we want to shade and the color we want to shade it. This is the algorithm:
- Find the key that matches the given letter
- If the key is already green, do nothing
- If the key is currently yellow, only allow it to become green
- Else, shade the key passed to the function
How to Add Notifications
Next, you will replace the JavaScript alerts in checkGuess with toasts, using Toastr.
Go over checkGuess, and replace all the alerts that notify the user of a mistake with calls to toastr.error().
The alert that notifies the user of a correct guess should be replaced with toastr.success(), and the alert that tells the user what the right guess was should be replaced with toastr.info().
This is what checkGuess should look like after you're done:
function checkGuess () {
    let row = document.getElementsByClassName("letter-row")[6 - guessesRemaining]
    let guessString = ''
    let rightGuess = Array.from(rightGuessString)

    for (const val of currentGuess) {
        guessString += val
    }

    if (guessString.length != 5) {
        toastr.error("Not enough letters!")
        return
    }

    if (!WORDS.includes(guessString)) {
        toastr.error("Word not in list!")
        return
    }


    for (let i = 0; i < 5; i++) {
        let letterColor = ''
        let box = row.children[i]
        let letter = currentGuess[i]

        let letterPosition = rightGuess.indexOf(currentGuess[i])
        // is letter in the correct guess
        if (letterPosition === -1) {
            letterColor = 'grey'
        } else {
            // now, letter is definitely in word
            // if letter index and right guess index are the same
            // letter is in the right position
            if (currentGuess[i] === rightGuess[i]) {
                // shade green
                letterColor = 'green'
            } else {
                // shade box yellow
                letterColor = 'yellow'
            }

            rightGuess[letterPosition] = "#"
        }

        let delay = 250 * i
        setTimeout(()=> {
            //shade box
            box.style.backgroundColor = letterColor
            shadeKeyBoard(letter, letterColor)
        }, delay)
    }

    if (guessString === rightGuessString) {
        toastr.success("You guessed right! Game over!")
        guessesRemaining = 0
        return
    } else {
        guessesRemaining -= 1;
        currentGuess = [];
        nextLetter = 0;

        if (guessesRemaining === 0) {
            toastr.error("You've run out of guesses! Game over!")
            toastr.info(`The right word was: "${rightGuessString}"`)
        }
    }
}
How to Make the On-screen Keyboard Generate Input
To get your on-screen keyboard functioning, all you have to do is dispatch a key up event whenever any key on your on-screen keyboard is clicked. To do that, add this code to script.js:
document.getElementById("keyboard-cont").addEventListener("click", (e) => {
    const target = e.target

    if (!target.classList.contains("keyboard-button")) {
        return
    }
    let key = target.textContent

    if (key === "Del") {
        key = "Backspace"
    }

    document.dispatchEvent(new KeyboardEvent("keyup", {'key': key}))
})
This function listens for a click on the keyboard container or any of its children (the buttons). If the clicked element was not a button, we exit the function. Else, we dispatch a key up event corresponding to the clicked key.
How to Add Animation
We already installed animate.css, so now let's write a JavaScript function to use it.
const animateCSS = (element, animation, prefix = 'animate__') =>
  // We create a Promise and return it
  new Promise((resolve, reject) => {
    const animationName = `${prefix}${animation}`;
    // const node = document.querySelector(element);
    const node = element
    node.style.setProperty('--animate-duration', '0.3s');

    node.classList.add(`${prefix}animated`, animationName);

    // When the animation ends, we clean the classes and resolve the Promise
    function handleAnimationEnd(event) {
      event.stopPropagation();
      node.classList.remove(`${prefix}animated`, animationName);
      resolve('Animation ended');
    }

    node.addEventListener('animationend', handleAnimationEnd, {once: true});
});
This function comes from the Animate.css homepage. It applies classes to the animation target to trigger an animation, and when the animation ends, it removes the classes it added.
The function returns a promise to allow you to perform actions that need to run only after the animation ends, but you won't need to implement that in this tutorial.
Now that we have a function to animate any element, let's apply it. Go back to our insertLetter function, and add the following line before we replace the textContent of box:
animateCSS(box, "pulse")
This is what insertLetter should look like now:
function insertLetter (pressedKey) {
    if (nextLetter === 5) {
        return
    }
    pressedKey = pressedKey.toLowerCase()

    let row = document.getElementsByClassName("letter-row")[6 - guessesRemaining]
    let box = row.children[nextLetter]
    animateCSS(box, "pulse")
    box.textContent = pressedKey
    box.classList.add("filled-box")
    currentGuess.push(pressedKey)
    nextLetter += 1
}
The code tells insertLetter to pulse each box quickly, just before we fill it with a letter.
Next, you want to animate each letter of a guess while you're checking it.
Go back and modify checkGuess, like so:
let delay = 250 * i
setTimeout(()=> {
    //flip box
    animateCSS(box, 'flipInX')
    //shade box
    box.style.backgroundColor = letterColor
    shadeKeyBoard(letter, letterColor)
}, delay)
This code adds an animation to flip each box vertically, just before we change the color.
Conclusion
That concludes the tutorial. You just built a Wordle clone, andI hope you had fun along the way. You can find the complete code at the GitHub repository for this project.
If you enjoyed this article, you can find more of my writing at my here, or follow me on Twitter.