
By Abiola Farounbi
Developing web pages used to involve writing HTML, CSS, and a little scripting code like JavaScript for functionality.
But over time, we've developed new and more advanced technologies and frameworks to create webpages. We now use things like reusable components, routing, and rendering to the document object model (DOM).
These new frameworks have helped developers make web accessibility an integral part of their applications.
In this article, we'll examine the concept of web accessibility, explore some accessible features for Vue apps, and build a demo Vue project that incorporates all these accessibility features.
To follow the tutorial portion of this article, you should have some experience with Vue and JavaScript.
What is Web Accessibility?
Web accessibility is the practice of designing and developing web applications and tools that are accessible to people with any type of disability.
In simple terms, web accessibility means making the web available and accessible to everyone. The web should be accessible to everyone to provide equal access to users, so anyone can experience the web's full benefits and capacity.
One benefit of making your web application accessible is to improve your site's SEO (search engine optimization). This makes it easier to find in different search engines.
Web Content Accessibility Guidelines (WCAG) provides an international set of principles for web accessibility. You can use it to guide your development to make the web accessible for all.
Web Accessibility Principles
WCAG consists of four principles known as POUR:
P - Perceivable
O - Operable
U - Understandable
R - Robust
Make Your Site Perceivable
The perceivable principle means that users should be able to identify contents and interact with the interface using one or more of their senses (vision, touch, and hearing) through the browser or through assistive technologies like screen readers.
Make Your Site Operable
Making your site operable means users can interact with all controls and interactive elements using a mouse, keyboard, or assistive device. Focus should also be enabled in the different sections of the page.
Make Your Site Understandable
To make a website understandable, we should use clear and concise language. We should try to eliminate spelling errors and complex grammar. The content and functions should all be easy to understand.
Make Your Site Robust
To be robust, your site should be compatible across all platforms, devices, and browsers. The web content should be compatible with current and future software and tools. A wide range of technologies should be able to access web page content without limitations.
Accessibility Features to Implement in Your Vue Apps
When you develop a Vue.js application, you should put some important features in place to make your web application accessible to everyone.
Set the Page Title for Each Page
The page title gives users an overview of the page. Search engines also rely on it to determine if a page is relevant to their search.
When you provide a unique and concise title, it helps assistive technology users understand what the web page is about.
In a Vue app, you can do this by declaring meta tags in your routes:
``` routes: [
{
path: '/',
name: 'home',
component: HomePage,
meta: {
title: 'Home'
}
},
{
path: '/login',
name: 'login',
component: LoginPage,
meta: {
title: 'Login'
}
},
]
For the meta tags to display, use the `beforeEach` hook Vue-router provides:
router.beforeEach((to, from, next) => {
document.title = to.meta.title
next()
})
To learn more about the router package, check the [official vue router website](https://router.vuejs.org/guide/essentials/dynamic-matching.html#reacting-to-params-changes)

Over time, Vue community members have developed packages such as [vue-head](https://github.com/ktquez/vue-head) and [vue-meta](https://github.com/declandewet/vue-meta) to add metadata when instantiating a component.


### Specify the Text Content's Language

When you use the HTML lang attribute, it is easy for screen readers to identify the text content language. The lang attribute takes an [ISO language](https://www.loc.gov/standards/iso639-2/php/code_list.php) code as its value.

You can implement this in the index.html file:
If the application does not specify a language, the screen reader uses its default language. This leads to an issue if the page isn't actually in the default language. The screen reader might not announce the page's text correctly.
### Use Landmarks to Help Users Navigate to Sections
Landmarks provide easy access to sections within a Vue app. Assistive technology users can navigate to each section of the application and skip over the content.
You can enable this using HTML5 semantic elements or Accessible Rich Internet Applications (ARIA) roles.
Here are the HTML5 semantic elements and alternative ARIA you can use in your application:

### Use Headings in the Proper Hierarchical Order
Your web application should include headings such as:
To structure your content for easy accessibility, your headings must follow the proper hierarchical order, from H1 potentially down to H6, if needed. Also, your headings should be brief, clear, informative, and unique.
### Use Adequate Color Contrast in Your Application

It's important to ensure that the colors on your application have adequate contrast. The contrast between the colors of the text and the background must be distinct to make content readable.
### Use Alternative Text for Images
In image code like below, adding the "alt" section enables you to describe the image.

Including alternate text for an image makes it easy for people who cannot see to understand the image using a screen reader.

Use the `<img>` tag only to show content images, such as photos or illustrations, that are meaningful to the content. Also, use null alt text on purely decorative images.

### Create Accessible Forms

Making accessible Vue application forms may involve:

- Using HTML5 Semantic elements for forms elements, like:

  ```<form>, <label>,<input>, <textarea>, and <button>
- Including labels for form elements:
<label for="name">Name</label>
  <input type="text" name="name" id="name" v-model="name"  />
An input field's "for" attribute must be the same as its "id" attribute to bind them together, as shown above. This enables the screen reader to notify the user when they click on the associated name's text field.
Use ARIA Attributes
Accessible Rich Internet Applications (ARIA) is an extension to the HTML syntax that passes extra information to assistive technologies. You can use ARIA attributes to describe custom elements.
<button aria-label="close" @click="modalClose" > X </button>
In the example above, the aria-label provides a description to help assistive technologies know the application will close when you click the X button.
Use Keyboard Handlers
For every mouse event handler, there should be a corresponding keyboard handler. This is important for users who would rather navigate through the platform with their keyboard. For example:
<button type="submit"

            @keydown.enter="displayMessage"

            @click.prevent="displayMessage" >

             Submit
</button>
You can do this by simply adding the “Vue-directive" keyup and the modifier ".enter" as demonstrated above.
Manage Focus and Make Elements Focus-able
People who use screen readers also use the keyboard to access information. You need to make your application keyboard accessible by making elements focus-able.
Giving elements focus works in different ways, such as:
- Using Vue refs: To focus an element in Vue, we use the ref attribute, which enables you to directly access the underlying DOM nodes.
<template>
          <ul>
             <li ref='projectList'> Vue project   </li>
          </ul>
</template>
<script>
    mounted() {
       const projectListRef = this.$refs.projectList;
        projectListRef.focus();
       }

</script>
In the code snippet above, we are able to add focus to the list element once the component is mounted to the DOM.
- Using tabindex: You can also use tabindex to add focus to an element. To use tabindex: 1) If given a value of 0, the element can be focused via the keyboard and falls into the tabbing flow of the page.
2) If given a value of ""-1"", the element can't be tabbed.
3) Values greater than 1 create a priority level, with 1 being the most important.
<input type='search" id='searchBar' tabindex="0" />
In web pages where there are multiple links, it's a good idea to add a skip to main content link. This saves the user's time and gives them the ability to focus on the main content. Skip links are usually hidden until they are focused.
Here is the code snippet to implement skip links in Vue:
The Vue Announcer Library
For large Vue applications consisting of various pages, the vue announcer Library provides an easy way for people using screen readers to tell what's going on in your application.
To use the library:
import Vue from 'vue'

import VueAnnouncer from '@vue-a11y/announcer'

Vue.use(VueAnnouncer)
You can explore the official documentation guide. to learn more.
Demo Vue Project
In this section, we'll build a single page app following all accessibility features and principles. Check out the Demo and code repository on Github.
This application is simple. It is divided into different components and we will build each component following accessibility standards.
To build the application, follow these steps:
Create a Vue project
First, install the Vue command-line interface (CLI):
npm install -g @vue/cli
Then, create the Vue app using this command:
vue create accessibile-vue-app
cd into accessible-vue-app, and run the command below to start the application:
npm run serve
How to Create the Different Components
The page is divided into different components and rendered into the App.vue file.
For each component, semantic HTML defines the structure. Then we render them all in App.vue as one.
App.vue:
  <Header></Header>
  <main>
<section class='pageOptions'>
   <button @click="selectedComponent = 'WelcomeCard'" > Welcome Message </button>
  <button @click="selectedComponent = 'Form'" > Contact Form </button>
</section>
  <!-- binding the current component to the property  -->
  <component :is="selectedComponent"></component>
 </main>
  <Footer></Footer>
</template>
You can explore the demo on Netlify here.
Accessibility Tools to Test Vue Applications
There are lots of different tools you can use to test if your web content meets accessibility guidelines.
Here are some tools and websites you can use to check if a website is accessible:
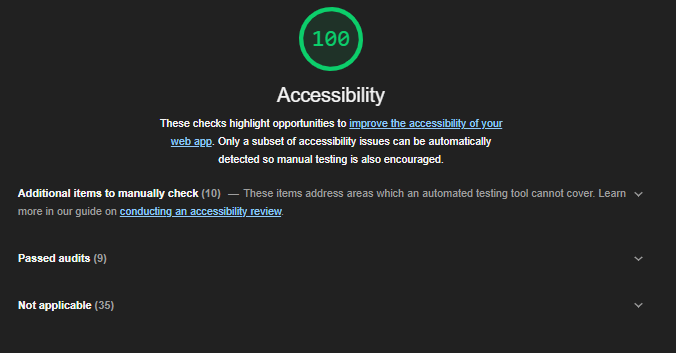
- Lighthouse in Chrome dev tools
- Web Accessibility Evaluation Tool (WAVE)
- Screen Readers on Chrome Vox
- Accessibilty Checklist
- Accessibility auditing for Vue.js applications on Vue axe
- Color Contrast Checker Tool on WebAIM.
Conclusion
In this article, we have learned about web accessibility, what it is, and why it is important to make our web pages accessible.
We also looked at different accessibility features to add to your Vue.js applications and learned how to implement them.
Using this information, you can successfully build a Vue application that everyone can use.
To learn more about how to make your Vue applications more accessible, explore the Vue.js website.
You can also reach out to me on Twitter for questions. Thanks for reading!