By Timonwa Akintokun
In this article, I'm going to show you how to build a real-time chat app using React.js and Firebase.
In the app, we will allow the user to log in with their Google account using Firebase's Google sign-in Authentication. We will also store and retrieve all the chatroom messages using Firebase's Cloud Firestore.
Prerequisites
You should have Node.js installed on your system. You should also have intermediate knowledge of CSS, JavaScript, and Reactjs. Finally, you should know how to use the command terminal. You do not need to know how to use Firebase.
What is Firebase?
Firebase is a Backend-as-a-Service (Baas). It is a Google-backed app development platform that allows developers to build iOS, Android, and web apps.
It provides tools for tracking analytics, reporting and fixing app crashes, and creating marketing and product experiments. These help developers develop quality apps, grow their user base, and make a profit.
We will be using two of their tools: Firebase Authentication and Cloud Firestore.
Firebase Authentication
Firebase Authentication (SDK) is a Firebase tool that supports different authentication methods like passwords, phone numbers, Google, Facebook, Twitter, Github, and more. In this app, we will be using the Google sign-in Authentication.
Cloud Firestore
Cloud Firestore is a cloud-based NoSQL database server for storing and syncing data. It stores data in documents as key-value pairs, and the documents are organized into collections.
The documents can also have sub-collections, allowing you to nest collections within collections. The data is also synchronized automatically among all devices listening for them.
Now that you have an idea of how Firebase and Cloud Firestore work, let's build our app.
Note: For this article's scope, I have already prewritten the CSS and prebuilt the components for the chat app. You can find the final project code on GitHub and the CSS and components in the setup folder. You can also view the final project with this live link.
How to Create Our React App
Clone this GitHub repo, delete the src folder in the root directory, and replace it with the src folder located in the setup folder.
Alternatively, you can create your React app by running the code in your terminal, npx create-react-app react-chat, to create it. Here, react-chat is the name of the app. Then you can run npm install firebase react-firebase-hooks to install firebase and react-firebase-hooks.
Delete the current src folder and replace it with the one from the setup folder to use the prewritten CSS and prebuilt components. (Optionally, you can write yours yourself.)
Your new src folder now contains the following:
- a components folder with a NavBar component having the Google sign-in and Sign Out button,
- a Welcome component that will be visible to the user not signed in,
- a Chatbox component that will be visible only when the user is signed in,
- the Message component for displaying a user’s message, and
- a SendMessage component so the user can input and send in their messages.

It also has:
- an img folder where the Google Sign-in image for the Sign-in button is stored,
- an App.css file with the prewritten CSS codes,
- the new App.js file with all our components imported into it,
- and the index.js file.
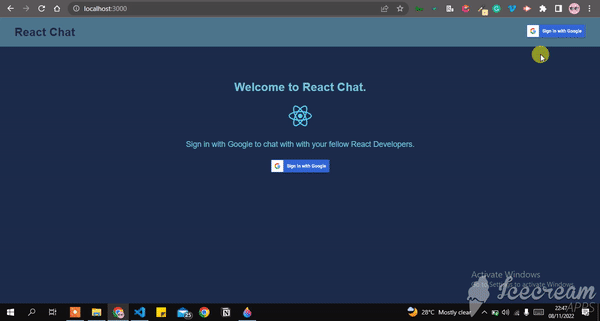
Run npm start to view the app in the browser. Our app should look like this:
 Our React app
Now let's create a Firebase account and set up our Firebase project.
How to Set Up the Firebase Project
If you do not have a Firebase account already, you can open one using your Gmail (you can only use google mail). On the landing page, click on Get started and then, Add project.

 How to setup a Firebase project
Fill out the Create a project form by providing a project name. If you want Google Analytics enabled for your project, leave it enabled. Otherwise, disable it. After that, click on Create project.
 Create a project
Once created, click on Continue.
 What you'll see while Firebase is creating your project.
Choose the type of app where you want to add Firebase. For this article, we chose the code icon because we are building a web app.
 Choose the type of app to which you want to add Firestore
Enter a nickname for your app and click on Register app.
 Register your app
Then select npm, copy the code snippet below it (we will be using it later), and click Continue to console.
 Code snippet
How to Set Up Firebase Authentication
To set up Firebase Authentication, go to the menu on the left side of the screen, click on Build, and select Authentication from the dropdown.
 Select authentication from dropdown
Click on Get started and select Google in the Sign-in method's tab.
 Choose your authentication sign in method
Enable Google, choose your Project support email, and click Save.

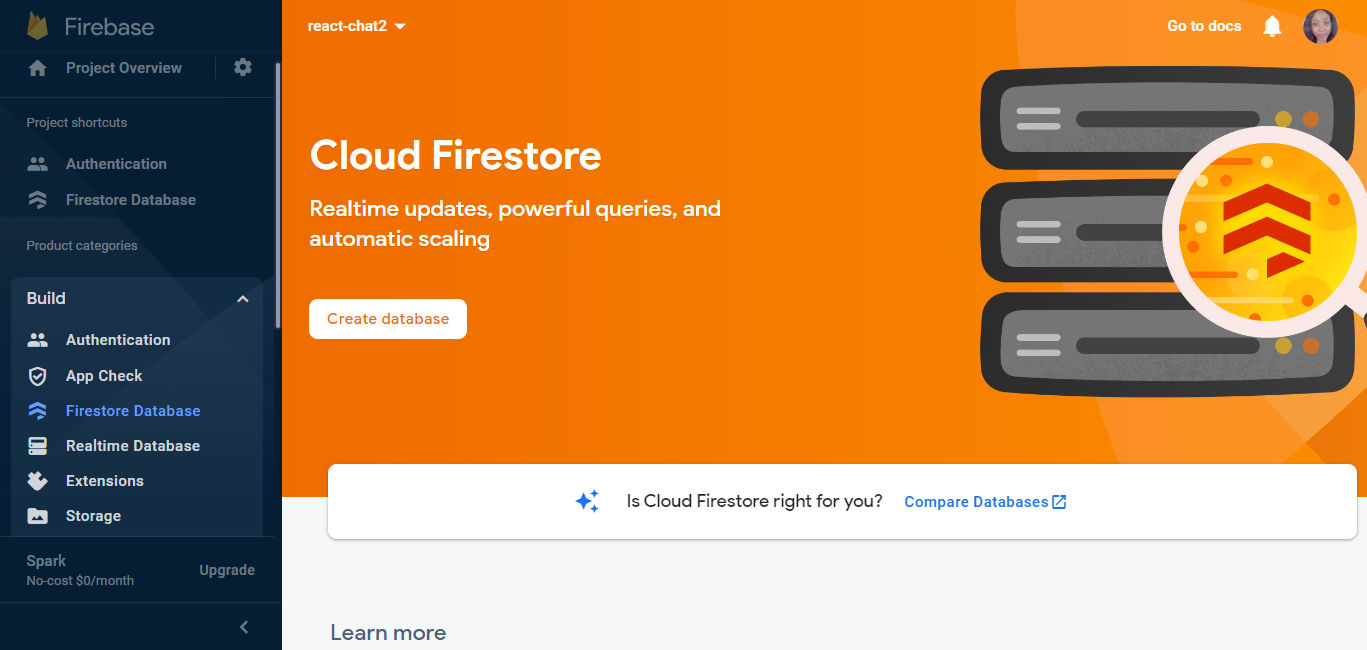
How to Set Up Cloud Firestore
Again, go to the menu on the left side of the screen. Click on Build and select Firestore Database from the dropdown. Then click on Create database and fill out the form.
 Setting up Cloud Firestore
Select which mode you want your database to run, production or test.
Test mode means that any client will have read/write access to your database for 30 days. Production mode means that no one will have read/write access to your database. You will have to edit your rules to grant access to specific clients.
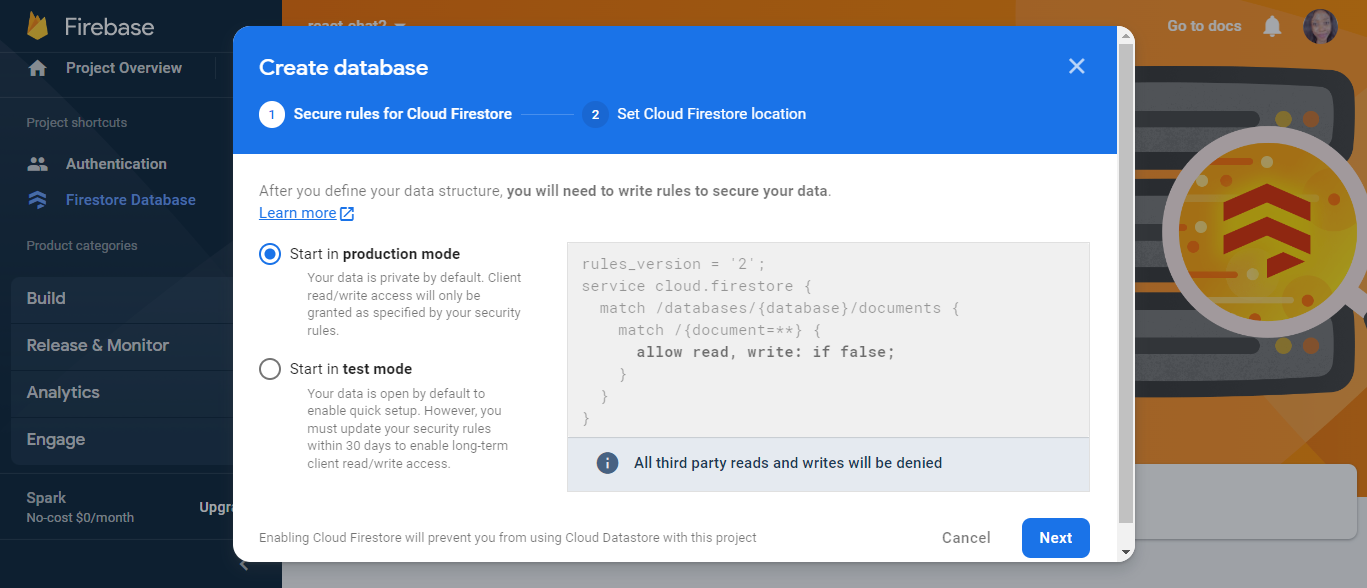 Chose test mode or production mode (we choose production mode).
Select production mode and click Next.
Select a location where you want your Firestore to be stored and click Enable. It will default to the location closest to you.
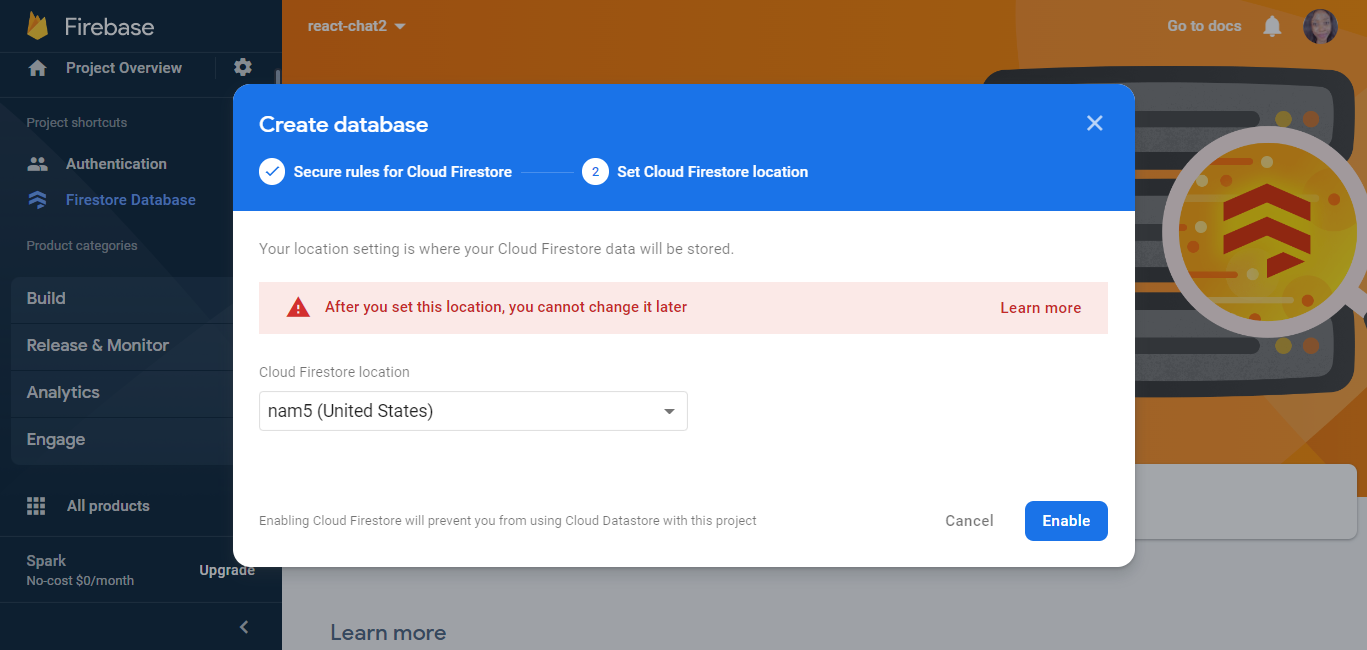 Set a location (default is the location closest to you)
Next up, we edit our rules. Click on the Rules tab and edit the rules,
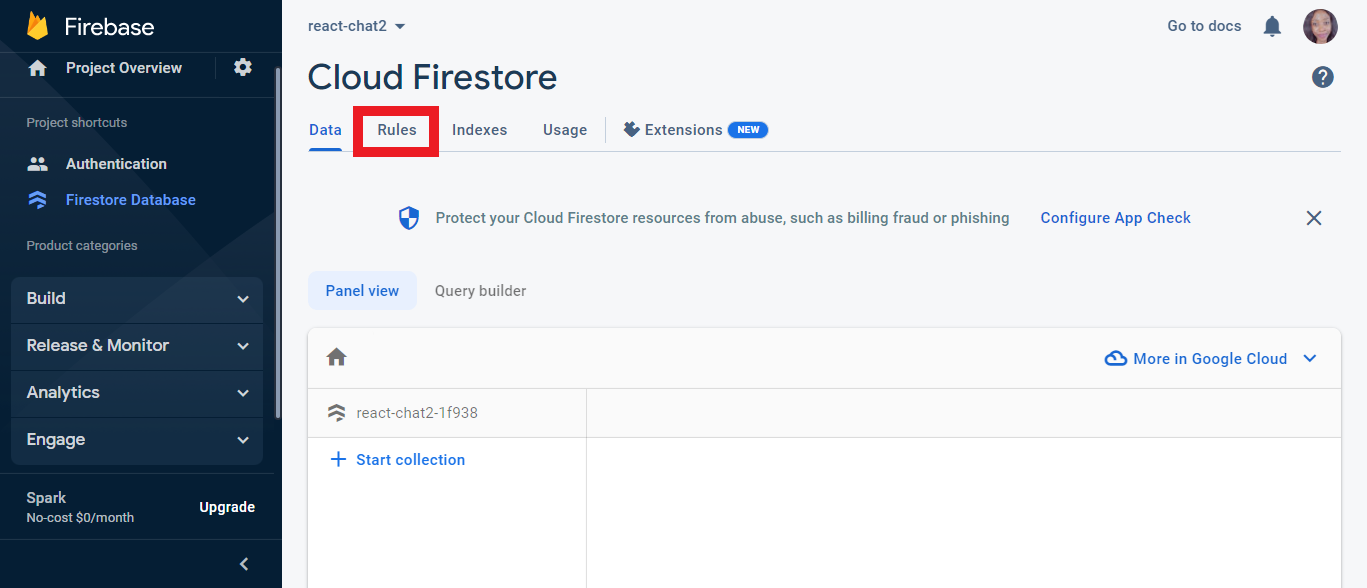 Edit the rules through the Rules tab
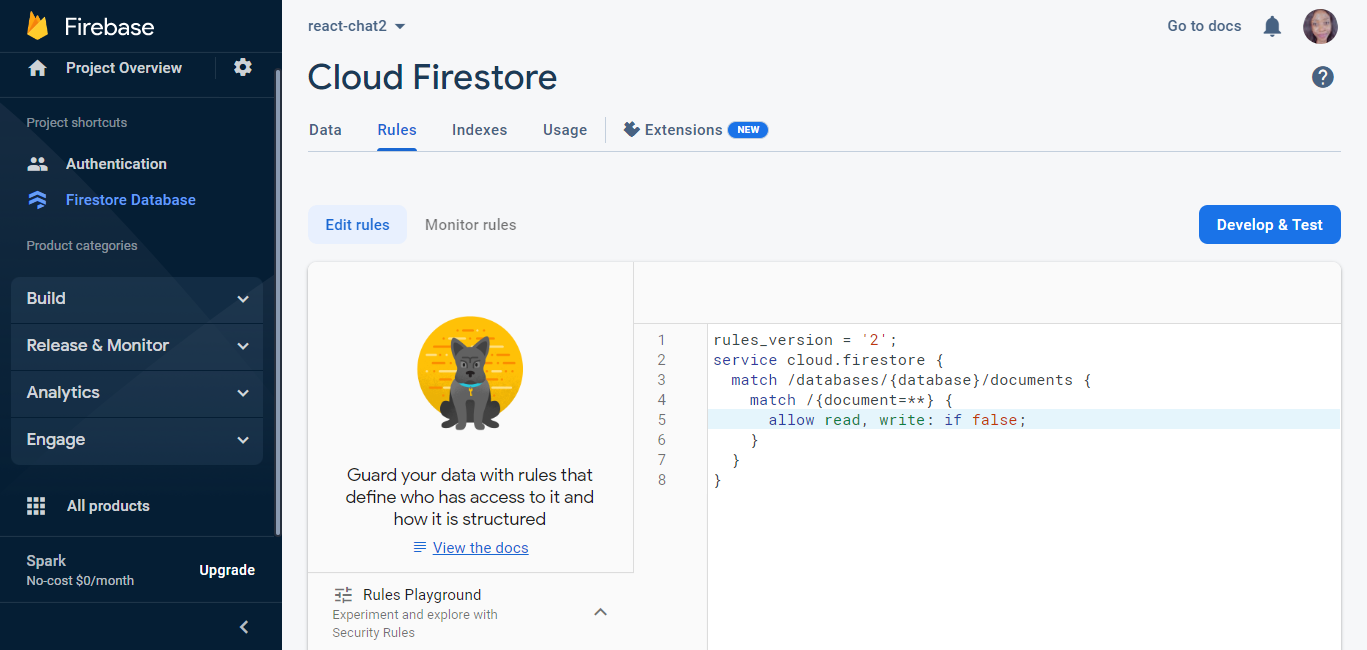 Rule to be replaced
Replace the current rule with the code below and click on Publish.
rules_version = '2';
service cloud.firestore {
  match /databases/{database}/documents {
    match /{document=**} {
      allow read: if true;
      allow create, update, delete, write: if request.auth != null;
    }
  }
}
The allow read: if true; means that anyone can read your database. The allow create, update, delete, write: if request.auth != null; means only authenticated clients can create, update, delete, and write to your database.
You can either start to add/create a collection in your database or create one automatically in your React app, which we will do later. If you want to create a collection in Cloud Firestore, go back to the data tab by clicking Data beside Rules and then click on Add Collection.
Enter the collection’s name, for example “messages”, and click Next.
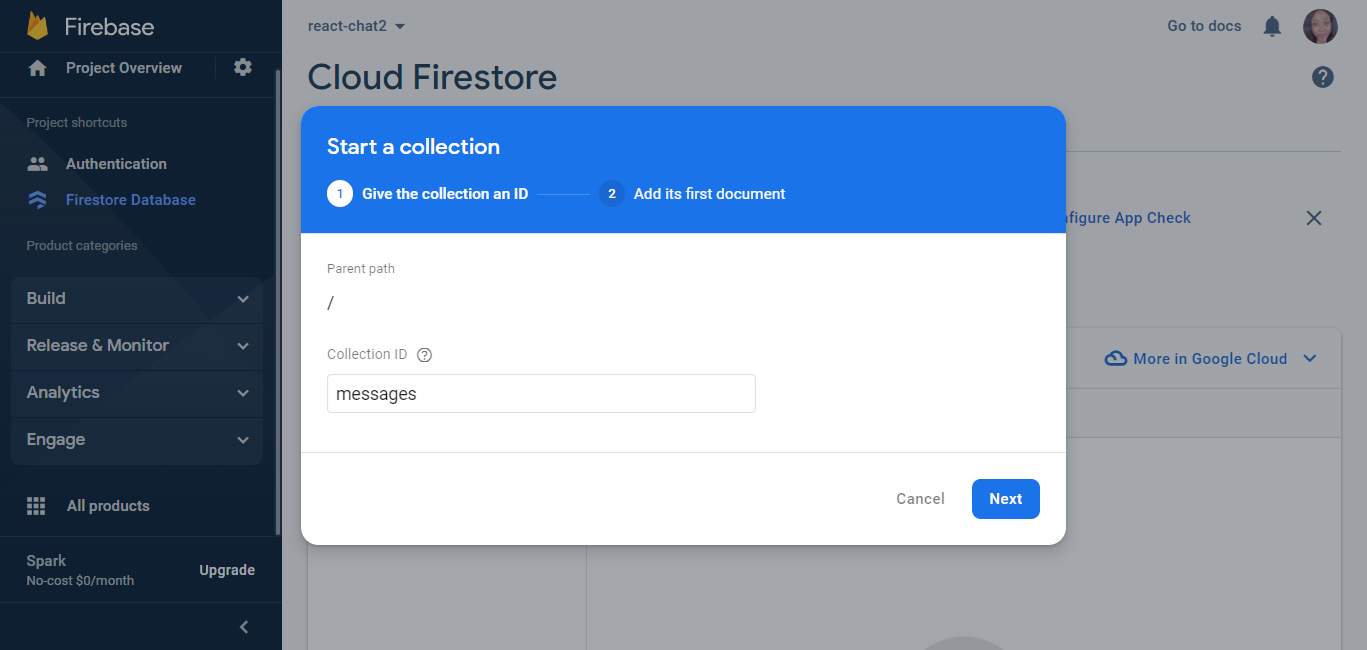 Start a collection in Firestore
Now create a document for the Collection.
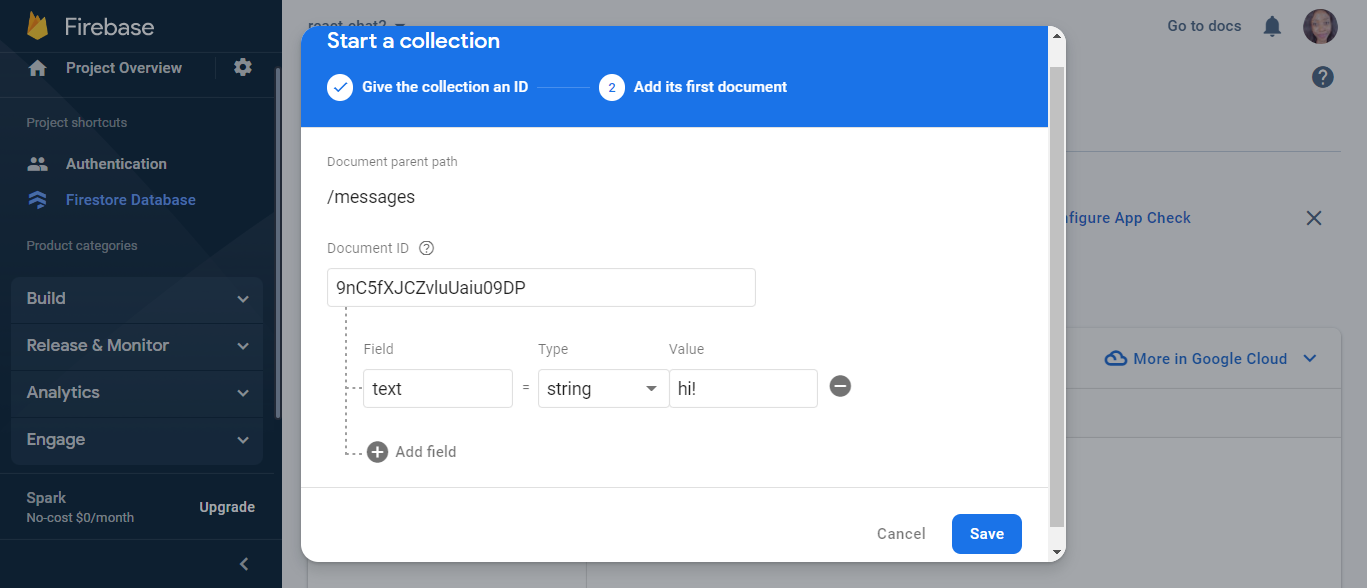 Creating a document for the collection
You can either click Auto_ID to generate an id for the doc or enter one yourself.
After that, create the key-value pairs of the Document. The Field input represents the key name, the Type defines what type of data it is (string, number, timesStamp, and so on), and the Value is the value of the key.
You can also add more documents by clicking the plus sign, otherwise, click Save to save your collection.
Our Firebase project is set. Let's go back to our React app.
How to Configure Firebase in React
In our src folder, create a file called firebase.js and paste the code we had copied into it.
Let's also import the getAuth and getFirestore services from Firebase's auth and firestore libraries, respectively, and export them. You can learn more about Firebase's available libraries from their documentation.
Our Firebase config should look like this:
// Import the functions you need from the SDKs you need
import { initializeApp } from "firebase/app";
// TODO: Add SDKs for Firebase products that you want to use
// https://firebase.google.com/docs/web/setup#available-libraries
import { getAuth } from "firebase/auth";
import { getFirestore } from "firebase/firestore";

// Your web app's Firebase configuration
// For Firebase JS SDK v7.20.0 and later, measurementId is optional
const firebaseConfig = {
  apiKey: REACT_APP_API_KEY_GOES_HERE,
  authDomain: REACT_APP_AUTH_DOMAIN_GOES_HERE,
  projectId: REACT_APP_PROJECT_ID_GOES_HERE,
  storageBucket: REACT_APP_STORAGE_BUCKET_GOES_HERE,
  messagingSenderId: REACT_APP_MESSSAGING_SENDER_ID_GOES_HERE,
  appId: REACT_APP_APP_ID_GOES_HERE,
};

// Initialize Firebase
const app = initializeApp(firebaseConfig);
export const auth = getAuth(app);
export const db = getFirestore(app);
How to Implement Firebase into our React App
How to Authenticate Users with Their Google Account
We want our users to have access to the chatroom and send messages if logged in. They should see the welcome page if they are not. They should also see the Sign Out button if logged in and the Google Sign-in button if not.
This authentication will be handed within our NavBar component, which holds our sign-in and sign-out buttons.
In our NavBar component, we currently import our Google sign-in image and store it as a const called GoogleSignin. We also have a state called user set to false, a googleSignIn function which sets the user state to true, and a signOut function which sets the user state to false.
We also have a nav element with an h1 tag representing our app's title and two buttons rendered conditionally based on the user's state.
import React, { useState } from "react";
import GoogleSignin from "../img/btn_google_signin_dark_pressed_web.png";

const NavBar = () => {
  const [user, setUser] = useState(false);
  const googleSignIn = () => {
    setUser(true);
  };
  const signOut = () => {
    setUser(false);
  };
  return (
    <nav className="nav-bar">
      <h1>React Chat</h1>
      {user ? (
        <button onClick={signOut} className="sign-out" type="button">
          Sign Out
        </button>
      ) : (
        <button className="sign-in">
          <img
            onClick={googleSignIn}
            src={GoogleSignin}
            alt="sign in with google"
            type="button"
          />
        </button>
      )}
    </nav>
  );
};
export default NavBar;
Let's make changes to the NavBar component. Import the following:
import { auth } from "../firebase";
import { useAuthState } from "react-firebase-hooks/auth";
import { GoogleAuthProvider, signInWithRedirect } from "firebase/auth";
Replace the user state with the code below:
const [user] = useAuthState(auth);
And edit the googleSignIn and signOut functions:
const googleSignIn = () => {
  const provider = new GoogleAuthProvider();
  signInWithRedirect(auth, provider);
};
const signOut = () => {
  auth.signOut();
};
The useAuthState function gets triggered when the user signs in or out, allowing us access to the user’s details. Currently, the user state is null. Once they are logged in, the user state will change to the data provided by the authentication method – in this case, Google.
In the googleSignIn function, we let Firebase know that the user wants to sign in with Google using the GoogleAuthProvider(). It also redirects them to Google’s sign-in page.
After the user successfully signs in, their data is saved in auth, and the user is redirected to our app. The signOut function clears the auth data, returning it to null. The new user state also determines which authentication buttons are rendered to the user.
Let's also add authentication to our App.js file. Import the following:
import { auth } from "./firebase";
import { useAuthState } from "react-firebase-hooks/auth";
Add the new user state so we can use it to render the Welcome component if the user is not logged in or the Chatbox component if the user is logged in.
const [user] = useAuthState(auth);
The final code looks like this:
import { auth } from "./firebase";
import { useAuthState } from "react-firebase-hooks/auth";
import "./App.css";
import NavBar from "./components/NavBar";
import ChatBox from "./components/ChatBox";
import Welcome from "./components/Welcome";

function App() {
  const [user] = useAuthState(auth);
  return (
    <div className="App">
      <NavBar />
      {!user ? <Welcome /> : <ChatBox />}
    </div>
  );
}
export default App;
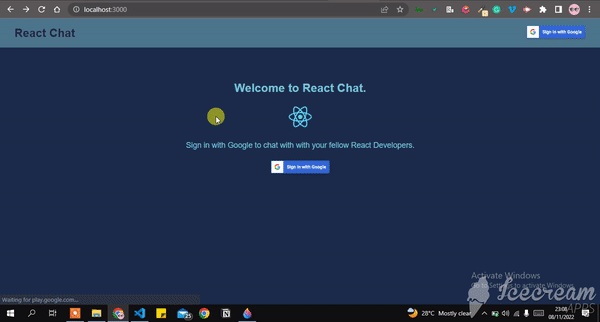
Testing our new sign-in and sign-out functions, we see the following:
 App demo
Now let's do the same for our Welcome Component, which currently has the following code:
import React from "react";
import GoogleSignin from "../img/btn_google_signin_dark_pressed_web.png";

const Welcome = () => {
  const googleSignIn = () => {};

  return (
    <main className="welcome">
      <h2>Welcome to React Chat.</h2>
      <img src="/logo512.png" alt="ReactJs logo" width={50} height={50} />
      <p>Sign in with Google to chat with with your fellow React Developers.</p>
      <button className="sign-in">
        <img
          onClick={googleSignIn}
          src={GoogleSignin}
          alt="sign in with google"
          type="button"
        />
      </button>
    </main>
  );
};
export default Welcome;
We import the following:
import { auth } from "../firebase";
import { GoogleAuthProvider, signInWithRedirect } from "firebase/auth";
and also edit the googleSignIn function:
const googleSignIn = () => {
    const provider = new GoogleAuthProvider();
    signInWithRedirect(auth, provider);
};
Now we can also log in from the second Sign in button:
 Updated app demo
How to Send and Store Messages in Firebase
Currently, we are displaying a dummy message from our Message Component, and the Send button also does not perform any action. When the user inputs a message and hit the Send button, we want the message to be seen immediately in the chatroom.
With our current SendMessage component having the code below, let's edit it:
import React from "react";

const SendMessage = () => {
  return (
    <form className="send-message">
      <label htmlFor="messageInput" hidden>
        Enter Message
      </label>
      <input
        id="messageInput"
        name="messageInput"
        type="text"
        className="form-input__input"
        placeholder="type message..."
      />
      <button type="submit">Send</button>
    </form>
  );
};
export default SendMessage;
First, we import useState from React, auth and db from our firebase configuration file, and addDoc, collection and serverTimestamp from the Firestore library.
import React, { useState } from "react";
import { auth, db } from "../firebase";
import { addDoc, collection, serverTimestamp } from "firebase/firestore";
We create a state called message which is initially set to an empty string and passed as a value to the input tag. An onChange function is also added to the input, which sets the message state to whatever the user types in.
const SendMessage = () => {
  const [message, setMessage] = useState("");

  return (
    <form className="send-message">
      <input
        ...
        value={message}
        onChange={(e) => setMessage(e.target.value)}
      />
      <button type="submit">Send</button>
    </form>
  );
};
We also create a function called sendMessage, and we add an onSubmit attribute to our form, which runs the sendMessage function when the user clicks on Send. Note that the button must have type="submit" for the onSubmit attribute to work.
 const sendMessage = async (event) => {
    event.preventDefault();
    if (message.trim() === "") {
      alert("Enter valid message");
      return;
    }
    const { uid, displayName, photoURL } = auth.currentUser;
    await addDoc(collection(db, "messages"), {
      text: message,
      name: displayName,
      avatar: photoURL,
      createdAt: serverTimestamp(),
      uid,
    });
    setMessage("");
  };

  return (
    <form onSubmit={(event) => sendMessage(event)} className="send-message">
...
The sendMessage function is an async function. It first checks if the user is trying to send an empty string or whitespace as a message and alerts the user.
If the message is not an empty string, it gets the user’s uid, displayName, and photoURL from the auth data provided when they log in. This corresponds to the user’s unique id, full name, and photo URL, respectively.
Once that is done, it then uses the addDoc() to create a document inside a collection called messages in our database, which we have access to via the db import. If the collection doesn't exist, it will create it for us.
It also creates key-value pairs, storing our message in text, displayName in name, storing the time the message was saved in our database in createdAt, and then the user’s uid.
These key-value pairs are what make up the data for our document. After this is done, it then resets the message state to an empty string.
How to Retrieve Messages from Our Database
After sending the user's message, we need to display it on the screen to the user. Going into our ChatBox component, we import the following:
import { useEffect, useRef, useState } from "react";
import {
  query,
  collection,
  orderBy,
  onSnapshot,
  limit,
} from "firebase/firestore";
import { db } from "../firebase";
We create a useEffect hook that will run anytime changes are made in the chatroom, like sending or deleting a message.
useEffect(() => {
  const q = query(
    collection(db, "messages"),
    orderBy("createdAt", "desc"),
    limit(50)
  );
  const unsubscribe = onSnapshot(q, (QuerySnapshot) => {
    const fetchedMessages = [];
    QuerySnapshot.forEach((doc) => {
      fetchedMessages.push({ ...doc.data(), id: doc.id });
    });
    const sortedMessages = fetchedMessages.sort(
      (a, b) => a.createdAt - b.createdAt
    );
    setMessages(sortedMessages);
  });
  return () => unsubscribe;
}, []);
In this useEffect hook, we have a const q, a Firebase query that queries our database looking for a message collection. It then orders the documents in the collection based on the createdAt key, and returns a maximum of 50 documents (messages saved).
The unsubscribe const represents the onSnapshot function which listens to changes in the document. It has an empty array called messages.
The forEach loop loops through all the documents from the collection and saves the data in the new array. It then sets the initial messages array to the new messages array.
We also use a map function on our messages array to render each message/document data in our Message component.
{messages?.map((message) => (
  <Message key={message.id} message={message} />
))}
The final code looks like this:
import React, { useEffect, useRef, useState } from "react";
import {
  query,
  collection,
  orderBy,
  onSnapshot,
  limit,
} from "firebase/firestore";
import { db } from "../firebase";
import Message from "./Message";
import SendMessage from "./SendMessage";

const ChatBox = () => {
  const [messages, setMessages] = useState([]);
  const scroll = useRef();

  useEffect(() => {
    const q = query(
      collection(db, "messages"),
      orderBy("createdAt", "desc"),
      limit(50)
    );

    const unsubscribe = onSnapshot(q, (QuerySnapshot) => {
      const fetchedMessages = [];
      QuerySnapshot.forEach((doc) => {
        fetchedMessages.push({ ...doc.data(), id: doc.id });
      });
      const sortedMessages = fetchedMessages.sort(
        (a, b) => a.createdAt - b.createdAt
      );
      setMessages(sortedMessages);
    });
    return () => unsubscribe;
  }, []);

  return (
    <main className="chat-box">
      <div className="messages-wrapper">
        {messages?.map((message) => (
          <Message key={message.id} message={message} />
        ))}
      </div>
      {/* when a new message enters the chat, the screen scrolls down to the scroll div */}
      <span ref={scroll}></span>
      <SendMessage scroll={scroll} />
    </main>
  );
};

export default ChatBox;
Going into our Message component, let's render the data passed into it in our browser.
import React from "react";
import { auth } from "../firebase";
import { useAuthState } from "react-firebase-hooks/auth";
const Message = ({ message }) => {
  const [user] = useAuthState(auth);

  return (
    <div
      className={`chat-bubble ${message.uid === user.uid ? "right" : ""}`}>
      <img
        className="chat-bubble__left"
        src={message.avatar}
        alt="user avatar"
      />
      <div className="chat-bubble__right">
        <p className="user-name">{message.name}</p>
        <p className="user-message">{message.text}</p>
      </div>
    </div>
  );
};
export default Message;
We imported auth and useAuthState, and stored the user details in user. We deconstructed the messages prop and passed the avatar into the img src attribute. We also replaced the dummy name and message with the one gotten from the message data.
We also conditioned a CSS style to take effect based on the uid of the message's author. So if the message’s author uid is the same as the uid of the person logged in, then the CSS styles stored in the selector right should be added to the div. Otherwise, no new style should be added.
Currently, all messages are positioned to the left, so if the logged user is the message’s author, their message should be positioned to the right. Let's view these changes in our browser:
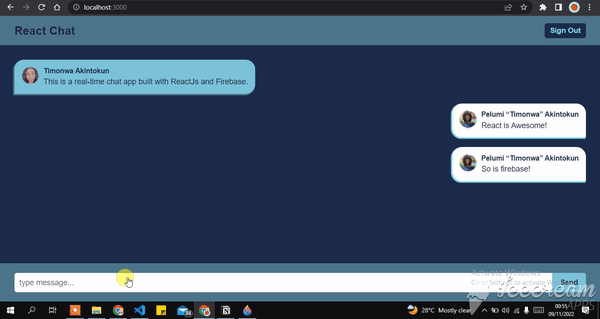 Updated app demo
The message is sent and stored in our database. Then all the messages are retrieved, and the chatroom is updated in real-time with the new messages.
The name and avatar of the user are also present on the message card. But we can also see that the chat doesn't scroll to the bottom when a new message enters. Let's fix that.
How to Add Scroll to the Bottom
Going into our ChatBox.js, we import the useRef hook and create a const called scroll:
import React, { useEffect, useRef, useState } from "react";
...
const scroll = useRef();
We then create a span element with a ref attribute whose value is scroll, and also pass the scroll into our Messages component:
<main className="chat-box">
   ...
   {/* when a new message enters the chat, the screen scrolls dowwn to the scroll div */}
   <span ref={scroll}></span>
   <SendMessage scroll={scroll} />
</main>
We then go into the Messages component, access the scroll const, and add scroll.current.scrollIntoView({ behavior: "smooth" }) to the bottom of our sendMessage function.
This code tells the browser to let the scroll span be in view in the browser after sending a message. That is why the span tag was placed at the bottom of all the messages.
const SendMessage = ({ scroll }) => {

  const sendMessage = async (event) => {
   ...
    setMessage("");
    scroll.current.scrollIntoView({ behavior: "smooth" });
  };
  ...
};
Going back to the browser, we should see the chat scroll to the bottom when the user sends in a new message.
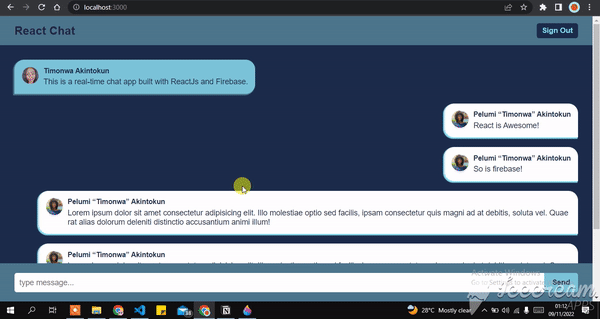 Demo showing chat scrolling to the bottom with a new message
How to Add Authorized Domains
When deploying our React app, it's essential to add our domain to the list of authorized domains in Firebase. This step ensures that our app communicates with the Firebase services correctly. Here's how you can do it:
In the Firebase console, navigate to the Authentication section from the left sidebar and click on the Settings tab. Scroll down to the Authorized Domains section, then click on the Add Domain button. Add the domain or domains that your React app will be deployed on.
For example, if you are deploying your app to https://my-react-chat-app.com, enter my-react-chat-app.com as an authorized domain. Click the Add button to apply the changes.

By adding your app's domain to the authorized domains list, you grant permission for Firebase services to be accessed from that domain. Without adding the domain, you may encounter errors when trying to establish connections or perform operations with Firebase.
Wrapping Up
And that's it on building a real-time chat app. Congrats!
In this tutorial, we learned how to use Firebase and React to build a real-time chat app. We also authenticated the users using Firebase Authentication’s Google sign-in method and stored the chat room messages in a database using Cloud Firestore. We also learned how to use some of Firebase’s services and libraries.
You can find the code for this project on GitHub, and you can explore the chat room using this live link.
If you enjoyed this article, consider sharing it to help other developers. You could also visit my blog to read more articles from me and you can connect with me on Twitter and LinkedIn.
Till next time guys, byeeeeee!