
By Atakan Goktepe
This month, I started to build my new product. It helps convert any website to JSON, XML, CSV, or any other format. I wrote my own Chrome extension for pointing to the fields in websites.
Most articles show how you can render it in a popup. In this article, we will render our app directly in the content (with Content Scripts). I will show you to how to start writing a chrome extension using ReactJS and Parcel from scratch. I will assume you have basic knowledge of JavaScript.
Note: If you don’t want to read this article and just want to start coding, you can find the Git repo at the end.
The Scenario
We need to render our app on the visited website when a user clicks the render element button in the popup.
So, let’s get started.
How our project will look
 A finished version of a project
├── icon.png
├── manifest.json
├── node_modules
├── .babelrc
├── package.json
└── src
    ├── build
    │   └── main.js [We will use that build file as content script]
    ├── js [Where our development file is stored]
    │   ├── components [We are storing components in this folder]
    │   │   └── Header.js
    │   ├── main.js [Our main file, that renders our app]
    │   └── popup.js [Our javascript file for popup]
    └── popup.html [Our html file for rendering popup after clicking the icon in the bar]
Step 1: Creating Project Files
Firstly, create manifest.json, as we need that file for providing information about our Chrome extension.
Every extension has a JSON-formatted manifest file, named manifest.json, that provides important information like name, version, and permissions.
And here is how it looks:
{
  "manifest_version": 2,

  "name": "Name of your chrome extension",
  "description": "Description of your chrome extension.",
  "version": "1.0",

  "browser_action": {
    "default_icon": "icon.png",
    "default_popup": "src/popup.html"
  },

  "permissions": [
    "activeTab",
    "tabs"
  ],

  "content_scripts": [
    {
      "matches": ["http://*/*", "https://*/*"],
      "js": ["src/build/main.js"]
    }
  ]
}
After creating the manifest file, we need to configure our project environment and structure.
Let’s start creating out project structure — so open your terminal and follow my steps!
Step 2: Creating package.json
As you can see, there are two scripts build and watch
watchcommand watches yourmain.jsand compiles if there was a change or if dependencies are imported frommain.js.buildcommand builds your files into thesrc/build/main.jsfile.
{
  "name": "extension-name",
  "version": "0.1.0",
  "description": "Description",
  "main": "src/js/main.js",
  "scripts": {
    "build": "parcel build src/js/main.js -d src/build/ -o main.js",
    "watch": "parcel watch src/js/main.js -d src/build/ -o main.js"
  },
  "author": "Atakan Goktepe",
  "dependencies": {
    "babel-preset-env": "^1.6.1",
    "babel-preset-react": "^6.24.1",
    "parcel-bundler": "^1.6.2",
    "react": "^16.2.0",
    "react-dom": "^16.2.0"
  }
}
Step 3: Creating files and folders
- Create a source folder
mkdir src
- Create a components folder in
srcfolder
mkdir src/js/components
- Create
main.js,popup.jsandpopup.htmlfiles
touch src/js/main.js src/js/popup.js src/popup.html
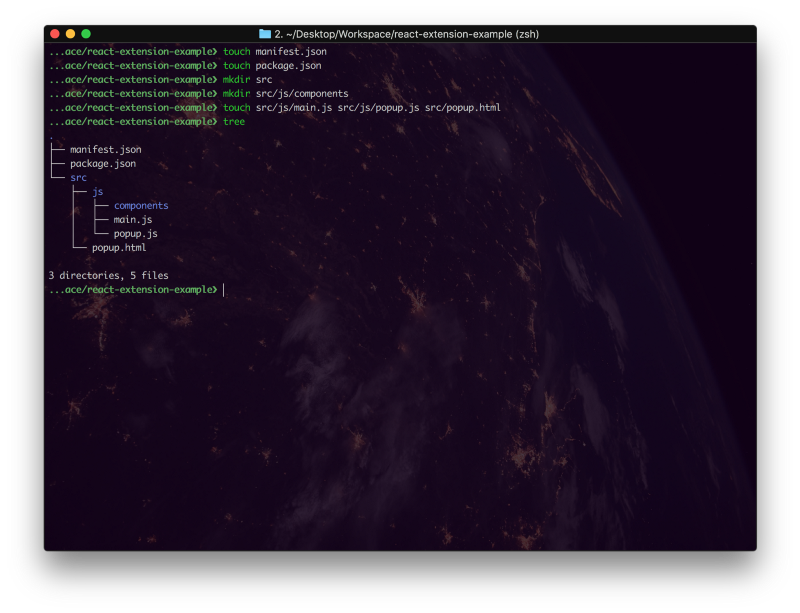 Project Structure
Step 4: Writing the Popup
 Popup
Popup
The popup appears at the top of the bar in Chrome when a user clicks the icon of the extension.
The React App will be rendered in the content when a startApp message comes from the popup. The popup will share a startApp message with the app.
Edit your popup.html file with the following HTML:
<!doctype html>
<!--
 This page is shown when the extension button is clicked, because the
 "browser_action" field in manifest.json contains the "default_popup" key with
 value "popup.html".
 -->
<html>
  <head>
    <title>Getting Started Extension's Popup</title>
    <style type="text/css">
      body {
        margin: 10px;
        white-space: nowrap;
      }

      #container {
        align-items: center;
        display: flex;
        justify-content: space-between;
      }

      .start {
        border: 1px solid #000;
        border-radius: 15px;
        padding: 5px 15px;
        cursor: pointer;
      }
    </style>

    <script src="js/popup.js"></script>
  </head>

  <body>
    <div id="container">
     <!--
      Render react app in the visited website when the .start button is clicked.
     -->
      <button class="start">
        Render App
      </button>
    </div>
  </body>
</html>
There is a button in the popup which sends a message to our main.js file when a user is clicked.
And edit your popup.js file with the following:
window.onload = () => {
  const $startButton = document.querySelector('.start');

  $startButton.onclick = () => {
    // Get active tab
    chrome.tabs.query({
      active: true,
      currentWindow: true,
    }, (tabs) => {
      // Send message to script file
      chrome.tabs.sendMessage(
        tabs[0].id,
        { injectApp: true },
        response => window.close()
      );
    });
  };
}
chrome.tabs.sendMessage method shares the message with a listener. Our listener is working in the main.js.
Step 5: Rendering React App
At this point, main.js should listen to messages which are coming from popup.js.
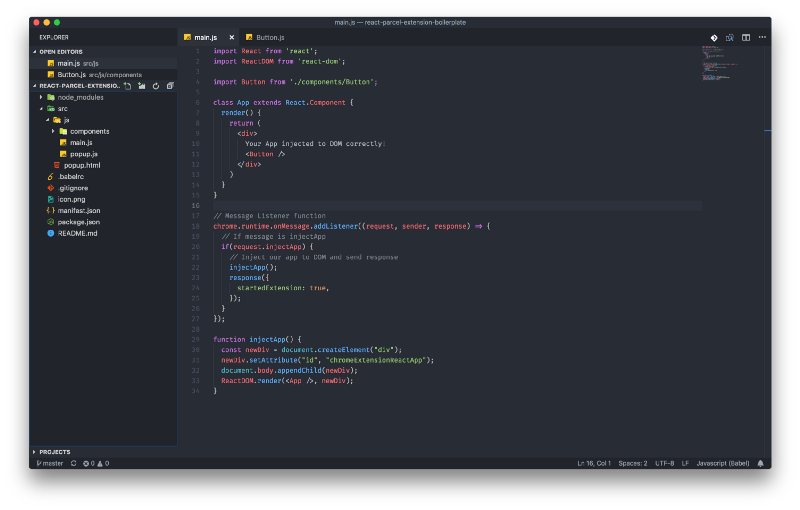
We can listen to messages with the chrome.runtime.onMessage.addListener method. And here is how our main.js file looks:
import React from 'react';
import ReactDOM from 'react-dom';

class App extends React.Component {
  render() {
    return (
      <div> Your App injected to DOM correctly! </div>
    )
  }
}

// Message Listener function
chrome.runtime.onMessage.addListener((request, sender, response) => {
  // If message is injectApp
  if(request.injectApp) {
    // Inject our app to DOM and send response
    injectApp();
    response({
      startedExtension: true,
    });
  }
});

function injectApp() {
  const newDiv = document.createElement("div");
  newDiv.setAttribute("id", "chromeExtensionReactApp");
  document.body.appendChild(newDiv);
  ReactDOM.render(<App />, newDiv);
}
Let’s look at what have we done in main.js:
- Imported React and ReactDOM libraries.
- Created an App class for rendering a React element.
- Added an event listener function for listening for messages which are coming from
popup.js - Created an
injectAppfunction that created a div, and injected it into a body. We rendered our<App/> component inside it.
Testing it
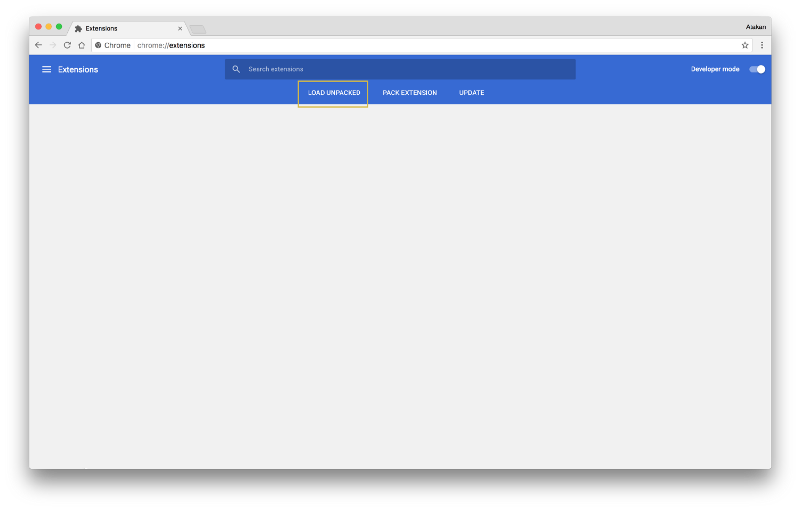
For testing your extension:
- If you didn’t build your files, build them by running the
npm run buildcommand - Go to “chrome://extensions”
- Check the “Developer Mode” switcher
- Click the “Load Unpacked” button, then select your project folder.
And Whoa! You have created an extension for Google Chrome. You are awesome!
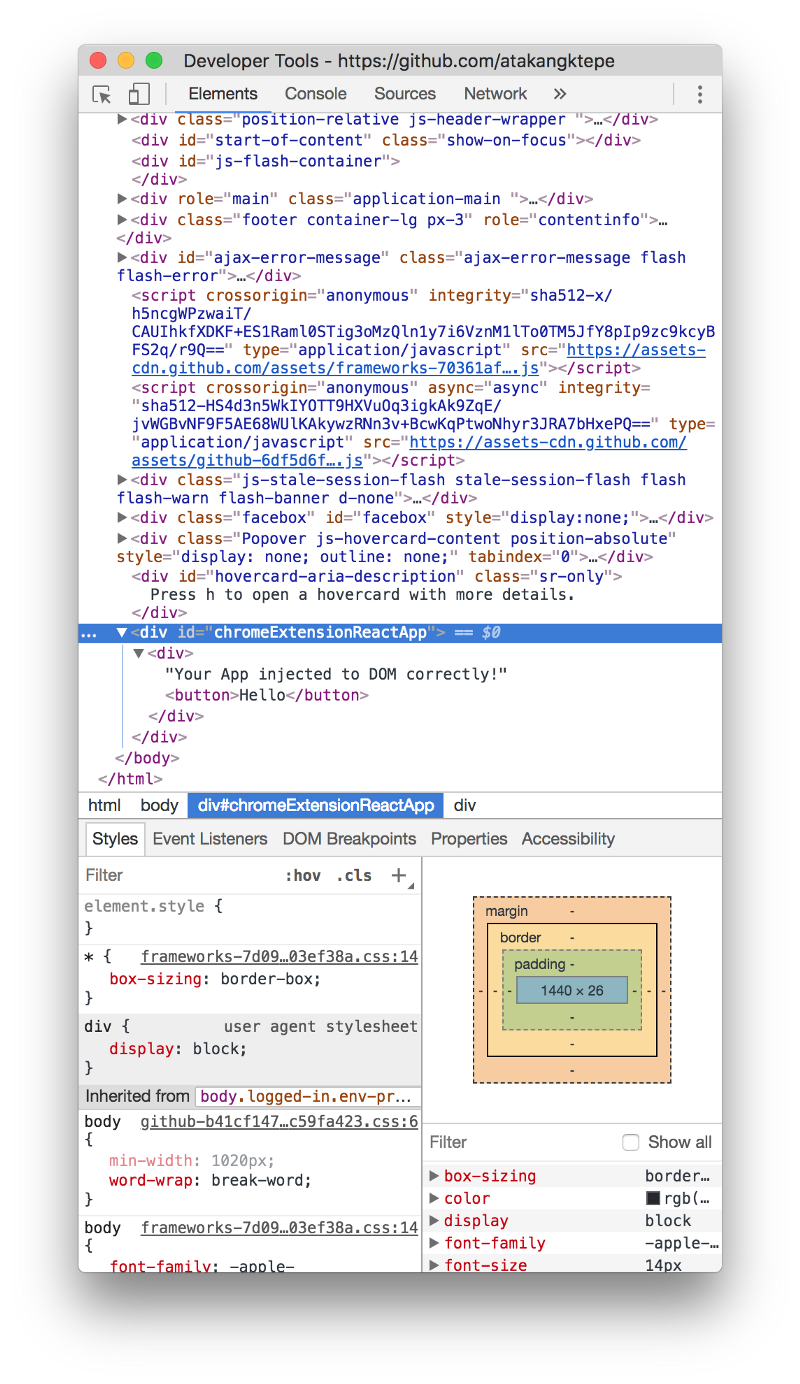 Your extension rendered!
Open your developer tools and look at the end of the body — your element rendered successfully!
Source Code
Here’s the final repo:
atakangktepe/react-parcel-extension-boilerplate
_react-parcel-extension-boilerplate - A Chrome extension boilerplate built with ReactJS and Parcel (renders in content…_github.com
Done!
Thanks for reading through this tutorial. It was my first article in English! If it has been helpful, please recommend it by hitting the clap button ? or (even better) share it. ??