
By Daniel Deutsch
The voting app challenge on freeCodeCamp was the first freeCodeCamp project in the curriculum that struck me as really hard. I just couldn’t do it as easily as all the other challenges. So much knowledge in of so many concepts is necessary to build it.
I didn’t find any tutorials or examples that broke this challenge down with up-to-date tools. So I decided to document my process of building it.
In this tutorial, will use:
- MongoDB
- Express
- React + Redux
- Node.js
also known as the “MERN-Stack”.
“I fear not the man who has practiced 10,000 kicks once, but I fear the man who has practiced one kick 10,000 times.”
— Bruce Lee
What this article is about
I will describe the process of building the voting app for the freeCodeCamp challenge.
This is not an optimized example for building the application. I am open for feedback of any kind. I am still a beginner and also left some things open.
This is not designed as a tutorial! It’s simply a documentation I wrote while building the app.
Structure
I will divide this article into sections of back-end, front-end, data visualization and the deployment process. The project will be available as open source code on GitHub. That is where you can follow up with commits and the end result.
Development Environment
- Plain JavaScript
- Node.js
- Express (JS framework)
- MongoDB (Database)
- Yarn (package management)
- Visual Studio Code as editor
- Postman (testing APIs)
- Robomongo / Robo 3T (working faster with MongoDB)
Packages / Features / Dependencies
General
- (ES 6 (JS scripting-language specification))
- eslint with Airbnb extension (for writing higher quality code)
- nodemon (restarting server when changes occur)
- Babel (javascript compiler)
- Webpack (module bundler/builder)
- dotenv (for configuring environment variables)
- shortid (random ID generator)
Back-end
- Node.js (JS runtime environment for server-side)
- MongoDB (document based database)
- connect-mongo (for storing sessions in MongoDB)
- body-parser (for parsing incoming requests)
- express (to make the application run)
- mongoose (object data modeling to simplify interactions with MongoDB)
- morgan (HTTP request logger middleware)
- passport (authentication middleware for Node.js)
Front-end
- React (JS framework)
- Redux (state management for React)
- Redux Thunk (asynchronous Redux)
- Materialize CSS (framework for material design)
- React Router (routing in the frontend)
Visualization
- React Google Charts (React wrapper for Google Charts)
- Google Charts (for visiualizing data)
Deployment / DevOps
- Heroku (PaaS to run applications in the cloud)
- (Unit)Testing: Not implemented in this app (but normally it should be)
First things first
First I will set up my environment:
- add Git for version control
- create your package management with yarn init
- add express for a fast web development
- add the nodemon package for restarting your server on changes
- add eslint.rc for your eslint configuration
- add babel and corresponding plugins for compiling JS
As additional integration I’ll use:
- Travis CI (for continuous integration)
- Code Climate (for Code quality)
- Assertible (Monitoring Web Services, especially checking deployment — Quality Assurance)
Here is my commit on GitHub after the setup.
Back-end
For me, the back-end is most difficult. So that’s where I’ll start.
Set up Packages, Middleware and Mongoose
I will use:
- body-parser for parsing request bodies
- morgan for logging out HTTP requests
- compression for compressing response bodies
- helmet for setting basic security with HTTP headers
- mongoose object modeling tool for asynchronous database connection
Next steps:
- create a constants file to set your different environment variables and corresponding settings
- create a middleware file to pass in middleware to your app and differentiate for environments. Use bodyparser and morgan packages here.
- create a database file to set up the mongoDB connection
- modularize your code and outsource your constants, middleware and database connection. This is for keeping smaller files.
- import everything in your app.js file, pass in the
middlewarefunction and test your setup with a simplehttprequest
Here’s my commit on GitHub after this setup.
Set up your routes
Revisit the User stories and lay out your routes accordingly.
Following the CRUD approach:
As an unauthenticated user I want to:
- see all polls (R)
- see individual polls (R)
- vote on available polls (C)
As an authenticated user I want to
- see and read all polls (R)
- see individual polls (R)
- vote on available polls (C)
- create new polls (C)
- create new options and votes (C)
- delete polls (D)
Therefore:
- set up error handling as middleware
- set up your router object
- create your GET, POST, DELETE routes and response with JSON objects
- test the set up routes with postman (all should have a status code of 200)
- connect your routes to your middleware and app.js
Set up Mongoose and your Schemas and connect everything to your routes
When setting up Schemas think about how you want to structure the documents that you will store in the database. In this example we need to store the user for the authentication process and polls with answers.
For polls we need:
- the question
answers and votes
create your mongoose schemas and models
- connect to mlab to monitor your DB actions better
Be aware that MLab creates “System Collections.” They throw “duplicate key error index dup key: { : null }” error in postman, when creating new polls. Until now I haven’t found a solution but deleting all collections allows us to start again.
- use the dotenv package to store your credentials in the environment and add the .env file to .gitignore (if you make your project open source)
- connect you routes with your mongoose model to handle the documents in MongoDB
Be Sure To Read the Docs if you are stuck. This part is pretty hard when you haven’t done a lot with mongoose and MongoDB!
Here’s what my commits looked like on Github after these steps.
Establish authentication and authorization with Twitter
I want to use the twitter sign-on as an OAuth provider to authenticate. It provides better user experience and I also got to explore OAuth.
OAuth is a standard protocol that allows users to authorize API access to web and desktop or mobile applications. Once access has been granted, the authorized application can utilize the API on behalf of the user.
Of course I found the great article on how to set up the authentication process in Nodejs. After I failed implement it properly in my app and it took me a whole day, I decided to dive straight into the documentation of passport!
I love the quote they put up there:
“Despite the complexities involved in authentication, code does not have to be complicated.”
⭐ Again, as a reminder: Read the Documentation!
- register your app on twitter apps and get your settings right. Determine the Access Level and the Callback URL
- add passport, passport-twitter and express-session packages to your application
- create a file defining a passport strategy for Twitter
- to support login session passport has to serialize and deserialize user
- pass passport to your passport configuration and connect passport.initialize and passport.session to your app as middleware. Use express-session before this!
- set up routes for authenticating and the callback
Check out my commit on Github after these steps.
After that, connect the authentication process to your database
⭐ Tip: Use for your callback and testing always http://127.0.0.1:3000/ instead of http://localhost:3000/, since it solves a lot of problems, that might occur using passport-twitter. ?
- create a mongoose Schema for your users to track them in your database
- fill the callback function of your passport.js file when implementing the twitter strategy. Filter your database for the user and create a new one if a user is not existing
- use the connect-mongo package to create a mongoStore and store your sessions in MongoDB
- create a function to test if a user is authenticated. Implement it in your desired routes when providing sufficient authorization
The implementation can look like this:
passport.use( new Strategy(constants.TWITTER_STRATEGY, (req, token, tokenSecret, profile, cb) => { process.nextTick(() => { if (!req.user) { User.findOne({ 'twitter.id': profile.id }, (err, user) => { if (err) return cb(err); if (user) { if (!user.twitter.token) { user.twitter.token = token; user.twitter.username = profile.username; user.twitter.displayName = profile.displayName; user.save(() => { if (err) return cb(err); return cb(null, user); }); } return cb(null, user); }
// if no user is found create one const newUser = new User();
newUser.twitter.id = profile.id; newUser.twitter.token = token; newUser.twitter.username = profile.username; newUser.twitter.displayName = profile.displayName;
newUser.save(() => { if (err) return cb(err); return cb(null, newUser); }); }); } else { // when user already exists and is logged in const user = req.user;
user.twitter.id = profile.id; user.twitter.token = token; user.twitter.username = profile.username; user.twitter.displayName = profile.displayName;
user.save((err) => { if (err) return cb(err); return cb(null, user); }); } });}), );
After that your authentication and authorization with Twitter is done.
Here’s what my commits looked like on Github after these steps.
Establish local authentication and authorization
The next step is to authenticate locally. There is actually not much to it, since we have already set up the environment.
- update your user schema for local by defining email and password
- add the bcrypt-nodejs package for securing passwords
- add hashing and validating password methods to your Schema
- define the routes. This process always clarifies what I actually want to implement
I had a main issue which I was only able to resolve after many hours of searching. Here is the example from the docs:
app.get('/login', function(req, res, next) { passport.authenticate('local', function(err, user, info) { if (err) { return next(err); } if (!user) { return res.redirect('/login'); } req.logIn(user, function(err) { if (err) { return next(err); } return res.redirect('/users/' + user.username); }); })(req, res, next);});
Passing in the authentication in the callback function provided enough flexibility for displaying errors. But it’s very important to create the session explicitly with logIn()!
- make sure to differentiate in the routes between signup and login!
- I installed EJS as view engine to actually being able to test my signup and login properly and efficient
- create a logout route, that destroys your session
I spent so many hours on an Error that I want to display it here: MongooseError: Cast to ObjectId failed for value “favicon.ico” at path “_id”
I solved it through checking all middleware which had a major error, and routes. It turned out that setting a route to (‘/:pID’) is not good when working in development.
Check out my commit on GitHub after the back-end setup.
Of course at this point the back-end is not perfect. But it’s stable enough to go to the next step, the front-end.
Things to do:
- use validation with joi
- write unit tests
Frontend
Think before you do!
First of all think about what you want to create. Draw out some sketches to visualize what you want to build.
Then consider appropriate frameworks. I will choose React.js and the state management library Redux. The size of this application does not necessarily require the use of Redux.
I want to build it as a single page experience. I want to have scalability and I like to practice the use of Redux. So, it’s a good fit.
Start planning everything out thinking in React.
Necessary setup with Babel and Webpack
It’s important to realize that Babel and Webpack are not too complicated to set it up yourself. There are so many tutorials for both that you can do it easily yourself.
- add Babel for React and ES2015:
Add babel-preset-react babel-preset-es2015 to your dev dependencies to compile JSX into JS and have all ES6 features. - update your .babelrc file
- update your webpack config and add the react-hot-loader package
First I want to structure my front-end without the back-end to connect the whole front-end with the back-end at the end. This is because right now I don’t know how my Redux implementation will look. So progressively connecting to the back-end wouldn’t be efficient.
- restructure your current app.js into an own folder
- create a new app.js as entry point and provide the basic setup code for rendering a simple page
- get the setup working. Install the react-router, webpack-dev-server and react and react-dom packages
- opening a page on the dev-server port should display your react component
Here’s what my commits looked like on Github after these steps.
Structure components
I sketched everything out on a paper and came to the conclusion that I need to build 14 components:
- the app component, that hosts everything
- a header
- a footer
- a sidebar
- a signup, login and social media component
- a home screen
- a list of all polls
- the display of a single poll
- a component for the poll and it’s answers
- the answers as a list
- the chart
- a 404 page
That layout was for the start and should provide an overview. It is very natural to adapt the component structure when the application is evolving.
Design and build components
- I lay out all the components and styled them with Materialize. Materialize is a responsive design framework.
- remember that styling with React is more complicated than styling normal HTML elements. For simplicity reasons I fixed everything with inline styling on the component itself.
Tip: For 100vh on your main content use this inline style on a div. It fits perfectly into the Materialize flexbox:
style={{ display: 'flex', minHeight: '100vh', flexDirection: 'column',}}
- As you build components you will get a feeling on how you need to structure your state management with React and Redux
Check out my commit on GitHub after the components are built and styled
- Now we have to set up React Router to get a basic functionality and feeling for the app
- enable
historyApiFallback: trueon your webpack dev server to allow proper routing with react router - add state and it’s management to the components
- realize that Redux might be a good next step
Here is a list of painful learnings I had to undergo throughout this process:
- to access object properties, use bracket instead of dot notation. For example: JavaScript
answers = answers.concat(this.refs[temp].value) - import everything as
* (import * as Polls from ‘./ducks/polls’;)from ducks. Otherwise it will not work - I have often read to not use the index of a map function as a key value for a component. However, when rendering with
onChangeand generating a unique key, the input loses focus and does not work properly. For example:(const answerList = this.state.answers.map((answer, ind) => { return (<div className=”input-field col s10" key={ind}>) - when you iterate over an array of objects and want to change properties on an object you have to return an object. For example:
return{ answer: answ.answer, votes: 0};
It took me 4 hours to understand ?
The Principles of Redux are:
- Single source of truth
- State is read-only
- Changes are made with pure functions
Keep in mind, that local state doesn’t need to take part in Redux when it’s state isn’t used by other components.
- add the react-redux and redux packages
- make use of the ducks structure to manage the redux files better
- create a store in Redux and wrap your rendering app in a
Providertag from react-redux - connect state to your application with
connect - add the Redux DevTool to debug faster
Now that State is available through Redux, it’s time to create the event handlers and render everything properly. Now you should validate your your propTypes as well.
Visualization
For displaying the results I chose between:
After skimming all docs and trying a few things out I ended up choosing React-Google-Charts. Google provides many options and the React wrapper makes it easy to implement in a React application.
With the React Wrapper this step was super easy and fast.
const resultChart = (props) => { basic = [['Answer', 'Votes']]; (() => props.poll.answers.map(ans => basic.push([ans.answer, ans.votes])))(); return ( <Chart chartType="PieChart" data={basic} options={{ title: `${props.poll.question}`, pieSliceText: 'label', slices: { 1: { offset: 0.1 }, 2: { offset: 0.1 }, 3: { offset: 0.1 }, 4: { offset: 0.1 }, }, is3D: true, backgroundColor: '#616161', }} graph_id="PieChart" width="100%" height="400px" legend_toggle /> );};
Connect Front-end to the Express Back-end with React Router
Rendering client- and server-side
As this was my first real full-stack app, connecting the front-end and back-end was a mystery to me. I found a good answer to my question on Stack Overflow.
To summarize and quote the answer of Stijn:
“With client-side routing, which is what React-Router provides, things are less simple. At first, the client does not have any JS code loaded yet. So the very first request will always be to the server. That will then return a page that contains the needed script tags to load React and React Router etc. Only when those scripts have loaded does phase 2 start. In phase 2, when the user clicks on the ‘About us’ navigation link for example, the URL is changed locally only to http://example.com/about (made possible by the History API), but no request to the server is made. Instead, React Router does it’s thing on the client side, determines which React view to render and renders it.”
To read more of his comments click here.
In the end I went with the catch-all solution: See in my routes.js file.
//routes.jsrouter.get('/*', (req, res) => { const options = { root: `${__dirname}/../../public/`, dotfiles: 'deny', }; res.sendFile('index.html', options);});
It was easy and fast to implement and covered the basic problems.
Serving everything all together
To understand that, the best way is to take a look at my package.json file.
The scripts say:
"scripts": { "start": "node src/serverSide/server.js", "serve": "babel-node src/serverSideES6/server.js", "dev": "npm-run-all --parallel dev:*", "dev:client": "webpack-dev-server --hot", "dev:server": "nodemon src/serverSide/server.js", "build": "npm-run-all --parallel build:*", "build:client": "webpack --progress", "build:server": "babel src/serverSideES6 --out-dir src/serverSide" },
The build script builds the files on the client and server side.
- It compiles all my ES6 node.js code into ES5 so Heroku can read it as well
- Webpack starts the bundling and transpiling of the client side such as from ES6 to ES5, and JSX to JavaScript.
The dev script serves everything in a development environment and (hot) reloading. Everything is as fast and smooth as possible, when changing the codebase.
The start script actually starts the back-end server, which also consumes the built and bundled front-end HTML, CSS, JavaScript, presenting the whole application.
Deployment
For deploying the app, Heroku once again has proven to be the way to go.
Using the Heroku CLI, the Heroku logs command helps a lot. I always had trouble setting up my app on the platform. But after solving all the errors the logs show, it becomes very easy.
Always important:
- Be aware that devDependencies are not installed
- Use the adequate build-pack. In this case it is for Node.js
- Have
startscript or define one in your Procfile - Be sure to push the right branch from the right repository
Conclusion
As you can see my documentation for this article gets worse and worse with the progress of the app. This is due to the fact that I got completely overwhelmed with Redux. I did other projects on the side and wasn’t able to keep track.
But don’t worry! I tried to name my commits as clear as possible. So you can traverse all commits for details in my Repository. See Commits here.
If you have questions feel free to ask :)
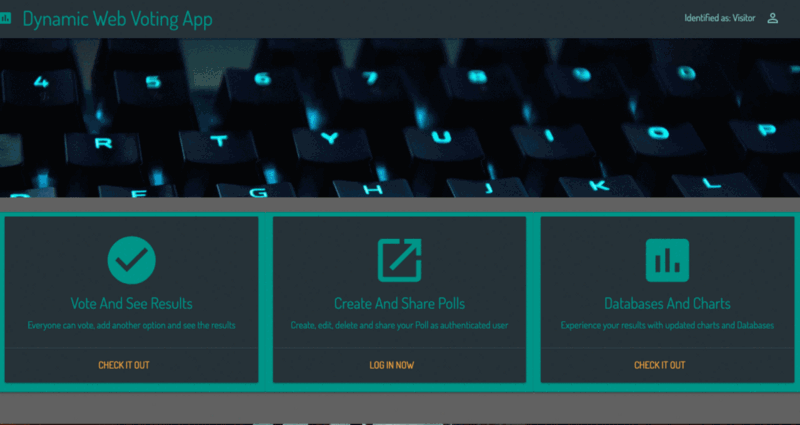
- Repository on Github is available here.
- Live version of the result is available here.
- Learnings and numbers are available here.
Many, many thanks to Edo Rivai, who gave very valuable tips along the way. :)
Thanks for reading my article! Feel free to leave any feedback!