By Tarique Ejaz
In the world of web development, Chrome extensions are a pretty handy set of tools to have around.
Whether you use them to add headers to simple requests or to scrape important data from the DOM, extensions help provide extra functionality that makes life easier.
I started playing around with developing a Chrome extension for a use-case I had in mind at work. It was then that I stumbled upon the way we pass around certain data from a web page to an extension. And the lack of a simplified guide made me write this article.
We do have the Chrome API documentation, and it is indeed very thorough. But I consider myself to be more of a visual learner, and being able to visualize how we pass messages between the extension scripts helped simplify the overall development.
Note: This article makes use of Manifest V2 instead of V3. The major difference between the two is the usage of service workers in V3 instead of background pages and related actions.
Message Passing: Interaction Between Scripts
An extension, as the name suggests, is like a layer on top of the existing webpage you're trying to access. The browser acts as the container.
It mainly comprises the following scripts:
- Popup Script - Local JavaScript file for the extension DOM
- Background Script - Provides persistence and handles background events
- Content Script - Scripts that run in isolation in the context of the web page
- Injected Script - Scripts that are programmatically injected into the web page
Normally, if you have to merely deal with the DOM content, then the way the extension is developed is relatively straightforward.
The raw HTML is already available to the content script and all you need to do is pass it to the popup script.
However, if you need to access the page's variables and functions, the process gets a little tricky.
The variables and functions available in the page context, say in the window object, are not accessible to the content scripts since they tend to run in a special JavaScript environment. They have access to only the DOM of the page but not the variables and functions.
To access a page's variables and functions, we inject scripts by appending them to the DOM. This makes the browser assume that it is run in the context of the web page. This in turn provides the injected script access to the local variables and functions.
Since Chrome extensions are event-driven because of their architecture, once the injected scripts have access to the page's variables and functions, they can pass it to the content script.
The content script then passes the these objects to the background page.
And finally, the popup script is able to call onto the background page using the Extension API and pass it to the Extension DOM.
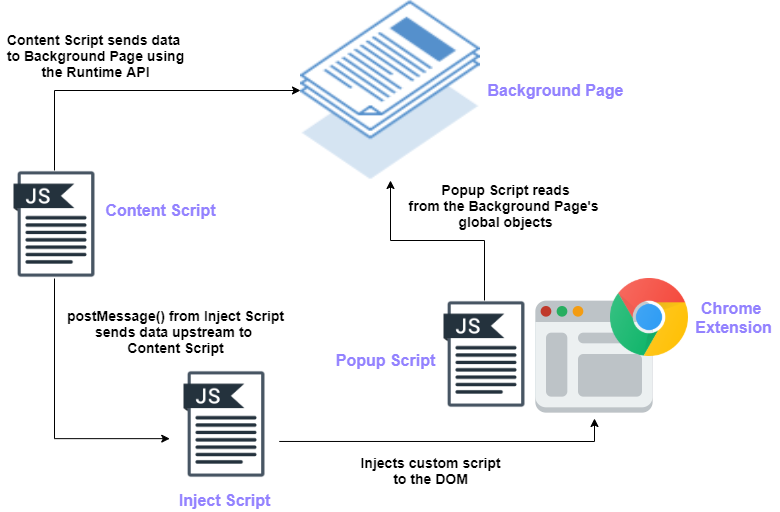 Message Passing Overview
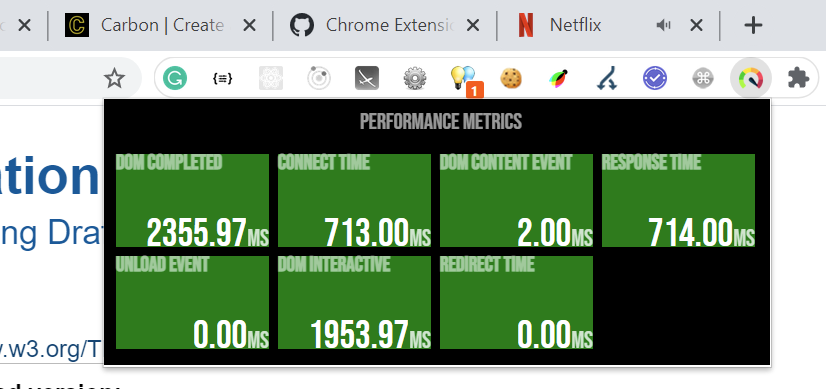
Now, we will build a simple Performance Watcher extension that reads the performance data from the global window object of a page and maps the essential metrics for the user to see. Let's get into the code then.
Enough Talk, Show Me The Code
You can find the complete code repository for the project here. Let's quickly run through the primary files and the important functionalities they offer.
The Manifest File
Every Chrome Extension needs a manifest file. It is basically a JSON-formatted file that provides a set of metadata so the browser can recognize the permissions that need to be granted and the likely operational reach of the extension.
Here is the manifest used for our application.
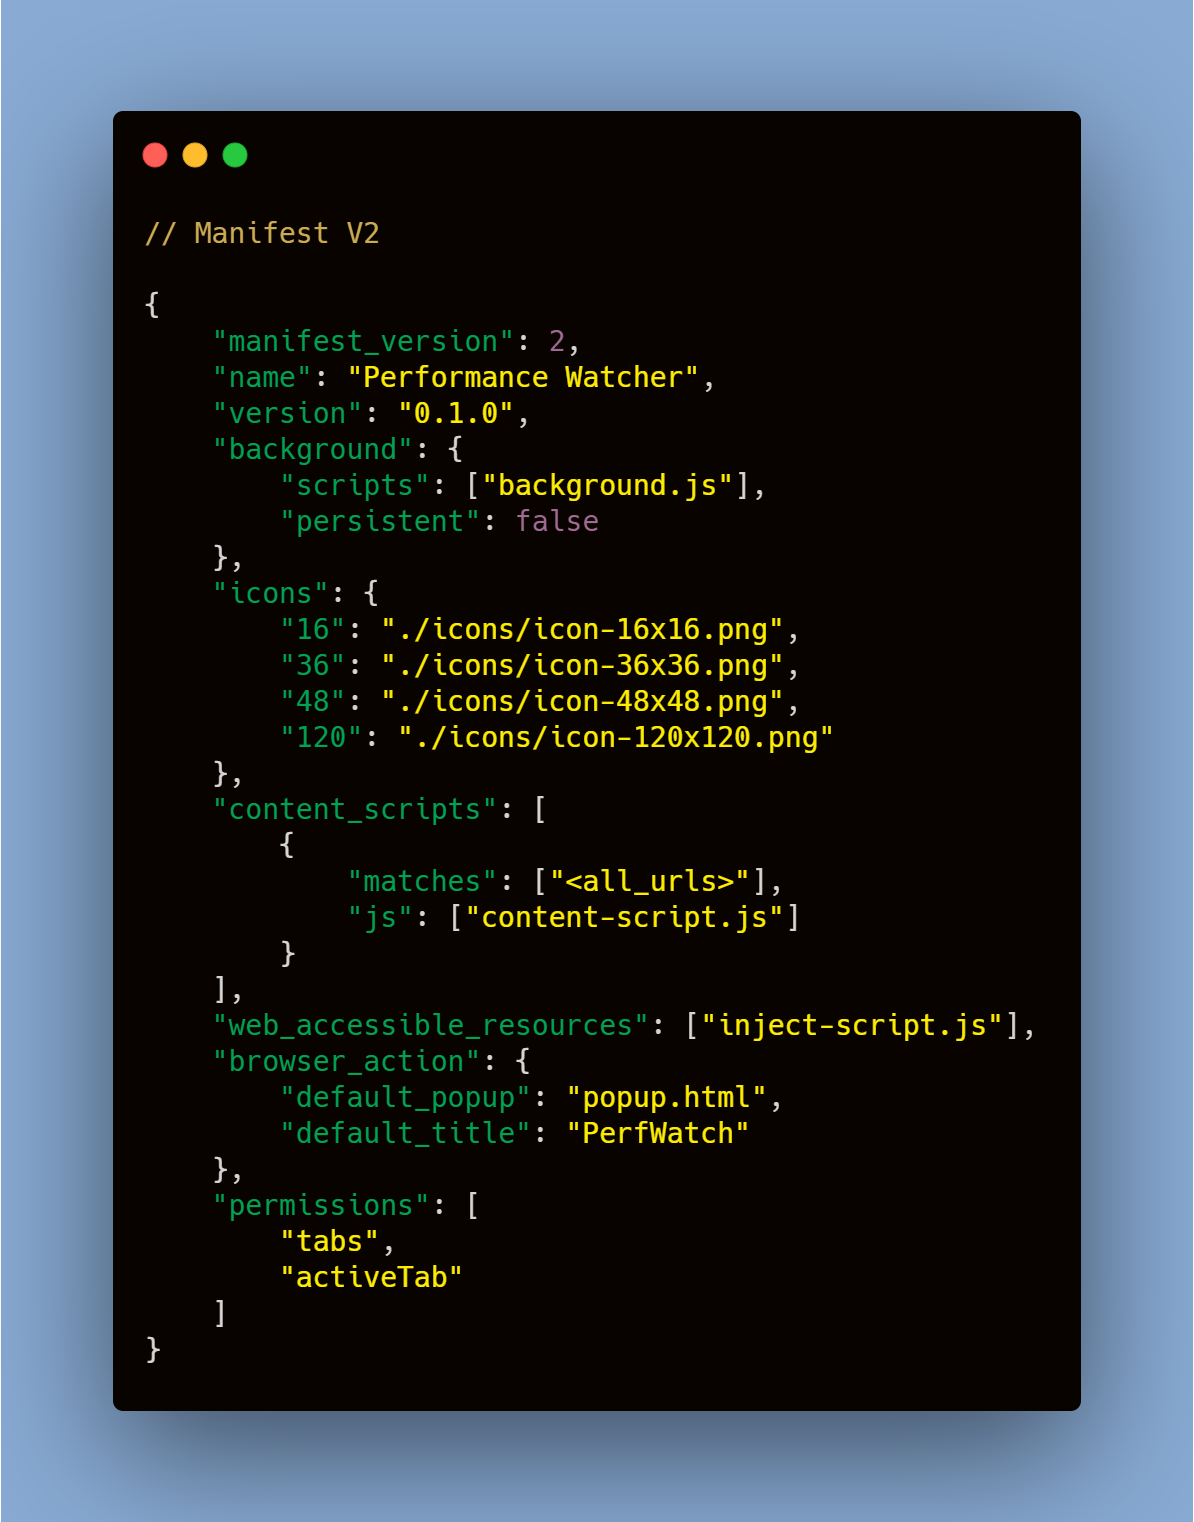 manifest.json: metadata for your extension
Some of the important properties we need to focus on are the following:
background- Takes an array of scripts that would be run in the background page.content-scripts- Includes an array of content scripts we wish to run as part of the web page's context.web_accessible_resources- An array of packaged resources expected to be used in a web page's context. For example, an image we intend to embed in a page or a custom script we want to inject.permissions- Allows your extension to gain access to certain Chrome APIs like tabs in this case.
The Content Script
Content Scripts have easy access to the DOM of the web page. We make use of the content script to append our custom script – inject-script.js – into the DOM.
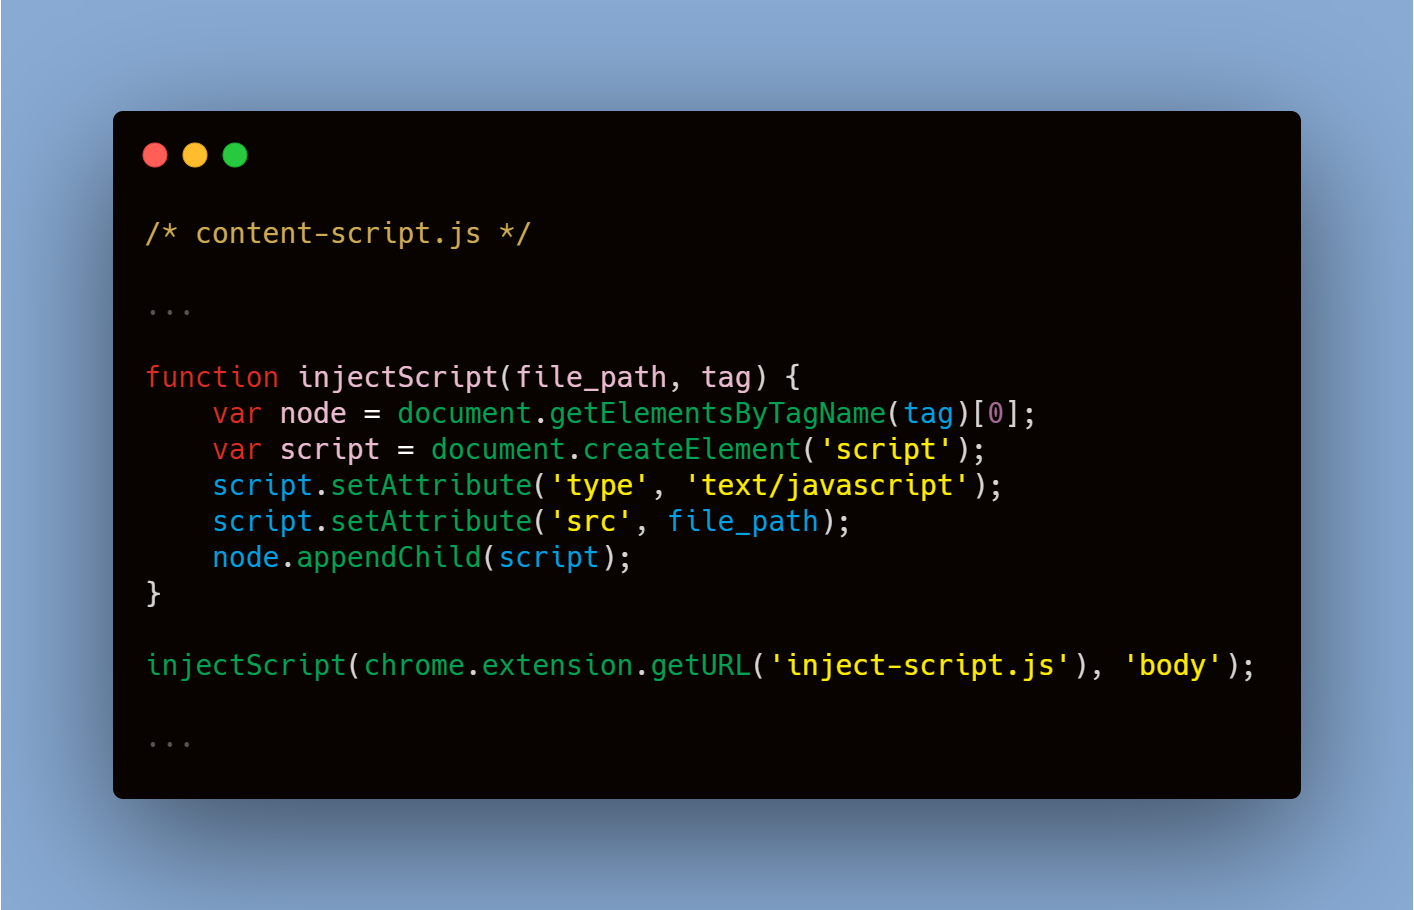 content-script.js: inject custom script into the DOM
The content script also simultaneously continues to listen for any message being sent upstream from the custom script.
As soon as we get a message from the injected script, we run a quick check on the data received and verify whether our extension is installed. Once done, we simply use Chrome's Runtime API to send the data received forward to the background page.
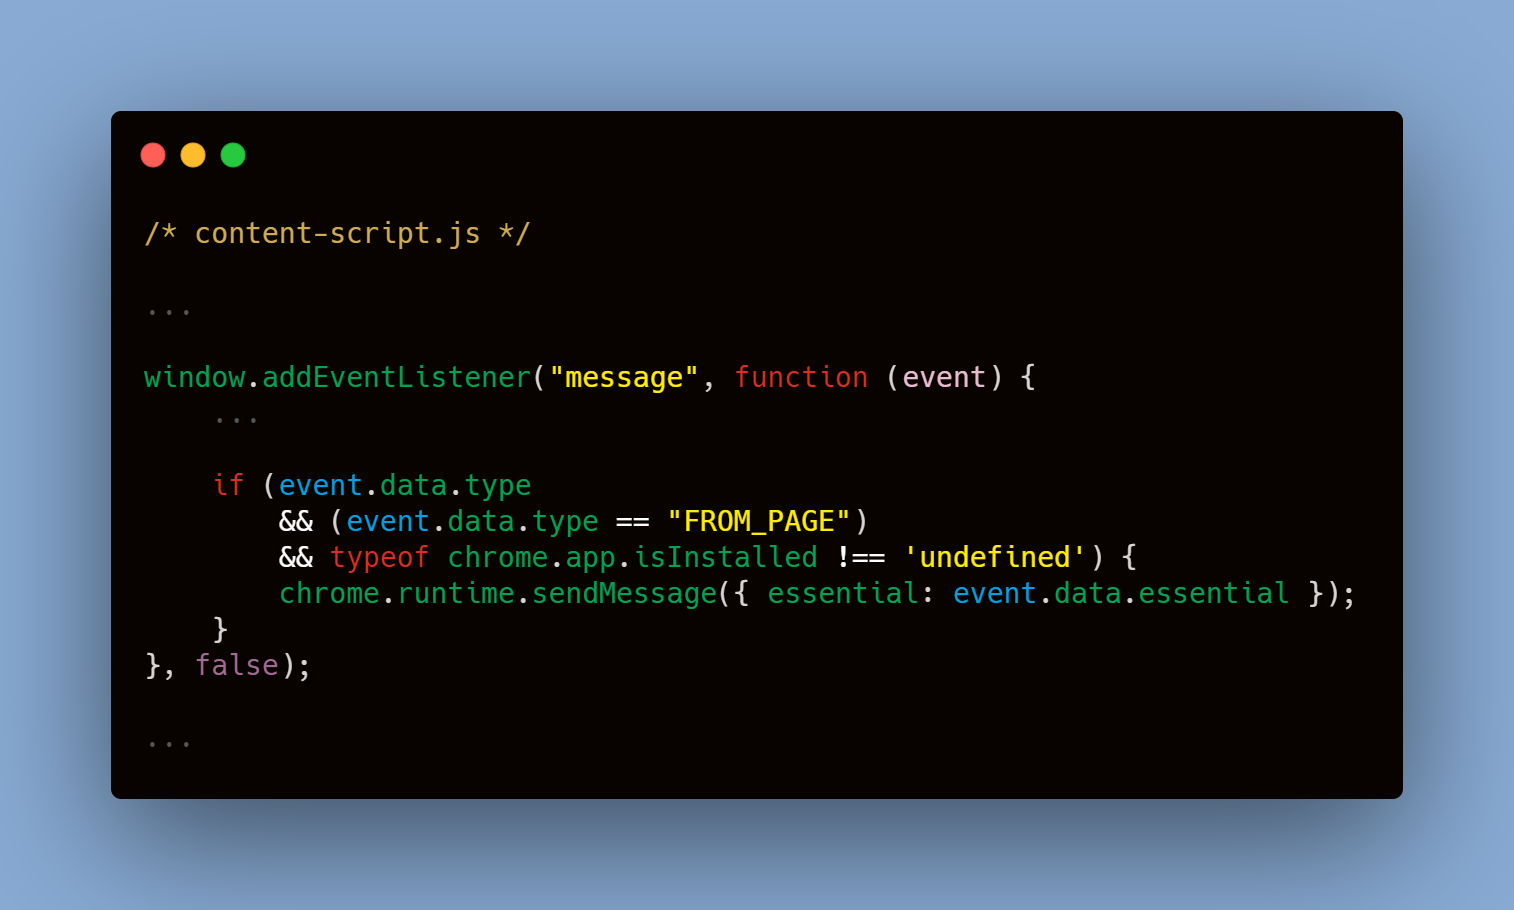 content-script.js: send the required data to the background page
The Injected Script
The custom script can access global variables and functions like the window object. We map only the properties we require.
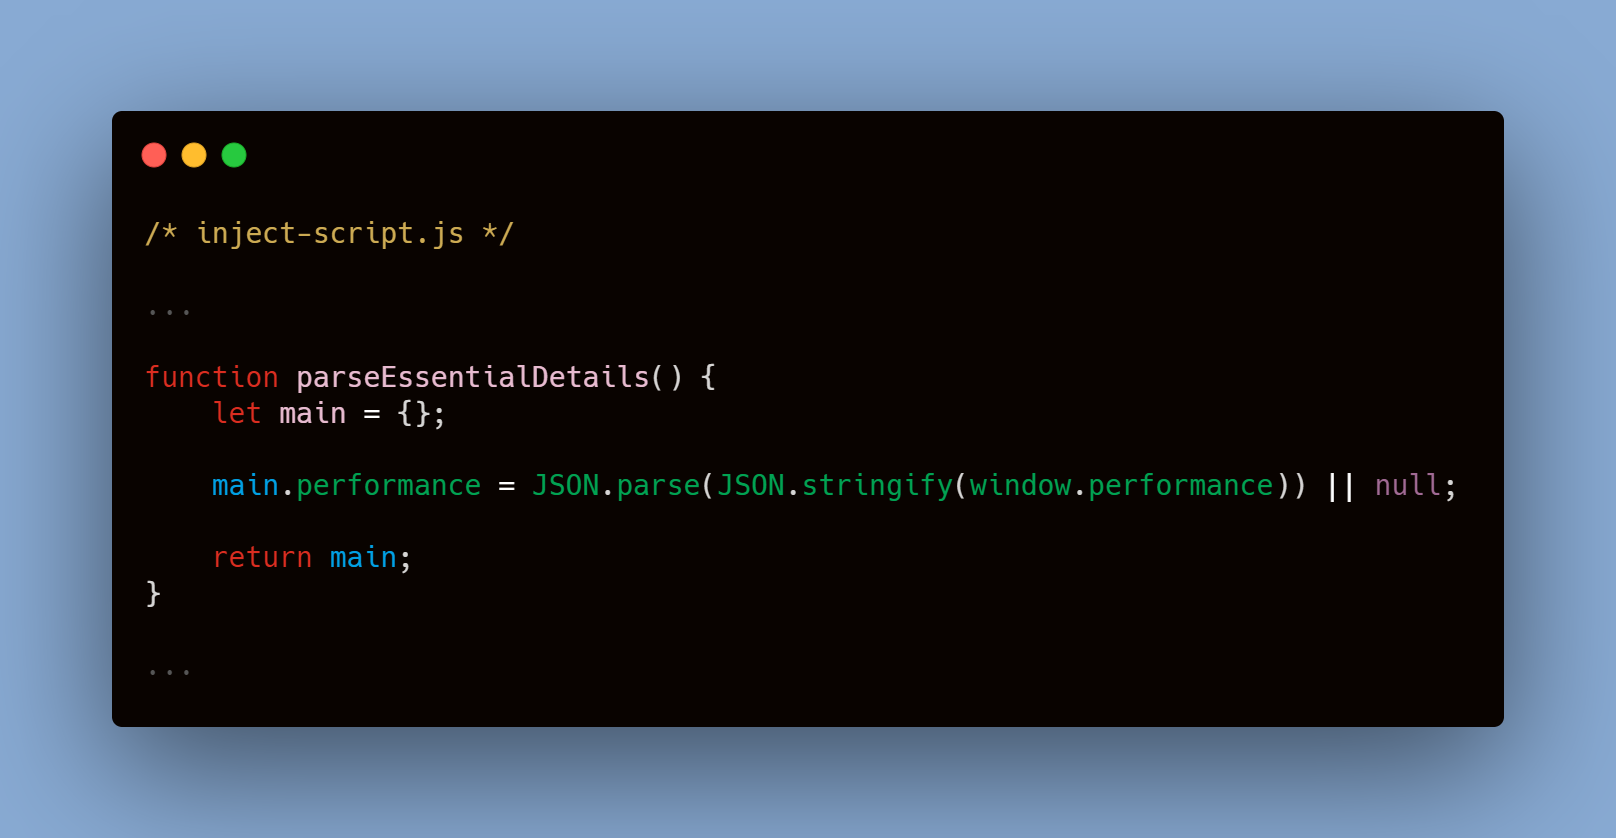 inject-script.js: procure required object from the page's JS context
The message from the custom script is communicated safely to the content script using the [window.postMessage](https://developer.mozilla.org/en-US/docs/Web/API/Window/postMessage) function. In this case, a setInterval function is used to dynamically update the properties we are observing.
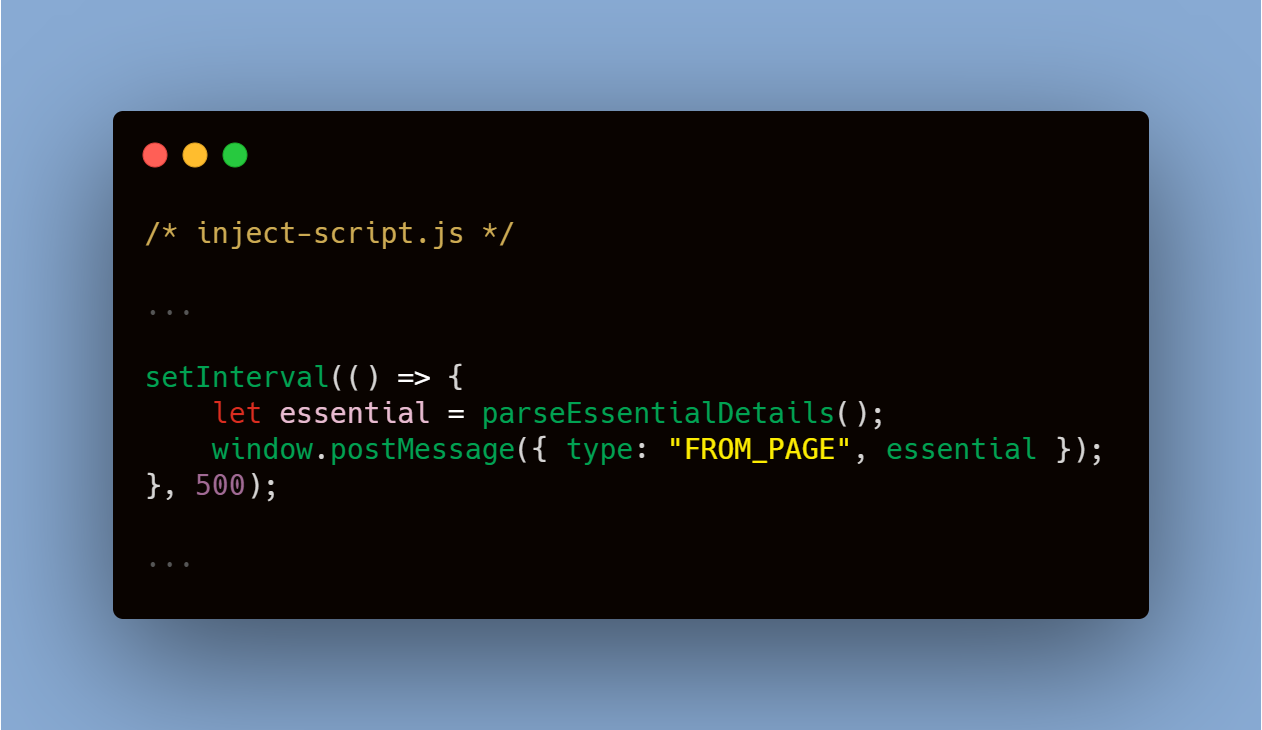 inject-script.js: send the gathered data to the content-script
The Background Script
The background script listens for any message transmitted by the content script using the Runtime API. The window object of the background page is then updated with the tab.id acting as the identifier.
 background.js: listen for incoming message from the content-script
The Popup Script
The popup script is where we finally read the data we had procured from our custom script. It is also the place where we code any necessary JavaScript operations.
The background page is retrieved using the getBackgroundPage method of the Extension API. The active tab's id is queried using the tabs.query method of the Tabs API in order to correctly extract the relevant data.
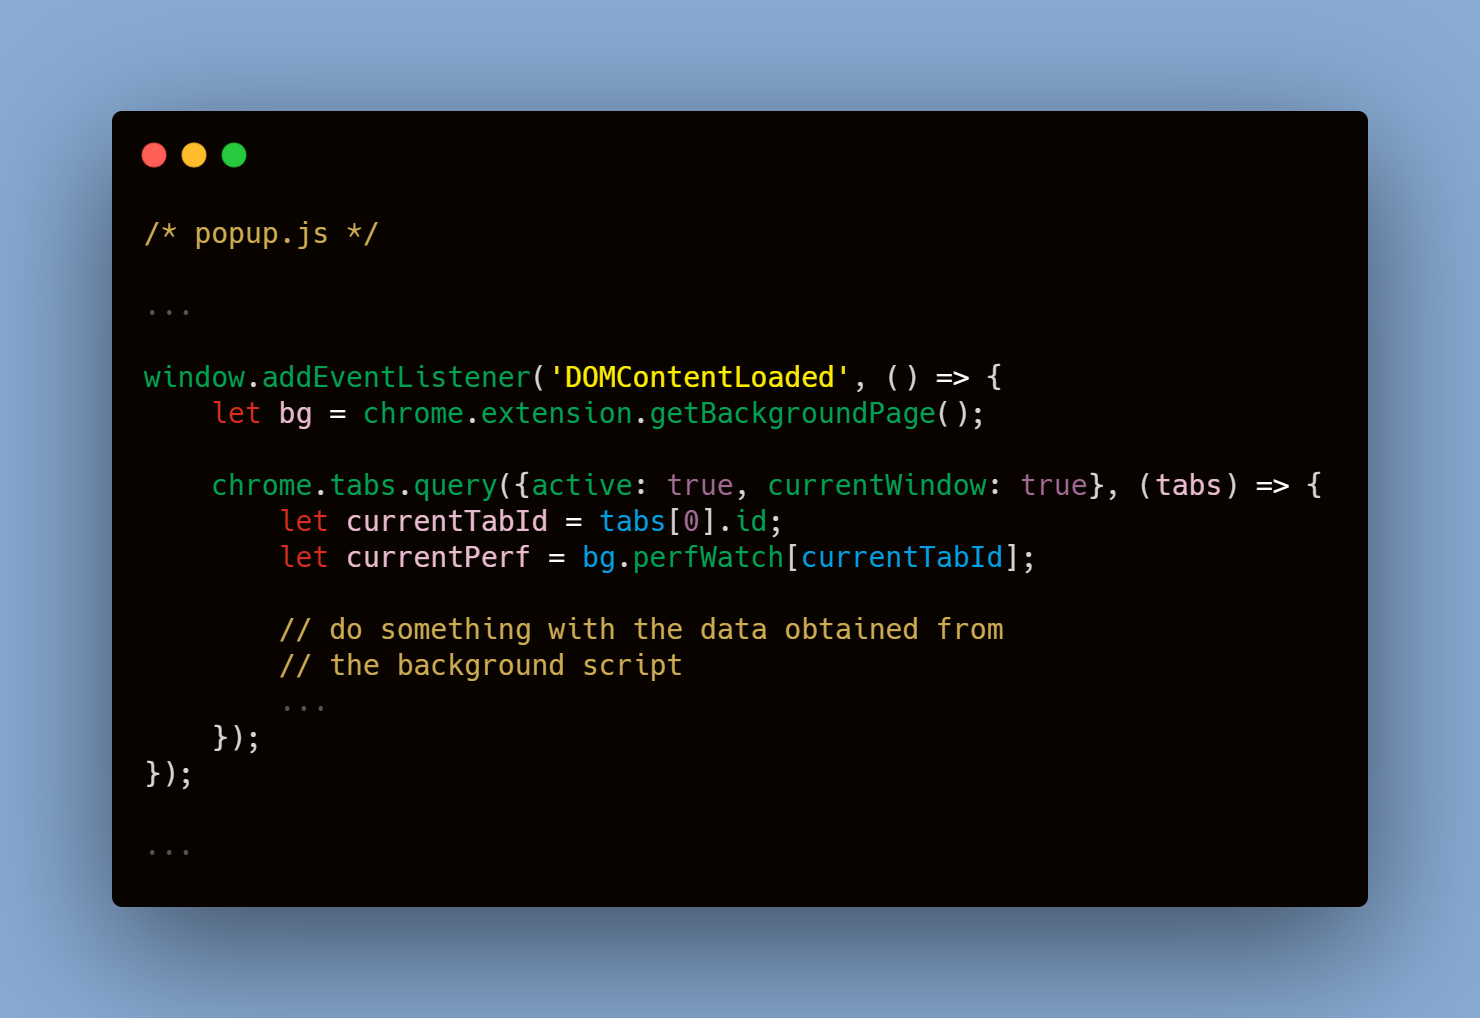 popup.js: reading the global object stored in the background page context
In this way, we are able to finally receive and map the data we need – performance in our case – efficiently in our extension.
The UI styling and other cosmetic code are available in the repository, for further reference.
Final Thoughts
Message passing is an essential concept when it comes to developing a Chrome extension. This is just one of the multiple ways in which you can communicate between scripts.
I spent a few hours in order to figure out how it would work for my use case. Hopefully, this simple walkthrough and the visual representation saves you some time.
I would suggest playing around with the code for a bit. If you have any questions, feel free to reach out to me on [LinkedIn](https://www.linkedin.com/in/tarique-ejaz/).
In the meantime, keep coding.