By Clark Jason Ngo
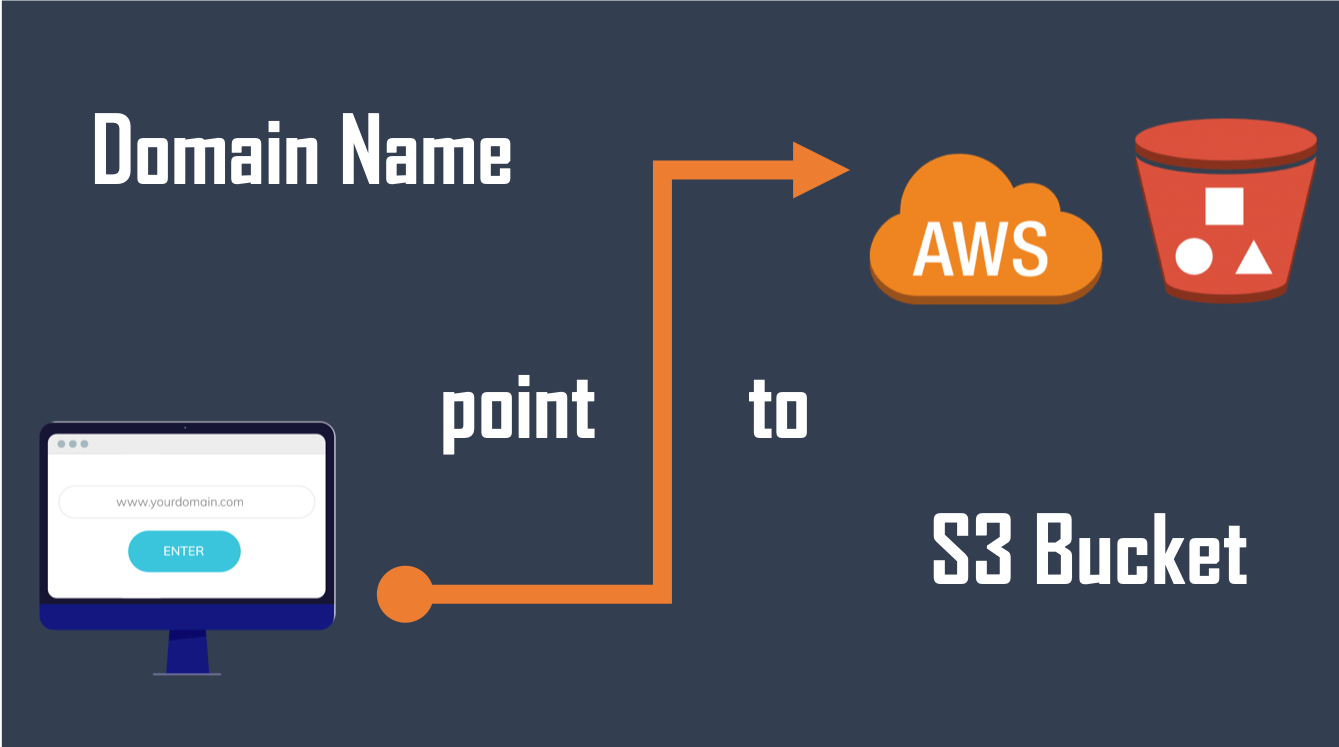
If you're hosting a static website in an S3 bucket and it's your first time buying a domain name, this simple guide is for you.
Summary - What You Need
Amazon S3
- Have an S3 bucket with the same name as your domain name
- Upload your website's code
- Allow public access
- Add a policy to enable S3 GetObject
- Enable static website hosting
Domain Name provider
- In your domain name's DNS Zone settings, delete all A records
- In DNS Zone settings, add www to subdomain and the S3 endpoint in hostname for CNAME records
Let's go through these steps one by one.
Step 1: Create an S3 bucket
Create an S3 bucket to host your files for your website
First you need to create a bucket for your website. The name for your bucket must be the same as your domain name. Let's say we bought the domain name www.clarkngo.net. Then my S3 bucket's name should be www.clarkngo.net as well.
After configuration, my endpoint should look similar to this:
http://www.clarkngo.net.s3-website-us-west-2.amazonaws.com
Go to your AWS console and login. Choose S3.
- Click Buckets
- Click Create bucket

Add your domain name in the bucket name
You may choose any Region
Creating the S3 bucket and general configuration

Follow the checkboxes below and click Create Bucket.
Only tick the following:
- Block public access to bucket and objects granted through new access control lists (ACLs)
- Block public access to bucket and objects granted through any access control lists (ACLs)

Uploading files to the S3 Bucket
- Click Overview and Upload.
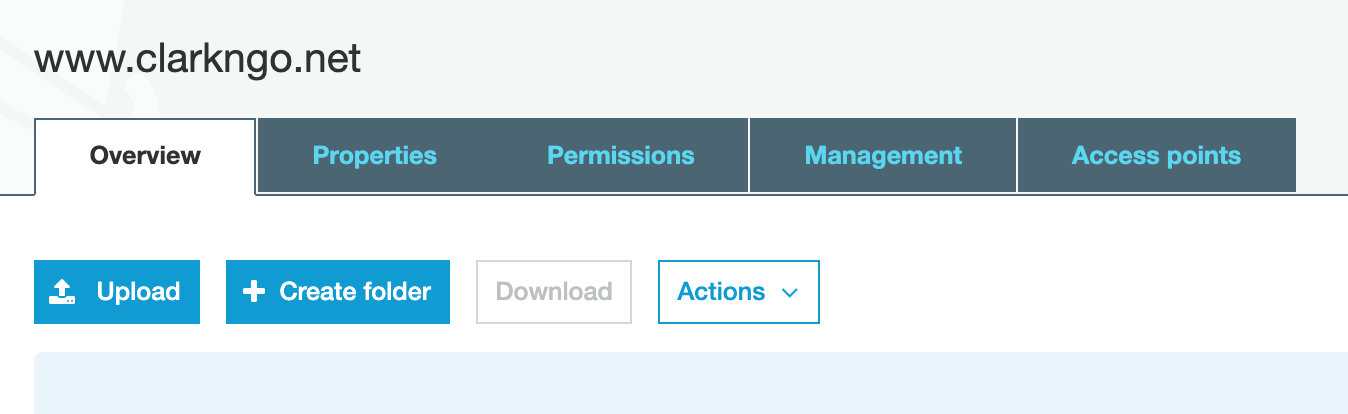
- Upload your website files in Select Files

For Set permissions, hit Next.
For Set properties, hit Next. (The default is Standard S3.)
For Review, hit Upload.
Editing the Bucket Policy
- Click Permissions, then Bucket Policy.

- Add the policy. (Note: For your website you'll change arn:aws::s3:::www.clarkngo.net/*)

{
    "Version": "2012-10-17",
    "Id": "Policy1548223592786",
    "Statement": [
        {
            "Sid": "Stmt1548223591553",
            "Effect": "Allow",
            "Principal": "*",
            "Action": "s3:GetObject",
            "Resource": "arn:aws:s3:::www.clarkngo.net/*"
        }
    ]
}
- Hit Save.
Static website hosting
- Click Properties, then Static website hosting.

Choose Use this bucket to host a website.
For Index document, type index.html.
For Error document, type index.html.
Hit Save.

Step 2: Add the S3 Endpoint to your Domain
Editing your DNS Zone
- Login to your domain provider.
- In this example, choose Name Servers/DNS, then Modify DNS Zone (or the equivalent).

- Remove all A records in your domain. Usually it will have a default IP address for a 404 Not Found page.

Add a CNAME to point to the S3 Bucket:
add www for the Subdomain.
- add www.clarkngo.net.s3-website-us-west-2.amazonaws.com (the S3 Endpoint) to the Hostname.

And you're done! Note that it might take a while for your new settings take effect.
Connect with me in LinkedIn here.
