By Nitish Phanse
Code splitting can offer some respite when it comes to loading massive client apps. We’re in an era where a user’s attention span is probably close to 10 seconds per page, and you’re definitely not going to get a conversion if 6 seconds are spent fetching and parsing your JavaScript.
Webpack 3 offers brilliant support for dynamic imports. This allows you to load only the useful chunks to the client. Higher order components coupled with dynamic imports can split your JavaScript bundle into multiple tiny chunks. Recently, the React team added a sleek page on code splitting in their documentation.
Higher order components are functions which accept a component as an argument and return another component.
Yes. That was the simplest definition I could think off, nothing fancy. Code splitting of your bundle has to be handled slightly differently when done on server side apps as compared to pure client apps.
I have divided this article into two parts. The first part explains code splitting in pure client apps. The second part explains code splitting on server rendered apps. Both methods use higher order components.
Pure Client Apps
These are apps which have a stripped down index.html. They’re usually used for authenticated routes (which need not utilize SEO benefits). They are built completely on the client side.
Typically, any App.js will look like the one below:
For tiny apps, the above structure does work. But if we have 20 routes on our webpage, then we’re creating a bit of a monster. So we dynamically import only those routes needed once the user navigates to that page.
This should split up your code based on the routes. asyncComponent is a function which loads a component chunk asynchronously. The LoadingComponent is a placeholder which we can display while the request is being completed.
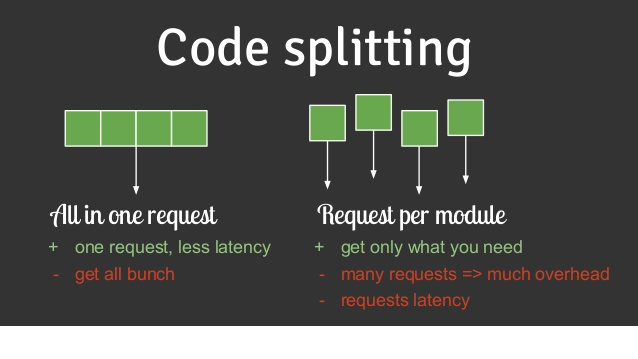
 Webpack splits your bundle into chunks
Whenever you call your ReactDOM.render method, the appropriate chunk will get loaded. This way you load only the routes needed on the page that the user is viewing. When navigating to a route, the appropriate bundle will get called for.
Server Rendered Apps
This section is definitely more interesting than the former. Server rendered apps create a markup string of the page in view and serve it to the client. Then we call the hydrate method. It first makes a diff check to see whether our server DOM tree is the same as the one made on the client. If its not the same, React will throw a warning saying there was a mismatch in your tree shape.
If we follow the above method for server rendered apps, we will definitely get the error mentioned. Why?? Take a step back for a minute, and see what’s happening.
The first request to the page returns the app string. But when the hydrate method kicks in, it tries to fetch the bundle for the page requested. Due to the async nature of the fetch, it loads the LoaderComponent for a brief moment of time. When the component is fetched, it re-renders the page. This gives a jittery / jagged effect to our UI and spits out the dreaded mismatch in DOM warning.
So we need a better approach to solve this problem.
- Split our code on the server side too
- Preload our components on the server side
- Call the hydrate method only after the current bundle in context has been fetched.

React loadable is a pretty cool higher order component. It does all the above mentioned and is pretty simple to implement.
In your server.js:
I am keeping the code to a minimum for the sake of simplicity.
Now let’s pick the bundle on the server side. We will use ReactLoadable’s Capture method, which will create a map of bundles needed for a that chunk.
const modules = [];
function fetchModuleName(moduleName: string) { return modules.push(moduleName);}
const markup = ReactDOMServer.renderToString( <Loadable.Capture report={fetchModuleName}> <StaticRouter location={request.url} context={context}> <App /> </StaticRouter> </Loadable.Capture>);
Once that is done, let’s use ReactLoadable’s Webpack plugin to create chunks of the code. It maintains a stats file which will later be used by the server file to map which bundles to serve to the client.
const ReactLoadablePlugin = require(‘reactloadable/webpack’).ReactLoadablePlugin;
In webpack config
plugins : [ //Other plugins,
new ReactLoadablePlugin({ filename: ‘./dist/build/react-loadable.json’, })]
So our routes are split. We need to call the hydrate method only after the bundles have been fetched from the server, so let’s tackle that. We will use ReactLoadables’s preloadReady method.
window.main = () => { Loadable.preloadReady().then(() => { hydrate( <BrowserRouter> <ScrollHandler> <App /> </ScrollHandler> </BrowserRouter>, document.getElementById(‘root’) ); });};
We’ve attached a main function to the window object which will then get called in our server marked up file.
There are just a few steps left. We now need to tell our server file which appropriate bundle to fetch. After that is done, call the main function so that the client side app can take over.
So our final markup file will be like this:
A few things one can optimize on:
- Precache bundles for most frequently visited routes. For example, from the home page if the user is likely to navigate to the login or products page, you can use Loadable.preload() in the componentDidMount of the Home Page. A service worker can be handy here.
- If you don’t want to block the main thread, use a web worker. Use the window.postMessage API and fetch bundles in the background.
- React Loadable can be used to chunk bundles in any apt way you please.
- To decide which chunks to pre-cache, read some data off your analytics library, mix panel / GA to see where users navigate from the home page.
Feedback is always welcome!